Are you dreaming of beautifully tailored window treatments that perfectly complement your home’s aesthetic, without the hefty price tag? Look no further! This comprehensive guide will teach you exactly how to make curtains yourself, empowering you to create stunning, custom window coverings that elevate your home decor. Our step-by-step DIY sewing tutorial breaks down the process of how to sew curtains into an easy, enjoyable project, yielding professional-looking results with minimal effort. Imagine the satisfaction of crafting bespoke homemade curtains that reflect your unique style, all while saving a significant amount of money. Get ready to transform your living space with personalized window treatments!
Unleash Your Creativity: How to Make Custom Curtains
Watch Our Easy-to-Follow Video Tutorial for Sewing Curtains:
For those who prefer a visual learning experience, we’ve prepared a detailed video guide to accompany this written tutorial. This easy sewing project is brought to life, allowing you to see each step in action, from measuring to the final stitch. Watch below to gain a clear understanding of every technique:
Essential Supplies Needed to Make Beautiful Curtains:
Before you embark on your curtain-making journey, gathering the right tools and materials is crucial. Having everything on hand will ensure a smooth and enjoyable crafting experience. Here’s a detailed list of what you’ll need:
- Curtain Fabric: The heart of your project! Choose a fabric that aligns with your desired aesthetic, light control needs, and durability. Consider various types like cotton for a crisp, casual look, linen for natural texture, velvet for luxury, or blackout fabric for optimal light blocking. Ensure you purchase enough for your window dimensions, plus extra for hems and seams.
- Matching Thread: Select a high-quality polyester thread that closely matches your fabric’s color. This ensures your stitches blend seamlessly, creating a professional finish. If your fabric has multiple colors, choose a thread that matches the dominant or darkest color.
- Sewing Machine: A reliable sewing machine is indispensable. Any standard domestic sewing machine with a straight stitch capability will work perfectly. Ensure it’s in good working order and you’re comfortable operating it.
- Comprehensive Sewing Kit: A well-stocked kit makes all the difference:
- Ball Pins: Essential for temporarily holding fabric layers together before sewing. Opt for sharp, fine pins that won’t snag your fabric.
- Seam Ripper: Your best friend for correcting any mistakes! A sharp seam ripper allows you to undo stitches cleanly without damaging the fabric.
- Fabric Snips: Small, sharp scissors perfect for snipping threads close to the fabric, giving your finished curtains a clean appearance.
- Fabric Scissors: Invest in a pair of sharp, dedicated fabric scissors. Never use them for paper or other materials, as this dulls the blades and can ruin your fabric.
- Measuring Tape or Ruler: Crucial for accurate measurements of your window and fabric. A flexible tape measure is ideal for fabric, while a yardstick can help with long straight cuts.
- Iron and Ironing Board: Pressing your fabric at various stages is non-negotiable for professional-looking curtains. An iron helps set seams, remove wrinkles, and create crisp folds.
- Curtain Rod: While not used in the sewing process, having your curtain rod on hand for measuring and final fitting is important. Consider the style and length you desire for your finished window treatments.
Precision is Key: Measuring Notes for Your DIY Curtains
Accurate measurements are the foundation of stunning homemade curtains. Before you cut a single piece of fabric, carefully assess your window and plan for the desired look. For this demonstration, we’re working with a window that measures 4 feet wide by 4 feet tall. To ensure ample material for a beautiful drape and to accommodate all necessary hems and seams, we recommend purchasing fabric that is approximately 1 foot wider and 1 foot taller than your final desired curtain dimensions. So, for our 4’x4′ window, we acquired fabric measuring 5 feet wide and 5 feet tall. This extra allowance is crucial, providing enough material to span the window elegantly even after all the sewing processes are complete and the fabric naturally shrinks or shifts slightly. Remember, it’s always better to have a little extra fabric than not enough!
When calculating your fabric needs, consider the following:
- Width: For a standard gathered look, your curtain panel(s) should be 1.5 to 2 times the width of your window or curtain rod. For a fuller, more luxurious appearance, you might even go up to 2.5 or 3 times the width. Our example uses a 5-foot width for a 4-foot window, allowing for some fullness and side hems.
- Length: Decide where you want your curtains to fall. Common lengths include:
- Sill Length: Just reaching the windowsill.
- Apron Length: Extending 4-6 inches below the windowsill.
- Floor Length: Barely touching the floor. This is often the most elegant choice.
- Puddled Length: Curtains that extend 6-12 inches (or more) beyond the floor, creating a luxurious puddle effect.
Add at least 6-10 inches to your desired finished length for the top rod pocket and bottom hem.
A meticulous approach to measuring will save you time and frustration, ensuring your custom curtains fit perfectly.
Step 1: The Foundation of Perfection – Press the Fabric Before You Cut
The journey to impeccable homemade curtains begins with a crucial preparatory step: pressing your fabric. Always start with clean, freshly pressed fabric. This initial pressing removes any creases, wrinkles, or fold lines from the manufacturing or storage process, ensuring that your fabric lays out perfectly flat and smooth as you begin to cut and sew. When working with large pieces of fabric, even a tiny wrinkle can lead to inaccurate cuts and undesirable gapping or distortion in your finished curtains. A smooth canvas ensures precision in every subsequent step, contributing significantly to the overall professional appearance of your custom window treatments.
Step 2: Precise Cutting – Tailoring Your Fabric to Size
With your fabric now perfectly pressed, it’s time to cut it to the appropriate size. If you were unable to purchase fabric in exact dimensions, this is the moment to trim it down to the precise measurements required for your window. In our demonstration, we aim for two curtain panels to elegantly frame the window. Therefore, we cut the 5-foot wide by 5-foot tall fabric precisely down the middle, creating two equal segments, each measuring 2.5 feet wide by 5 feet tall. This strategic cut ensures that both panels will be perfectly symmetrical. Remember to focus on creating one panel at a time, maintaining accuracy and attention to detail for each piece.
Step 3: Beginning the Side Hems – Fold Edges Under and Press
Now that your fabric is cut to the desired shape for your curtain panel, the assembly process becomes quite straightforward. We will systematically finish all four edges of the fabric to create durable and aesthetically pleasing seams. Let’s begin with the two vertical side edges. Carefully fold the raw side edge of your fabric under by 1/2 inch towards the wrong side of the fabric. Once folded, firmly press this fold with a hot iron. This initial press creates a crisp, stable crease, making it easier to manage the fabric and ensure a straight, even hem in the subsequent steps. This small detail significantly contributes to the overall professional finish of your custom curtains.
Step 4: Securing the Side Hems – Double Fold, Pin, and Press
To create a robust and clean finished edge, we will double-fold the side hems. After completing the initial 1/2-inch fold and press, proceed to fold the side edge under another 1/2 inch. This second fold completely encloses the raw edge of the fabric, preventing fraying and creating a neat, durable seam. Once folded, secure the hem in place with ball pins, spacing them evenly along the length of the fabric. Finally, press this double-folded and pinned seam with your iron. Pressing at this stage helps to flatten the seam, setting the fabric in place and making it much easier to sew a perfectly straight line in the next step. This technique is key to achieving a professional, store-bought look for your DIY curtains.
Step 5: The Finishing Touch – Top Stitching the Side Hems with Your Sewing Machine
Now it’s time to secure your carefully pressed and pinned side hems with a top stitch. This stitch will be visible on the front of your curtain panel, so precision is key for a polished appearance. Place your fabric face up (right side up) under the presser foot of your sewing machine. Position your needle so that you can stitch along the length of the fabric, maintaining a consistent 3/8-inch seam allowance from the folded edge. The primary goal here is to “catch” the folded-under fabric securely in your top stitch, ensuring the hem remains flat and neat. As you guide the fabric through the machine, you can gently use your finger as a guide, feeling for the slight bump of the folded fabric to maintain a perfectly straight line. A consistent stitch length, typically 2.5-3mm, will give your curtains a professional finish.
Step 6: Symmetry in Design – Repeat on the Other Side
To ensure both sides of your curtain panel are perfectly symmetrical and professionally finished, simply repeat the last three steps on the opposite side. This involves folding the raw edge under 1/2 inch and pressing, then folding it under another 1/2 inch, pinning it, pressing it flat, and finally top stitching it with your sewing machine. Once this is complete, both vertical sides of your curtain panel will be neatly hemmed, providing a clean, durable, and attractive finish. With the side seams expertly completed, you are now ready to move on to crafting the top edge of your custom curtain, which will include the all-important rod pocket.
Step 7: Crafting the Rod Pocket – Finishing the Top Seam
The top seam of your curtain panel serves a crucial function: it not only finishes the edge but also creates a sturdy tunnel, or rod pocket, through which your curtain rod will slide. This unique design requires a slightly different approach than the side seams. Begin this step by precisely measuring down 5 inches from the very top raw edge of your fabric. Mark this measurement clearly with a ball pin or a fabric pencil. This 5-inch mark indicates the point to which you will fold your fabric, forming the depth of your rod pocket. Accuracy here is essential to ensure your curtain hangs correctly and accommodates your chosen curtain rod.
Step 8: Forming the Rod Pocket – Folding the Top Over to the Mark
With your 5-inch mark clearly established, proceed to fold the top edge of your fabric. First, turn the raw top edge under by 1/2 inch, just as you did for the side seams, and press this fold firmly with your iron. This initial fold hides the raw edge. Now, instead of folding under another 1/2 inch, you will fold the entire top section of the fabric down to align precisely with your 5-inch mark. This substantial fold creates the main body of your rod pocket. Secure this larger fold in place with pins, ensuring it’s held firmly and evenly across the entire width of the curtain panel. Pressing this fold will help set the crease and prepare it for sewing, making your rod pocket crisp and well-defined.
Step 9: Securing the Rod Pocket – Top Stitching Over the Top Fold
Now, it’s time to permanently secure the rod pocket by top stitching over the folded edge. Similar to the side seams, this stitch will be visible, so focus on a straight and even line. Place your fabric face up under the sewing machine’s presser foot. This time, instead of strictly following a seam allowance, your objective is to carefully catch the very edge of the large fold with your stitch. Aim to sew approximately 1/8 to 1/4 inch from the folded edge. As you guide the fabric through the machine, you can use your finger to feel the bulk of the fabric beneath the fold, helping you maintain a perfectly straight line all the way across the width of the curtain. This creates a neat, durable channel for your curtain rod, essential for functional and attractive window treatments.
Step 10: Crucial Fit Check – Checking the Height of Your Curtain Hem
With your top and side seams beautifully completed, only the bottom hem remains. However, before you finish it, a crucial step is to double-check the overall height and hang of your curtain. This ensures your custom curtains fall exactly where you want them to. Take your curtain rod and slide it through the newly created rod pocket. Then, temporarily hold the curtain up over the window where it will be installed. Stand back and observe: Is the height acceptable? Does it meet the floor as desired, or perhaps just skim the windowsill? You might find it helpful to enlist an extra pair of eyes to get a good perspective from a distance.
At this point, mark the precise length where you want your curtain to fall. The reason we perform this fitting step during the process, rather than relying solely on initial measurements, is to compensate for any minor variances, fabric stretch, or slight loss of height that might have occurred during the sewing process. This real-time adjustment guarantees a perfect custom fit for your window coverings.
Step 11: The Final Edge – Finishing the Bottom of Your Curtain Panel
With the curtain’s ideal length now marked, it’s time to finish the bottom hem, mirroring the durable and clean technique used for the side seams. First, turn the raw bottom edge under by 1/2 inch towards the wrong side of the fabric and press firmly with your iron. This initial fold creates a crisp guide and hides the raw edge. Next, fold the edge under another 1/2 inch, completely enclosing the raw fabric. Secure this double-folded hem in place with pins, ensuring even spacing. Press the entire hem one last time with your iron to flatten it and set the creases. Finally, using your sewing machine, topstitch along the length of the bottom hem, aiming for a consistent seam allowance of approximately 3/8 inch from the folded edge. This final stitch secures the hem, completing your first custom curtain panel with a neat, professional finish.
Step 12: The Professional Touch – Snipping Off Excess Threads
Once all your seams are sewn, take a moment to meticulously inspect your entire curtain panel. You will likely find small tails of excess thread at the beginning and end of each seam, or where you’ve transitioned stitches. Using your small, sharp fabric snips, carefully cut off any and all excess threads as close to the fabric as possible without accidentally cutting the stitches. This seemingly minor step is incredibly important for any sewing project. It prevents the curtain from looking unfinished or messy, eliminates tangles, and ensures your custom window treatment has a truly professional and clean appearance. A neat finish truly elevates the handmade quality of your DIY curtains.
Step 13: The Grand Finale – Press All Seams for a Crisp Finish
You’re almost there! With all the sewing complete, the final pressing step is crucial for giving your homemade curtains that coveted crisp, tailored look. Lay your finished curtain panel flat on your ironing board. Systematically press all four seams – the two side hems, the top rod pocket, and the bottom hem. Apply steam and firm pressure with your iron, ensuring that all folds lie perfectly flat and straight. Pay special attention to the corners, pressing them until they are nice and sharp. This final pressing not only removes any minor puckering or wrinkles that may have occurred during sewing but also helps the fabric “settle” and hang beautifully straight. This step truly distinguishes amateur projects from professionally finished custom window treatments.
Step 14: Expanding Your Style – Making More Curtain Panels
Congratulations on completing your first custom curtain panel! The process for creating additional panels is exactly the same. Simply repeat all the previous steps, from pressing the fabric (Step 1) to the final pressing of the seams (Step 13), until you have the desired number of curtains for your window or room. For our example, we made two panels to frame the window symmetrically. If you’re covering a wider window, or prefer a fuller look, you might make three or even more. Consistency in your technique for each panel ensures a cohesive and balanced aesthetic for your custom window treatments.
Step 15: Installation Prep – Putting Curtains on the Curtain Rod
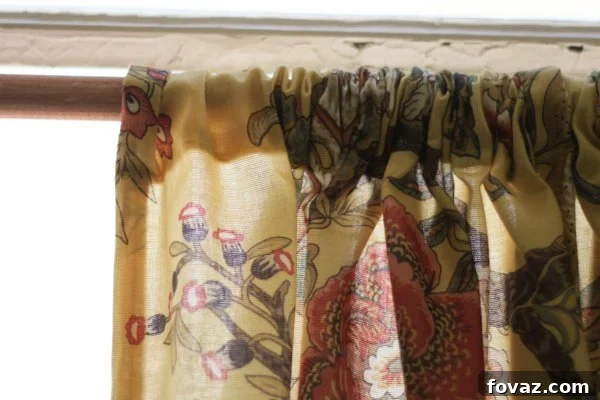
With your custom curtain panels now beautifully finished, it’s time for the exciting moment of installation preparation. Gently slide your chosen curtain rod through the rod pocket you meticulously created at the top of each curtain panel. Take care not to snag the fabric. Ensure that the rod is threaded evenly through each panel, allowing them to gather or spread as desired. This step is a visual preview of how your new window treatments will look and function in your home.
Step 16: The Grand Reveal – Hang and Enjoy Your Custom Curtains!
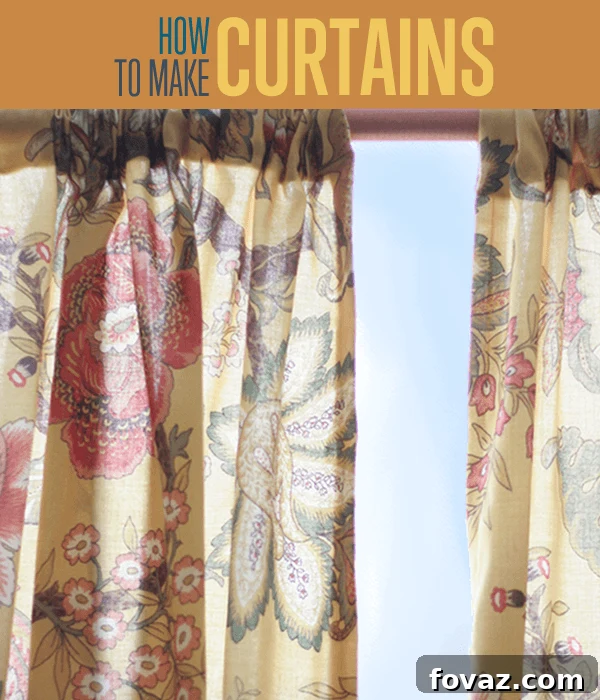
The moment has arrived! With your curtains now on the rod, proceed to hang them securely above your window. Step back and admire your handiwork. These are not just any window coverings; these are custom curtains, lovingly crafted by you! Each stitch, each fold, reflects your personal touch and effort. Enjoy the incredible satisfaction of transforming your space with these unique, homemade curtains that perfectly embody the style and comfort you’ve always dreamed of. Your dedication to this DIY project has resulted in beautiful, personalized window treatments that elevate your home decor and bring a sense of accomplishment to your living environment. Revel in your success and the beauty of your new custom window fashion!