
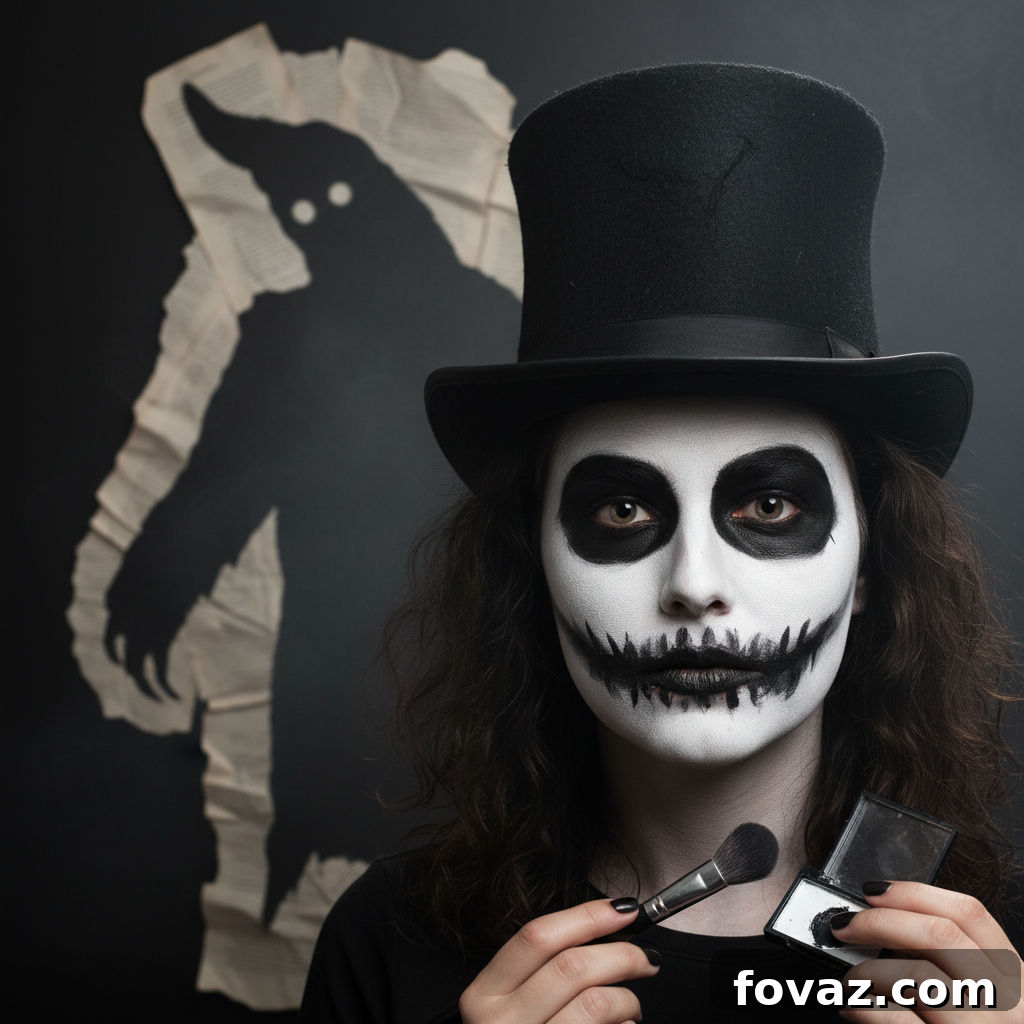
Master the Menace: Transform into The Babadook with This DIY Halloween Makeup Tutorial
Are you ready to truly scare this Halloween? Ditch the generic costumes and embrace the chilling, psychological terror of one of modern horror’s most iconic figures. This detailed, DIY Halloween makeup tutorial is your ultimate guide to transforming into The Babadook. Whether you’re attending a party, haunted house, or just aiming for a truly unforgettable look, this step-by-step guide will help you achieve a professional-level scare with simple, at-home techniques.
The Australian-Canadian horror masterpiece, The Babadook, captivated and terrified audiences worldwide upon its debut, leaving an indelible mark on the genre. Its titular monster, a terrifying entity born from grief and fear, presents a unique and compelling challenge for any DIY enthusiast. Bring the chilling presence of The Babadook to life this Halloween with an incredible, faithful replica of its signature, menacing look. Our guide focuses on accessibility, ensuring you can achieve a truly terrifying transformation without needing expensive special effects makeup.
Why Choose The Babadook for Your Halloween Transformation?
In a sea of vampires, zombies, and witches, The Babadook offers a refreshing and genuinely unsettling alternative. Its impact isn’t just about jump scares; it’s about the deep-seated dread and psychological torment it embodies. This makes it a powerful and sophisticated choice for Halloween. Recreating this character allows you to tap into a very specific kind of horror – one that’s both visually striking and intellectually unsettling. Moreover, The Babadook’s distinct silhouette and stark features make it an excellent canvas for creative makeup application, offering plenty of room for personal touches while staying true to the original.
The Allure of DIY Halloween Makeup
There’s an undeniable satisfaction in crafting your own Halloween look. DIY Halloween makeup isn’t just a cost-effective alternative to pre-made masks and expensive prosthetics; it’s an opportunity for pure creative expression. It allows you to tailor every detail to perfection, ensuring your costume stands out from the crowd. For the crafty and detail-oriented, the process of bringing a character like The Babadook to life with your own hands is an incredibly rewarding experience. Plus, you control the quality and ingredients, often leading to more comfortable and skin-friendly results.
Essential Tools and Materials: What You’ll Need
Before you dive into the transformation, gathering your supplies is crucial. The beauty of this Babadook makeup tutorial lies in its simplicity, often utilizing products you might already own or can easily find at a local pharmacy or craft store. Here’s a breakdown of what you’ll need:
- Makeup Brushes: A variety of sizes for different applications (foundation, eyeshadow, fine lines).
- Face Paint/Cream Makeup: Black, white, grey, and possibly dark brown for shading and contouring. High-quality theatrical cream makeup or even robust face paints designed for costumes will work best.
- Eyeshadow Palette: Dark shades (black, grey, deep purple, dark brown) for creating hollowed eyes and shadows.
- Eyeliner: Black liquid or gel eyeliner for sharp lines and details.
- Setting Powder: Translucent setting powder to lock your makeup in place, ensuring it lasts all night.
- Makeup Sponges: For applying base layers and blending.
- Blue and Green Food Coloring: The secret ingredients for those deliciously disgusting “rotting teeth.”
- Black Tooth Coloring (optional but recommended): A safe, non-toxic product specifically designed to temporarily darken teeth, enhancing the decaying effect. This is usually found in costume shops.
- Liquid Latex (optional): For creating subtle texture or even faux scars, though not strictly necessary for the core Babadook look.
- Cotton Swabs and Makeup Remover: For touch-ups and eventual removal.
- Mirror: A well-lit mirror is essential for precision.
- Moisturizer & Primer: To prep your skin and create a smooth canvas.
Preparing Your Canvas: Skin Care and Safety First
Before applying any makeup, especially for a full-face transformation, proper skin preparation is paramount. Start with a clean, moisturized face. This creates a smooth base for the makeup, helps it adhere better, and makes removal easier later. Always perform a patch test with any new makeup product on a small, inconspicuous area of your skin (like behind your ear or on your inner arm) at least 24 hours in advance to check for allergic reactions, especially with theatrical paints or food coloring.
Deconstructing The Babadook’s Eerie Aesthetic
The Babadook’s appearance is a masterful blend of the human and the monstrous, characterized by stark contrasts and unsettling details. To truly capture its essence, we’ll focus on several key areas:
The Pale, Ghastly Complexion
The Babadook isn’t just pale; it’s almost sickly, devoid of life. Achieving this requires a solid base of white or very light grey face paint, applied evenly across the entire face, neck, and any exposed skin. Blend well to avoid harsh lines, creating a uniform, deathly pallor.
Hollowed, Menacing Eyes
Its eyes are deep-set, dark, and full of silent menace. Use dark eyeshadows (black, deep grey, purplish-black) to create dramatic shadows around the eyes. Extend these shadows down towards the cheekbones to give a sunken, gaunt appearance. The goal is to make the eyes look like deep, empty sockets rather than just dark circles. Use a fine brush to add subtle, vein-like lines under the eyes for an extra touch of decay.
The Distinctive, Distorted Mouth and Rotting Teeth
This is arguably the most iconic and terrifying feature of The Babadook. The mouth is unnaturally wide, extending far beyond normal human proportions, and filled with jagged, decaying teeth.
- Drawing the Grin: Using black face paint and a fine brush, carefully outline the exaggerated, wide smile. This grin should extend past the corners of your natural mouth, tapering into sharp, almost claw-like points. Fill in the entire inner area of this extended mouth with black paint to create a cavernous, empty space.
- Crafting the Rotting Teeth: This ingenious DIY trick uses food coloring! On a clean, dry toothbrush or a cotton swab, apply a few drops of blue and green food coloring. Mix them slightly. Then, carefully dab and brush this mixture onto your teeth, focusing on uneven coverage to mimic decay. For an extra grotesque effect, add a drop of black tooth coloring (available at costume shops) to some teeth, or strategically paint some teeth completely black for a missing or severely rotted look. Remember to be careful not to swallow large amounts of food coloring, though small amounts are generally safe. This effect is temporary and will wash off.
Adding Dimension: Shadows, Creases, and Texture
The Babadook is not flat; it has texture and age. Use dark grey or black eyeshadows and a blending brush to create sharp, angular shadows and creases across the face, particularly around the forehead, cheekbones, and jawline. This will give your face a more skeletal and angular appearance, enhancing the monster’s haggard look. Thin, dark lines can mimic exaggerated wrinkles or scars, adding to the grotesque realism.
The Hair and Silhouette
While makeup is key, the overall silhouette completes the transformation. The Babadook’s hair is typically dark, slicked back, and almost helmet-like, contributing to its unnerving, unkempt appearance. If you have dark hair, slicking it back with gel or hairspray works wonders. For lighter hair, a temporary black hair spray or a wig is recommended. Pair this with a dark trench coat and a top hat to fully embody the character.
Step-by-Step DIY Babadook Makeup Tutorial
For a truly immersive and detailed visual guide, we highly recommend checking out the full DIY Halloween makeup tutorial video below. It offers incredible insights and demonstrations to help you perfect each stage of the transformation. However, here’s a general sequence of steps to follow:
(Video courtesy of Glam and Gore’s fantastic Babadook makeup tutorial)
- Cleanse and Prime: Start with a thoroughly cleansed and moisturized face. Apply a makeup primer to create a smooth, long-lasting base.
- Base Layer: Using a sponge or large brush, apply an even, opaque layer of white or very light grey face paint across your entire face, neck, and ears. Ensure full coverage and blend down into any exposed skin.
- Eye Detailing: With a fluffy brush, apply dark grey and black eyeshadows around your eyes, extending the shadow downwards and outwards to create a deeply hollowed, gaunt effect. Use a smaller brush to draw fine, dark lines for a veiny or aged look.
- Outline the Mouth: Carefully use black liquid or cream eyeliner and a fine brush to draw the exaggerated, wide Babadook grin. Make sure it extends beyond your natural mouth line and tapers to a point.
- Fill the Mouth: Fill in the area within your drawn grin with solid black face paint to create the illusion of a deep, dark maw.
- Rotten Teeth Effect: Prepare your blue, green, and black tooth coloring. Carefully apply it to your teeth using a cotton swab or a clean toothbrush, ensuring an uneven, decaying appearance.
- Contouring and Shadows: Using dark grey or black face paint and an angular brush, add shadows under your cheekbones, along your jawline, and deepen existing facial creases. This adds structure and a more skeletal quality to the face.
- Set the Look: Lightly dust your entire face with a translucent setting powder. This will help prevent smudging and keep your terrifying Babadook look intact for hours.
- Hair and Costume: Style your hair to match The Babadook’s slick, dark look, and don your trench coat and top hat to complete the transformation.
Tips for Success and Longevity
- Patience is Key: Don’t rush the process. Take your time with each step, especially the intricate details of the mouth and eyes.
- Layer Thinly: Build up your makeup in thin layers, especially with face paints, to avoid a cakey look and allow for better blending.
- Practice Makes Perfect: If you have time, do a test run a few days before Halloween. This allows you to refine your technique and identify any potential issues.
- Setting Spray: For extra staying power, consider using a makeup setting spray after your setting powder.
- Hydration and Removal: After the festivities, use a good quality makeup remover or micellar water to gently take off your makeup. Follow up with your regular skincare routine to rehydrate your skin.
With this detailed guide and a dash of creativity, you’re well on your way to becoming the most frightening presence this Halloween. Embrace the psychological terror and let your inner monster out!
Love this terrifying transformation? Then you’ll also love…
20 DIY Superhero Costume Ideas: Become a Homemade Vigilante
DIY Minions Costume Ideas You Have to Check Out
15 DIY Ninja Turtle Costume Ideas: Cowabunga!
Do you have any incredible DIY Halloween makeup ideas or Babadook transformation tips of your own? We’d love to see your creativity! Share your thoughts, photos, or questions in the comment section below. Your insights could inspire fellow DIY enthusiasts!