
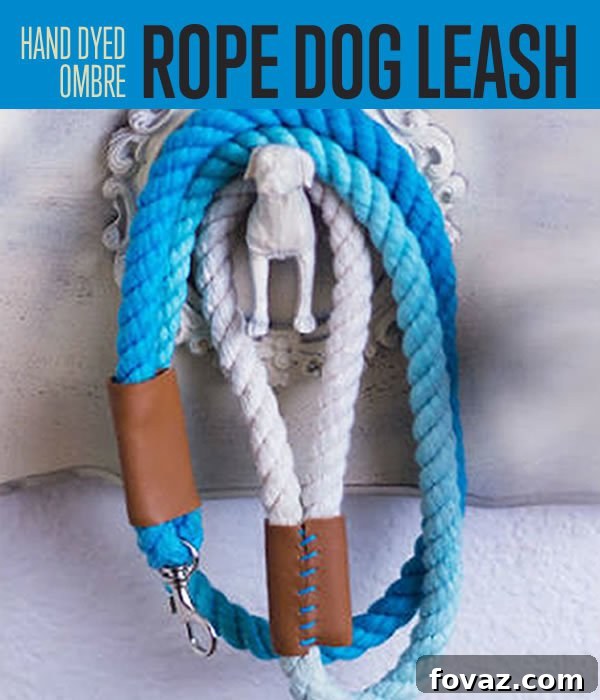
DIY Ombre Rope Dog Leash: Craft a Custom, Stylish Accessory for Your Canine Companion
Elevate your dog’s walking experience with a unique, handcrafted ombre rope leash! While designer dog leashes featuring this chic dip-dyed effect can command a hefty price online, creating one yourself is not only incredibly satisfying and fun but also significantly more economical. This comprehensive guide will walk you through every step of making a durable, stylish, and personalized rope leash that will surely turn heads at the dog park. Get ready to unleash your creativity and spoil your furry friend with a one-of-a-kind accessory!
Essential Supplies for Your DIY Ombre Dog Leash
Before embarking on this exciting pet craft project, gather all the necessary materials. Having everything on hand will ensure a smooth and enjoyable crafting experience as you create your custom dog leash.
-
Three-Strand Rope (approximately 2 yards): The foundation of your ombre dog leash! We recommend a ⅜” wide natural fiber rope for an average-sized dog, which provides a comfortable grip and excellent dye absorption. For larger breeds, consider a thicker rope, and for smaller pups, a thinner option might be more suitable. You can find quality rope from specialized suppliers like the Knot & Rope Supply website, which often offers various widths to accommodate all dog sizes. Selecting the right rope is crucial for both aesthetics and functionality.
-
Rit Dye: This versatile fabric dye is key to achieving that beautiful ombre effect. Rit Dye is widely available online through retailers like Amazon.com, at craft stores such as Michael’s Crafts, and in many other general merchandise stores. Choose a color that complements your dog’s fur or your personal style!
-
Rope Ferrule Clamps: These metal clamps are vital for securely fastening the rope to the snap hook and creating a sturdy handle loop. They are typically found in the hardware section of your local hardware store. A crucial tip: bring your chosen rope with you to the store when purchasing the ferrules. This allows you to test the fit and ensure the rope can thread through easily, preventing frustration later on. The right size ferrule will make installation much simpler.
-
Swivel Eye Snap: This essential piece allows you to attach the leash securely to your dog’s collar. Look for a durable, heavy-duty swivel snap at Amazon.com or your local hardware store. Ensure it’s strong enough for your dog’s size and provides smooth rotation to prevent tangles.
-
Hand Darning Needles: These large, blunt-tipped needles are perfect for working with embroidery thread and leather. They can be purchased easily from Amazon.com (for example, at this link) or any craft supply store. Their size makes them ideal for sewing through tough materials like leather.
-
Embroidery Thread: Select embroidery thread in colors that coordinate with your chosen Rit Dye or offer a pleasant contrast. This thread will be used to meticulously stitch the leather covers over the ferrules, adding a decorative and professional finish to your custom dog leash.
-
Leather Scraps: Small pieces of leather will be used to stylishly conceal the metal ferrules. If you don’t have a scrap bag readily available (perhaps from previous craft projects), craft stores like Michael’s Crafts often sell affordable bags of assorted scrap leather. Look for pieces that are pliable yet durable enough to wrap around the ferrule and be sewn. This touch of leather adds a premium, finished look to your handmade dog leash.
Additional Household Items to Have on Hand
Beyond the primary supplies, a few common household items will facilitate the crafting process and ensure your safety and convenience.
-
Tape (Masking or Electrical): Essential for preventing the rope ends from fraying before and during the crafting process. Masking tape or electrical tape works best due to its adhesion and flexibility.
-
Scissors: A sharp pair of scissors is necessary for cleanly cutting the rope and leather pieces.
-
Hammer: You’ll need a hammer to securely crimp the ferrule clamps onto the rope, locking them into place.
-
Nail: A nail will be used to pre-punch holes in the leather, making the sewing process much easier and more precise.
-
Bowl: A clean bowl is needed for soaking the rope in warm water, which prepares it for even dye absorption.
-
Big Soup Pot: This pot will be used to heat the Rit Dye. We highly recommend dedicating a “crafting pot” for this purpose, perhaps one picked up affordably from a thrift store like Goodwill. It is not advisable to use pots for food preparation after they have been used to heat Rit Dye, ensuring safety and preventing chemical contamination.
Step-by-Step Guide: Crafting Your Ombre Rope Dog Leash
Step 1: Measure and Prepare Your Rope
Begin by cutting your three-strand rope to your desired leash length. A common and comfortable length is 5 feet, which serves as a great average for most walking situations. However, feel free to customize this; for a slightly longer lead, opt for 6 feet or more. Once cut, immediately wrap the ends tightly with masking or electrical tape. This crucial step prevents the rope from fraying, which can quickly ruin the aesthetic and integrity of your leash. Ensure the tape binds the ends as snugly as possible, as this will also make threading the rope through the ferrule clamps much easier in later steps.
Step 2: Pre-Soak the Rope for Optimal Dye Absorption
Place your cut and taped rope into a bowl of warm, clean water. Allow it to soak thoroughly for several minutes. Pre-soaking the rope is a vital step in achieving an even and vibrant ombre dye job. Dry rope tends to absorb dye unevenly, leading to blotchy results. By ensuring the rope is saturated with water first, the dye will be drawn into the fibers more consistently, creating a smoother gradient effect for your custom dog leash.
Step 3: Prepare Your Rit Dye Solution
While your rope is soaking, prepare your dye bath on the stove. Fill your designated “crafting pot” with water and place it on the stove, setting the heat to a medium-to-high temperature. Avoid bringing the water to a rolling boil; a hot, steamy temperature is ideal for dye activation. Add your chosen Rit Dye to the heated water. Since you’re working with a smaller quantity of water and rope for a dip-dye effect, there isn’t a strict rule for dye measurement. A good starting point is about half a bottle of Rit Dye for the pot, which generally yields excellent results. Stir the mixture well to ensure the dye is fully dissolved and evenly distributed.
Step 4: Achieve the Perfect Ombre Dip-Dye Effect
After approximately ten minutes of soaking and dye preparation, it’s time for the magical dip-dyeing process! This is where the ombre effect comes to life:
1. First Dip (Darkest Shade): Submerge about 2-3 feet of one end of your rope into the pot of hot dye. Hold it there for the longest duration, allowing it to soak up the most color. For a deep, rich shade, aim for about 30 minutes. You may need to use a plastic spatula or spoon to keep the buoyant rope fully submerged. This initial, longest dip will create the darkest part of your ombre.
2. Second Dip (Medium Shade): While keeping the first section submerged, dip an additional foot of rope into the dye. Let this section sit for a shorter period, around 5-10 minutes. This creates a slightly lighter, transitional shade, building the gradient.
3. Third Dip (Lightest Shade): Finally, quickly dip another foot of rope into the dye for just a few seconds. This very brief immersion will create the lightest, most subtle tint, completing your seamless ombre progression. The varied dipping times are essential for achieving the beautiful gradient effect characteristic of an ombre design on your handmade dog leash.
Step 5: Rinse Your Ombre Rope Thoroughly
Once your rope has achieved its beautiful ombre gradient, it’s time to rinse out any excess dye. Working from the lightest part of the rope towards the darkest, rinse everything thoroughly under cold running water. Continue rinsing until the water runs completely clear. This step is critical to prevent any dye from bleeding onto your dog’s fur or your clothes once the leash is in use. Cold water helps to set the dye and removes any unabsorbed particles, ensuring a clean and vibrant finish for your stylish dog leash.
Step 6: Dry the Rope and Decide on Leash Ends
After rinsing, gently squeeze out any excess water from your rope. Lay it out to air dry completely, which can take several hours depending on humidity. If you’re eager to finish your project quickly, you can use a hairdryer on a low setting to speed up the drying process. Once dry, examine your ombre rope and decide which end will serve as the handle and which will attach to the swivel snap. Consider the color progression and how it will best look when in use, ensuring both ends are prepared for the next steps.
Step 7: Thread the Rope Through the Ferrules
Now, take your rope ferrules and thread one onto each end of the rope. This can sometimes be the trickiest part of the process, especially if the ferrules are a snug fit, as pictured in many DIY guides for step 7. Reiterate the advice: if you didn’t take your rope to the hardware store, you might find yourself wrestling with it! If it’s a very tight squeeze, gently twist the rope as you push it through. The goal is to have the rope loop back on itself through the ferrule, forming a secure loop for the handle and another for the swivel snap. Patience is key here to avoid fraying the taped ends.
Step 8: Secure the Ferrules with a Hammer
Once the rope is correctly threaded through both ferrules, lay each ferrule section flat on a hard, protected surface (like an old piece of wood or a sturdy workbench). Using your hammer, firmly strike the wide, flat sides of the ferrules. A few solid whacks are usually all it takes to securely crimp the metal around the rope, locking the loops permanently into place. This process is surprisingly satisfying and ensures that your custom dog leash is incredibly strong and reliable, capable of withstanding your dog’s pulls and tugs during walks.
Step 9: Enhance the Leash with Stylish Leather Covers
Your ombre dog leash is now technically functional, but why settle for plain when you can add a touch of handcrafted elegance? Those metal, hammer-smashed ferrules, while strong, aren’t the most aesthetically pleasing. Let’s cover them up in style with leather! Cut two rectangular pieces of leather that are wide enough to fully wrap around each ferrule and long enough to provide complete coverage. Ensure there’s a slight overlap for sewing, as this will create a neat seam and a polished finish, transforming the utilitarian clamps into a design feature of your handmade dog leash.
Step 10: Prepare Leather for Sewing
To make the upcoming sewing step much easier and to ensure uniform stitches, use a nail and a hammer to carefully pound small, evenly spaced holes along the edges of your leather rectangles. These pre-punched holes will guide your needle, allowing for consistent stitch placement and a professional-looking seam. Take your time to ensure the holes are aligned on both sides of the leather strip where they will meet. This attention to detail will significantly improve the final appearance of your leather-covered ferrules.
Step 11: Begin Sewing the Leather Cover
Select an embroidery thread color that complements your leash and thread it through one of your hand darning needles. Tie a secure knot at the end of the thread. To achieve a clean, hidden finish, pierce the needle through the rope itself, just inside the area where the leather strip will sit. Pull the thread through until the knot catches securely within the rope fibers. This technique ensures that your starting knot is completely concealed once the leather is wrapped, contributing to the professional look of your DIY dog leash.
Step 12: Stitch the Leather Securely
With your knot hidden, wrap the leather rectangle around the ferrule, aligning the pre-punched holes. Working back and forth in a neat zig-zag pattern (or a saddle stitch, if you’re familiar), sew the edges of your leather together where they meet. Pull each stitch tightly to ensure a snug and secure fit around the ferrule. The tighter your stitches, the more durable and polished the leather cover will be. Repeat this process for both ferrules, creating two beautifully finished sections on your stylish dog leash.
Step 13: Your Custom Leash is Complete!
Congratulations, you’ve done it! Your custom-crafted ombre rope dog leash is now complete, showcasing both functionality and stunning style. With both leather sections meticulously sewn on, your leash is ready for adventure. Now, grab your beloved dog, attach the shiny swivel snap to their collar, and confidently stroll down the sidewalk. Prepare for compliments as your pup sports this unique, handmade accessory that truly reflects your love and creativity. Enjoy the fruits of your labor and the joy of walking your dog in unparalleled style!
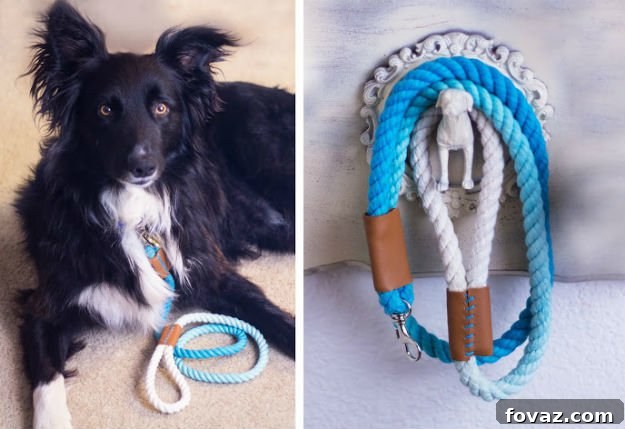
Explore More DIY Pet Projects to Shower Your Furry Friends with Love!
If you enjoyed crafting this beautiful ombre dog leash, you’ll love these other exciting pet-centric DIY ideas. Keep your creativity flowing and show your pet even more affection with these handmade projects:
-
DIY Fabric Dog Collar | How to Make a Dog Collar
-
How To Make a Shabby Chic Dog Leash and Treat Wall Hanger | DIY Pet Project
-
Easy DIY No Sew Dog Jacket
-
15 Homemade Dog Treats | Recipes and Instructions
-
Easy DIY No Sew Dog Jacket
-
How To Make a Chic Dog Sweater
-
How to Make a Paracord Dog Collar | Instructions
-
DIY Dog Crafts Man’s Best Friend Will Love
-
Awesome DIY Pet Projects to Keep Your Furry Friends Happy
-
15 DIY Pet Projects & Recipes
-
12 DIY Dog Clothes and Coats