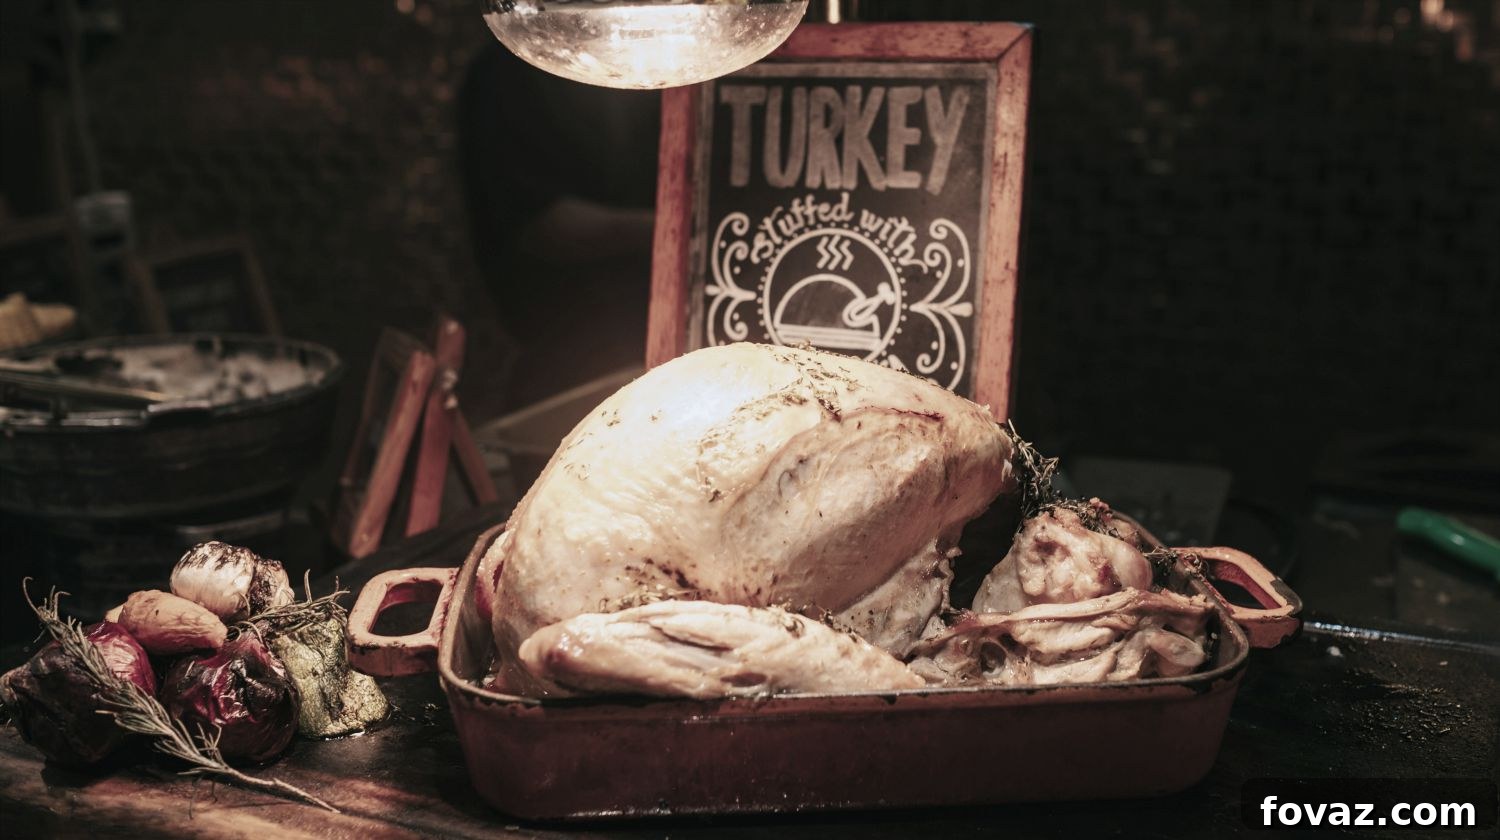
Prepare to impress your guests and delight your family with what could very well be the best Thanksgiving turkey you’ve ever had! This classic roast turkey recipe is designed to deliver a succulent, flavorful, and perfectly cooked centerpiece for your holiday feast.
RELATED: 9 Thanksgiving Side Dishes With Bacon That Will Steal The Show
In this article, you will discover:
- Mastering the Art of Roasting a Thanksgiving Turkey
- Essential Ingredients for Your Perfect Thanksgiving Turkey
- Crucial Thanksgiving Turkey Preparation Notes and Tips
- Step-by-Step Thanksgiving Turkey Recipe Instructions
- The Importance of Resting Your Roasted Turkey
- Presenting Your Glorious Thanksgiving Turkey
- Serving Your Delectable Thanksgiving Turkey
- Expert Tips for Carving Your Thanksgiving Turkey
A Classic Roast Turkey Recipe for Thanksgiving You Simply Must Try
Mastering the Art of Roasting a Thanksgiving Turkey
The roasted turkey stands as the undeniable star of any Thanksgiving dinner, a symbol of bounty and togetherness. Achieving a perfectly cooked, golden-brown turkey with moist, tender meat and crispy skin might seem like a daunting task, but it doesn’t have to be.
While there are countless approaches to preparing a whole turkey, from brining to deep-frying, our focus today is on a timeless, easy-to-follow roasting method that guarantees spectacular results. This isn’t about overly complicated techniques; it’s about simplicity, flavor, and foolproof execution.
This classic roast turkey recipe combines a fragrant herbed butter rub with strategic cooking steps to ensure your turkey is not only delicious but also incredibly juicy from the inside out. With our detailed instructions and expert tips, you’ll confidently create a memorable holiday centerpiece that will have everyone asking for your secret.
Essential Ingredients for Your Perfect Thanksgiving Turkey:
- One 12-14 lbs. whole turkey: Opt for a fresh, high-quality turkey if possible. If using frozen, ensure ample time for proper thawing.
For the Aromatic Herbed Butter Mixture:
- 4 tbsp. fresh parsley, finely chopped: Fresh herbs infuse the turkey with vibrant flavor.
- 4 tbsp. fresh rosemary, finely chopped: Rosemary provides a classic, earthy aroma that pairs perfectly with poultry.
- 8 tbsp. (1 stick) unsalted butter, softened: Softened butter is key for easy mixing and spreading. Unsalted allows you to control the seasoning.
- Salt and freshly ground black pepper (to taste): Essential for enhancing all the other flavors. Don’t be shy, turkey needs generous seasoning.
- 1 large lemon (zest and juice): Lemon zest adds bright, aromatic notes, while the juice helps tenderize and moisten the meat.
- 2 tbsp. olive oil: Helps create that beautifully crispy skin and prevents the butter from burning too quickly.
- 1 tbsp. garlic paste: Garlic paste provides a deep, savory aroma evenly distributed throughout the butter. You can also mince 3-4 cloves of fresh garlic.
For the Aromatic Turkey Cavity Stuffing (not traditional bread stuffing):
- 1-2 lemons, quartered: Adds citrusy freshness and moisture from within.
- 1-2 medium onions, quartered: Contributes a sweet, savory aroma.
- 1-2 medium apples, sliced: Offers a subtle sweetness that complements the turkey.
For the Roasting Pan Base:
- 1-2 large onions, roughly chopped: Forms a fragrant bed, preventing the turkey from sticking and contributing to flavorful drippings.
- 1-2 oranges, sliced: Adds a beautiful citrus aroma to the roasting pan and pan drippings.
- 1-2 apples, sliced: Sweetens the pan drippings and adds another layer of aroma.
- A few sprigs of fresh parsley: For added freshness and aroma.
- A few sprigs of fresh thyme: Earthy and robust, perfect for roasting poultry.
- 2-3 cups chicken or vegetable broth (optional): For a moist roasting environment and more flavorful drippings for gravy.
Crucial Thanksgiving Turkey Preparation Notes and Tips:
- Understanding Defrosting Time: If you start with a frozen turkey, proper thawing is the most critical first step. Many underestimate the time required. A large turkey can take several days to fully defrost, so plan ahead!
- Refrigerator Thawing (Safest & Best): The safest and recommended method is to slowly defrost your turkey in the refrigerator. Allow approximately 24 hours for every 4-5 pounds of turkey. Place the turkey (still in its original packaging) on a tray or in a pan to catch any potential drips. For a 12-14 lb turkey, this means 3 to 4 full days in the fridge.
- Cold Water Thawing (Faster, but Requires Attention): If you’re short on time, you can thaw your turkey in cold water. Keep the turkey in its sealed original packaging and submerge it in a sink or large cooler filled with cold water. Change the water every 30 minutes to ensure it remains cold and safe. Allow about 30 minutes per pound. For a 12-14 lb turkey, this would take 6-7 hours. Do not use warm or hot water, as this can promote bacterial growth.
- Never Thaw at Room Temperature: Thawing a turkey on the kitchen counter at room temperature is unsafe and can lead to foodborne illness. Always use the refrigerator or cold water method.
- Check for Doneness: To ensure your turkey is fully defrosted, check the cavity for any ice crystals. The legs and wings should be flexible, not rigid.
- Brining vs. Butter Rub: This recipe focuses on a flavorful herbed butter rub applied directly under and over the skin, which helps keep the turkey moist and crispy. While brining can also achieve a juicy result, it’s an extra step and often changes the crispness of the skin. For this classic recipe, the butter rub is paramount.
Step-by-Step Thanksgiving Turkey Recipe Instructions:
Step 1. Prepare Your Turkey for Roasting
Once your turkey is fully defrosted and removed from its packaging, rinse it thoroughly inside and out under cold running water. The next crucial step is to pat it absolutely dry with paper towels. Achieving a very dry surface is essential for crispy, golden-brown skin. After drying, let the turkey sit at room temperature for about 1 to 2 hours. This step is often overlooked but allows the turkey to cook more evenly, preventing a cold center and ensuring tenderness.
Step 2. Craft the Aromatic Herbed Butter Mixture
While your turkey comes to room temperature, begin preparing your flavorful herbed butter. In a medium bowl, combine the softened unsalted butter with the finely chopped fresh parsley and rosemary. Season generously with salt and freshly ground black pepper. Next, add the vibrant zest and juice from one lemon. The lemon zest provides intense aromatic oils, while the juice adds a touch of acidity that brightens the overall flavor and helps tenderize the meat. Pour in the olive oil – this acts as a barrier, preventing the butter from burning too quickly during the high-heat roasting process, leading to a beautifully browned crust. Finally, stir in the garlic paste until all ingredients are well combined into a smooth, fragrant mixture.
Step 3. Gently Separate the Turkey Skin
This step requires a delicate touch. Locate the opening of the turkey’s main cavity. Carefully slide your fingers between the skin and the breast meat, gently separating them. Work your way across the breast and down towards the thighs, creating pockets under the skin. Be very gentle to avoid tearing the skin, as it will hold in the precious herbed butter and contribute to a beautiful presentation.
Step 4. Infuse Flavor Underneath the Turkey’s Skin
Take about half of your prepared herbed butter mixture. Using your hands, carefully spread this mixture directly underneath the separated skin, ensuring it covers the breast meat and extends towards the thighs. This direct application allows the butter and herbs to seep into the meat as it cooks, resulting in an incredibly moist and flavorful turkey. Don’t forget to put a small dollop of the herbed butter mixture inside the main cavity as well for internal aroma.
Step 5. Distribute the Butter Evenly
Once the butter is underneath the skin, gently press down on the skin from the outside and spread the herbed butter mixture evenly across the breast and thigh areas. You can use a circular motion to ensure every part of the meat is coated, creating a uniform layer of flavor that will render the skin crispy and the meat succulent.
Step 6. Coat the Entire Turkey with Herbed Butter
With the remaining herbed butter mixture, generously coat the entire exterior of the turkey. Rub it over the thighs, wings, and any exposed skin, ensuring a full and even application. This external layer will contribute to the rich, golden-brown color and provide additional flavor and crispness to the skin.
RELATED: How to Plan Your Thanksgiving Dinner Menu + Fun Holiday Quiz
Step 7. Stuff and Secure the Turkey
For added aromatic flavor, lightly stuff the turkey’s cavity with the quartered lemons, onions, and sliced apples. These aromatics will gently infuse the turkey with their essences as it roasts. Once lightly filled, you can either tie the legs together with kitchen twine or, for a simpler approach, cut a small slit in the flap of skin at the cavity opening and tuck the ends of the drumsticks into it. This helps keep the legs together, ensures even cooking, and contributes to a tidy presentation. Tuck the wing tips underneath the body to prevent them from burning.
Step 8. Prepare Your Roasting Pan
Before placing your magnificent turkey into the roasting pan, create a fragrant bed. Scatter the chopped onions, sliced oranges, sliced apples, fresh parsley sprigs, and thyme sprigs across the bottom of the pan. These aromatics will release steam and flavor during cooking, contributing to a moist environment and creating incredibly rich drippings for your gravy. If you have a roasting rack, place it over the aromatics, then carefully position your prepared turkey on the rack, breast-side up.
Step 9. Initiate the Roasting Process
Preheat your oven to 350ºF (175ºC). Place your turkey into the preheated oven. For a 12-14 lb turkey, anticipate a total cooking time of approximately 3 to 4 hours. However, always remember that cooking times can vary based on oven calibration and turkey density. The most accurate way to determine doneness is by using a reliable meat thermometer. Insert it into the thickest part of the thigh, avoiding the bone. The turkey is done when the internal temperature reaches 165ºF (74ºC).
Step 10. Baste for Moisture and Color
After the first 1 to 1.5 hours of roasting, the pan drippings will begin to accumulate. Use these flavorful drippings to baste your turkey every 30-45 minutes. Basting not only helps to moisturize the skin and keep it from drying out but also encourages a beautiful, even golden-brown crust and infuses the exterior with more savory flavor.
Step 11. Cover with Aluminum Foil for Even Cooking
If you notice the turkey skin browning too quickly during the roasting process, especially the breast, loosely cover the turkey with aluminum foil. This prevents over-browning while allowing the rest of the turkey to cook through. Continue roasting at 350ºF (175ºC) until the internal temperature reaches the target 165ºF (74ºC). Remember to remove the foil for the last 30 minutes of cooking if you want to crisp up the skin again.
The Importance of Resting Your Roasted Turkey
Once your turkey reaches the safe internal temperature of 165ºF (74ºC), carefully remove it from the oven. This next step is absolutely critical for a juicy turkey: resting. Transfer the turkey to a large cutting board and loosely tent it with aluminum foil. Let it rest for at least 20-30 minutes, or even up to 45 minutes for a larger bird.
During this resting period, the juices, which have been driven to the center of the bird during cooking, redistribute themselves throughout the meat. If you carve the turkey too soon, these precious juices will simply run out onto the carving board, leaving you with dry meat. Resting allows the meat fibers to relax and reabsorb those juices, ensuring every slice is incredibly moist and flavorful. While it rests, you can prepare your gravy using the flavorful pan drippings!
Presenting Your Glorious Thanksgiving Turkey, Fresh from the Oven!
After the essential resting period, behold your masterpiece! Your Thanksgiving turkey should emerge from the oven boasting a stunning, rich golden-brown skin, a testament to the flavorful herbed butter and careful basting. The aroma filling your kitchen will be nothing short of intoxicating, signaling the start of a truly special holiday meal. At this stage, your turkey is not just food; it’s the beautiful, succulent centerpiece of your Thanksgiving table, ready to be admired before the carving begins.
Serving Your Delectable Thanksgiving Turkey
To enhance the visual appeal of your perfectly roasted turkey, consider a few simple garnishes that add a burst of color and freshness. Arrange fresh cranberries (or sugared cranberries for a festive touch) around the base of the platter. Tuck in a few sprigs of fresh parsley and rosemary for a vibrant contrast against the golden skin. This simple plating technique elevates your dish, making it even more inviting and truly ready to serve to your eager guests. Don’t forget to have your favorite gravy and an array of delicious side dishes ready to accompany your magnificent bird!
Expert Tips for Carving Your Thanksgiving Turkey!
The moment of truth has arrived! After all your efforts, you now have a perfectly cooked, moist, and incredibly flavorful turkey. Its beautiful color and juicy interior are a testament to this foolproof recipe. Now, it’s time for the ceremonial carving.
Proper carving is key to making serving easy and ensuring every guest gets a beautiful slice of tender meat. Whether you entrust this honor to a seasoned carver or decide to take on the distinction yourself, a little knowledge goes a long way. Learning the correct technique ensures you get the most meat off the bone and present it elegantly.
For a comprehensive guide, including step-by-step visuals and professional tips on how to expertly carve your Thanksgiving turkey, we highly recommend checking out this detailed tutorial: Learn how to carve a turkey here!
Watch a full video tutorial of this sumptuous Thanksgiving turkey recipe from Cooking with Claudia for visual guidance:
There you have it, home cooks—what could very well be the easiest and best Thanksgiving turkey recipe you’ll ever encounter! This slow-roasted turkey recipe is designed to be so delicious, so tender, and so utterly finger-licking good, you’ll find yourselves picking the bones clean. The herbed butter method truly locks in moisture and infuses every bite with incredible flavor, making this holiday centerpiece a guaranteed success.
We sure hope you’ll still have some glorious leftovers because this turkey makes for some truly mean and delicious leftover turkey soup, sandwiches, or casseroles. In the meantime, savor every moment of your special home-cooked turkey and have a truly Happy Thanksgiving filled with warmth, family, and fantastic food!
Will you give this classic Thanksgiving turkey recipe a try this holiday season? Let us know in the comments section below what your thoughts are on this delicious and juicy Thanksgiving turkey recipe, or share your own favorite turkey tips!
Up Next:
- 10 Tempting Thanksgiving Desserts to Love | Thanksgiving Dessert
- Say Aloha to a Tropical Thanksgiving Dinner (VIDEO)
Stay connected with us on Facebook, Twitter, Pinterest, and Instagram for more inspiring DIY projects and holiday recipes!
Editor’s Note: This post was originally published on November 9, 2017, and has been updated for quality, relevancy, and comprehensiveness to provide you with the best Thanksgiving turkey cooking guide.