
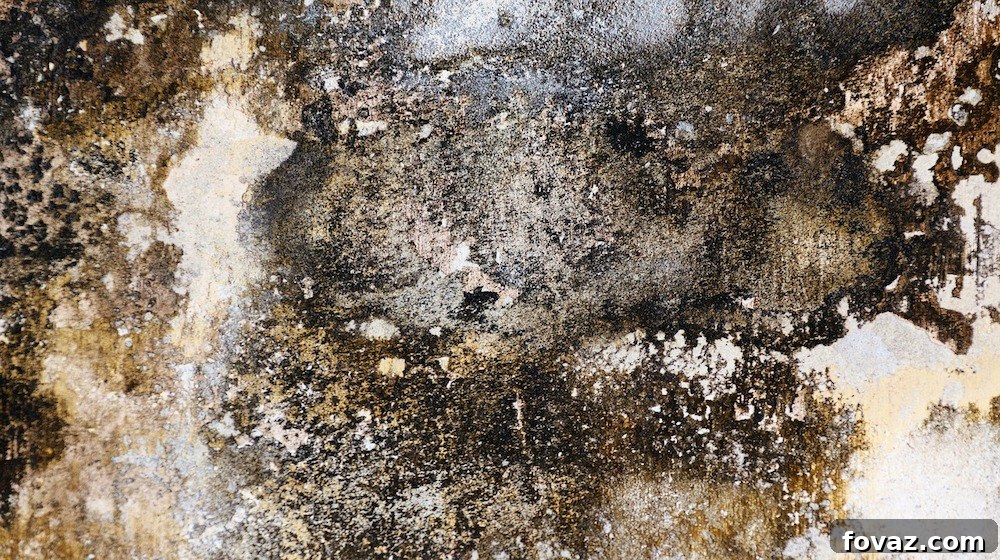
Basement mold is more than just an unsightly nuisance; it’s a persistent problem that, if not addressed correctly, can quickly reappear. While seemingly simple to tackle, effective mold removal and prevention require a thorough approach that goes beyond surface cleaning. Understanding the root causes of mold growth, particularly in moisture-prone basements, is key to saying goodbye to those unwelcome black spots for good. This comprehensive guide will walk you through the proper steps to eliminate mold from your basement and implement strategies to prevent its return, ensuring a healthier, mold-free environment.
Understanding Basement Mold: Why It’s a Common Problem and Its Risks
Mold is a type of fungus that thrives in damp, dark, and poorly ventilated environments, making basements prime locations for its growth. While some molds are harmless, others can produce allergens, irritants, and even potentially toxic substances (mycotoxins) that pose health risks to humans and pets. Common health effects range from allergic reactions like sneezing, runny nose, red eyes, and skin rash to more severe respiratory problems, asthma attacks, and even neurological issues in sensitive individuals or with prolonged exposure.
The musty smell often associated with basements is a strong indicator of mold or mildew presence, even if it’s not immediately visible. Mold can grow on almost any surface where moisture is present, including drywall, wood, fabric, insulation, and even concrete. Identifying and addressing mold early is crucial not only for health but also to prevent structural damage to your home.
Why Basements Are Prone to Mold Growth
Basements are inherently susceptible to moisture issues due to several factors:
- High Humidity: Without proper ventilation or dehumidification, basements often have higher relative humidity levels, creating an ideal breeding ground for mold spores.
- Water Leaks: Foundation cracks, leaky pipes, appliance malfunctions (e.g., water heaters, washing machines), and issues with window seals can introduce water directly into the basement.
- Condensation: Cold basement walls and floors can cause warm, moist air to condense, leading to surface moisture that encourages mold growth.
- Poor Air Circulation: Basements often lack adequate airflow, allowing moisture to settle and remain stagnant.
- Flooding: Even minor flooding incidents can leave behind enough moisture for mold to proliferate rapidly if not dried out completely and quickly.
Before embarking on any mold removal project, it’s paramount to identify and rectify the underlying moisture source. Without fixing the root cause, mold will almost certainly return, rendering your efforts temporary. This is why a holistic approach combining removal and prevention is essential for long-term success.
DIY Basement Mold Removal: A Step-by-Step Guide
For small to moderate mold infestations (generally less than 10 square feet), do-it-yourself removal can be effective. However, always prioritize safety and consider professional help for larger areas or if you suspect toxic mold. Here’s what you’ll need and how to proceed safely and effectively:
What You’ll Need:
- Personal Protective Equipment (PPE):
- Gloves (rubber or nitrile)
- Protective eye wear (goggles)
- N95 or P100 respirator mask (essential to prevent inhaling spores)
- Cleaning Supplies:
- Fungicide (commercial mold remover, diluted bleach solution, white vinegar, or hydrogen peroxide)
- Scrub brush or scouring pad
- Paper towels or old rags
- Plastic sheeting and duct tape (for containment, if necessary)
- Heavy-duty garbage bags
- Ventilation & Drying Tools:
- Fan(s)
- Dehumidifier (recommended for long-term moisture control)
Instructions:
Step 1: Prepare the Area and Apply Initial Fungicide Coating
Before you begin, ensure the area is well-ventilated. Open windows and doors if possible, and place a fan facing outward to draw air out of the basement, not into other parts of your home. If the moldy area is isolated, consider sealing off the work zone with plastic sheeting and duct tape to prevent spores from spreading throughout your house.
Once you’ve donned your essential protective equipment—gloves, safety goggles, and an N95 or P100 respirator mask—you’re ready for the first application. Apply your chosen fungicide over the affected area. Commercial mold removers are specifically formulated for this task. Alternatively, a solution of 1 cup bleach to 1 gallon of water (for non-porous surfaces only) or undiluted white vinegar (a natural, less harsh alternative for various surfaces) can be effective. Spray an even layer, ensuring full coverage of the moldy spots. Allow the fungicide to sit and penetrate the mold. This initial coating begins to kill the mold spores and their root systems. Depending on the product, this drying and killing phase can take a few hours. For areas with very little natural ventilation, keep the fan running to aid in drying and air circulation.
Step 2: Reapply Fungicide and Thoroughly Scrub the Stains
After the first application has dried and the fungicide has had time to work its magic, most of the mold organisms should be dead. Now it’s time to tackle the visible stains. Apply a second generous coat of fungicide to the treated area. Immediately after application, use a sturdy scrub brush or scouring pad to vigorously scrub the remaining black marks off the surface. Work in small sections, using a circular motion to lift and remove the stains. Be persistent; you may need to spray and scrub multiple times until the walls or affected surfaces are visibly clean and free of mold stains. For porous materials like wood, you might need to scrub more deeply to ensure complete removal.
Step 3: Wipe Excess Fungicide and Contaminated Residue
Fungicides and mold residues can be toxic and irritating. Once you’ve thoroughly scrubbed the area and confirmed the mold stains are gone, it’s crucial to wipe away any excess fungicide and dislodged mold particles. Use clean paper towels or old rags for this step. Dispose of these contaminated materials immediately in heavy-duty garbage bags. Double-bag them and take them out of your home as soon as possible to prevent any remaining spores from dispersing. This cleaning step also prepares the surface if you plan to repaint or refinish the area for a neat and fresh look, often desirable after mold removal.
Step 4: Leave to Dry Completely and Ensure Proper Ventilation
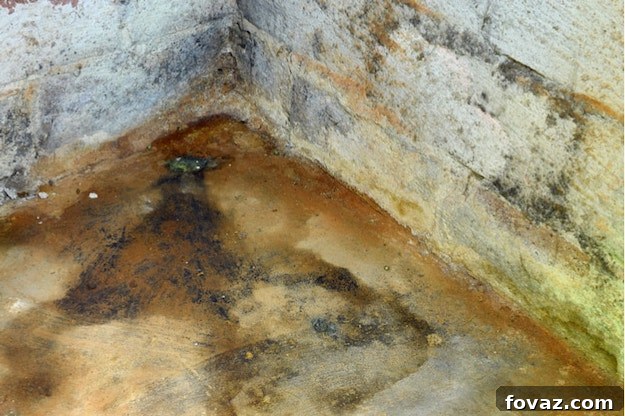
This final step is perhaps the easiest but one of the most critical. After cleaning, the treated area must be allowed to dry completely. Any lingering moisture will invite mold to return. Continue to use fans to circulate air and speed up the drying process. For basements, running a dehumidifier during and after this drying period is highly recommended. A dehumidifier will actively remove moisture from the air, helping to achieve and maintain low humidity levels. Depending on the humidity and airflow, complete drying can take anywhere from several hours to a full day. Do not rush this step.
Watch a visual demonstration of these vital mold removal steps in action below:
Beyond Removal: Comprehensive Mold Prevention Strategies for Your Basement
Removing existing mold is only half the battle. To truly keep your basement mold-free, you must implement effective moisture control and prevention strategies. Addressing the root cause of moisture is paramount to long-term success. Here are key areas to focus on:
1. Master Moisture Control and Humidity Management
- Invest in a Dehumidifier: This is arguably the most effective tool for preventing basement mold. A good quality dehumidifier will consistently pull excess moisture from the air. Aim to maintain relative humidity levels between 30% and 50% in your basement. Ensure you regularly empty the water reservoir or connect it to a drain for continuous operation.
- Improve Ventilation: Enhance air circulation by opening windows on dry days, installing exhaust fans, or using floor fans. Good airflow prevents stagnant, moist air from settling on surfaces.
- Seal Leaks: Regularly inspect your basement for any signs of water intrusion.
- Pipe Leaks: Check plumbing, water heaters, and washing machine connections for drips or condensation. Repair any leaks promptly.
- Foundation Cracks: Seal visible cracks in your foundation walls or floor using hydraulic cement or epoxy injection kits. For larger or persistent cracks, consider professional assessment.
- Window and Door Seals: Ensure basement windows and doors are properly sealed and caulked to prevent water entry during rain.
2. Exterior Drainage and Waterproofing
Preventing water from entering the basement from the outside is critical:
- Clean Gutters and Downspouts: Ensure your gutters are free of debris and that downspouts extend at least 5-10 feet away from your home’s foundation to direct rainwater away.
- Proper Grading: Check that the ground around your home slopes away from the foundation, preventing water from pooling against the basement walls. You might need to add soil to achieve proper grading.
- Waterproofing Barriers: Consider applying a waterproof sealant or paint to interior basement walls. For more severe issues, exterior waterproofing systems (e.g., French drains, foundation wraps) might be necessary, often requiring professional installation.
3. Proper Insulation to Prevent Condensation
Insulating basement walls and rim joists can help prevent condensation, especially in colder climates. When warm, moist air meets cold surfaces, condensation forms, providing an ideal environment for mold. Proper insulation keeps surfaces warmer, reducing this effect.
4. Regular Inspections and Maintenance
Make routine inspections of your basement a habit. Look for:
- Musty Odors: A strong indicator of hidden mold.
- Visible Mold Growth: Check walls, floors, ceilings, and stored items.
- Water Stains or Discoloration: Signs of current or past water intrusion.
- Dampness: Feel surfaces for moisture.
Addressing any signs of moisture or mold immediately will save you time, money, and potential health issues in the long run.
When to Call a Professional Mold Remediation Service
While DIY mold removal is suitable for small areas, there are situations where professional help is warranted:
- Large Infestations: If the mold covers an area larger than 10 square feet (roughly 3×3 feet), it’s often best to call in experts.
- Suspected Toxic Mold: If you suspect black mold (Stachybotrys chartarum) or are unsure of the mold type, professionals have the expertise and equipment to handle it safely.
- Health Concerns: If anyone in your household is experiencing severe health symptoms related to mold exposure.
- Hidden Mold: If you detect a strong musty smell but cannot locate the mold, it might be hidden within walls or under flooring, requiring specialized tools to find and remove.
- Recurrent Mold: If mold keeps coming back despite your best efforts, there might be a complex underlying moisture problem that requires professional diagnosis and remediation.
- Post-Flooding: After significant water damage or flooding, professional remediation ensures thorough drying and mold prevention.
Conclusion: Embrace a Mold-Free Basement
A mold-free basement is achievable with the right knowledge and consistent effort. By understanding why mold grows in this unique environment, prioritizing safety during removal, and diligently implementing preventative measures, you can transform your basement into a healthier and more usable space. Remember, proactive moisture control and regular vigilance are your best defenses against this persistent household foe. Don’t let mold dictate the health and integrity of your home any longer. Take these steps today for a cleaner, drier, and more comfortable basement tomorrow.
For more home improvement inspiration and DIY projects, explore our extensive collection!
Featured image via HGTV