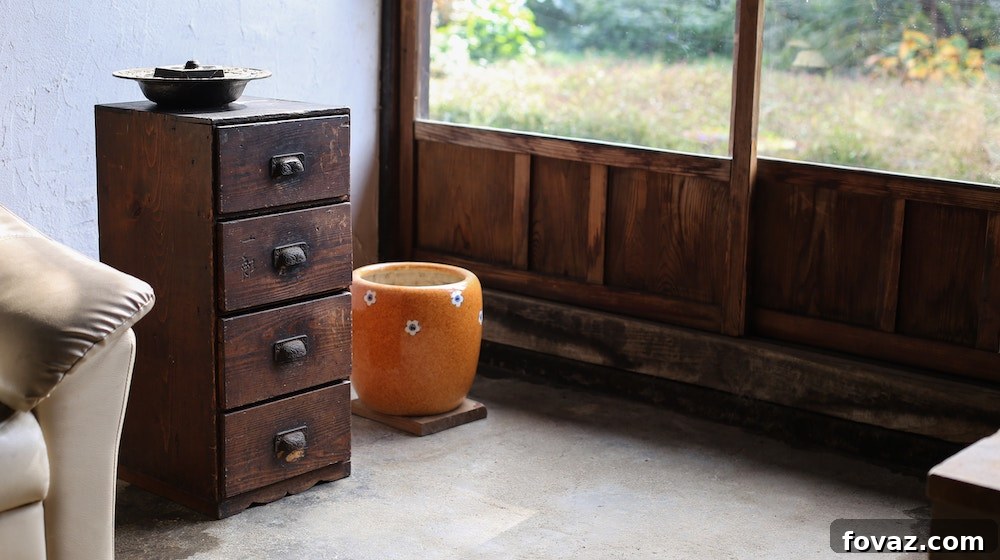
Are you ready to transform your outdated furniture into stunning statement pieces that breathe new life into your home? A furniture makeover isn’t just about saving money; it’s a rewarding journey of creativity, sustainability, and personalization. With a few essential supplies, some patience, and the right techniques, you can give your beloved furniture a brand-new look and extend its lifespan for years to come. Forget about the endless hunt for new pieces or the hefty price tags – this weekend, embark on a DIY furniture restoration project that will leave you with unique, custom furnishings and a deep sense of accomplishment.
The Ultimate Guide to Furniture Makeovers: Transform Your Home with DIY Furniture Restoration
Furniture pieces often represent a significant investment in home decor. While durability and adaptability are key qualities we seek, the desire for a fresh look often leads us to discard perfectly functional items. This cycle not only strains your wallet but also contributes to environmental waste. Fortunately, the art of furniture restoration offers a brilliant solution, allowing you to repurpose old furniture and achieve a contemporary, personalized aesthetic without breaking the bank. This comprehensive guide will walk you through everything you need to know for a successful furniture facelift, focusing on preparation, painting, and long-lasting protection.
A special thanks to fix.com for inspiring countless DIY enthusiasts with their insightful resources on furniture makeovers.
Why Embark on a Furniture Makeover Journey?
Beyond the simple act of refreshing an old item, choosing to restore or upcycle furniture offers a multitude of benefits:
- Cost-Effectiveness: Refinishing an existing piece is almost always more affordable than purchasing new furniture. You save on material costs, manufacturing, and often delivery.
- Environmental Sustainability: By giving old furniture a second life, you actively reduce waste and lessen the demand for new products, which in turn conserves natural resources and energy. It’s a fantastic way to practice eco-friendly living.
- Uniqueness & Personalization: Factory-made furniture often lacks character. A DIY makeover allows you to inject your personal style, ensuring your pieces are truly one-of-a-kind and perfectly match your home’s aesthetic.
- Quality & Durability: Many older furniture pieces are constructed from solid, high-quality wood that is often superior to modern, mass-produced alternatives. A makeover preserves this inherent quality, allowing you to enjoy a well-made item for longer.
- Skill Development & Satisfaction: Learning new DIY skills and seeing a project through from start to finish is incredibly rewarding. The satisfaction of transforming a worn-out item into something beautiful and functional is unmatched.
Essential Tools & Materials for Your Furniture Restoration Project
Before you dive into the transformation, gathering the right tools and materials is crucial. Investing in quality supplies will not only make the process smoother but also ensure a professional and durable finish.
What You’ll Need:
- Drop Cloths: Essential for protecting your floors and surrounding areas from paint spills, dust, and stripper residue. Canvas drop cloths are more durable and slip-resistant than plastic ones, and they can be reused.
- Paint Stripper: Use if the existing finish is bubbling, chipping severely, has multiple layers, or if you plan to stain rather than paint. Options range from strong chemical strippers (fast-acting but require excellent ventilation and protection) to more eco-friendly, slower-acting varieties. Always read the instructions carefully.
- Power Sander: A true time-saver. Orbital or palm sanders are excellent for removing old finishes and smoothing surfaces efficiently. While hand sanding yields about 100-200 strokes per minute, a power sander can deliver 6,000-8,000 strokes, drastically speeding up your prep work. Different grits of sandpaper (see below) are used with the sander.
- Putty Knife / Plastic Scraper: Indispensable for removing softened paint stripper, applying wood filler, and scraping off loose paint or old finishes.
- Sandpaper: A variety of grits is necessary for a smooth finish.
- Coarse-grit (60-80): For aggressive removal of old paint, varnish, or significant imperfections.
- Medium-grit (100-120): For general sanding, removing residue, and preparing the surface for primer.
- Fine-grit (180-220): For smoothing wood filler, light sanding between coats of primer or paint, and achieving a silky finish.
- Sanding Blocks: Help apply even pressure and maintain flat surfaces.
- Clean Cloths / Tack Cloths: Used for cleaning dust and debris after sanding. Tack cloths are slightly sticky and excellent for picking up fine dust particles before painting.
- Painter’s Tape: High-quality painter’s tape is vital for masking off areas you don’t want to paint, such as drawer interiors, hardware, or adjacent surfaces, ensuring crisp, clean lines.
- Primer: A crucial step for bare wood or when painting over a dark finish with a lighter color. Primer helps paint adhere better, blocks stains, and creates a uniform base for your chosen paint color. There are specific primers for wood, stain-blocking primers, and bonding primers for tricky surfaces.
- Paint:
- Oil-based paints: Known for their durability and smooth finish, oil-based paints are long-lasting and can be used in cooler temperatures. However, they have a strong odor that can linger for weeks and require mineral spirits for cleanup.
- Latex (water-based) paints: Dry quickly, have less odor, and clean up easily with water. They are best applied in warm, dry conditions. Be aware that latex paint can sometimes swell the grain of wood, making light sanding between coats essential for a smooth result.
- Specialty paints: Consider chalk paint (for a distressed, matte look with minimal prep), milk paint (for an antique, chippy finish), or spray paint (for quick, even coverage on smaller or intricate pieces).
- Brushes: Invest in good quality brushes appropriate for your chosen paint type. Synthetic bristles work well with latex paints, while natural bristles are better for oil-based paints. Have a few sizes: a larger brush for broad areas and smaller angled brushes for intricate details and edges.
- Rollers: Foam rollers provide a very smooth finish, ideal for flat surfaces. Microfiber or short-nap rollers are good for general painting. Choose sizes appropriate for the surfaces you’re painting.
- Wood Filler: To fill in any holes, dents, or cracks in the wood. It comes in various types (e.g., latex, epoxy) and colors.
- Protective Topcoat (e.g., Paste Wax, Polyurethane, Polycrylic): Essential for protecting your finished piece from wear and tear, moisture, and scratches.
- Paste Wax: Provides a soft sheen and some protection, often used over chalk paint.
- Polycrylic: A water-based, clear protective finish that is durable and non-yellowing, ideal for lighter paint colors.
- Polyurethane: An oil-based clear coat that offers excellent durability, but can have an amber tint, best for darker colors or stains.
- Lacquers: Offer a very durable, high-gloss finish.
- Fine Steel Wool: Useful for buffing paste wax or achieving a smoother finish on certain topcoats.
Step-by-Step Guide to Refinishing Wood Furniture
A successful furniture makeover hinges on meticulous preparation and careful application. Follow these steps for professional results.
Phase 1: Preparation is Key
Workspace Protection
Lay down drop cloths meticulously to cover all surrounding floors and furniture. If working indoors, ensure adequate ventilation by opening windows and using fans. Consider setting up a dedicated workspace if possible.
Thorough Cleaning
Use a damp cloth with a mild, wood-safe cleaner or a degreaser (like TSP substitute) to thoroughly clean the entire piece, including drawers and undersides. This removes years of grime, grease, and dirt that could hinder paint adhesion. Allow the furniture to dry completely.
Remove & Organize Hardware
Unscrew and remove all hardware – handles, knobs, pulls, hinges. Place them in a labeled bag or jar to ensure no parts go missing and you remember where each piece belongs, especially if you plan to reuse them.
Disassembly (Optional but Recommended)
For complex pieces like dressers or cabinets, taking a “before” photo or marking each piece with a number before disassembling drawers and doors can be incredibly helpful for reassembly. Disassembly often makes it easier to achieve an even finish on all surfaces.
Stripping Old Finishes (If Necessary)
If the existing finish is heavily damaged, has multiple paint layers, or if you’re aiming for a stained wood look, apply a paint stripper according to the product’s instructions. Some varieties may need 30 minutes, while others require up to 24 hours. Use a putty knife or plastic scraper to gently remove the softened finish, working in small sections. Always wear appropriate safety gear (gloves, goggles, respirator) and work in a well-ventilated area.
Rough Sanding
Using a medium-grit sandpaper (e.g., 100-120 grit) with your power sander (or by hand), lightly sand the entire surface. This removes any remaining dirt, residue, and provides a “tooth” for the new finish to adhere to. If you stripped the piece, this step helps remove any lingering stripper residue and smooth the exposed wood grain.
Repair & Fill
Inspect the furniture for any holes, cracks, or dents. Use wood filler and a putty knife to fill these imperfections. Overfill slightly, as wood filler can shrink as it dries. Allow it to dry completely according to manufacturer instructions (this can take several hours). Once dry, sand the repaired spots smooth with medium-grit sandpaper, ensuring they are flush with the surrounding surface.
Fine Sanding
Switch to fine-grit sandpaper (180-220 grit) or a sanding block and lightly sand the entire piece once more. This step ensures a silky-smooth surface, which is crucial for a professional-looking paint finish. Pay attention to edges and corners.
Dust Removal
This is a critical step that many skip! Use a vacuum cleaner with a brush attachment, followed by a clean, damp cloth, and then a tack cloth to meticulously wipe away all sanding dust and particles. Any remaining dust will be trapped under your primer or paint, resulting in a bumpy finish.
Masking Off Areas
Carefully apply painter’s tape to any areas you don’t want painted, such as the inside of drawers, cabinet interiors, glass panels, or trim that will be a different color. Press the tape down firmly to create a tight seal and prevent paint bleed.
Priming for Success
While not every piece *absolutely* needs priming, it’s highly recommended, especially for bare wood, if you’re changing a dark color to a light one, or if you suspect potential stain bleed-through from the wood (e.g., mahogany or knotty pine). Apply a thin, even coat of primer using a brush or roller. Allow it to dry completely according to the product’s instructions. If the wood grain has raised slightly, a very light sanding with fine-grit sandpaper (220+) and another dust wipe down before a second coat of primer can further improve the finish.
Phase 2: Painting Techniques for a Flawless Finish
Apply Paint Strategically
- Start with large, flat surfaces: Use a roller for these areas to achieve a smoother, more even finish with fewer brush marks.
- Work from top to bottom: This allows you to catch any paint drips or runs as you go, ensuring a cleaner final look.
- Paint with the grain: For wood surfaces, always apply paint in the direction of the wood grain for the most natural and professional appearance.
- Avoid overloading your brush or roller: Apply several thin, even coats rather than one thick coat. Thick coats are prone to drips, runs, and uneven drying.
- Address edges and trim: Use a high-quality brush for these detailed areas, ensuring full coverage without excess paint buildup.
- Wipe away drips: If you notice any drips or imperfections immediately after application, gently wipe them away with a clean, damp cloth before the paint dries.
- Sand between coats: After the first coat of paint has dried completely (check product instructions), lightly sand the entire piece with a fine-grit sandpaper (220-320 grit). This smooths out any minor imperfections, brush strokes, or raised wood grain, creating a perfectly smooth canvas for subsequent coats. Always wipe away dust thoroughly after sanding.
- Apply multiple thin coats: Typically, two to three thin coats of paint will provide superior coverage, durability, and a smoother finish than a single thick coat. Allow adequate drying time between each coat.
Phase 3: Protection & Final Touches
Apply a Durable Topcoat
After your final coat of paint has dried for at least 24 hours (or longer, depending on the paint type and humidity), it’s time to protect your masterpiece. Apply your chosen topcoat (paste wax, polycrylic, polyurethane, etc.) according to the manufacturer’s instructions. For paste wax, apply a thin, even layer, let it dry for 10-15 minutes, then buff with a clean cloth or fine steel wool until you achieve a desired sheen. For liquid topcoats, apply several thin coats, allowing proper drying time between each. This protective layer is crucial for the longevity and durability of your furniture makeover.
Allow for Full Curing
While paint may be “dry to the touch” in a few hours, it typically takes several days to several weeks to fully “cure” and reach its maximum hardness and durability. During this curing period, be gentle with your newly refinished furniture. Avoid placing heavy objects on it, sliding items across its surface, or exposing it to excessive moisture for at least two days, or ideally, up to a couple of weeks, to prevent smudges, nicks, or damage to the fresh finish.
Replace Hardware
Once the finish is fully dry and cured, it’s time to reattach your old hardware or install new handles, knobs, and pulls. This final detail significantly contributes to the overall aesthetic and functionality of your revamped piece.
Furniture Rehab Safety Guidelines
Working with paints, strippers, and sanding equipment requires attention to safety. Always prioritize your health and well-being.
- Personal Protective Equipment (PPE): Always wear chemical-resistant gloves (especially when using strippers), a protective apron, safety goggles, and a dust mask or ventilator. A proper respirator is essential when dealing with strong fumes or fine dust particles to protect your respiratory system.
- Ventilation: Work in a well-ventilated area. Open windows, use fans, and if possible, work outdoors. Good airflow dissipates fumes and dust, reducing inhalation risks.
- Flammable Materials: Many strippers, paints, and solvents are flammable. Keep them away from open flames, sparks, and heat sources.
- Oily Rags: Oily rags (from oil-based paints, stains, or solvents) can spontaneously combust as they dry. Always lay them flat outside to dry completely before disposing of them in a metal container with a tight lid, or immerse them in water.
- Proper Disposal: Check your local and state regulations for the proper disposal of hazardous materials, including paint stripper, old paint, and solvent-soaked rags. Never pour chemicals down drains or dispose of them in regular household trash.
- Keep Children and Pets Away: Ensure children and pets are kept far away from your workspace and any chemicals or tools.
Beyond the Paint: Other Furniture Makeover Ideas
While painting is a popular choice, there are many other creative ways to give your furniture a new lease on life:
- Staining & Varnishing: If your wood piece has beautiful grain, consider stripping and then restaining it to highlight its natural beauty. Follow with a durable varnish for protection.
- Adding New Hardware: Sometimes, simply replacing old, outdated knobs and pulls with modern or vintage-inspired ones can completely change a piece’s look.
- Decoupage: Use decorative paper, fabric, or even maps to create unique patterns and textures on surfaces.
- Upholstering: For chairs, benches, or headboards, reupholstering with a new fabric can dramatically alter its style and comfort.
- Distressing & Antiquing: Achieve a shabby chic or aged look by sanding back paint in certain areas or applying an antiquing glaze.
- Adding Legs or Casters: Change the height or mobility of a piece by adding new legs or wheels.
Refinishing an old piece of furniture is an incredibly rewarding endeavor that offers both cost savings and immense personal satisfaction. While the entire process—from initial prep to the final protective coat—requires dedication, time, and patience, the result will be a stunning, revitalized piece that enhances your home and reflects your unique style. Your ‘new’ furniture beauty will undoubtedly be well worth every effort.
Did you find these furniture makeover tips helpful and inspiring? Share your thoughts and questions in the comments below!
For more DIY and craft news, follow us on Facebook, Twitter, Pinterest, and Instagram!
Like this? Then, you’ll LOVE…
DIY Rustic Pallet Headboard
Care Tips For Outdoor Furniture So It Lasts Longer
DIY Projects’s Ingenious DIY Hacks For Home Improvement