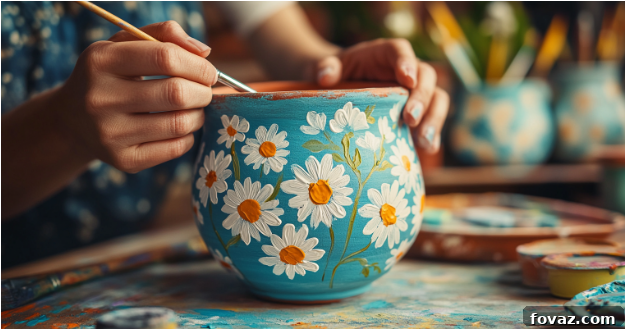
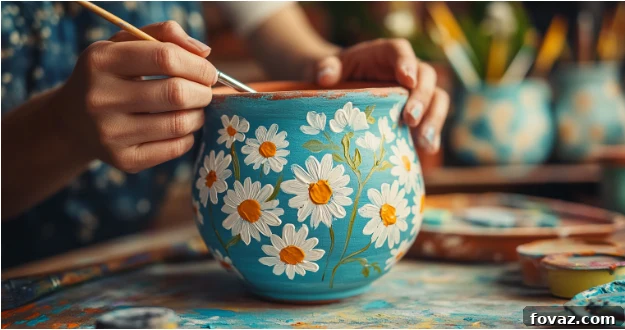
Transform Your Garden: The Ultimate Guide to Painting Terracotta Pots
Terracotta pots are a timeless staple for any gardener, known for their rustic charm and breathability. However, their natural, earthy hue, while classic, can sometimes feel a bit uninspiring. If you’re looking to infuse your garden or indoor spaces with vibrant color and unique personality, painting terracotta pots is a fantastic, budget-friendly, and highly rewarding DIY project. It’s an accessible craft for anyone, regardless of artistic experience, offering a wonderful way to express creativity and enhance your botanical displays. This comprehensive guide will walk you through every step, ensuring your decorated plant pots are not only beautiful but also durable.
Why Paint Terracotta Pots? Unleash Your Creativity and Enhance Your Space
Beyond simply adding color, personalizing your terracotta plant pots offers numerous benefits:
- Aesthetic Appeal: Transform plain pots into stunning decorative elements that complement your plants and overall garden design.
- Personal Expression: Reflect your unique style, whether it’s whimsical, elegant, modern, or rustic, through custom designs.
- Budget-Friendly Decor: Instead of buying expensive decorative planters, you can give new life to inexpensive terracotta pots or repurpose old ones.
- Therapeutic Craft: The act of painting can be a relaxing and meditative activity, offering a creative escape.
- Enhanced Durability (with sealing): Properly prepared and sealed, painted pots can resist weathering and last longer than unpainted ones, especially those used outdoors.
- Themed Gardening: Create themed sets for herbs, succulents, or specific flower arrangements, adding coherence to your garden layout.
Essential Preparation: Ensuring a Lasting Finish for Your Painted Terracotta Pots
Terracotta is a porous material, meaning it readily absorbs moisture. Without proper preparation, paint can peel, blister, or fade prematurely due to water wicking through the clay. Taking the time to prepare your pots correctly is crucial for achieving a beautiful and long-lasting finish. Follow these steps meticulously:
- Thorough Cleaning of the Surface:
- New Pots: Even new pots can have dust or manufacturing residues. Wipe them down with a damp cloth to remove any loose dirt.
- Used Pots: If you’re repurposing old pots, a more vigorous cleaning is needed. Scrub them thoroughly with warm, soapy water (using a mild dish soap). Pay attention to any soil residue, mineral deposits, or mold. For stubborn stains, a stiff brush or even a diluted bleach solution (1 part bleach to 9 parts water) can be used, followed by a thorough rinse.
- Complete Drying: This step is non-negotiable. Terracotta must be completely dry before painting. Allow pots to air dry for at least 24-48 hours, or even longer in humid conditions. Ensure no moisture remains trapped within the pores of the clay.
- Sealing the Clay (Pre-Painting):
While often listed as optional, pre-sealing the inside of your terracotta pot is highly recommended, especially for outdoor use or if planting directly into the pot. This step creates a barrier that prevents moisture from the soil from seeping through the clay and damaging your paint job. It also helps the paint adhere better and reduces the number of paint coats needed for vibrant color.
- Application: Apply a thin, even layer of a clay pot sealer, clear acrylic sealer, or even a waterproof PVA glue diluted with water, to the interior and optionally the exterior of the pot. Many crafters also seal the bottom drainage hole.
- Drying: Allow the sealer to dry completely according to the product instructions before moving to the next step.
For more details on effective sealing techniques, you can explore guides on how to seal terracotta pots, such as resources from Garden Tabs.
- Smoothing the Surface:
Terracotta pots can sometimes have rough spots, small bumps, or uneven textures. A smooth surface ensures better paint adhesion and a more professional-looking finish.
- Sanding: Lightly sand any rough areas with fine-grit sandpaper (e.g., 220-grit). Focus on the rim and any prominent imperfections.
- Dust Removal: After sanding, wipe the pot again with a damp cloth to remove all sanding dust, and then let it dry completely.
- Applying a Base Coat or Primer:
A base coat acts as a uniform foundation for your decorative paint, enhancing color vibrancy and ensuring better adhesion, especially if you’re using lighter colors on dark terracotta.
- Primer: An acrylic primer specifically designed for crafts or multi-surface use works wonders. It seals the pores further and provides an ideal surface for paint.
- White Acrylic Paint: Alternatively, a coat or two of white acrylic craft paint can serve as an excellent base, making subsequent colors pop and reducing the need for multiple layers of your chosen design colors.
- Application: Use a wide brush for even coverage. Apply thin coats and allow each layer to dry thoroughly before applying the next.
The Artistic Journey: Adding a Personal Touch to Your Terracotta Pots
Once your pots are meticulously prepared, it’s time for the most exciting part: bringing your creative vision to life! This is where you can truly transform a simple pot into a unique piece of art.
1. Selecting Your Colors and Theme
Before dipping your brush, consider the overall aesthetic you want to achieve. Your color palette and design theme can dramatically influence the final look and how the pot integrates into its environment.
- Garden Harmony: For outdoor spaces, consider colors that complement your existing flora or home exterior. Earthy tones (terracotta, greens, blues) blend naturally, while vibrant hues (reds, yellows, turquoises) can create striking focal points.
- Indoor Accent: For indoor plants, match the pot to your interior decor. Soft pastels might suit a minimalist home, bold geometrics for a modern space, or intricate floral patterns for a bohemian feel.
- Plant Pairing: Think about the plant that will live in the pot. Delicate succulents might look lovely in a subtly painted pot, while a lush fern could be enhanced by a rich, deep color.
- Themes: Explore themes like abstract art, whimsical creatures, natural elements (leaves, flowers), geometric patterns, or even holiday-specific designs.
2. Creating a Solid Base Layer
Even if you’ve applied a primer or white base coat, a solid base color specific to your design theme provides a smooth, even canvas for intricate details. This creates a clean, professional backdrop for your patterns.
- Application Technique: Use a wide, flat brush for smooth, even strokes. Apply thin layers to prevent drips and ensure consistent coverage.
- Drying Between Coats: Patience is key here. Allow each layer of base color to dry completely before applying the next. This prevents streaks and ensures vibrant, true-to-color results. You might need 2-3 thin coats for full opacity.
3. Adding Captivating Patterns and Designs
Now, let your imagination run wild! Here are various techniques to personalize your pots and make them truly one-of-a-kind:
- Freehand Painting:
Ideal for unique, organic designs. Use a fine-tipped brush for intricate details like delicate florals, winding vines, abstract swirls, or whimsical illustrations. If you’re nervous, lightly sketch your design with a pencil first.
- Stencils:
Perfect for achieving clean, repeatable shapes such as stars, leaves, geometric patterns, or letterings. Secure the stencil firmly with painter’s tape to prevent bleeding. Apply paint with a sponge or a stencil brush, dabbing vertically rather than brushing horizontally.
- Sponge Painting:
Create beautiful textured effects by dabbing different colors onto the pot with a sponge. Natural sea sponges offer irregular, organic textures, while craft sponges can provide more uniform dappling. Layer colors for depth and interest.
- Splatter Art:
For a playful and energetic look, load a brush with watered-down paint and gently flick it towards the pot. Experiment with different brush sizes and paint consistencies for varied splatter effects. Remember to protect your work area!
- Handwritten Details:
Add a truly personal touch with names, favorite quotes, inspiring words, or plant labels. Use fine brushes or paint pens for crisp lettering. Consider different font styles to match your pot’s theme.
- Tape Resist/Color Blocking:
Use painter’s tape to create sharp lines and geometric patterns. Apply tape after your base coat is dry, paint your desired sections, then carefully peel off the tape before the new paint fully dries to reveal crisp lines.
- Marbling:
Achieve an elegant, swirled effect by using a water marbling technique or by swirling two wet paints together directly on the pot with a toothpick.
- Decoupage:
For those who prefer not to paint freehand, decoupage involves gluing paper cutouts (from napkins, magazines, or craft paper) onto the pot, then sealing them with a clear topcoat for a seamless finish.
4. Blending and Layering Colors for Depth
To create a more dynamic and sophisticated look, experiment with blending and layering techniques:
- Ombre Effects: Gradually transition between two or more colors. Apply one color, then a slightly lighter shade next to it, and blend where they meet using a clean, damp brush.
- Two-Tone Gradients: Similar to ombre, but with a more distinct shift between colors, often used to highlight different sections of the pot.
- Subtle Shading: Add shadows or highlights to your painted elements to give them a three-dimensional appearance. Use a slightly darker or lighter shade of your base color to create depth.
- Dry Brushing: Dip a dry brush into a small amount of paint, wipe most of it off, then lightly drag the brush over your design to create a weathered or textured look.
5. Allowing for Complete Drying
Patience is absolutely essential after you’ve finished painting. Rushing this step can lead to smudges, peeling, or an uneven finish.
- Initial Dry Time: Most acrylic paints are touch-dry within 20-30 minutes, but this doesn’t mean they are fully cured.
- Full Cure Time: Allow your painted pot to dry for at least 24-48 hours, or even up to a week for outdoor pots, before applying a sealant or handling it extensively.
- Ventilation: Place the pot in a well-ventilated area, away from direct sunlight or extreme temperatures, to allow the paint to set and cure properly.
Selecting the Best Paints and Expanding Your Creative Design Ideas
The type of paint you choose significantly impacts the durability and finish of your decorated plant pots. Understanding the characteristics of different paints will help you make the best choice for your project.
Choosing the Right Paint for Terracotta
- Acrylic Craft Paint:
This is a popular choice for indoor terracotta pots due to its wide range of vibrant colors, quick drying time, and ease of use. It’s water-based, non-toxic, and easy to clean up. However, for outdoor use, it requires a robust sealant to protect against moisture and UV rays.
- Outdoor/Patio Paint:
Specifically formulated for exterior use, patio paint offers superior weather resistance, UV protection, and durability against chipping and fading. It’s an excellent investment for pots that will endure the elements, and often requires less sealing than standard acrylics.
- Spray Paint:
Ideal for achieving smooth, even coverage quickly, especially for large pots or uniform base coats. Look for spray paints designed for outdoor use or multi-surface application. Always use in a well-ventilated area and protect surrounding surfaces from overspray. A sealant is crucial to prevent chipping and ensure longevity.
- Chalk Paint:
Known for its matte, velvety finish and excellent adhesion with minimal prep. Chalk paint is great for creating a distressed, shabby-chic look. It does require a wax or clear coat sealant to protect the finish, especially if used outdoors.
- Enamel Paint:
Offers a hard, glossy, and durable finish. While highly resistant to weather and wear, enamel paints can be oil-based, requiring mineral spirits for cleanup, and may have a longer drying time. They provide excellent long-term protection once cured.
Need help picking the best paint for outdoor use? Many resources offer insights into top-rated acrylic paints suitable for exterior projects. You might find a helpful list of top-rated acrylic paints for outdoor use to guide your selection.
More Inspiring Design Ideas for Your Terracotta Pots
Beyond the basic patterns, here are a few other creative concepts to spark your imagination:
- Color Blocking: Use painter’s tape to define distinct geometric sections on your pot. Paint each section with a different, bold color for a modern, architectural look. Experiment with triangles, rectangles, or even abstract angles.
- Ombre Blends: Achieve a stylish gradient effect by smoothly fading two or more colors into each other. This can be done horizontally, vertically, or even diagonally, creating a serene and sophisticated transition.
- Hand-Painted Florals and Botanicals: Delicate flowers, trailing vines, lush leaves, or abstract botanical patterns add a natural, organic touch. Vary the size and type of flowers for a dynamic composition.
- Polka Dots & Stripes: Simple yet incredibly effective! Polka dots bring a whimsical, cheerful feel, while stripes add structure and energy. Combine different sizes of dots or vary stripe widths and directions for playful contrast and visual interest. Use a pencil eraser or the back of a paintbrush for perfectly round dots, and painter’s tape for crisp stripes.
- Mandala Designs: For a more intricate and meditative project, create symmetrical mandala patterns using dotting tools or fine brushes. These designs often evoke a bohemian or spiritual aesthetic.
- Chalkboard Pots: Paint a section of your pot with chalkboard paint. This allows you to write plant names, messages, or change designs with chalk whenever you like – perfect for herb gardens!
- Metallic Accents: Incorporate metallic paints (gold, silver, copper) into your design for a touch of glamour and sophistication. Use them for detailing, highlights, or as a contrasting base.
- Faux Texture: Use techniques like dry brushing or sponging with different shades to mimic the look of stone, concrete, or even aged wood.
Sealing and Caring for Your Painted Terracotta Masterpieces
After all your creative efforts, the final crucial step is to protect your beautifully painted terracotta pots. A proper sealing and ongoing care routine will ensure your designs remain vibrant and intact for many seasons.
Applying a Protective Sealant
Once your paint has fully cured (typically 24-72 hours), it’s time to apply a clear, waterproof sealant. This protective layer is vital for several reasons:
- Moisture Barrier: It prevents water from seeping into the paint layers, which can cause blistering, peeling, or fading.
- UV Protection: Many sealants contain UV inhibitors that protect your colors from fading due to sun exposure.
- Durability: A sealant adds a layer of protection against scratches, scuffs, and general wear and tear.
- Finish Enhancement: Sealants come in various finishes (matte, satin, glossy), allowing you to further enhance the look of your painted design.
Both spray-on and brush-on formulas work well; the choice often comes down to personal preference and the intricacy of your design:
- Spray-On Sealant: Offers quick, even coverage, especially for textured or detailed designs. Apply in thin, even coats from a consistent distance, allowing each coat to dry before applying the next (usually 2-3 coats are recommended).
- Brush-On Sealant: Provides precise application and often a thicker, more durable layer. It’s ideal for smooth surfaces and allows for careful sealing of specific areas. Apply with a soft brush, again in thin, even coats.
Consider sealing both the exterior and the interior (especially the top few inches of the interior rim) of the pot, even if you pre-sealed the inside. This double protection significantly extends the life of your painted design.
Long-Term Care for Your Painted Terracotta Pots
To keep your unique, hand-painted terracotta pots looking their best and to ensure their longevity, follow these care guidelines:
- Avoid Prolonged Soaking: While sealed, terracotta can still absorb moisture over long periods, potentially compromising the paint or sealant. Avoid leaving your pots submerged in water for extended durations.
- Gentle Cleaning: When your pots get dirty, simply wipe them down with a soft, damp cloth. Avoid harsh scrubbing brushes or abrasive cleaners, which can damage the painted design and protective sealant.
- Protect from Extreme Weather:
- Freezing Temperatures: Terracotta is susceptible to cracking in freezing conditions as absorbed moisture expands. Bring outdoor pots inside or store them in a sheltered area (shed, garage) during winter.
- Intense Sun and Rain: While sealants offer protection, prolonged exposure to harsh elements can still take a toll over many years. Consider rotating pots or providing some shade during peak summer to preserve color vibrancy.
- Periodic Re-sealing: Depending on exposure and the type of sealant used, you might find it beneficial to re-apply a fresh coat of sealant every 1-2 years, particularly for outdoor pots, to maintain optimal protection.
Conclusion: Transforming the Ordinary into Extraordinary with Painted Terracotta Pots
A little paint, combined with thoughtful preparation and proper care, can turn a basic, humble terracotta pot into a magnificent focal point for your home or garden. Painting terracotta pots is more than just a craft; it’s an accessible form of art that allows you to infuse your personality, creativity, and love for nature into every corner of your living space. From vibrant color blocking to delicate hand-painted botanicals, the possibilities for customization are truly endless.
By following this comprehensive guide – from cleaning and sealing to selecting the right paints and applying protective topcoats – you can create durable, beautiful, and truly unique planters that will stand the test of time and bring joy for seasons to come. So, gather your brushes, unleash your inner artist, and start transforming your garden with these delightful DIY projects!
Frequently Asked Questions About Painting Terracotta Pots
1. What type of paint works best on terracotta?
For indoor use, acrylic craft paint is a versatile and popular choice due to its wide color range and ease of use. For outdoor pots, consider outdoor or patio paints, which are formulated with UV and weather resistance. Spray paint can also be used for quick, even coverage, but always follow up with a strong sealant for durability.
2. Do I need to prime my terracotta pot before painting?
While not strictly required for all paints, priming is highly recommended. A primer or a base coat of white acrylic paint helps seal the porous clay, prevents moisture wicking, makes colors appear brighter and more vibrant, and ensures better adhesion and longevity of your final paint layers.
3. How long does paint take to dry on terracotta?
Most acrylic paints are touch-dry within 20-30 minutes. However, for complete curing and to ensure proper adhesion between layers, it’s best to wait at least 2-4 hours between coats. For the final coat, allow 24-48 hours of drying time before applying any sealant or handling extensively.
4. Should I seal my painted pots?
Yes, absolutely! Sealing is a critical step, especially for outdoor pots. A clear, waterproof, and UV-resistant sealant protects your painted design from moisture (which can cause peeling), sunlight (which causes fading), and general wear and tear. It significantly extends the life and beauty of your artwork.
5. Can I use spray paint on terracotta pots?
Yes, spray paint works wonderfully for achieving smooth, even finishes, and can be very efficient for larger pots or base coats. Ensure you use an exterior-grade spray paint if the pot will be outdoors, and always follow up with a durable, clear sealant for long-lasting results and protection against chipping.
6. How do I clean painted terracotta pots?
For routine cleaning, simply use a soft, damp cloth to gently wipe away dust and dirt. Avoid harsh scrubbing brushes, abrasive cleaners, or chemical solvents, as these can damage the paint and sealant over time. If possible, avoid prolonged soaking.
7. Can I paint old or used terracotta pots?
Definitely! Repurposing old pots is a great way to save money and be eco-friendly. Just make sure to clean them thoroughly to remove all soil, mineral deposits, and mold. Sand any rough spots if needed, and then proceed with the usual priming, painting, and sealing steps.
8. Will my painted design fade over time?
Without a proper sealant, painted designs, especially those exposed to direct sunlight and outdoor elements, can fade over time. Using a high-quality, UV-resistant sealant is essential to protect your colors and extend the life of your design for many seasons.
9. Can I paint the inside of the pot?
While you can paint the inside for decorative purposes (e.g., if using the pot as a cachepot or for artificial plants), it’s generally best to leave the inside unpainted if you plan to plant directly into the pot. Paint can inhibit the natural breathability of terracotta, potentially trapping moisture and affecting plant health. If you must paint the inside, ensure it’s fully sealed with a non-toxic, waterproof sealant.
10. What are some creative ways to use painted terracotta pots?
Painted terracotta pots are incredibly versatile! They are perfect as decorative planters for flowers, succulents, or herbs. They can serve as charming patio decor, unique centerpieces, or even as personalized gift containers. You can also use them to organize craft supplies, kitchen utensils, or as candle holders.