
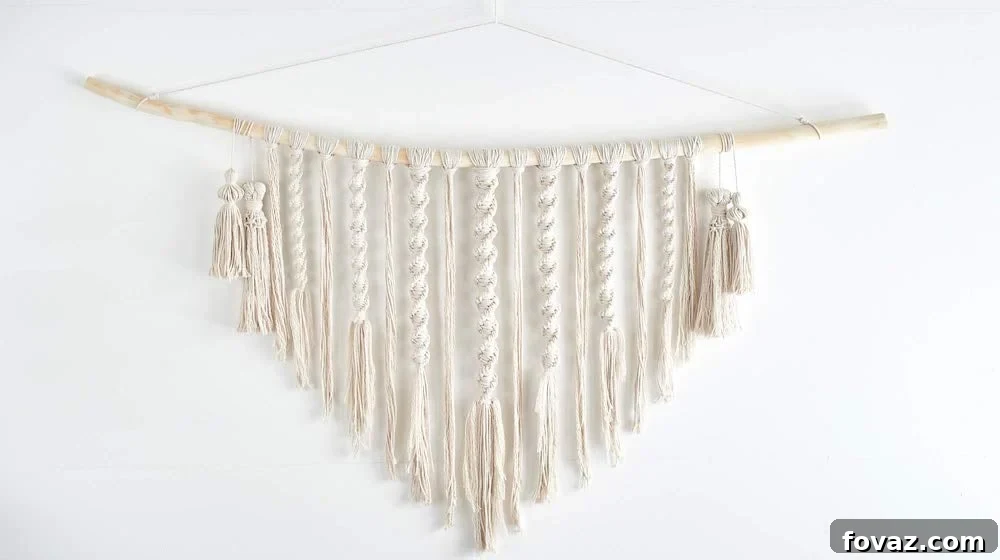
Macrame wall hangings have soared in popularity, becoming a must-have home decor item this year. Adorning the pages of countless home, interior, and lifestyle magazines, these chic wall decorations have captivated the hearts of homeowners and interior designers alike. The intricate, hand-crafted knots and diverse macrame patterns offer a unique blend of bohemian charm and modern elegance, making them incredibly versatile. While many are keen to purchase these beautiful pieces, there’s an even more satisfying option: creating one yourself!
The beauty of macrame lies in its diverse knotting techniques, transforming simple cords into breathtaking works of art. It’s truly amazing how a few basic knots can evolve into a stunning, personalized wall hanging that adds character and warmth to any space. If you’re excited by the prospect of crafting your own macrame masterpiece, then you’ve come to the right place. Let’s dive into the world of creative knotting!
Unleash Your Creativity: How to Make a Modern Macrame Wall Hanging
Discover the Joy of DIY Macrame with These Easy-to-Follow Steps!
Macrame is enjoying a spectacular resurgence, capturing the attention of crafters and decor enthusiasts worldwide. Forget the dated designs of the 70s; today’s macrame is all about sleek lines, contemporary patterns, and stylish aesthetics. I’m thrilled to see this ancient craft re-emerge as a chic and accessible art form. What makes macrame even more appealing is the simplicity and eco-friendliness of the materials required, making it an ideal project for all ages. Imagine spending a delightful afternoon with your kids, bonding over a creative endeavor that results in a beautiful piece of art for your home! Whether you’re an experienced knot stylist or a complete beginner, this guide will empower you to create a gorgeous macrame wall hanging with ease.
The versatility of macrame wall hangings is truly remarkable. They seamlessly complement almost any home decor style, from minimalist modern to rustic farmhouse, and, of course, classic bohemian. The visually arresting intricate macrame patterns make them perfect for adding texture and warmth, especially during the cozy fall and winter months. Beyond home decor, these artistic hangings also serve as exquisite backdrops for special events, like a bohemian wedding, or as thoughtful, handmade gifts. Ready to embark on your knotting adventure? Let’s gather our supplies!
Essential Materials for Crafting Your Macrame Wall Hanging:
- High-quality cotton or nylon cording (choose based on desired texture and durability)
- A sturdy wooden dowel, branch, or copper pipe (for hanging your creation)
- Optional: Leather cording or a contrasting colored rope for the hanger
- Acrylic paint in your preferred color (if you choose to paint your dowel)
- Sharp scissors
- A foam-tipped paint brush (if painting the dowel)
- A measuring tape or ruler
- (Optional) A cutting mat or large surface with grid lines for precise knotting
- (Optional, for synthetic cords) A lighter to seal ends
Step 1: Customize Your Dowel Rod
While the natural look of a wooden dowel offers a rustic appeal, adding a pop of color can instantly elevate your macrame design to match your decor. Choose an acrylic paint color that complements your space or provides a vibrant contrast to your cording. Carefully paint the entire surface of the wooden dowel using your foam-tipped brush, ensuring an even coat. Once painted, set it aside in a well-ventilated area and allow it to dry completely. This step allows for a personalized touch, making your macrame truly unique.
Step 2: Mastering the Josephine Knot – Your Foundational Technique
The Josephine knot, also known as the Carrick Bend in knotting terminology, is a beautiful and decorative knot perfect for adding intricate detail to your macrame. To begin, decide on the desired length of the working cord for your practice knot – a shorter piece is ideal for learning. Lay out your cord flat. Take the right side of the cord and form a loop, passing it *under* itself. It’s crucial to keep the strands flat and untwisted throughout this process. Next, take the left side of the cord and cross it *over* the right loop. Finally, take the working end of the right side and cross it *under* the left loop, weaving it into the emerging knot structure.
Step 3: Completing and Tightening the Josephine Knot
Now for the magical part: bringing the knot to life. Carefully take the two working ends of the cord. The left end should go *under* the top of the initial right loop, *over* the part where the cords cross, and then *under* the bottom of the left loop. Gently pull both ends of the cord simultaneously. As you pull, you’ll feel the knot tighten and twist into its distinct, elegant shape. Practice this a few times until you’re comfortable with the movement and can create a neat, even knot. This practice will build your confidence for the main project.
Step 4: Determine the Ideal Length for Your Macrame Wall Hanging
Before you commit to cutting all your cords, visualize where your macrame piece will hang. Consider the wall space, ceiling height, and the overall aesthetic you want to achieve. Do you want a long, dramatic piece that cascades down the wall, or a shorter, more subtle accent? The length you choose will significantly impact the visual presence of your finished wall hanging. Measure this desired length carefully, keeping in mind that the cords will be folded in half and additional length will be used up in knotting. A good rule of thumb is to cut your cords at least 3-4 times the desired finished length of the macrame, allowing ample room for knots and fringe.
Step 5: Attaching Your Cords to the Dowel
Now it’s time to bring your vision to life by attaching the cut cords to your prepared dowel. Take one of your pre-cut cords and double it in half. Place the looped end over the top of the dowel rod. Thread the two loose ends of the cord through this loop, pulling them down firmly to secure the cord to the dowel. This is known as a Lark’s Head knot, a fundamental macrame technique for attachment. Ensure you leave a couple of inches of space on each side of the dowel for the hanging cord. Continue attaching your remaining cords to the dowel, evenly spacing them across its length.
Important Note on Density: You have full control over the density and pattern of your macrame. If you desire a fuller, more intricate look, attach your cords tightly together, packing them closely on the dowel. For a more open, minimalist design, you can leave greater spaces between each attached cord. Experiment with spacing to achieve your desired aesthetic!
Step 6: Let the Knotting Begin!
With all your cords securely attached, it’s time for the most exciting part: creating your macrame pattern! If you’re working with a specific pattern, plot out where your first series of knots will go. For beginners, a simple repeating pattern of Josephine knots, or even square knots, is a great starting point. Dedicate a good amount of time to this step, allowing yourself to get into a creative flow. Focus on maintaining consistent tension in your knots for a neat and professional finish. Don’t be afraid to try different combinations of knots or vary the spacing to create unique textures and designs.
Pro Tip for Precision: Working on a cutting mat or a large surface with grid lines can be incredibly helpful. These lines act as a visual guide, allowing you to keep your knots aligned and your pattern straight, ensuring a symmetrical and polished final product.
Step 7: Finishing Touches: Trimming and Securing
Once you’ve completed your desired knotting pattern, it’s time to refine the bottom edge of your macrame. Using sharp scissors, carefully trim the ends of the rope to your preferred length and shape. You might opt for a straight line, a V-shape, or an asymmetrical cut – whatever suits your design. If you’re using synthetic cording (like nylon), you might notice some fraying. To prevent this, gently use a lighter to melt down the very ends of the frayed strands, being careful not to burn the cord. For natural fibers like cotton, simply trim neatly. Finally, take your chosen leather cording or a sturdy rope and tie a secure knot on each side of your dowel rod. This creates the hanger for your beautiful new wall art.
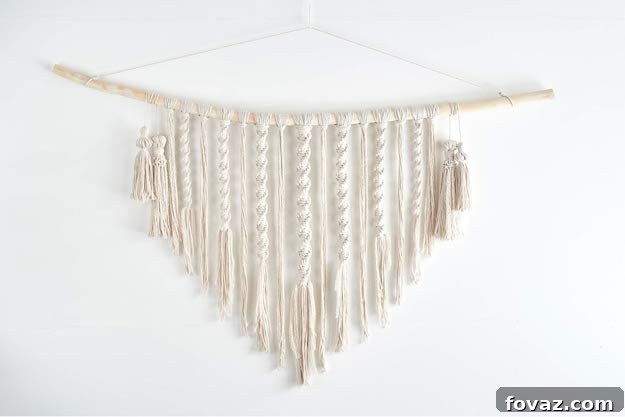
And there you have it! Your stunning, handmade macrame wall hanging is complete. I absolutely adore how this particular piece turned out, especially with the elegant pink and black accent. The blend of modern style and traditional craft makes it a true statement piece.
For a visual guide, watch the full video tutorial from HGTV Handmade below:
Congratulations on creating a beautiful macrame wall hanging with your own hands! Projects like this, which require minimal time and materials yet yield such satisfying results, are incredibly rewarding. This DIY macrame project is perfect for a weekend craft session, and the sense of accomplishment you’ll feel is unmatched. It’s not just a decoration; it’s a reflection of your creativity and dedication.
Care and Maintenance for Your Macrame Masterpiece
To keep your macrame wall hanging looking fresh and vibrant, a little care goes a long way. For everyday dusting, a soft brush or a lint roller can be used. If it requires a deeper clean, gently spot clean any soiled areas with a mild soap and cold water, blotting carefully with a clean cloth. Avoid harsh scrubbing or machine washing, as this can distort the knots and fibers. Allow it to air dry completely, ideally by hanging it back in its designated spot, to prevent any mold or mildew. With proper care, your handmade macrame will adorn your walls for years to come.
What are your thoughts on this delightful wall hanging? Would you be interested in more DIY craft tutorials like this one? Share your feedback and ideas by leaving a comment below! Happy knotting, and enjoy the beauty you’ve created!
Craving more bohemian-inspired decor ideas? Explore this link for more captivating DIY projects!
Stay connected and inspired by following me on Facebook, Twitter, Pinterest, and Instagram!
Feature image credit: trapillo