
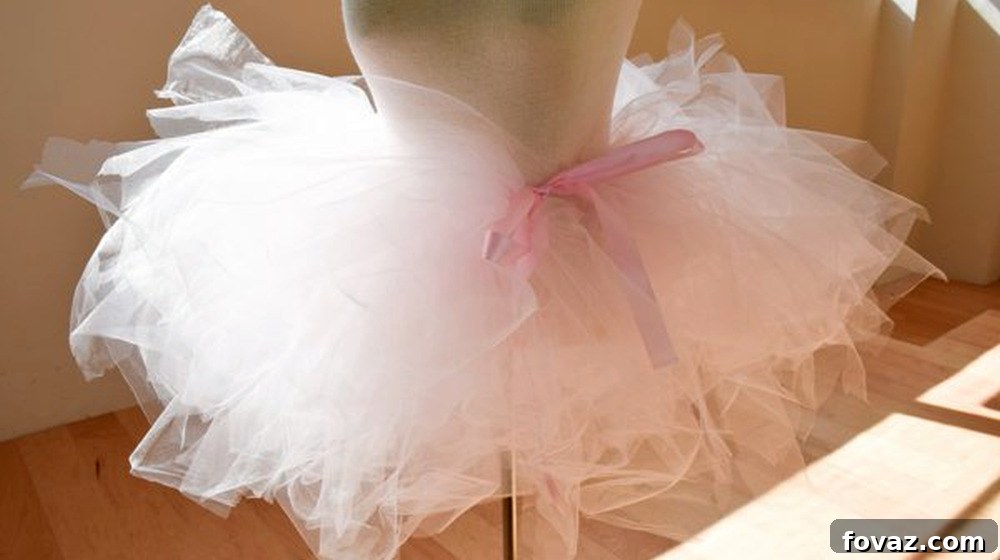
How to Make a Stunning No-Sew Tutu Skirt: Your Ultimate DIY Guide
Dreaming of a whimsical, fluffy tutu skirt but dreading the thought of intricate sewing? You’re in luck! This comprehensive guide will show you exactly how to make your very own stunning DIY tutu in less than 30 minutes, without needing a single stitch. Whether it’s for a budding ballerina, a festive costume, or just a touch of everyday magic, this no-sew method is incredibly simple, rewarding, and produces beautiful results every time. Get ready to unleash your creativity and craft a delightful tutu that will bring smiles and joy!
RELATED TUTORIAL: How to Make a No Sew Dog Tutu
What You’ll Discover in This Guide:
- Why Choose a No-Sew Tutu?
- Essential Supplies for Your DIY Tutu
- Step-by-Step Tutorial: Crafting Your No-Sew Tutu
- Styling Your New Tutu & Creative Ideas
- Frequently Asked Questions About Tutu Making
Why Choose a No-Sew Tutu? The Magic of Effortless Crafting
The allure of a no-sew tutu lies in its incredible accessibility and speed. Forget about threading needles, wrestling with sewing machines, or spending hours on a complex project. This method is perfect for beginners, busy parents, or anyone looking for a quick and satisfying craft. Here’s why crafting a no-sew tutu has become a favorite:
- Speed: Create a full, fluffy tutu in under half an hour. This makes it perfect for last-minute costume emergencies, spontaneous dress-up sessions, or a quick handmade gift.
- Simplicity: No prior sewing experience or special equipment is needed. If you can tie a basic knot, you possess all the fundamental skills required to complete this project successfully.
- Versatility: These tutus are wonderfully adaptable for a multitude of occasions. They’re ideal for ballet and dance practices, add charm to birthday parties, make fantastic components for Halloween costumes, or simply serve as a fun dress-up item for imaginative play.
- Customization: Easily adjust colors, lengths, and embellishments to match any theme, personal preference, or specific outfit. The possibilities for personalization are endless.
- Cost-Effective: Tulle fabric and satin ribbon are generally inexpensive materials, making this a budget-friendly project that delivers a high-impact result without breaking the bank.
The finished tutu will be light, airy, and possess that coveted fluffy volume everyone loves. It’s a project that delivers big on charm with minimal effort, making it a truly delightful DIY endeavor that you’ll be proud to show off.
Essential Supplies for Your DIY Tutu: Gather Your Materials
Before diving into the creative process, gathering all your materials is key. This carefully curated list provides everything you need to create a beautiful, durable, and delightfully fluffy tutu. The specified quantities are generous enough to yield one adult-sized tutu or two child-sized tutus, offering great value and flexibility for your projects. Careful selection of your materials will ensure the best possible outcome for your homemade tutu.
- Tulle Fabric: Approximately 6 yards of a 54″ bolt. Tulle is the magical ingredient for that iconic fluffy look. Choose your favorite color, or combine several shades for a vibrant, multi-layered effect. For extra volume and a truly luxurious feel, you might opt for slightly more tulle, or even a different type of tulle like glitter tulle for added sparkle.
- Satin Ribbon: About 2 yards. This will form the comfortable, adjustable, and visually appealing waistband of your tutu. Satin ribbon not only looks elegant and adds a polished touch but also feels soft against the skin, preventing any irritation. Select a width that complements the tutu’s intended size – a wider ribbon (e.g., 1 to 1.5 inches) for adult tutus for better support and aesthetic, and a narrower one (e.g., 0.5 to 1 inch) for child-sized tutus.
- Fabric Scissors: A good pair of sharp fabric scissors is absolutely essential. Using sharp scissors will make cutting the delicate tulle much easier, prevent snagging or tearing, and result in cleaner, crisp edges, which contribute to a professional-looking finish.
- Tape Measure: A reliable tape measure is crucial for accurate waist measurements and for cutting your tulle strips to the correct, consistent length. Precision in these measurements ensures a balanced, proportional, and aesthetically pleasing tutu.
With these simple yet essential supplies in hand, you’re well on your way to creating a fantastic homemade tutu. Remember, the quality and colors of your materials can significantly impact the final look and feel of your project, so choose wisely and enjoy the creative process!
Step-by-Step Tutorial: Crafting Your No-Sew Tutu Skirt
Let’s get started on bringing your fluffy tutu to life! Follow these detailed instructions carefully for the best results. This method is incredibly simple, relying on a series of clever knots to secure your tulle without any stitching required. Each step is designed for clarity and ease, ensuring a smooth crafting experience.
Step 1: Preparing Your Ribbon Waistband Foundation
The first crucial step is to create the foundation for your tutu: the waistband. This will be made from your chosen satin ribbon. If you are making the tutu for yourself, loosely tie the satin ribbon around your waist, making sure it’s comfortable but not too tight, as you’ll be adding tulle to it. If the tutu is for someone else (a child or friend), gently wrap the ribbon around their waist to get an accurate measurement. You can either keep the ribbon tied on them as you work (if they’re present) or carefully mark the exact point where the bow will form, then remove it and wear it yourself as you proceed. This ensures a perfect and comfortable fit for the final wearer.
Step 2: Customizing Ribbon Length for a Stylish Finish
After establishing the waistband, it’s time to refine the ribbon ends for a polished look. Decide how long you want the ribbon “tails” of your bow to hang down once tied. A common and elegant length that allows for a flowing aesthetic is approximately 12 inches cascading down from the bow, but you can adjust this to your preference. Using your sharp fabric scissors, carefully cut the ends of the ribbon at a slight angle. This angled cut not only adds a lovely, decorative touch to the finished tutu, enhancing its overall elegance, but it also helps to prevent the ribbon from fraying over time. This small detail significantly elevates the overall appearance of your homemade masterpiece.
Step 3: Preparing Your Tulle Fabric – The Initial Fold and Cut
Now, let’s prepare the star of the show: the tulle fabric. You will eventually be cutting the tulle into numerous individual strips, but first, you need to make the bolt of fabric more manageable for precision cutting. Unroll a generous length of your tulle bolt, specifically about 36 inches. Most tulle bolts are sold folded in half lengthwise. Carefully identify this natural centerfold. Using your sharp fabric scissors, cut precisely down this fold, effectively splitting the entire 36-inch segment of fabric into two narrower pieces. This initial cut is crucial for preparing your tulle for the subsequent strip-cutting process, making it easier to handle and ensuring more uniform strips.
Step 4: Segmenting Tulle for Easier Handling and Efficiency
Following the previous step, take the 36-inch section of tulle you just divided (which should now be two narrower pieces) and cut it completely off the main bolt of fabric. Ensure your cut is straight and perfectly parallel to the bolt’s original edge. Working with smaller, pre-measured segments of tulle is significantly easier and less cumbersome than trying to manage the entire large bolt at once. This strategic step helps streamline the entire cutting process, making the subsequent task of slicing the tulle into individual strips much more efficient, accurate, and enjoyable. You will repeat this segmentation process as you need more tulle.
Step 5: Gathering Tulle for Efficient and Consistent Strip Cutting
To prepare your tulle for rapid and consistent strip cutting, take one of the 36-inch segments you just separated. Hold the fabric lengthwise and bring the top and bottom edges together in your hands. Gently gather them, effectively folding the fabric upon itself like an accordion or simply bunching it up tightly and evenly. This compact gathering technique is vital because it allows you to cut through multiple layers of tulle simultaneously, significantly speeding up the process of creating your individual tulle strips. The more neatly you gather, the more uniform your strips will be.
Step 6: Cutting Tulle into Uniform Strips for Volume
Now for the main cutting action! While holding the gathered tulle firmly in one fist, begin cutting 6-inch wide segments from the folded edge. A good approximate measurement for 6 inches is often the width of your fist, with a small allowance on each side to ensure consistency. The goal here is to create numerous uniform strips. This bulk cutting method allows you to slice through multiple layers of tulle at once, dramatically accelerating the process. From each 36-inch segment of fabric, you should yield approximately six 6-inch strips. You will repeat these cutting steps, preparing more tulle as needed, until you have a good pile of strips ready for tying. The consistency of these strips directly impacts the evenness and fluffiness of your finished tutu.
EXPLORE MORE DIY FASHION: 15 DIY Clothes for Kids You Should Make
Step 7: Initiating the Tulle Knot – Creating the First Loop
With your numerous tulle strips now prepared, it’s time to start attaching them to your satin ribbon waistband. Take one of your 6-inch wide tulle strips and fold it precisely in half lengthwise. Ensure the ends meet evenly. This action will create a clean loop at one end of the strip and two loose, even tails at the other end. This initial loop is the fundamental starting point for the knotting technique that will securely attach the tulle to your waistband without needing any sewing, forming the basis of your fluffy skirt.
Step 8: Forming the Secure Lark’s Head Knot
This step demonstrates the core knotting technique, commonly referred to as a “Lark’s Head Knot,” which is simple yet incredibly secure. Hold the satin ribbon waistband taut in one hand. With the other hand, take the looped tulle strip from Step 7 and place the loop *underneath* the ribbon. The loop should be pointing upwards, away from your body, and the two loose ends should be hanging down behind the ribbon. Now, bring the two loose ends *up and through* the loop that is now above the ribbon. This action creates a secure and visually appealing connection between the tulle strip and the ribbon, forming the basis of your tutu.
Step 9: Securing Each Tulle Knot Firmly
Once the two loose ends of the tulle strip are threaded completely through the loop, it’s time to secure it. Gently but firmly pull both ends of the tulle strip downwards. This action will tighten the knot you’ve just formed, securing the tulle strip snugly onto the satin ribbon waistband. Ensure the knot is firm enough to hold the tulle perfectly in place and prevent it from shifting, but avoid pulling so aggressively that you damage the delicate tulle fabric or distort the ribbon. The goal is a secure, neat knot that lies flat and evenly against the ribbon, ready for the next strip.
Step 10: Arranging Tulle for a Full, Even Tutu Volume
As you add more tulle strips, it’s critically important to arrange them correctly to achieve that desired full, dense, and voluminous look. After tightening each new tulle knot, carefully slide it along the satin ribbon waistband so that it sits as closely as possible to the previously tied strip. There should be no visible gaps between the tulle knots. This continuous, tightly packed arrangement of tulle strips around the entire ribbon will ensure your tutu is wonderfully dense, magnificently fluffy, and completely opaque, giving it a professional and charming finish. Take your time with this step to ensure an even distribution of volume.
Step 11: Continuing the Tulle Application Process for Fullness
This is where the magic truly unfolds and your tutu begins to take its magnificent shape! You will now repeat Steps 4 through 10 (cutting more tulle segments from your bolt as needed, then folding, knotting, and sliding them) until the entire length of your satin ribbon waistband is completely filled with tulle strips. Continue this process, working your way meticulously around the ribbon until there are absolutely no more visible gaps. The more tulle strips you thoughtfully add, the fuller, more luxurious, and more vibrant your tutu will appear. Take your time, ensure each knot is secure and positioned perfectly close to its neighbor, and watch with satisfaction as your beautiful, voluminous tutu takes its final, enchanting form.
Step 12: Finalizing Your Tutu with a Perfect Ribbon Bow
Once you have completely filled the satin ribbon waistband with a continuous stream of tulle strips, and your tutu has reached its desired magnificent fullness, it’s time for the crowning final touch. Carefully retie the original satin ribbon into a neat, beautiful, and secure bow. Adjust the bow to sit comfortably and aesthetically on the waist of the wearer, ensuring it enhances the overall look of the tutu. This not only secures the entire tutu firmly but also adds a charming, elegant, and decorative element, truly completing your gorgeous homemade creation. Take a moment to double-check that all tulle strips are evenly distributed for a perfectly balanced and enchanting look.
Step 13: Admire and Enjoy Your Handmade No-Sew Tutu!
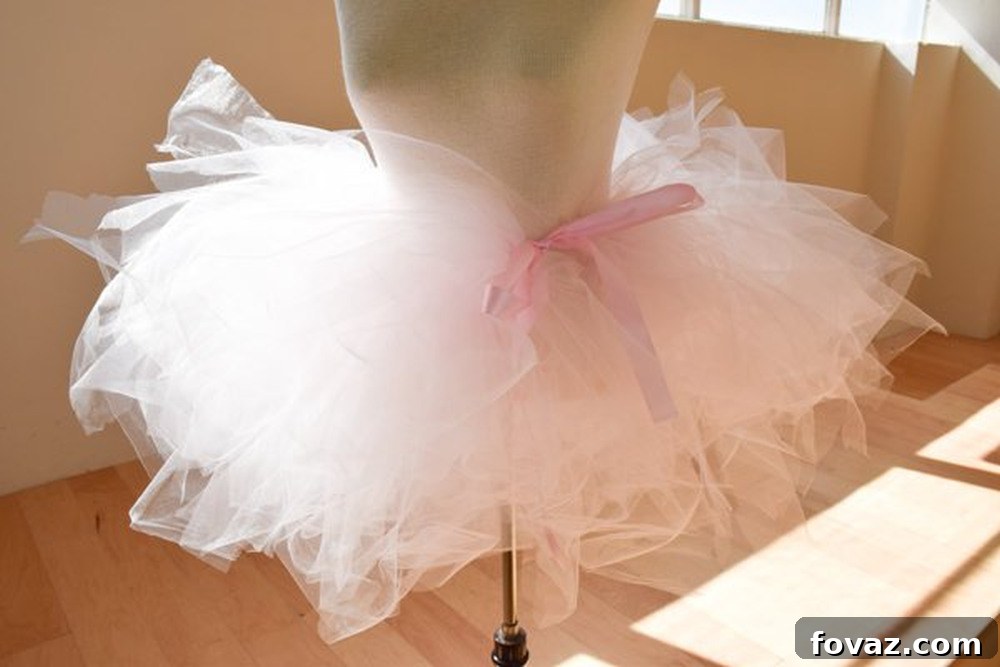
Congratulations! You’ve successfully created a stunning, fluffy, and completely no-sew tutu skirt. Now it’s time to celebrate your impressive crafting achievement. Put it on, twirl around, and revel in the magical feel of your lovely new tutu. This quick and easy DIY project is perfect for gifting, costuming for special events, adding a touch of playful elegance to any occasion, or simply enjoying the satisfaction of a handmade item. You’ve proven that beautiful handmade creations don’t require complicated techniques, extensive sewing experience, or hours of arduous work. Embrace the joy of your effortless DIY success!
Styling Your New Tutu & Creative Ideas
Your newly crafted no-sew tutu is incredibly versatile and serves as a fantastic foundation for a myriad of looks and creative expressions! Here are a few inspiring ideas to help you style and enjoy your creation:
- Ballet & Dance Practice: The most classic application! Your tutu is perfect for ballet classes, dance rehearsals, or even a mini-recital at home. Its lightness and fluffiness will enhance every movement.
- Enchanting Costumes: A tutu is an absolute cornerstone for countless imaginative costumes. Transform into a whimsical fairy, a graceful princess, a mischievous ballerina, a spooky witch, or even abstract creations for themed parties. Simply pair it with a coordinating top, some fun accessories, and watch the magic unfold!
- Dress-Up Play: Every child’s imagination comes alive with a beautiful tutu. Encourage creative role-playing and storytelling by letting them accessorize their tutu with capes, crowns, wands, and other dress-up items.
- Memorable Photography Props: Create stunning and memorable photoshoots with a vibrant tutu. It adds an element of fantasy and charm, perfect for capturing childhood milestones or unique portraits.
- Festive Party Wear: Elevate any birthday party or special event outfit with a festive and unique tutu. It’s a guaranteed showstopper that will make the wearer feel special and joyful.
Don’t be afraid to experiment with different colors of tulle (creating layers of contrasting or complementary hues), add glitter sprays for extra sparkle, attach small decorative ribbons, or adorn it with charming fabric flowers to truly personalize your creation and make it uniquely yours!
Frequently Asked Questions About Tutu Making
- Q: Can I make this tutu longer or shorter?
- A: Absolutely! The finished length of your tutu is entirely determined by the initial length you cut your tulle strips. For a longer, more dramatic tutu, simply cut your strips to a greater length (e.g., 8-10 inches or more, keeping in mind the final length will be half of your cut strip’s length). For a shorter, puffier, and more voluminous look, you can cut them shorter. Experiment with different lengths to achieve your desired aesthetic.
- Q: How do I make the tutu even fluffier and fuller?
- A: To achieve maximum fluffiness and volume, there are a few tricks! The simplest method is to use more tulle. You can either add more layers by cutting additional strips and tying them even more closely together around the waistband, or you can use wider strips of tulle (e.g., 8-inch wide strips instead of 6-inch) which naturally create more bulk. Layering different colors of tulle also adds visual depth and contributes to a perceived fullness.
- Q: What if the tulle strips start to unravel or fray?
- A: Tulle is a delicate mesh fabric, but typically, it doesn’t unravel easily because it’s woven rather than a solid piece of fabric. If you do notice any fraying, it might be due to blunt scissors causing uneven cuts or excessive rough handling. Ensure your fabric scissors are always sharp for clean cuts. Once tied, the Lark’s Head knots usually keep everything securely in place. If desired, for extra peace of mind, you can apply a tiny dab of clear fabric glue on the back of each knot, though it’s rarely necessary for tulle.
- Q: Can I use elastic instead of ribbon for the waistband?
- A: Yes, you certainly can! Using elastic is a very popular alternative, especially for a stretchier, pull-on tutu that children can easily put on and take off independently. To do this, simply measure a piece of elastic to fit snugly around the waist (ensuring it can still stretch to go over the hips), then securely sew or tie the ends together to form a continuous loop. Then, tie your tulle strips onto the elastic band in the exact same manner as you would with the ribbon. Elastic offers a more permanent and often more comfortable waistband, particularly for active wear.
This comprehensive no-sew tutu skirt DIY tutorial has made getting this job done in no time incredibly easy. We hope you enjoyed creating your unique piece and found the process as fun and rewarding as the end result!
Do you have your own special tips, creative variations, or finished projects on how to make a no-sew tutu skirt? We’d absolutely love to hear them and see your creations! Share your unique insights and beautiful tutus with us in the comments section below!
Explore More Fantastic DIY Projects:
- DIY Clothes For Teens To Make On The Cheap
- DIY Clothes For Women | 37 DIY Fashion Tops, Pants, And Skirts Tutorials
- How To Make A Little Cardboard Suitcase | Craft Projects
Editor’s Note: This post was originally published on April 30, 2014, and has been updated for enhanced quality, improved relevancy, and increased comprehensiveness, providing even more value to our readers.