
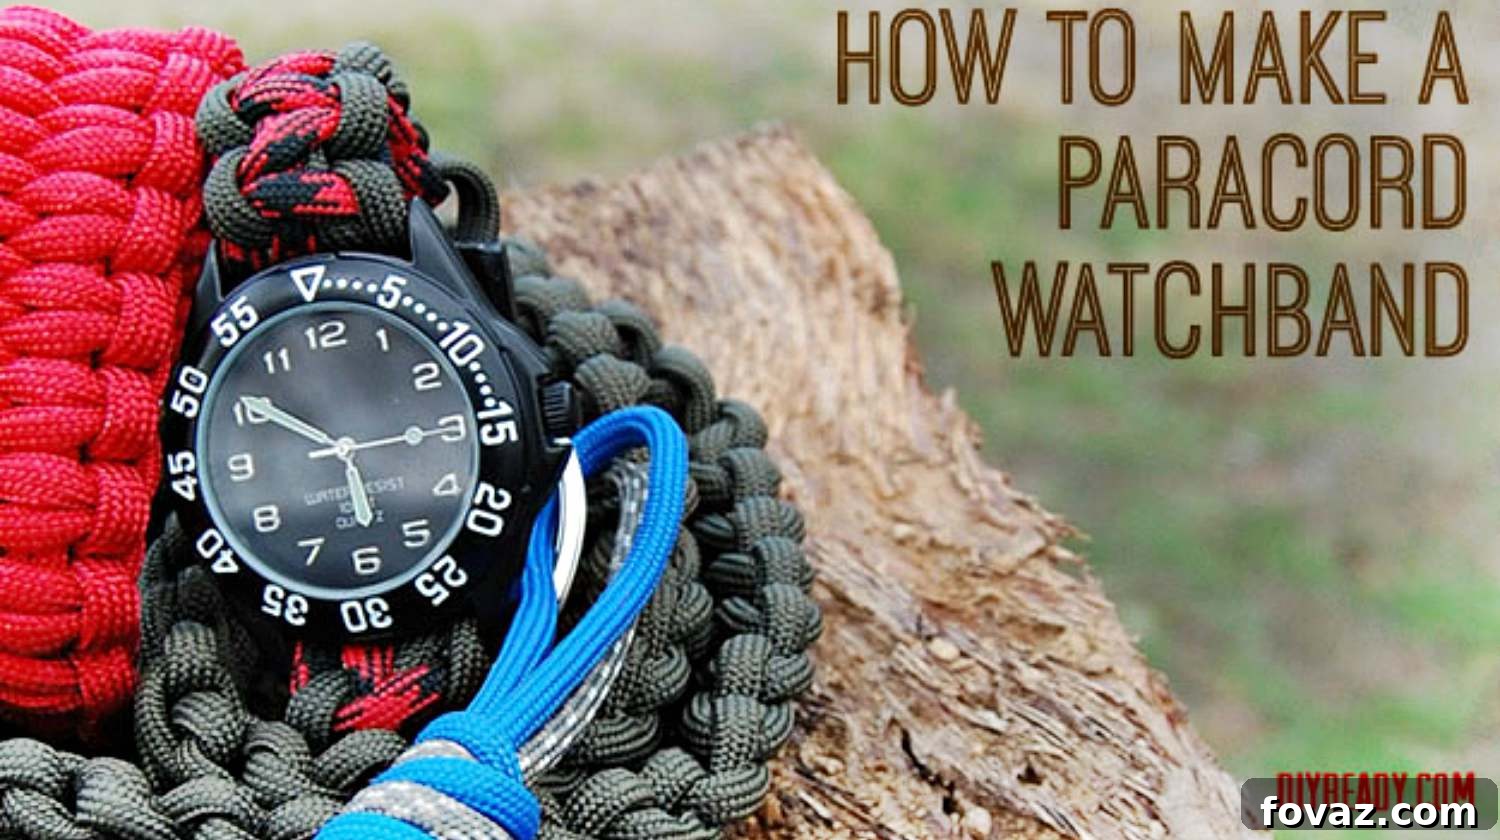
Master the Paracord Watchband: A Step-by-Step DIY Guide for Style and Survival
Dive into the rewarding world of paracord crafting and learn how to create your very own paracord watchband! This comprehensive, easy-to-follow guide will walk you through every step, allowing you to craft a durable, stylish, and highly functional accessory. Whether you’re a seasoned survivalist, a DIY enthusiast, or simply looking for a unique gift idea, a custom paracord watchband is a fantastic addition to any collection.
Paracord, short for parachute cord, is renowned for its incredible strength and versatility. Originating from military use, its applications extend far beyond its primary purpose, making it an ideal material for crafting items that are both fashionable and prepared for emergencies. Your new paracord watchband won’t just tell time; it could provide vital cordage in a survival situation.
RELATED: How To Make A Paracord Belt: Step-By-Step Instructions
Craft Your Own Survival Statement: The Paracord Watchband
The beauty of a paracord watchband lies in its dual functionality and endless customization possibilities. Imagine sporting a rugged yet refined accessory that perfectly matches your outdoor gear or casual attire. Beyond aesthetics, the core value of a paracord watchband is its hidden utility – up to 12 feet of strong cordage, readily available for any unforeseen circumstances. This guide focuses on the popular cobra weave, known for its sturdy construction and classic look, and teaches you how to integrate a buckle for secure wear.
How to Make a Paracord Watchband with Buckle: Your Custom Creation Awaits
One of the most frequent questions we encounter is not just “how to make a paracord watchband with buckle,” but also “how to make a paracord watchband with two colors.” The appeal of personalization is immense! For my outdoor adventures like hiking or camping, I often opt for an emerald green watchband; its natural hue blends seamlessly with the environment. On other occasions, when I’m aiming for a casual yet trendy look with friends, my two-colored red and black band makes a vibrant statement.
This tutorial is designed to empower you, whether you prefer a sleek single-color design or a dynamic two-tone masterpiece. You’ll learn the fundamental techniques to create a watchband that’s perfectly tailored to your wrist and style. Let’s gather our materials and embark on this exciting DIY journey!
Essential Supplies to Craft Your Paracord Watchband:
- 1 Basic Watch Face: Choose a simple watch face that can accommodate paracord straps. Many craft stores or online retailers offer watch faces specifically designed for DIY projects.
- 12 Feet of Paracord: For a single-color band, you’ll need 12 feet of your chosen hue. If you’re going for a striking two-color design, prepare 6 feet of each color. High-quality 550 paracord is recommended for its strength and durability.
- Sharp Scissors: Essential for making clean, precise cuts. Dull scissors can fray the paracord, making it harder to work with.
- Torch Lighter (or regular lighter/soldering iron): Used to melt the ends of the paracord, preventing fraying and creating a secure finish. A torch lighter offers more control and a cleaner melt.
- Measuring Tape: Crucial for accurately measuring your wrist and determining the ideal length of your watchband.
- 5/8 Inch Side Release Buckle: This type of buckle is easy to use, secure, and commonly used in paracord projects. Ensure it’s sturdy enough for daily wear.
Looking for supplies? Here are our picks for quality materials to get you started:
Paracord550 Paracord – Five Colors 100 Feet TotalRothco Type III Commercial Paracord (Black, 550-Pound/100-Feet)
Side Release Buckles50 – 1/2″ Side Release Plastic Buckles
Watch FacePlanetZia Rectangle Ribbon Watch Faces for Interchangeable Beaded Bands (2pcs Black Paint)
Optional Customization Ideas:
Beyond watchbands, paracord’s versatility allows you to expand your crafting repertoire. You can easily adapt this weave to create a paracord bracelet for yourself or as thoughtful, handmade gifts for friends. Experiment with different color combinations, adding beads, or even trying alternative weaves once you’ve mastered the cobra. The possibilities are truly endless!
RELATED: How To Make A Paracord Survival Bracelet: Tire Tread
Step-by-Step Instructions: Weaving Your Paracord Watchband
Step 1. Precise Wrist Measurement & Cord Preparation
Accuracy is key for a comfortable fit. Begin by measuring your wrist circumference using a flexible measuring tape. Wrap it snugly around your wrist, noting the measurement. If you don’t have a tape measure, a piece of paracord works just as well: wrap it around your wrist, mark where the ends meet, then lay it flat and measure with a ruler.
For example, if your wrist measures six inches, that’s your target length. Once measured, prepare your paracord. To prevent fraying and make weaving significantly easier, you’ll need to melt the ends of your paracord. Carefully hold each end over a flame (from your torch lighter or regular lighter) until it just begins to melt. Immediately and gently pinch the melted end between your wetted thumb and index finger to create a tapered, sealed tip. This ensures the cord passes smoothly through loops and resists unraveling.
Step 2. Securing the First Buckle Half with a Lark’s Head Knot
Take one of your paracord pieces (or if using two colors, grab one strand of each color if you’re planning a two-tone core, otherwise just one of your chosen core colors) and find its center by folding it in half. Hold the folded cord with the loop at the top. Guide this loop through one opening of your side-release buckle. Now, thread the two loose ends of the paracord through the loop you just created and pull them tight. This creates a secure knot, often called a Lark’s Head or Cow Hitch knot. Slide this knot firmly to one side of the buckle. Repeat this entire process with your second piece of paracord (or the other two colors), attaching it to the same buckle half. You should now have four strands of paracord hanging from one half of your buckle.
Step 3. Integrating Your Watch Face for Optimal Placement
Now, let’s incorporate your watch face. If you’re using two colors, pair one strand from each color together. Carefully slide these paired strands beneath the watch face, passing them through the pins or attachment bars designed for the watch strap. Next, take the other half of your side-release buckle (the one without any paracord attached yet). Unhook the buckle, then feed the paired paracord strands through the opening of this detached buckle piece. This creates the initial structure. Position the watch face precisely in the middle of the paracord length that will form your band, aligning it with the wrist measurement you took earlier. It’s helpful to make a temporary mark at this point, either with a marker or a small clip, to guide your weaving and ensure the watch face remains centered.
Step 4. Setting Up for the Iconic Cobra Weave
With the watch face now integrated, slide the loose paired paracord strands through the attachment point of the second buckle half. This step requires careful adjustment to ensure the entire watchband fits perfectly once completed. Before you begin weaving, reconnect both halves of your side-release buckle and try on the watchband. It should fit snugly but not uncomfortably tight around your wrist. Remember, the cobra weave tends to add a little bulk and can slightly reduce the effective length, so aim for a fit that is about half an inch longer than your actual wrist measurement. This accounts for the thickness of the weave and prevents it from being too tight. Once the length is satisfactory, separate the four paracord strands – two on each side of the central core strands – preparing for the well-known cobra weave. The cobra weave, also known as the Solomon bar or Square knot, is a fundamental and robust knotting technique in paracord crafting.
Step 5. Initiating the Cobra Weave – The First Half-Hitch (Left Side)
We’ll begin the cobra weave, forming alternating half-hitches. Take the working cord on the far left. Pass this cord UNDER the two central core strands that run between the two buckle halves. Then, bring the left cord OVER the right working cord. Next, take the working cord on the far right and pass it OVER the two central core strands, and then UNDER the left working cord (which you just brought over the central strands). Pull both working cords firmly and evenly to tighten the knot against the buckle. This forms your first half of the cobra knot. Ensure the tension is consistent to achieve a neat, uniform weave.
Step 6. Mirroring the Weave with the Right Side Half-Hitch
Now, we’ll create the second half of the cobra knot, mirroring the previous step. Take the working cord that is now on the far right. Pass this cord UNDER the two central core strands. Then, bring the right cord OVER the left working cord. Next, take the working cord on the far left and pass it OVER the two central core strands, and then UNDER the right working cord. Pull both working cords firmly and evenly to tighten the knot. Each completed pair of these alternating half-hitches forms one segment of the cobra weave. Consistent tension and mirroring each side are crucial for a symmetrical and professional-looking band.
Step 7. Continuous Weaving and Seamless Watch Face Integration
Continue repeating Steps 5 and 6, alternating the starting side with each full cobra knot. You’ll weave down the length of the band until you reach the watch face. When you arrive at the watch face, carefully slide your two working paracords (the ones you are actively weaving with) *underneath* the pins or attachment bars of the watch face. This ensures the weave integrates smoothly with the watch. Continue the cobra weave on the other side of the watch face, repeating the same alternating process until you reach the second half of the buckle. Maintain consistent tension throughout to ensure an even and attractive pattern across the entire length of your watchband.
Step 8. Finishing Strong: Trimming and Securely Sealing Your Paracord Watchband
Once you have woven all the way to the end of the second buckle half, it’s time to finish your watchband. Using your sharp scissors, carefully cut the excess working paracord strands. Leave a small tail of about a quarter to a half-inch on each cut end. Now, with your lighter, gently melt the cut ends of the paracord tails. As the plastic melts and becomes pliable, use the side of your lighter (or a metal tool, being careful not to burn your fingers) to press the melted cord down onto the adjacent woven cords. This fuses the ends securely, preventing them from unraveling and creating a clean, durable finish. Ensure the melted cord is firmly attached but try to avoid creating large, unsightly burnt blobs. With this final step, your custom paracord watchband with a side-release buckle is complete!
Now you have a paracord watchband with a side release buckle, ready for adventure or daily wear!
Enhance Your Skills: Watch a Video Guide for the Trilobite Weave
While this guide focuses on the popular cobra weave, there are many other fascinating paracord patterns to explore. If you’re curious about different techniques, you might want to check out this quick and easy video guide from Survival Life, which demonstrates how to make a paracord watchband using the distinctive trilobite weave:
The Enduring Appeal of Your Handmade Paracord Watchband
Wasn’t making this DIY paracord watchband both fun and surprisingly easy? It’s a project that requires minimal tools and supplies, making it accessible to anyone with a keen interest in DIY or a touch of curiosity. Within a short time, you’ve transformed simple cordage into a functional piece of gear or a stylish accessory. The sense of accomplishment that comes from creating something with your own hands is truly unmatched.
This skill can quickly become a rewarding hobby. Imagine crafting custom watchbands in various colors and weaves for every outfit, or even designing personalized gifts for friends and family during the holidays. Beyond the joy of creation, you’re also equipped with a practical item that offers peace of mind in challenging situations. So, get started today, and before you know it, you’ll be a paracord weaving pro!
Will you give this DIY paracord watchband a try this weekend? Tell us your plans for it in the comments section below! What colors will you choose?
Expand Your Paracord Crafting Horizon: More DIY Projects
Up Next:
- How To Tie A Paracord Bracelet: Oat Spike
- Learn To Make A Paracord Dog Collar | Instructions
- 31 Super Cool Reclaimed Wood Craft Ideas And DIY Projects
Stay connected with us on Facebook, Twitter, and Instagram for more inspiring DIY ideas!
Editor’s Note: This post was originally published on November 12, 2013, and has been updated for quality and relevancy.