
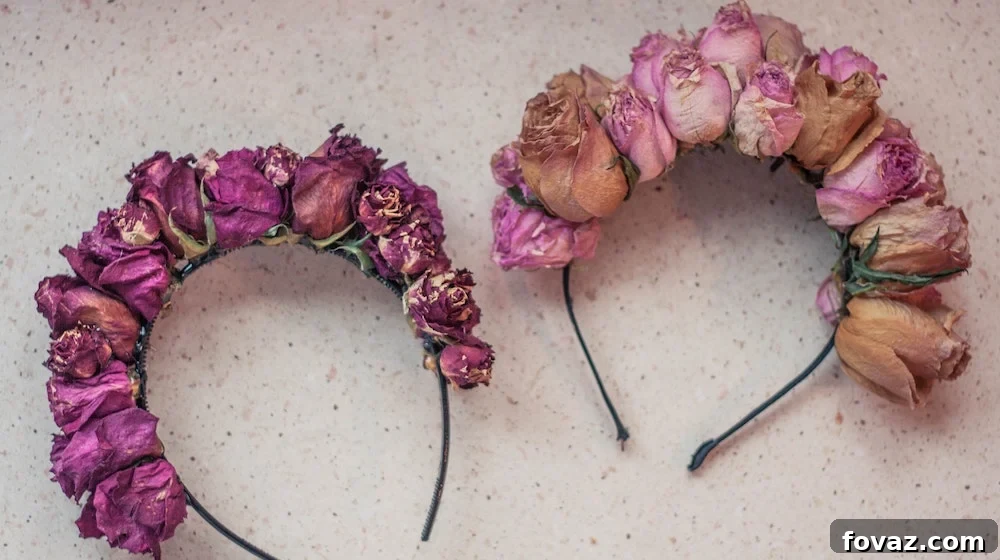
Unleash Your Inner Stylist: 10 Inspiring DIY Headband Projects You Can Craft Today
Transform your look, tame a bad hair day, or simply add a unique touch to your ensemble with the ultimate versatile accessory: the headband. Far from just a functional item, headbands have evolved into a dynamic fashion statement, offering endless possibilities for personal expression. And what could be more satisfying than creating these stylish accents yourself?
Welcome to the world of DIY headbands, where creativity meets practicality. Whether you’re a seasoned crafter or a complete beginner, making your own headbands is an incredibly rewarding experience. It’s an opportunity to inject your personal style into every outfit, save money, and even repurpose materials that might otherwise go to waste. Forget generic store-bought options; handmade headbands allow for unparalleled customization, ensuring your accessories are as unique as you are.
From whimsical floral designs to chic vintage-inspired pieces, and from clever no-sew solutions to elegant braided patterns, this guide will inspire you to craft headbands for every mood, occasion, and outfit. Get ready to dive into these simple, economical, and stylish projects that promise to elevate your hair game in minutes!
Why Embrace the Art of DIY Headbands?
Beyond the sheer joy of creation, making your own headbands comes with a treasure trove of benefits that extend far beyond simply having a new hair accessory:
- Unleash Your Personal Style: Mass-produced accessories rarely capture the essence of your unique aesthetic. DIY headbands provide a blank canvas, allowing you to choose fabrics, colors, embellishments, and styles that perfectly reflect who you are and match your wardrobe with precision.
- Budget-Friendly Fashion: High-quality, fashionable headbands can often come with a hefty price tag. By crafting your own, you dramatically cut down on costs, often utilizing materials you already have around the house, like fabric scraps, old t-shirts, or forgotten ribbons.
- Sustainable & Eco-Conscious: Repurposing old garments or fabric offcuts into beautiful new headbands is a fantastic way to practice sustainability. It reduces waste and gives new life to items that might otherwise end up in a landfill, making your fashion choices kinder to the planet.
- Therapeutic & Creative Outlet: Crafting is renowned for its calming and meditative qualities. Engaging in a DIY project, even a simple one like making a headband, can be a wonderful way to relax, de-stress, and tap into your creative potential. The sense of accomplishment upon completion is incredibly satisfying.
- Versatility for Every Occasion: Headbands are incredibly versatile. They can be a savior on a “bad hair day,” a sophisticated touch for a formal event, a practical solution for workouts, or a playful addition to a casual look. With DIY, you can create a headband specifically tailored for any scenario.
- Thoughtful Handmade Gifts: A beautifully crafted headband makes a heartfelt and personal gift for friends, family, or even as a unique baby shower present. It shows care and effort, making it far more meaningful than a store-bought item.
Ready to embark on this creative journey? Let’s explore some of the most captivating and easy-to-make DIY headband projects that will soon become staples in your accessory collection.
Before You Begin: Essential Tools & Materials for Headband Crafting
To ensure a smooth and enjoyable crafting experience, having a few basic tools and materials on hand will be incredibly helpful. While specific requirements will vary by project, here’s a general list to get you started:
- Cutting Tools: Sharp fabric scissors are essential for clean cuts, especially with delicate materials.
- Adhesives: A hot glue gun with glue sticks is invaluable for quick, strong bonds. Fabric glue or super glue can also be useful for smaller details.
- Measuring Tools: A tape measure or ruler will help you get accurate dimensions for fabrics and elastic.
- Needle and Thread: For projects requiring some sewing, a basic sewing kit with a variety of thread colors is useful. A sewing machine can speed up more complex fabric projects.
- Base Headbands: Consider having a few plain plastic or metal headbands, or elastic bands, as a foundation for your decorative elements.
- Fabric Scraps: A diverse collection of fabric remnants – cotton, satin, lace, felt, jersey – will open up a world of possibilities for different textures and looks.
- Ribbons & Trims: Various widths and colors of ribbon, lace, braid, or decorative trims can add elegance and flair.
- Embellishments: Buttons, beads, sequins, artificial flowers, charms, and faux gems are perfect for adding sparkle and personality.
- Old Clothing: Don’t underestimate the potential of old t-shirts, leggings, or even nylons for upcycled headband projects.
With these essentials, you’re well-equipped to tackle our inspiring list of DIY headband tutorials!
10 Easy-to-Make DIY Headbands for Every Style
1. DIY Flower Headband
Embrace perpetual spring with a beautiful DIY flower headband. This enchanting accessory is perfect for adding a touch of natural elegance to any outfit, from casual brunch attire to a special occasion ensemble. Unlike real flowers, these handcrafted blossoms will never wilt, allowing you to enjoy their beauty indefinitely. You can use silk flowers, felt, or even fabric scraps to create a vibrant floral arrangement that suits your taste. This project is surprisingly simple, often involving just a few snips and a dab of hot glue, making it an ideal choice for beginners looking to create a stunning piece. Its versatility makes it a popular choice for bridesmaids, festival-goers, or anyone wishing to channel a bohemian vibe.
See how you can make it here.
2. DIY Ruffle Headband
Infuse a playful and feminine touch into your style with an adorable ruffle headband. This charming accessory adds volume and texture, creating a soft, whimsical look that can elevate a simple ponytail or complement a flowing dress. Typically crafted from strips of fabric gathered and layered, ruffle headbands are surprisingly easy to construct, often requiring minimal sewing or just a good fabric glue. Experiment with different fabrics like cotton, chiffon, or satin to achieve varying levels of drape and fluffiness. The ruffle detail provides a delightful visual interest, making it a fantastic statement piece for children and adults alike, perfect for brightening up any casual day or adding a sweet flair to a party outfit.
Check this video tutorial for detailed instructions.
3. Vintage Headband
Step back in time and add a touch of timeless sophistication with a vintage-inspired headband. These accessories often feature intricate details like lace, pearls, beads, or antique-style brooches, evoking the glamour of past eras. A vintage headband can be the perfect crowning glory for a bride on her wedding day, a charming addition to a flapper-style costume, or an elegant accent for anyone with an appreciation for antique aesthetics. The beauty of DIY lies in the ability to source unique materials from thrift stores or old jewelry boxes, giving your headband an authentic, one-of-a-kind feel. This project encourages attention to detail and a creative eye for combining various textures and elements to achieve that desired classic look.
Make it with this tutorial.
4. DIY Fabric Flower Headband
Unleash your inner designer by transforming ordinary fabric scraps into extraordinary blossoms with a DIY fabric flower headband. This project is not only an excellent way to use up leftover materials from other sewing projects but also offers endless creative possibilities in terms of color, texture, and flower style. From delicate rosettes to bold petals, fabric flowers provide a softer, more organic look compared to artificial ones, making your headband uniquely charming. It’s a fantastic accessory for adding a handmade, artisanal touch to everyday wear, or for creating custom pieces that perfectly match a specific outfit. The process of folding, gathering, and shaping fabric into beautiful blooms is both meditative and rewarding.
Make it with this tutorial.
5. Big Bow 3-in-1 Headband
Combine comfort, style, and versatility with a big bow 3-in-1 headband. These headbands are typically crafted from soft, stretchy fabrics like jersey knit, ensuring they are gentle on the head and incredibly comfortable for prolonged wear. The “3-in-1” aspect often refers to its adaptability – it can be worn as a wide band, scrunched up for a narrower look, or with the bow prominently displayed. Its softness makes it an ideal choice for babies and toddlers, serving as a charming and practical accessory, and a wonderful baby shower gift. For adults, it’s a cozy yet chic solution for adding a touch of cuteness to a casual ensemble or keeping hair neatly away from the face during light activities. This project highlights simple sewing techniques and the joy of creating functional, adorable items.
See how you can make it here.
6. No Sew T-Shirt Headbands
Give your old, worn-out t-shirts a fashionable second life with these ingenious no-sew t-shirt headbands. This project is a champion of upcycling, transforming everyday garments into stylish hair accessories without needing a needle or thread. It’s perfect for crafters who prefer quick results and minimal fuss. By simply cutting and manipulating fabric strips from old tees, you can create stretchy, comfortable headbands in a variety of widths and styles. The soft, familiar fabric of a t-shirt makes these headbands incredibly comfortable for everyday wear, gym sessions, or just lounging around. Plus, you can easily make one to match every single outfit, making your wardrobe even more versatile and sustainable.
easy tutorial.
7. Braided T-shirt Headband
Take t-shirt upcycling to the next level with a braided t-shirt headband. This clever project leverages the natural stretch and softness of jersey knit fabric to create a beautifully textured accessory. It’s a fantastic way to recycle old tees, particularly those with interesting colors or patterns, into something both practical and stylish. The braiding technique adds a sophisticated detail, making the headband look much more intricate than it actually is. Best of all, many braided t-shirt headband tutorials can be completed in under 5 minutes, making it an ideal last-minute DIY project. It’s perfect for keeping flyaways at bay, adding a casual chic touch, or even as a sporty accessory for active days.
This tutorial takes less than 5 minutes to complete.
8. DIY Paper Flower Hairband
For a whimsical, temporary, or highly customizable accessory, consider creating a DIY paper flower hairband. This project allows for incredible artistic freedom, letting you craft flowers in a myriad of colors, sizes, and styles using various types of paper – from vibrant cardstock to delicate crepe paper. Paper flower headbands are particularly perfect for special events like weddings, birthday parties, or photo shoots, adding a magical touch to flower girls or bridesmaids without the worry of wilting blooms. They are also a wonderful craft for kids and adults alike, offering a fun way to experiment with color palettes and structural design, resulting in a lightweight and eye-catching accessory.
here. This is perfect to put on bridesmaids or flower girls!
9. DIY Woven Headband
Add a unique textural element to your hair accessory collection with a DIY woven headband. This project typically involves interlacing various ribbons, fabric strips, or even yarn onto a plain headband base, creating a beautiful and intricate pattern. The beauty of a woven headband lies in its endless customization possibilities: you can play with contrasting colors, different textures, and various weaving techniques to create a piece that is truly one-of-a-kind. It’s an excellent way to tame dreaded flyaways with style, adding a polished yet bohemian flair to your look. This craft encourages precision and patience, resulting in a durable and stunning accessory that will garner compliments.
See how you can make it here.
10. DIY Nylon Headband
Discover the ingenious way to transform old nylons or tights into a new, chic head accessory with a DIY nylon headband. This project is the epitome of resourcefulness, turning a commonly discarded item into something both practical and stylish. Nylon fabric is inherently soft, stretchy, and comfortable, making for an excellent headband material that won’t tug at your hair. The resulting headband is often seamless and sleek, perfect for a minimalist look, or for keeping hair secure during activities like yoga or a workout. It’s an incredibly simple and economical craft that yields a surprisingly elegant and functional accessory, showcasing how easily everyday items can be repurposed into valuable fashion statements.
Check it here for the detailed instructions!
Beyond the List: Tips for Customizing Your Headbands
While these 10 tutorials offer fantastic starting points, the true magic of DIY lies in customization. Don’t be afraid to experiment and make each headband truly your own:
- Mix Materials: Combine different fabric textures like lace with cotton, or add metallic ribbons for a unique contrast.
- Embellish with Flair: Go beyond the basics by adding beads, sequins, embroidery, small charms, or even painted details to your finished headbands.
- Play with Color Palettes: Experiment with monochromatic schemes, bold contrasts, or subtle ombré effects to match specific outfits or seasonal trends.
- Vary Widths and Bases: Try making thin, delicate headbands for a subtle look, or wider, more dramatic bands for a statement. Use elastic for a softer fit, or rigid bases for structured designs.
- Add Personal Touches: Incorporate initials, small hand-stitched motifs, or charms that hold personal significance to make your headband even more special.
Caring for Your Handmade Headbands
To ensure your beautiful DIY headbands last, proper care is key. For fabric-based headbands, gentle hand washing with mild soap and air drying is usually recommended. Avoid harsh chemicals or excessive heat, which can damage delicate embellishments or alter fabric shapes. Store your headbands neatly to prevent crushing or tangling, perhaps on a dedicated hook or in a drawer, ensuring they’re always ready to wear.
Want more tutorials to make DIY headbands? Let’s watch this video from Trahu DIY and learn how to make a rabbit bunny ear ribbon metal wire headband:
There you have it! From repurposing old garments to creating whimsical floral arrangements, the world of DIY headbands is rich with possibilities. These projects offer not just a stylish accessory, but also the joy of creation, the satisfaction of sustainability, and the unique expression of your personal flair. So, which DIY headband will be your next creative endeavor? We’d love to hear about your favorites or any new ideas you’re inspired to try. Share your thoughts and creations in the comments below!
Stay connected with us on Facebook, Twitter, Pinterest and Instagram!
Like this post? Then you’ll love…
6 DIY Beauty Products to Boost Your Natural Appeal
The Best Homemade Skin Care Recipes | Sugar Scrub, Gifts Ideas & More
22 DIY Face and Body Scrubs That Will Rock Your World