
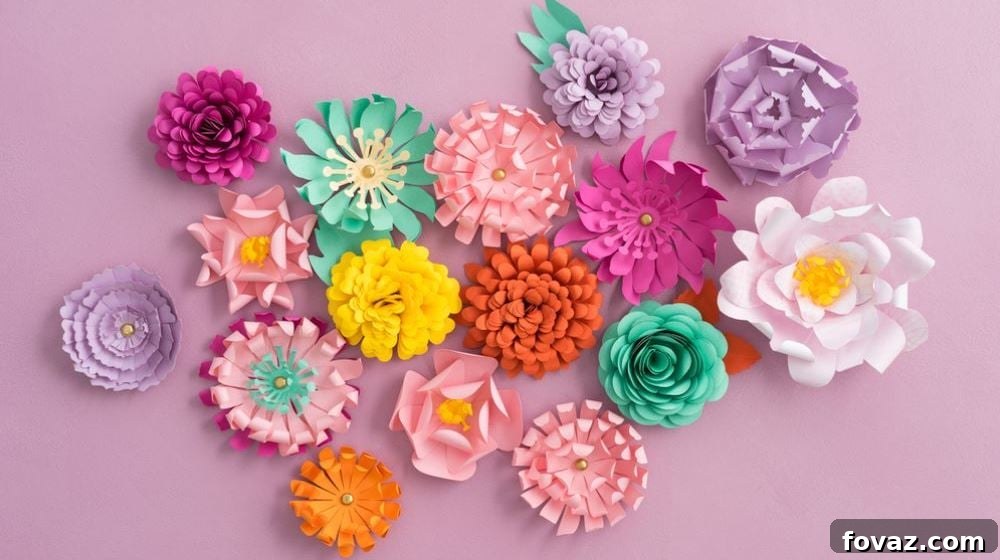
Crafting Elegance: Your Ultimate Guide to DIY Paper Flower Candle Holders
Transforming your living space doesn’t have to be expensive or complicated. With a little creativity and some basic supplies, you can craft stunning decorative pieces that add warmth and charm to any room. One such project, both delightful and surprisingly simple, is making DIY paper flower candle holders. Imagine soft, flickering candlelight gently diffusing through beautifully crafted paper petals – it’s an instant mood enhancer and a testament to your personal touch.
Whether you’re looking to elevate your dinner table, create a serene bedroom ambiance, or design a captivating centerpiece for a special occasion, these homemade candle holders are the perfect solution. They’re incredibly versatile, allowing you to match any decor style or color scheme, and best of all, they can be completed in mere minutes. Forget generic store-bought decorations; it’s time to infuse your home with unique, handcrafted beauty!
Why Choose DIY Paper Flower Candle Holders?
Beyond their undeniable aesthetic appeal, these paper flower candle holders offer numerous benefits:
- Budget-Friendly Decor: Utilizing readily available and inexpensive materials like paper, you can create high-impact decor without breaking the bank.
- Quick & Easy Craft: Perfect for beginners and seasoned crafters alike, this project requires minimal time, often less than 10 minutes per holder.
- Customizable Design: From vibrant hues to subtle pastels, glossy finishes to matte textures, the choice of paper allows for endless customization to suit any theme or preference.
- Personalized Touch: Hand-crafted items bring a unique charm and a sense of accomplishment that mass-produced decorations simply can’t match.
- Versatile Use: Ideal as everyday room decor, stunning table centerpieces, thoughtful handmade gifts, or even accents for parties and events.
- Eco-Conscious Choice: By using paper, you’re opting for a renewable resource, and you can even repurpose old paper for an extra touch of sustainability.
Materials You’ll Need for Your Paper Flower Candle Holder Project
Gathering your supplies is the first step to crafting success. The beauty of this project lies in its simplicity and the minimal tools required. For each individual paper flower candle holder, you will need:
- 4 Sheets of Colored Paper: Standard letter or A4 size paper works perfectly. Experiment with different colors, patterns, or even cardstock for added durability and a more premium feel. Lighter paper is easier to fold and shape, while cardstock holds its form better.
- Sharp Scissors: A good pair of sharp scissors is essential for clean, precise cuts, especially when creating the intricate petal designs.
- Ruler (Optional but Recommended): While not strictly necessary for every step, a ruler helps achieve perfect squares and precise measurements, leading to a more polished final product.
- Candle Jar: Choose a sturdy glass candle jar. This will serve as the core structure for your paper flower and, most importantly, provide a safe enclosure for your candle flame. Votive holders or small jar candles work best. Ensure the jar is clean and free of any wax residue.
- Hot Glue Gun and Glue Sticks (Optional): For extra stability, especially if you plan to move your candle holders frequently or want them to last longer, a hot glue gun can securely hold the paper layers together.
- Pencil (Optional): Useful for lightly marking your folds or cuts before committing with scissors.
Step-by-Step Guide: How to Make DIY Paper Flower Candle Holders
Let’s dive into the fun part! Follow these detailed instructions to create your beautiful paper flower candle holders.
Step 1: Preparing Your Square Paper Base
Begin by taking one sheet of your chosen colored paper. To create the foundational square for your flower petals, carefully fold one corner of the paper diagonally to align with the opposite edge, forming a large triangle. The excess rectangular strip at the bottom will need to be removed. Use your ruler to create a crisp fold line for the excess, then cut it off cleanly with your scissors. This ensures you start with a perfect square, which is crucial for symmetrical flower petals.
Step 2: Folding for Petal Symmetry
With your square paper now in a triangle shape (from the previous fold), you’re ready to create the folds that will define your petals. Fold this triangle in half three more times, always folding through the middle. Each fold should be precise, creating sharp creases. You will end up with a much smaller, denser right-angled triangle. Before moving on, use your scissors to trim any remaining excess paper from the open edges of this small triangle. This ensures all edges are neat and ready for shaping.
Step 3: Shaping the Basic Petal Outline
Now comes the creative part of defining your flower’s silhouette. Holding your small, folded triangle, use your scissors to carefully round off the longer, open edge. Imagine drawing a smooth, gentle curve that starts from one point of the triangle and ends at the opposite point, creating a half-petal or ‘C’ shape. The depth of this curve will determine the roundness of your flower petals. For a more pointed flower, make the curve shallower; for a softer, more rounded look, make it deeper. This initial cut will give your flower its primary petal shape when unfolded.
Step 4: Adding Intricate Petal Designs
To give your paper flower a more layered and detailed appearance, we’ll introduce some internal cuts. While still keeping your paper folded in the small triangle, make a small cut from the rounded edge inwards, about a few centimeters, but *do not* cut all the way through to the center point. This cut should run parallel to the rounded edge. A few centimeters below this first cut, make another similar cut, again not going all the way through. These strategically placed cuts will create an interesting layered design, giving the illusion of multiple petals within each fold. When you carefully unfold your paper, you’ll reveal a beautiful, multi-layered flower design. Repeat this entire process (Steps 1-4) with another sheet of paper to create a second identical flower with the intricate design.
Step 5: Crafting Simpler Base Flowers
For the remaining two sheets of colored paper, you will create a simpler style of paper flower. Follow Steps 1, 2, and 3 only. This means you will prepare your square base, fold it into the small triangle, and then round off the edge to form the basic petal shape, just as before. However, you will *skip* Step 4, meaning you won’t add the intricate internal cuts. These simpler flowers will serve as the base layers, providing fullness and support to your candle holder. Make two of these simpler flowers.
Step 6: Pre-Shaping the First Base Layer with Your Candle Jar
Take one of the simpler paper flowers you just made (without the internal design). Gently wrap it around your empty candle jar. The goal here is to carefully mold the paper, coaxing its petals to curve and rise slightly, mimicking the shape of the jar. This pre-shaping step is crucial as it helps the paper flower conform better to the jar’s contours, making it sit more naturally and elegantly when assembled. Spend a moment gently creasing the folds slightly around the jar to help it hold its form.
Step 7: Shaping the Remaining Paper Flowers
Continue this shaping process with the other three paper flowers. For each flower, gently fold and bend the petals along their natural creases, encouraging them to ‘rise’ and develop a three-dimensional form. This gives your flower layers volume and prevents them from lying flat. Focus on creating a natural, slightly upward curve for each petal. The more care you put into shaping here, the more dynamic and realistic your finished paper flower candle holder will appear.
Step 8: Assembling Your DIY Paper Flower Candle Holder
Now it’s time to bring all the elements together! Start with one of the intricately designed paper flowers and place it flat on your work surface. Take the second intricately designed flower and layer it directly on top of the first, slightly rotating it so that its petals overlap and fill the gaps of the bottom layer. This creates a fuller, more luxurious look. Next, layer the two simpler paper flowers on top, again overlapping and rotating them for optimal coverage and volume. Finally, place the paper flower you pre-shaped with the candle jar (from Step 6) as the topmost layer. Once all the paper layers are stacked, carefully place your candle jar directly on top, pressing down gently to hold everything together. The weight of the jar will help to secure the paper layers in place.

PRO TIP: For a more permanent and secure assembly, especially if you plan to move your candle holder frequently or use it outdoors, apply a small dot of hot glue between each paper layer before placing the next. A small bead around the base of the candle jar can also help affix the top layer.
Ignite the Ambiance: Your Finished Paper Flower Candle Holder!
Congratulations! You’ve successfully crafted a beautiful and unique paper flower candle holder. The only thing left to do is place a tea light or small candle inside the jar, light it, and admire the warm, inviting glow that emanates through your handmade petals. The soft illumination will instantly transform the atmosphere of any room, creating a cozy and elegant setting.
Why stop at one? These exquisite pieces are perfect for creating a cohesive theme for parties, weddings, or special events. Imagine a series of these candle holders gracing your reception tables, providing a magical glow. Or simply make a few more to create an impressive DIY centerpiece that will surely be a conversation starter. Wasn’t that an incredibly easy and rewarding paper craft project that took mere minutes?
Variations & Customization Ideas for Your Paper Flower Candle Holders
The beauty of DIY lies in endless possibilities for personalization. Here are some ideas to make your paper flower candle holders truly unique:
- Color Palette: Experiment with ombré effects using shades of the same color, or create a vibrant contrast with complementary colors. Think seasonal themes – reds and greens for holidays, pastels for spring, earthy tones for autumn.
- Paper Types: Beyond standard colored paper, consider using patterned scrapbook paper, glitter cardstock, vellum for a translucent effect, or even recycled book pages for a vintage look.
- Embellishments: Add small beads, rhinestones, or glitter glue to the center of your flower for an extra sparkle. A touch of metallic paint on the edges can also create a stunning effect.
- Petal Shapes: Instead of simple rounded edges, try cutting pointed petals, scalloped edges, or even slightly fringed edges for a different floral appearance.
- Different Sizes: Vary the initial square paper size to create candle holders of different dimensions, adding visual interest to your display.
- Scented Paper: Lightly spray your finished paper flowers with a subtle, non-flammable room spray for an added sensory experience.
Safety First: Important Considerations for Candle Holders
While these paper flower candle holders are designed to be beautiful, safety should always be your top priority:
- Always Use a Glass Jar: The paper flowers are purely decorative and should never be in direct contact with a flame. The glass jar acts as a crucial barrier.
- Choose the Right Candle: Opt for tea lights, small votives, or LED flameless candles. Avoid tall taper candles or candles that burn down quickly and close to the paper.
- Never Leave Unattended: Always keep a watchful eye on burning candles. Extinguish them before leaving a room or going to sleep.
- Keep Away from Flammables: Ensure your candle holder is placed on a stable, heat-resistant surface, away from curtains, drapes, or other easily flammable materials.
- Ventilation: Ensure adequate ventilation when burning candles.
Want to see how these paper flower candle holders are made? Check out this video tutorial from The Teacher Training:
We hope you thoroughly enjoyed this tutorial on how to make an elegant paper candle holder! We’d love to hear your thoughts and experiences. Please share your comments below and tell us what you think of this homemade candle holder project. Do you have any other brilliant DIY ideas or paper craft tips you’d like to share with our community? We’re always eager to try new projects and connect with fellow DIY enthusiasts.
Our passion lies in empowering people to tap into their creative side and discover the immense satisfaction of crafting things themselves. From innovative craft projects and beautiful home decor ideas to clever upcycling solutions, delicious recipes, and helpful tutorials – we strive to bring you a wealth of DIY inspiration. Join our growing community where every project is just a click away! Stay connected with us on Facebook, Twitter, Pinterest and Instagram!
Explore More Inspiring DIY Projects:
-
17 Amazing DIY Paint Chip Projects
-
100 Creative Ways to Use Washi Tape
-
Festive Crafts: DIY Felt Ball Garland