
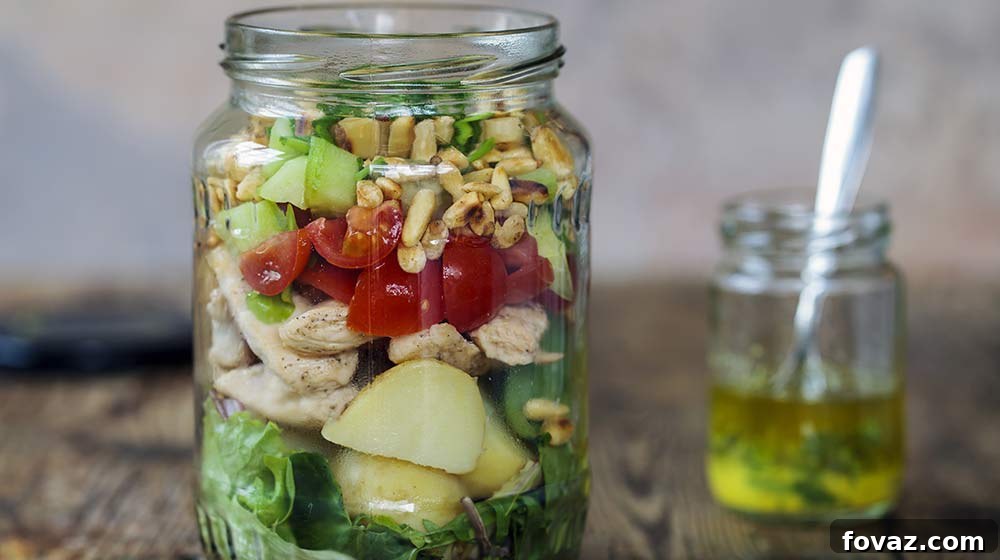
In the world of DIY, few items offer the versatility and rustic charm of the humble mason jar. Far more than just containers for preserves, these iconic glass jars have become a beloved staple for crafters and home organizers alike. Their transparent beauty and sturdy design make them perfect candidates for a myriad of projects, adding a simple yet elegant touch to any space, whether it’s a bustling craft room, a tidy kitchen, or a serene workspace.
RELATED: How To Make A DIY Mason Jar Chandelier
Transform Your Space: 6 Ingenious Mason Jar Organization Hacks
Maximize Your Home’s Potential with Smart Mason Jar Storage Solutions
A clutter-free, thoughtfully organized environment is more than just aesthetically pleasing; it’s a foundation for enhanced creativity, improved productivity, and a greater sense of well-being. The right organizational tools can transform chaotic corners into serene sanctuaries. As enthusiasts of practical and beautiful DIY solutions, we’ve explored countless ways to streamline our spaces and discovered that mason jars are absolute heroes in this mission. They offer an affordable, sustainable, and highly customizable approach to tackling disarray. Below, we’ve curated some of our favorite, most functional, and visually appealing mason jar organizing tutorials, designed to inspire your next decluttering adventure.
1. Stylish Mason Jar Wall Organizers
Reclaim precious counter and desk space with these ingenious mason jar wall organizers. This project is a fantastic way to repurpose your glass jars into functional and decorative storage units, ideal for craft supplies, office essentials, bathroom necessities, or even small kitchen utensils. They add a rustic, farmhouse-inspired touch while keeping your most-used items easily accessible and neatly displayed.
What You’ll Need:
- 8, 12, or 16oz. Mason jars (Choose sizes based on what you plan to store)
- Hose clamps (One per jar)
- Wood (A sturdy piece, approximately 2 ft by 7 in. or sized to your preference)
- Wood stain (Optional, but highly recommended for a finished look)
- Picture hanging kit (For secure wall mounting)
- Drill & screws (Appropriate for wood and clamps)
Do It Yourself:
- Begin by preparing your wooden board. Apply your chosen wood stain according to the product instructions, ensuring even coverage. This step enhances the wood’s natural beauty and adds a polished finish to your organizer. Allow the stain to dry completely, which may take several hours. If you prefer a natural wood look or plan to paint the wood, you can skip the staining process.
- Once the wood is dry, determine the placement of your mason jars. Lay out your hose clamps on the wood and mark the spots where you intend to drill holes. Even spacing is key for a balanced aesthetic. Using a drill bit slightly smaller than your screws, pre-drill a small pilot hole through the hose clamp and into the marked spot on the wood. This prevents the wood from splitting and makes screwing easier. Align the holes, then firmly attach each hose clamp to the wood using your drill and screws. Ensure they are securely fastened as they will bear the weight of the jars.
- With the hose clamps firmly in place, gently insert your mason jars into each clamp. Tighten the hose clamps around the jars using a screwdriver until the jars are snug and stable, but not overtightened to avoid cracking the glass.
- Attach the picture hangers from your kit to the back of your wooden board. Position them strategically for even weight distribution when hung. Mount your newly crafted mason jar organizer on an empty wall space, ensuring it’s level and secure.
- Finally, fill your mason jars with various items that need organizing. Enjoy the newfound vertical storage and the charming aesthetic your DIY project brings to your home!
- 8 oz. capacity
- Set of 12 jars, durable glass construction
- Custom time tested Sealing compound, ensures a quality air-tight seal with each lid
- New brushed silver design on the outside lid, will match most kitchen designs
- Refrigerate up to 3 weeks, freeze up to 1 year, fresh preserve and store up to 1 year
Buy on Amazon
2. Creative Button Organization with Mason Jars
For crafters, sewers, and anyone with a collection of miscellaneous buttons, this mason jar organization hack is a game-changer. It’s a remarkably creative and practical way to store small items, making it easy to identify contents at a glance while adding a charming visual element to your craft space. This method ensures your tiny treasures are always organized and readily available, preventing frustrating searches through cluttered drawers.
What You’ll Need:
- 8, 12, or 16oz. Mason jars (Choose sizes that best fit your button collection)
- Craft Magnets (Small, strong magnets are ideal)
- Glue gun and hot glue (For a quick and secure bond)
- Your collection of buttons!
Do It Yourself:
- Select one button to serve as the visual identifier for each jar. Apply a small dab of hot glue to the back of this chosen button and firmly press a craft magnet onto the glue. Hold for a few seconds to ensure a strong bond.
- Once the glue has set, place the button with the attached magnet onto the metal lid of your mason jar. The magnet will adhere to the lid, creating a clear label for the contents inside. This allows you to quickly see what type or color of buttons are in each jar without opening it.
- Fill your jar with the corresponding collection of buttons. Screw the lid back on tightly.
- Repeat this process for all your different button sets and jars. This ingenious idea extends beyond just buttons; it’s a fantastic storage solution for a variety of small craft items like beads, sequins, or even hardware such as screws, nails, or washers. It brings order and aesthetic appeal to any crafting or DIY workstation.
- Glass Mason jars with a stylish quilted crystal decorative design
- Includes 24 Jars of 4 Ounce size with standard Regular Mouth lids
- Ideal for creative preserving and storing
- Great for gifting and crafting
- BPA-free, Made in USA
Buy on Amazon
3. Charming Mason Jar Pincushion and Sewing Kit
This delightful mason jar pincushion project is more than just a pretty face; it’s a brilliant way to keep all your essential sewing supplies neatly organized in one portable, charming container. Perfect for beginners and seasoned stitchers alike, it ensures that pins, needles, thread, and thimbles are always at hand. It also makes for a thoughtful, handmade gift for any crafting enthusiast, combining practicality with a touch of personal flair.
What You’ll Need:
- 8, 12, or 16oz. Mason jars (Choose a size that suits your sewing kit needs)
- Fiberfill (For stuffing the pincushion)
- Glue gun and hot glue (For secure assembly)
- Printed fabric (A small piece, about 4″x4″, choose a design you love!)
- Scrapbook paper (Best if it coordinates with your printed fabric for a cohesive look)
- Pencil (For tracing)
- Scissors
Do It Yourself:
- To create the base for your lid, flip your scrapbook paper over so the patterned side is facing down. Place the flat metal lid of your mason jar onto the paper and trace a perfect circle. Carefully cut out this circle; this piece will cover the inside of your lid, giving it a neat, finished appearance. Now, cut a 4″x4″ square piece from your chosen printed fabric.
- It’s time to assemble the pincushion lid. Take the metal rim of your mason jar lid and place it on a flat surface, with the side that normally faces up (where the jar screws in) facing down. Position your square piece of fabric directly on top of this rim, ensuring the pattern side of the fabric is facing down.
- Take a small fistful of fiberfill and place it directly on top of the fabric. This will be the soft cushioning for your pins.
- Carefully place the flat metal lid (the circular piece you traced earlier, but without the scrapbook paper yet) directly on top of the fiberfill.
- Gently but firmly, thrust the entire assembly (lid, fiberfill, and fabric) slightly through the metal rim. You are essentially pushing the fiberfill and fabric through the ring, with the flat lid creating the base of the pincushion. The fabric should now be visible through the top of the rim, gathered around the fiberfill.
- Once the pincushion is pretty secure within the rim, trim any excess fabric around the edges, leaving enough to fold neatly. Using your hot glue gun, apply glue to the inside edge of the rim and carefully press down the trimmed fabric to make it lay flat and secure.
- Finally, take your pre-cut scrapbook paper circle and hot glue it to the inside of the lid, covering all the raw fabric edges and creating a clean, professional finish. Now you have a beautiful pincushion top for your jar! Fill the jar with thread, thimbles, and other sewing notions to complete your portable sewing kit.
RELATED: Mason Jar Salad Recipes | DIY Projects
4. Innovative Mason Jar Under-Shelf Storage
Constantly struggling with limited storage space in your pantry, craft room, or workshop? This clever mason jar storage shelf hack provides an ingenious solution to expand the usable area of any existing shelf. By utilizing the often-overlooked underside of shelves, you can create easily accessible, transparent storage for small items, keeping your workspace tidy and efficient. It’s a fantastic way to maximize vertical space and bring order to tiny components.
What You’ll Need:
- A sturdy shelf with a flat bottom (Wood or laminate works best)
- Mason jars with lids (1/2 pint and pint jars are versatile choices, ensure you have both the jar and the two-piece lid)
- Screws (Short enough not to pierce through the top of your shelf)
- Drill (With a bit suitable for your screws)
- Chalkboard labels (Optional, but highly recommended for easy identification)
Do It Yourself:
- If your shelf isn’t already mounted, start by hanging it securely on the wall. It’s generally much easier to get the shelf perfectly level and anchored before you add the weight and bulk of the jars. Once the shelf is mounted, carefully remove it from the wall (or work beneath it if it’s very secure) and flip it over so the bottom surface is facing upwards.
- Take the flat inner lids of your mason jars. Arrange them on the underside of the shelf, spacing them evenly and considering what you plan to store. Use a pencil to mark where each lid will be attached. Pre-drill small pilot holes at your marks through the center of each lid and into the shelf. Then, using your drill and screws, firmly attach only the flat inner lids to the underside of the shelf. Make sure the screws are short enough that they don’t come through the top surface of your shelf.
- Once all the lids are securely fastened, re-hang your shelf on the wall if you removed it. Now, with the lids permanently attached to the shelf, you can simply screw your mason jars filled with items directly into these lids from below. This provides an incredibly stable and accessible storage system.
- For ultimate organization, use chalkboard labels or a label maker to clearly identify the contents of each jar. This optional step ensures you can always find what you need quickly, making this under-shelf storage solution both practical and visually appealing.
5. Simple and Effective Mason Jar Desk Organizer
A cluttered desk can be a significant barrier to productivity and clear thinking. This incredibly frugal and highly effective mason jar desk organizer is the perfect solution for bringing order to your workspace. It’s designed to keep all your pens, pencils, scissors, rulers, and other desktop essentials neatly compartmentalized and within easy reach. The beauty of this project lies in its simplicity and the ability to customize it to your exact needs, making it a staple for any home office or student’s study area.
What You’ll Need:
- 8, 12, or 16oz. Mason jars (Collect several in various sizes to accommodate different items)
- Glue gun and hot glue (For a quick and strong bond)
Do It Yourself:
- You’ll be truly amazed at how quickly and effortlessly this functional desk organizer comes together! Gather your chosen mason jars. Decide on an arrangement that suits your desk and storage needs – perhaps a cluster, a row, or a combination of different heights.
- Apply a generous bead of hot glue to the sides of the jars where you want them to connect. Press the jars firmly together, holding them in place for a few seconds until the glue sets. Repeat this process until all your jars are securely glued into your desired configuration.
- That’s it! Your new, customized mason jar desk organizer is ready to be loaded up with all your pens, markers, office supplies, or even craft tools. This simple hack will instantly elevate the organization and aesthetic of your desk, making your workspace a more pleasant and productive environment.
6. Practical Mason Jar Yarn and String Dispenser
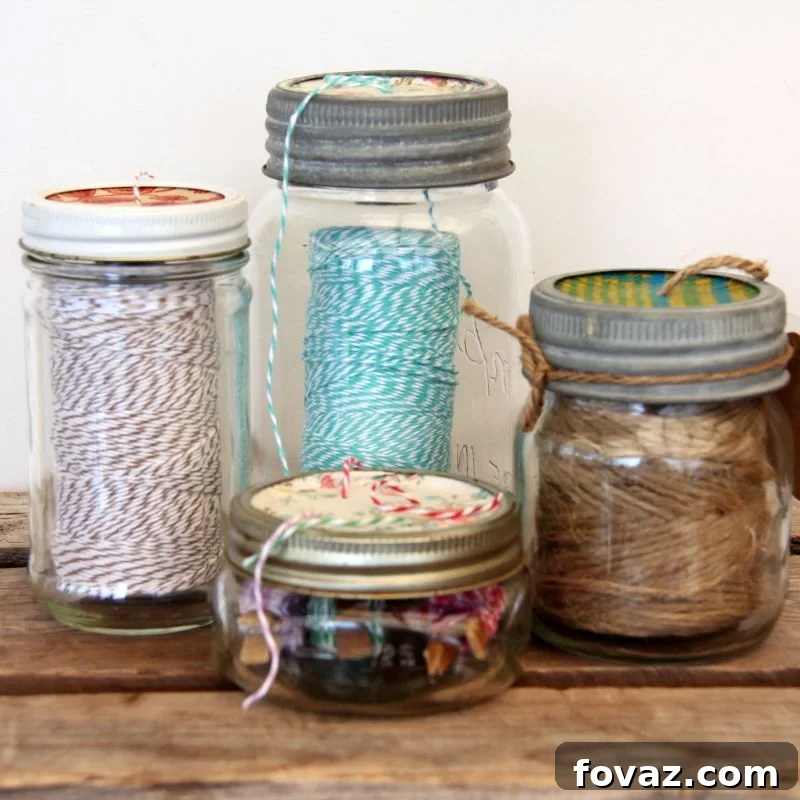
For knitters, crocheters, gardeners, or anyone who frequently uses spools of yarn, twine, or string, this mason jar dispenser is an absolute lifesaver. It’s an incredibly simple yet highly effective way to keep your yarn from getting tangled, unraveling, or rolling onto the floor, gathering dust and pet hair. This clever solution ensures a smooth, consistent pull of string, making your crafting or gardening tasks much more enjoyable and mess-free. Plus, the transparent jars allow you to see exactly how much material you have left.
What You’ll Need:
- 8 or 12 oz mason jars (Wider mouths are often easier for larger yarn balls)
- Nail (A medium to large nail will create a good-sized hole)
- Hammer (For punching the hole)
- Your yarn or string balls
Do It Yourself:
- Take the flat metal lid of a mason jar and place it on a sturdy, protected surface (like a scrap piece of wood). Position the tip of your nail in the very center of the lid. Using your hammer, carefully but firmly punch a hole through the metal lid. Aim for a hole size that is slightly larger than the thickness of your yarn or string to allow for smooth dispensing.
- Place a ball of yarn or a spool of string inside the mason jar. Pull the end of the yarn up and thread it through the newly created hole in the lid.
- Screw the lid securely onto the jar. Now, when you need yarn or string, simply pull it gently from the hole in the lid. The jar will keep your material contained and protected from tangles and dirt.
- Repeat this process for all your different balls of yarn or spools of string. This clever dispenser not only keeps your supplies neatly stored and untangled but also adds a charming, rustic touch to your craft space or shed.
No products found.
Do you have all the essential tools you need for your DIY projects? A well-equipped tool kit like this one is an invaluable starting point for tackling any home improvement task, from simple repairs to more ambitious DIY creations:
- Comprehensive Tool Set: The Cartman 218-Piece Tool Kit includes all the crucial tools needed for everyday home repairs and maintenance, from cutting to tightening, measuring to hammering.
- Sturdy and Corrosion-Resistant: All tools in the kit are heat-treated, ensuring that they resist corrosion and remain sturdy over time.
- Convenient Storage: The kit comes in a sturdy and handy blow-molded case, which securely houses each tool in its respective molded slot, making it easy to locate and organize your tools.
- Quality Assured: All tools in the kit meet or exceed critical standards, ensuring that you get great value for your money.
- Perfect for present giving: This tool set is a great gift idea for housewarming, corporate, and college-bound students. It contains the tools needed for most small repairs around the house, making it an option for homeowners and DIY enthusiasts.
Buy on Amazon
Press play to watch more clever storage DIY ideas from coupontoprovide:
Mason jars truly stand out as one of the most versatile and accessible materials for both crafting and effective home organization. Their simple design belies their immense potential for transforming cluttered spaces into beautifully ordered environments. We sincerely hope these practical, charming, and sustainable uses for glass jars have sparked your imagination and inspired you to embark on your own home organization projects!
Found these creative mason jar organization hacks inspiring and useful? Share your thoughts and experiences in the comments section below! We’d love to hear how you’re using mason jars to declutter and beautify your home.
Up Next:
- How to Make Kitchen Island Storage | DIY Projects
- 25 Toy Storage Solutions For A Well-Organized House
- Farmhouse Decor Ideas To Decorate Your Home In 2020
Calling all crafting DIYhards, DIY Projects needs YOU! Click here if you want to write for us.
Don’t forget to stay connected with us on Facebook, Twitter, Pinterest, and Instagram!Editor’s Note: This post was originally published on August 1, 2017, and has been updated for improved quality, relevancy, and comprehensiveness.