
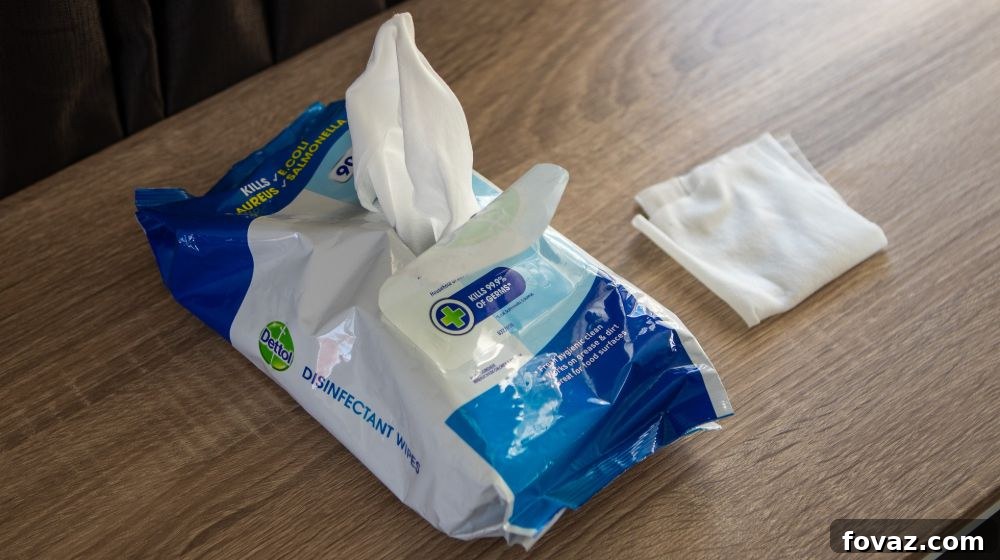
In today’s world, maintaining a clean and germ-free environment has become more crucial than ever. With the fluctuating availability and rising costs of commercial cleaning products, many households are seeking practical, cost-effective alternatives. Disinfecting wet wipes are a cornerstone of modern hygiene, perfect for quick sanitization of high-touch surfaces. But what if your local stores are perpetually out of stock, or you simply prefer a DIY approach?
The excellent news is, you can effortlessly create your own highly effective disinfecting wet wipes right at home, using materials you likely already have. This guide will empower you with the knowledge and steps to craft a reliable supply of homemade sanitizing wipes, ensuring your space remains clean and safe without relying on store shelves.
RELATED: Learn To Make Your Own Natural Cleaning Products
DIY Disinfecting Wet Wipes: Craft Your Own Powerful Sanitizing Solution at Home
Making your own disinfecting wipes offers a multitude of advantages beyond mere convenience. It provides a sustainable and economical way to manage household hygiene, granting you full control over the ingredients used. Whether you opt for a bleach-based solution, rigorously tested and recommended by health authorities, or an effective alcohol-based alternative, this guide covers all the essentials, ensuring your homemade wipes are both safe and potent.
Why Choose to Make Your Own Disinfecting Wipes?
- Uninterrupted Supply: Eliminate the frustration of empty store shelves. With DIY wipes, you can replenish your supply whenever needed, using readily available household items.
- Significant Cost Savings: Commercial disinfecting wipes can be a recurring expense. By utilizing paper towels and a common disinfectant, you dramatically reduce your cleaning budget.
- Ingredient Control: Select the disinfectant that best suits your needs – be it a bleach solution or rubbing alcohol. This also means avoiding unnecessary fragrances or additives often found in store-bought versions.
- Enhanced Safety Awareness: Preparing your own solution necessitates understanding proper dilution and handling, fostering a greater awareness of chemical safety in your home.
- Empowerment and Self-Sufficiency: Gain confidence in your ability to maintain a hygienic living space, regardless of external supply chain challenges.
Essential Materials for Your Homemade Disinfecting Wet Wipes
What You’ll Need:
Gathering the right materials is the first step toward creating your effective DIY disinfecting wipes. Ensure you have all items on hand before you begin.
- Primary Disinfectant (Choose One):
- Plain Household Bleach: Look for unscented chlorine bleach (sodium hypochlorite) with a concentration between 5% and 9%. Crucially, avoid “color-safe” bleach or bleach products with added cleaners, as these may contain harmful chemicals that react negatively with surfaces or other ingredients.
- Rubbing Alcohol (Isopropyl Alcohol): Ideally, choose 70% isopropyl alcohol. This concentration is most effective for disinfection as it contains enough water to denature proteins and effectively kill germs, unlike higher concentrations (like 90% or 99%) which evaporate too quickly. If you only have higher concentrations, you can dilute them with distilled water to approximately 70% (e.g., 7 parts 99% alcohol to 3 parts water).
- Absorbent Paper Towel Roll: A sturdy, high-quality paper towel roll will provide the best results, as it needs to withstand being wet without easily tearing. Choose a brand known for its durability.
- Airtight Storage Container: A clean, plastic container with a tight-fitting lid is essential. This could be a large food storage container, an empty coffee can, or even a repurposed commercial wipe dispenser. The airtight seal prevents your wipes from drying out and maintains the disinfectant’s efficacy.
- Water: Approximately 1 to 2 cups of clean tap water are needed for diluting the bleach solution. If using alcohol, water may only be required if diluting a higher concentration of isopropyl alcohol.
- Sharp Cutting Tool: A strong kitchen knife, a serrated knife, or even a utility knife will be necessary for cutting the paper towel roll.
- Measuring Utensils: Accurate measuring cups and spoons are vital for preparing the disinfectant solution at the correct and safe concentration.
- Protective Gloves: Always wear rubber or nitrile gloves when handling disinfectants, especially bleach, to protect your skin from irritation.
- Good Ventilation: Ensure you work in a well-ventilated area, particularly when mixing bleach solutions, to avoid inhaling fumes.
Step-by-Step Guide to Crafting Your Disinfecting Wipes
Step 1: Customizing Your Paper Towel Roll for the Container
The first critical step is to prepare your paper towel roll so it fits perfectly into your chosen storage container. Begin by placing the entire paper towel roll inside the container you intend to use. This will allow you to accurately mark where the roll needs to be cut. The goal is a snug fit that still allows the lid to close securely.
Typically, you’ll need to cut the roll to about one-third or one-half of its original height, depending on your container’s dimensions. Once you’ve made your mark, carefully use a sharp serrated or kitchen knife to cut the paper towel roll straight across its width. This task requires a steady hand and caution, as paper towel rolls are quite dense. Place the roll on a stable surface and cut slowly, applying even pressure, always directing the knife blade away from your body. Safety is paramount during this step.
Step 2: Preparing Your Disinfecting Solution
The effectiveness of your homemade wipes hinges on the correct dilution of your chosen disinfectant. Adhering to recommended guidelines ensures the solution is powerful enough to eliminate germs without being overly concentrated and potentially harmful.
Option A: Bleach-Based Solution (Following CDC Guidelines)
For a reliable bleach solution, the Centers for Disease Control and Prevention (CDC) advises a ratio of 5 tablespoons (approximately 1/3 cup) of 5%-9% plain household bleach per gallon of water for surface disinfection. For our smaller batch of wipes, we’ll scale this down.
In a clean measuring cup or bowl, combine **1 cup of clean tap water** with approximately **1/2 tablespoon (or about 1.5 teaspoons) of plain, unscented household bleach**. Stir the mixture thoroughly until the bleach is completely dispersed in the water. This yields a safe and effective disinfectant solution, targeting a concentration of roughly 0.1% sodium hypochlorite.
Crucial Bleach Safety Reminders:
- Never Mix Bleach: Do not combine bleach with ammonia, vinegar, rust removers, or any other cleaning products. This can produce highly toxic and potentially lethal fumes.
- Ventilation: Always work in an area with ample airflow to prevent fume buildup.
- Skin Protection: Wear gloves to protect your hands from direct contact with the bleach solution.
- Storage: Keep all bleach products and solutions out of reach of children and pets.
Option B: Rubbing Alcohol Solution
If you prefer an alcohol-based wipe, 70% isopropyl alcohol is an excellent choice. It works by denaturing proteins and dissolving lipids, effectively killing a wide range of bacteria and viruses. There’s no need to dilute 70% isopropyl alcohol; it’s ready to use as a disinfectant.
If you have higher concentrations (e.g., 90% or 99%), you must dilute them to roughly 70% for optimal germ-killing power. For instance, to achieve a 70% solution from 99% isopropyl alcohol, mix 7 parts 99% alcohol with 3 parts distilled water. This preparation is straightforward if you have the correct alcohol concentration.
Step 3: Positioning the Paper Towels in the Container
With your paper towel roll cut and your disinfecting solution ready, retrieve your airtight container. Carefully place the cut paper towel roll inside. It’s essential to orient the roll with the **cut side facing down**. This arrangement allows the paper towels to draw up the liquid from the bottom, ensuring even saturation throughout the roll and facilitating easier dispensing later.
Ensure the roll fits snugly against the bottom and sides of the container without being so tight that it prevents proper liquid absorption or makes future removal difficult.
RELATED: 35 Homemade Soap Tutorials, Recipes, And Ideas You Can DIY!
Step 4: Saturating the Paper Towels with Disinfectant
This is where your ordinary paper towels transform into powerful disinfecting wipes. Slowly and evenly pour your prepared disinfecting solution over the entire paper towel roll within the container. The exact amount of liquid will depend on the absorbency of your paper towels and the roll’s size, but generally, **1.5 to 2 cups of solution** should be sufficient to moisten the roll thoroughly without oversaturating it.
Pour in a circular motion over the top surface of the roll to promote even distribution. Once the liquid is poured, seal the container tightly with its lid. Allow the solution to fully permeate the paper towels for several hours. For the most uniform saturation, consider flipping the sealed container upside down every 30 minutes for the initial few hours. This utilizes gravity to ensure the liquid reaches every part of the roll, resulting in consistently wet and effective wipes.
Step 5: Removing the Cardboard Core for Easy Dispensing
After the paper towels have fully absorbed the disinfectant, it’s time to set them up for convenient use, mimicking the design of commercial wipe dispensers. Gently reach into the center of the now-soaked paper towel roll and grasp the cardboard core.
Carefully pull the cardboard core upwards and out of the center of the paper towels. As you remove it, the innermost edge of the paper towel should naturally come out with it. This inner sheet will be your first wipe. By extracting the core, you create a central opening from which each subsequent wipe can be effortlessly pulled, dispensing much like store-bought wipes.
If the initial wipe doesn’t easily emerge, gently tease out the innermost edge of the paper towel from the center opening. Once started, each pull will dispense the next wipe, ready for action.
Step 6: Disinfecting Effectively and Safely
Your homemade disinfecting wet wipes are now ready to tackle germs and maintain a pristine environment. Grab a wipe and begin sanitizing the various high-touch surfaces around your home or workspace.
Key areas to disinfect regularly include:
- Kitchen countertops, sinks, and appliance handles (refrigerators, microwaves)
- Bathroom fixtures, toilet handles, and light switches
- Doorknobs and cabinet pulls throughout your home
- Remote controls, computer mice, and keyboards (ensure electronics are powered off and use sparingly)
- Steering wheels, gear shifts, and other interior surfaces of your car
- Children’s toys (verify compatibility with disinfectant and rinse if necessary, especially for items that may be put in the mouth)
To ensure maximum effectiveness when disinfecting:
- Achieve Visible Wetness: When wiping a surface, make sure it remains visibly wet. This is crucial for the disinfectant to have sufficient “contact time” to kill germs.
- Observe Contact Time: For most disinfectants, including diluted bleach solutions and 70% rubbing alcohol, a contact time of 5 to 10 minutes is typically recommended. Allow the surface to air dry naturally during this period; do not wipe the solution off immediately.
- Consider Surface Compatibility: These solutions are most effective and safest on non-porous surfaces like sealed countertops, plastics, and metals. Avoid using bleach on fabrics, unsealed wood, or certain metals prone to corrosion. Always test a small, inconspicuous area first if you are unsure about a surface’s reaction. While rubbing alcohol is generally safer, it can still damage some delicate finishes or plastics over time.
- Maintain Airtight Storage: Always ensure the lid of your container is tightly sealed after each use. This prevents the wipes from drying out and preserves the disinfectant’s potency.
- Re-moistening Dried Wipes: Should your wipes begin to dry out over time, simply pour a bit more of your prepared disinfecting solution over the roll to remoisten them.
Quick Alternative: Disinfectant Spray Bottle
For those times when a wipe isn’t ideal, or you prefer a different application method, you can easily transfer your 70% rubbing alcohol or diluted bleach solution into a clean spray bottle. Simply spray the solution directly onto the surface you wish to disinfect, allow it to sit for the recommended contact time, and then wipe it clean with a fresh cloth. This method is particularly useful for larger surfaces or intricate items where direct wiping might be cumbersome.
Disinfectant wet wipes aren’t the only things that are always out of stock in groceries. If you’re also out of Lysol, Emily Carmona shows you how to make your very own DIY disinfectant spray:
Beyond the Wipes: Embracing a Culture of Disinfection and Hygiene
The lessons learned from recent global health challenges, such as the COVID-19 pandemic, have profoundly emphasized the indispensable role of stringent cleanliness and disinfection protocols. It’s crucial to understand that while cleaning removes visible dirt and grime, disinfection goes a step further by actively killing germs, thereby significantly mitigating the risk of illness transmission.
By mastering the art of making your own DIY disinfecting wet wipes, you add an invaluable tool to your household hygiene toolkit. This skill empowers you to proactively protect your health and the well-being of your family, ensuring you are never unprepared when faced with the need for essential sanitizing supplies.
Always remember that frequent and thorough handwashing with soap and water remains one of the most foundational and effective measures against germ spread. Surface disinfection, achieved with your homemade wipes, complements this practice, collectively fostering a safer and healthier living environment for everyone.
Safety Protocols and Storage Best Practices for Your Homemade Wipes
To ensure the safety and longevity of your DIY disinfecting wipes, adhere to these important guidelines:
- Clear Labeling: Always label your container clearly with “DIY Disinfecting Wipes” and specify the active ingredient (Bleach or Alcohol). Include a cautionary warning to keep out of reach of children and pets.
- Optimal Storage Conditions: Store the sealed container in a cool, dry place, away from direct sunlight. Sunlight can degrade the efficacy of bleach solutions over time.
- Shelf Life Considerations: Bleach solutions are most effective when fresh. It’s advisable to prepare a new batch of bleach solution every one to two weeks for maximum germ-killing power. Alcohol solutions are more stable but will still evaporate if the container isn’t sealed tightly.
- Ensure Ventilation During Use: Even during routine cleaning with the wipes, ensure proper ventilation, especially in confined spaces, to dissipate any fumes.
- Personal Protection: If you have sensitive skin or are using bleach-based wipes, consider wearing gloves during regular use to prevent skin irritation.
- Responsible Disposal: Used wipes should be disposed of in regular household trash. Never flush them down the toilet, as they are not designed to break down like toilet paper and can lead to plumbing blockages.
Have you discovered any unique or effective methods for making your own disinfecting wet wipes or other cleaning solutions? We invite you to share your innovative tips and personal experiences with us in the comments section below! Your insights could prove invaluable to others striving to maintain cleaner, safer homes.
UP NEXT:
- How To Repurpose Your Glass Bottle Into A Soap Dispenser
- DIY Bath Bombs For A More Bubbly And Lively Bath Experience
- Funny DIY Social Distancing Devices And How To Make Them
Calling all crafting DIYhards, DIY Projects needs YOU! Click here if you want to contribute for us.
Don’t forget to stay connected with us on Facebook, Twitter, and Instagram!