
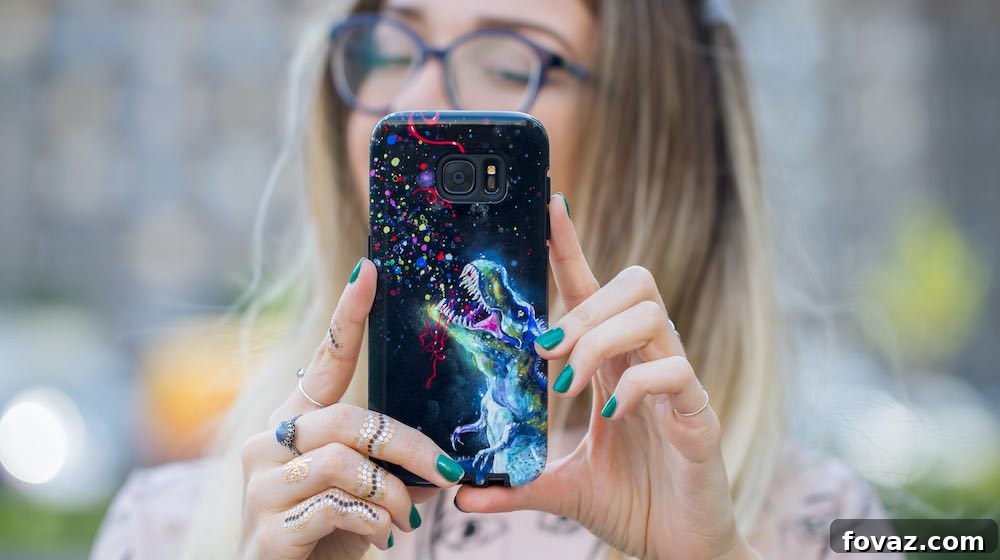
In our modern, fast-paced world, personal expression is more important than ever. Our smartphones are constant companions, and what better way to showcase your unique personality than with a custom phone case? Forget generic designs found in stores; imagine adorning your device with cherished memories, inspiring quotes, or artwork that speaks to your soul. This comprehensive guide will walk you through the exciting process of creating your very own personalized picture phone case using a simple, effective heat transfer method. It’s a fantastic DIY project, perfect for adding a personal touch to your daily life, creating a thoughtful gift, or simply unleashing your creativity during a quiet afternoon at home. Get ready to transform your ordinary phone case into a vibrant canvas of self-expression!
While there are numerous approaches to crafting unique phone cases, from intricate resin work to straightforward hot glue creations, our focus today is on a technique that offers unparalleled customization and stunning visual results: the heat transfer method. This approach allows you to seamlessly integrate any image, pattern, or text directly onto a clear jelly phone case, ensuring a durable and vibrant finish. Whether you’re a devoted fan wanting to immortalize your favorite celebrity, someone who lives by a powerful quote, or simply wish to carry a beloved photo everywhere you go, this method makes it incredibly easy and accessible. We’re here to demonstrate just how quick, easy, and satisfying this creative endeavor can be.
This detailed, step-by-step tutorial is designed to make the process enjoyable and straightforward, even for beginner crafters. The resulting personalized phone case is not only a stylish accessory for yourself but also makes an incredibly thoughtful and unique gift for friends and family. Dive in and discover how you can add a touch of personal flair to your phone today!
RELATED: DIY Custom Phone Case with Hot Glue Gun
Transform Your Phone: The Ultimate Guide to Making a Personalized Picture Phone Case
Essential Materials You’ll Need:
Before embarking on your creative journey, gather these fundamental tools and materials. Having everything ready will ensure a smooth and enjoyable crafting experience:
- Heat Transfer Paper: This is the star of our project. Choose a high-quality, iron-on transfer paper designed for inkjet or laser printers, depending on your printer type. Look for options that specifically mention use on flexible surfaces or fabrics, as this will yield the best results on a jelly phone case.
- Inkjet or Laser Printer: A standard home printer capable of printing in color is all you need. Ensure your ink cartridges are sufficiently filled to achieve vibrant and clear images.
- Computer or Design Device: You’ll use this to create, select, and finalize your chosen design. Any computer with image editing software (even basic programs like Paint or Google Docs) will suffice.
- A Soft, Clear Jelly Phone Case: The clearer, the better! This type of case provides the perfect transparent canvas for your design and is pliable enough to work with the heat transfer process. Make sure it’s the correct size and model for your smartphone.
- Sharp Scissors: Precision is key for cutting out your design cleanly. A craft knife can also be used for intricate details.
- Adhesive Tape: Masking tape or painter’s tape is ideal. Avoid strong, sticky tapes that might leave residue or damage the heat transfer paper. This will be used to secure your design during the ironing process.
- Clothes Iron: A standard household iron is perfect. Ensure it’s clean and free of any residue that could transfer to your case. An iron with steam settings is fine, but you will likely use it on a dry heat setting.
- Bowl with Lukewarm Water: This will be used to soak the case and aid in the transfer paper removal.
Step 1: Unleash Your Creativity and Choose Your Perfect Design
The first and most exciting step is selecting the image or graphic that will transform your phone case. Your options are limitless! You can download high-resolution images from the internet, create your own unique artwork using graphic design software, or even use a personal photograph. When choosing or creating your design, keep the following in mind:
- Image Quality: Opt for high-resolution images to ensure crisp, clear prints. Pixelated or blurry images will result in a less professional-looking case.
- Size and Aspect Ratio: Carefully measure the dimensions of the back of your phone case. You’ll want your design to fit perfectly, leaving space for camera cutouts and button access if necessary. Most image editing software allows you to resize and crop images precisely.
- Mirroring the Image: This is a crucial step for many types of heat transfer paper, especially those designed for dark fabrics or specific transfer methods. Always check the instructions for your specific heat transfer paper. If the paper requires mirroring, you’ll need to flip your image horizontally in your design software before printing. This ensures that text and directional images appear correctly once transferred.
- Design Ideas: Consider a collage of your favorite photos, a meaningful quote in an elegant font, a vibrant abstract pattern, the logo of your favorite band, or a custom illustration. This is your chance to truly personalize your device!
Once your design is ready, save it in a common image format (like JPEG or PNG) to your computer.
Step 2: Print and Precisely Cut Your Design
With your chosen design finalized on your computer, it’s time to bring it to life on paper. Load your heat transfer paper into your printer, ensuring it’s oriented correctly (refer to the paper’s instructions for which side to print on). Select the highest print quality setting on your printer for the best results. Once printed, allow the ink to dry completely to prevent smudging, which can take a few minutes.
Next, carefully cut out your printed design. Use sharp scissors or a craft knife to achieve clean, crisp edges. It’s often helpful to cut slightly inside the lines of your design to avoid any unprinted edges from transferring. Now, align the cut-out design onto the back of your clear jelly case. Position it exactly where you want it to appear, making sure it’s centered and straight. Once satisfied with the placement, use small pieces of tape to secure the design in place. Place the tape along the edges or corners of the heat transfer paper, ensuring it doesn’t cover any part of the image that needs to be ironed, as the tape might melt or interfere with the transfer process.
Step 3: Master the Art of Ironing the Design onto the Case
Now comes the pivotal step: transferring your design with heat. Plug in your iron and set it to a medium-high, dry heat setting (usually cotton or linen setting, without steam). Allow it to heat up fully. Place your phone case with the taped design face down on a hard, heat-resistant surface, such as an ironing board or a sturdy table covered with a thick towel. This provides a stable and heat-absorbent base.
Carefully press the hot iron firmly and evenly over the entire back of the heat transfer paper, which is now on the back of your soft clear jelly case. Apply consistent pressure and move the iron in small circular motions to ensure that heat is distributed uniformly across the design. Pay extra attention to the edges and corners to prevent lifting. The duration of ironing can vary depending on your specific heat transfer paper, so consult its instructions for recommended times. Generally, it might take 30 seconds to a few minutes. Once you believe the design has fully transferred, carefully remove the iron and let the case cool down completely for at least 5 minutes. Patience here is crucial; rushing this step can compromise the transfer.
While the case cools, prepare a bowl with lukewarm water, filled halfway. Once the case has cooled to the touch, submerge the entire case, with the heat transfer paper still attached, into the lukewarm water. Allow it to soak for approximately 15-20 minutes. This soaking process helps to loosen the paper backing from the transferred image, making it easier to rub off in the next step without damaging the design.
RELATED: DIY Phone Case Made With Just A Glue Gun
Step 4: Gently Rub Away the Paper to Reveal Your Artwork
After the recommended soaking time, remove the case from the water. With the heat transfer paper still wet, gently begin to rub the paper backing. You should notice the paper starting to peel or rub away, leaving the transferred ink design adhered to the clear jelly case. Use your fingertips to carefully rub in small, circular motions. If you encounter any stubborn areas, you can pour a little more lukewarm water directly onto the paper to help loosen it further. The goal is to remove all the paper residue without disturbing the transferred image. This step requires a delicate touch and a bit of patience. Ensure every bit of the paper backing is removed to reveal a smooth, clean design on your case.
You’re Done! Embrace Your Unique Creation
Once all the paper residue has been successfully removed, you’ll be left with a stunning, personalized design directly on your phone case. Take a moment to admire your handiwork! Now, it’s essential to let the case air dry completely. This might take a few hours, or you can gently pat it dry with a soft, lint-free cloth. Once thoroughly dry, your custom picture phone case is ready to protect and adorn your smartphone. Simply slip your phone back into its newly decorated case, and you’re all set to showcase your style.
The transformation is complete! You now possess a one-of-a-kind phone case that reflects your personality and creativity. This simple yet effective heat transfer method allows for endless possibilities, making it easy to refresh your phone’s look whenever inspiration strikes. Why not create a whole collection for different moods or occasions?
Watch this insightful video from Mr. Wow to see the DIY picture phone case process in action:
Tips for Longevity and Professional Results
The entire process, from design to completion, likely took you a minimum of 30-45 minutes, depending on your design complexity and drying time. This personalized phone case project is not only incredibly easy to make but also offers unparalleled customization. Just choose your design, print it, and iron it onto your phone case for an instant style upgrade.
To ensure the longevity and vibrancy of your design, here are a few additional tips:
- Internal Application: It’s highly recommended to apply the design to the inner portion of the clear jelly case. This strategic placement provides an extra layer of protection, shielding your design from scratches, scuffs, and daily wear and tear. If the design is placed on the outside, it can rub off more easily over time.
- Quality Paper Matters: Invest in the best quality heat transfer paper you can find. Superior paper generally leads to a cleaner transfer, more vibrant colors, and a more durable finish, giving your custom case a truly professional look.
- Consider a Sealant (Optional but Recommended): For maximum durability and to protect the design from fading or rubbing off, consider applying a thin, clear sealant or top coat once the design is fully dry. There are various craft sealants available (e.g., Mod Podge Outdoor, clear acrylic spray sealant) that are suitable for flexible plastics. Apply a thin, even coat and allow it to cure fully according to the product instructions.
- Gentle Cleaning: When cleaning your custom phone case, use a soft, damp cloth and avoid harsh chemicals or abrasive scrubbers, especially if you haven’t applied a sealant.
Share Your Masterpiece!
What is your ideal design for your DIY picture phone case? We’d love to hear about your creative visions, personal inspirations, or even the design you’ve just made! Share your thoughts, tips, and experiences in the comments section below. Your ideas could inspire fellow crafters!
UP NEXT: Discover More Exciting DIY Projects for Your Phone and Beyond!
- 3 Creative DIY Phone Cases You Can Make Today
- Free DIY Phone Case Printables (Choose Your Size & Style!)
- 15 Insanely Innovative DIY Projects You Can Create With Paper Binder Clips
Calling all crafting DIYhards! DIY Projects needs YOU to share your passion and expertise. Click here to learn how you can contribute to our vibrant community.
Don’t forget to stay connected with us on social media for more inspiring DIY ideas, tutorials, and community highlights. Find us on Facebook, Twitter, Pinterest, and Instagram!