

Road trips are a cherished tradition for many families and friends, offering a fantastic opportunity to explore new places and create lasting memories. However, these adventures, especially with little ones or pets in tow, often come with an undeniable consequence: messy car seats. From an unexpected bout of car sickness to spilled snacks, muddy paws, or just the accumulated grime of everyday use, car seats bear the brunt of our travels. Left unaddressed, these messes can lead to unpleasant odors, stubborn stains, and a less-than-inviting car interior. But don’t despair! Learning how to clean a car seat effectively is much easier than you might think. This comprehensive guide will walk you through a simple, yet highly effective DIY method to deep clean your car seats, making them look and smell fresh, as if they were brand new. Say goodbye to costly professional cleanings and hello to a sparkling, hygienic car interior with these straightforward steps.
Transform Your Car Seats: The Ultimate Guide to Easy DIY Cleaning
Car seats are arguably one of the most frequently used and abused surfaces in any vehicle. They endure a constant onslaught of dirt, dust, food crumbs, drink spills, pet hair, and even biological contaminants from sweat, body oils, and occasional accidents. Over time, these elements can degrade the fabric, create unsightly stains, and, perhaps most notably, contribute to lingering, unwelcome odors that permeate your car’s cabin. A dirty car interior not only detracts from the aesthetic appeal of your vehicle but can also become a breeding ground for bacteria and allergens, impacting the overall health and comfort of its occupants.
The good news is that you don’t need expensive equipment or harsh chemicals to achieve professional-level results. With a few common household items and a bit of elbow grease, you can restore your car seats to their former glory. This method is designed to be accessible, budget-friendly, and surprisingly effective, tackling everything from minor smudges to more significant spills. By following these simple steps, you’ll not only clean your car seats but also prolong their life and create a much more pleasant driving environment for everyone.
Essential Tools and Ingredients for a Pristine Car Interior
Before you embark on your car seat cleaning mission, gathering all the necessary supplies will ensure a smooth and efficient process. You’ll be surprised at how many of these items you likely already have around your home. This carefully selected combination of ingredients is effective at breaking down grime, lifting stains, and refreshing fabric without causing damage.
- 2 tablespoons dish soap: Opt for a mild, clear dish soap. Its degreasing properties are excellent for breaking down oils, food residue, and general dirt without being overly harsh on upholstery fabric.
- 2 tablespoons washing soda (sodium carbonate): Not to be confused with baking soda, washing soda is a more alkaline cleaning booster. It helps lift tough stains, neutralize odors, and enhance the cleaning power of the dish soap, leaving fabrics brighter and fresher.
- 2 cups hot water: Hot water helps dissolve the cleaning agents more effectively and can aid in breaking down stubborn dirt and grease trapped within the fabric fibers.
- Mixing bowl: Any standard bowl will do to prepare your custom cleaning solution.
- Stiff-bristled cleaning brush: Choose a brush specifically designed for upholstery or general cleaning. A medium-stiff brush is ideal for agitating the fabric and working the solution into the fibers without causing damage. Avoid overly abrasive brushes that might fray delicate materials.
- Several clean microfiber towels: Microfiber towels are highly absorbent and excellent for wiping away dirt and excess moisture without leaving lint or streaks. Have at least two or three on hand – one for applying, one for wiping, and perhaps another for a final dry buff.
- Vacuum cleaner with attachments: A powerful vacuum, ideally with a crevice tool and brush attachment, is crucial for removing loose debris before and after the wet cleaning process. A shop-vac or a robust household vacuum will work best.
- Linen spray or car air freshener (optional): For a final touch of freshness, a linen spray can impart a pleasant scent to your newly cleaned seats. Alternatively, a car-specific air freshener can be used.
- Spray bottle (optional, but recommended): A spray bottle allows for more even and controlled application of the cleaning solution, preventing oversaturation of the fabric.
- Gloves (optional): To protect your hands from the cleaning solution and dirt.
Step 1 – Initiate with a Thorough Vacuuming: The Foundation of Cleanliness
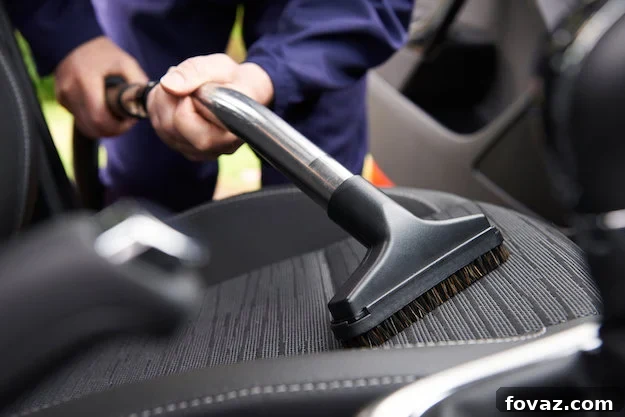
Before any liquid cleaning agents come into play, the most critical first step is to meticulously vacuum your car seats. This initial dry cleaning process is vital as it removes loose dirt, dust, crumbs, pet hair, and any other solid debris that would otherwise turn into muddy sludge when wet, making your cleaning job much harder and less effective. Think of it as clearing the battlefield before the main attack.
Start by removing any child car seats, floor mats, and personal items from the vehicle. Use your vacuum cleaner with appropriate attachments. The crevice tool is indispensable for reaching into tight spaces, such as the seams of the seats, where crumbs and dirt love to hide. The brush attachment is excellent for agitating and lifting stubborn dirt and pet hair from the fabric surface. Pay close attention to the areas where the seat back meets the seat bottom, around the seatbelts, and underneath the seats themselves. Run the vacuum over every inch of the upholstery, ensuring you’ve picked up as much dry debris as possible. A clean slate at this stage will significantly improve the outcome of your wet cleaning.
Step 2 – Crafting Your Potent Homemade Cleaning Solution
With the dry debris cleared, it’s time to prepare the star of our cleaning operation: your powerful yet gentle cleaning solution. This concoction is formulated to effectively tackle stains and refresh fabrics without harsh chemicals.
In your mixing bowl, combine 2 tablespoons of your chosen dish soap, 2 tablespoons of washing soda, and 2 cups of hot water. Stir the mixture thoroughly until the washing soda is completely dissolved and the ingredients are well incorporated. The hot water is key here, as it helps activate the cleaning properties of both the dish soap and washing soda, making them more effective at breaking down grease and lifting dirt from the fabric fibers. The dish soap acts as a surfactant, reducing the surface tension of water and allowing it to penetrate and lift grime more easily, while the washing soda boosts its cleaning power and helps neutralize odors. If you have a spray bottle, transfer the solution into it for easier and more even application in the next step. Always remember to test the solution on an inconspicuous area of your car seat first (like under the seat or a hidden corner) to ensure it doesn’t cause discoloration or damage to your specific upholstery fabric. Wait a few minutes to observe any adverse reactions before proceeding to the main cleaning.
Step 3 – Targeted Application and Gentle Brushing
Now that your cleaning solution is ready and tested, it’s time to apply it to your car seats. The key here is precision and avoiding oversaturation, which can lead to extended drying times and potential mildew growth. If using a spray bottle, mist the cleaning solution evenly over a small section of the car seat. If dipping your brush directly, ensure it’s damp, not dripping wet.
Dip your cleaning brush into the mixture, ensuring it’s damp but not saturated. Begin working on one section of the car seat at a time. Using light sweeping or circular motions, gently scrub the fabric. Focus on working the solution into the fibers, paying particular attention to any visible stains or heavily soiled areas. The aim is to dampen the fabric slightly, allowing the solution to penetrate and break down the dirt. You should see a light foam forming as you scrub. Avoid pressing too hard or saturating the fabric, as this can push the dirt deeper into the upholstery or leave excessive moisture that takes a long time to dry. Work systematically across the seat, overlapping slightly to ensure even coverage. For stubborn spots, allow the solution to sit for a minute or two before gently scrubbing again.
Step 4 – Extracting Dirt and Residue with a Clean Towel
Once you’ve scrubbed a section of the car seat, the next crucial step is to extract the dirt and the cleaning solution. This step acts as your “rinse” and ensures that no sticky residue is left behind, which could attract more dirt in the future.
Take one of your clean, dry microfiber towels. Dampen it slightly with plain, clean water, and wring it out thoroughly so it’s just moist. Then, firmly wipe down the section of the car seat you just scrubbed. You will notice the towel picking up the dirt and the cleaning solution. Rinse the towel frequently in a separate bucket of clean water and wring it out well before wiping again. Continue wiping and rinsing the towel until it comes away clean, indicating that you’ve successfully removed most of the dirt and soap residue from that section. Repeat this process for all sections of the car seat, ensuring each area is thoroughly wiped to remove as much moisture and dirt as possible. This meticulous wiping is vital for preventing water spots and ensuring a truly clean finish.
Step 5 – The All-Important Air Drying Process
After successfully cleaning and wiping down your car seats, proper drying is paramount. Skipping or rushing this step can lead to unpleasant mildew odors and potential damage to your upholstery. You need to ensure the fabric is completely dry before closing your car windows or using the vehicle.
The most effective way to dry your car seats is by maximizing airflow and leveraging natural heat. Open all car doors and windows wide. If possible, park your car in a sunny spot. The sun’s warmth will accelerate the drying process and its UV rays can also help sanitize the fabric. For optimal results, choose a day with low humidity and good ventilation. You can also place fans inside the car, directed at the seats, to further boost air circulation. A dehumidifier placed inside the car can also be very effective if you’re cleaning indoors or in a humid climate. Resist the urge to close up your car until you are absolutely certain the seats are bone dry to the touch, both on the surface and within the padding. This might take several hours, or even overnight, depending on the humidity and temperature.
Step 6 – The Final Polish: Re-Vacuum and Freshen Up
Once your car seats are completely dry, there’s one final step to ensure they look and feel their absolute best. This often-overlooked step can make a significant difference in the overall finish and longevity of your clean.
Take your vacuum cleaner for one last pass over the car seats. During the drying process, some dirt particles that were deeply embedded might have worked their way to the surface as the fabric dried. This final vacuuming will pick up any remaining loose debris and help to fluff up the fabric fibers, restoring their texture and appearance. After vacuuming, it’s time for the optional but recommended touch of freshness. Lightly mist your linen spray over the cleaned seats. If you don’t have linen spray, a few spritzes of a good quality car air freshener can achieve a similar effect. Alternatively, for a natural odor eliminator, you can sprinkle a thin layer of baking soda over the dry seats, let it sit for about 15-30 minutes to absorb any lingering odors, and then vacuum it up thoroughly. This final touch will leave your car smelling as clean and fresh as it looks, completing the transformation.
Watch This VideoFrom Artistry Photography For More Car Seat Cleaning Tips :
Advanced Tips and Considerations for Ultimate Car Seat Care
While the steps above provide a robust method for general car seat cleaning, a few advanced tips can help you tackle specific challenges and maintain your results:
- Dealing with Stubborn Stains: For exceptionally tough stains like ink, grease, or deeply set coffee, consider a specialized upholstery spot cleaner. Always test it in an inconspicuous area first. For biological stains like vomit, enzyme cleaners are highly effective at breaking down the organic matter and eliminating odors at their source. Act quickly on these types of stains for the best chance of complete removal.
- Preventative Measures: The best defense is a good offense. Invest in car seat covers, especially for seats frequented by children or pets. Encourage a “no eating or drinking” rule in the car, or at least limit it to specific, easy-to-clean areas. Regular light vacuuming once a week can prevent the buildup of dirt and grime, making deep cleans less frequent and easier.
- Protecting Your Investment: After a thorough cleaning, consider applying a fabric protector spray designed for car upholstery. These sprays create a barrier that repels spills and makes future cleaning easier, extending the life and pristine condition of your car seats.
- Understanding Fabric Types: While this guide is primarily for standard fabric upholstery, be aware that leather or suede car seats require different cleaning products and methods. Using the wrong solution can cause cracking, discoloration, or permanent damage to these materials. Always confirm your car seat material before proceeding.
- When to Call the Professionals: For extremely deep-set stains, extensive mold or mildew growth, or if you’re uncomfortable with DIY methods, professional detailing services are an excellent option. They have specialized equipment like steam cleaners and extractors that can provide a deeper clean and faster drying times.
Reap the Rewards: The Benefits of DIY Car Seat Cleaning
Now that you’re armed with the knowledge of how to clean a car seat effectively, you’re ready to tackle any messy scenario that comes your way. This DIY approach offers numerous advantages over continually relying on professional detailing services. Firstly, it’s incredibly cost-effective. You’re using common household items, saving you a significant amount of money in the long run. Secondly, it provides a sense of satisfaction and control. You know exactly what products are being used on your car’s interior, ensuring a gentle yet powerful clean. Thirdly, it promotes a healthier environment within your vehicle by regularly removing allergens, bacteria, and unpleasant odors.
Embrace the power of DIY car care. You don’t need to visit a car wash or an auto detailer every time your seats get dirty. With a little effort and these proven steps, you can maintain a clean, fresh, and inviting car interior that enhances your driving experience and makes every road trip, no matter how messy, a little bit more enjoyable. A clean car seat isn’t just about aesthetics; it’s about hygiene, comfort, and preserving the value of your vehicle.
Click HereFor More DIY Car Care Tips!
Explore More DIY Automotive Solutions!
Ready to take your car care skills to the next level? Dive into these other helpful guides for maintaining your vehicle:
12 Easy Steps To Fix Clear Coat Scratches On Your Car
DIY Mechanics School | DIY Projects For Automotive
Best ATV Tires – The Top 6 Lightest Mud Tires
Featured image via Popsugar