
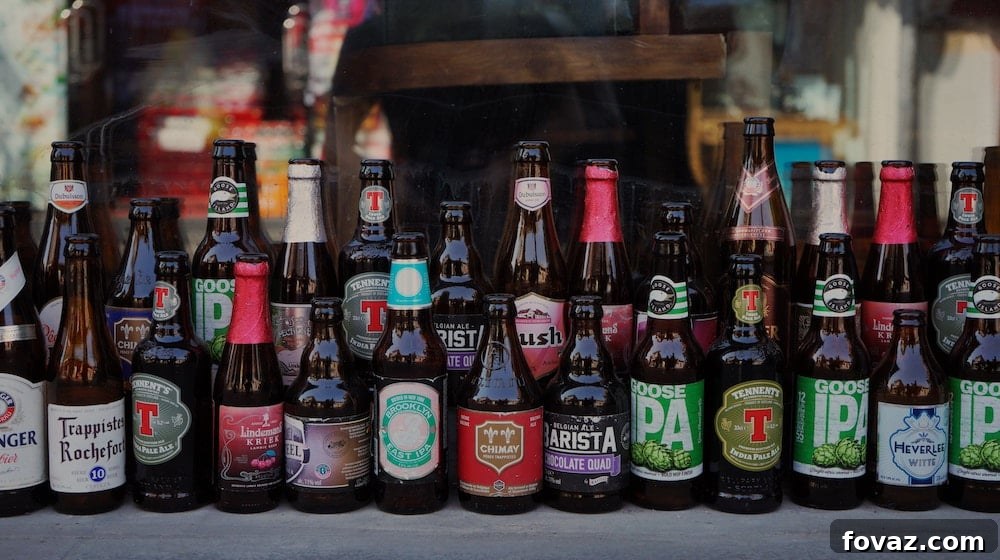
Are you ready to unlock the secrets of fermentation and craft your very own batch of refreshing, bubbly beer? If the thought of a personalized, cost-effective, and deeply satisfying brew appeals to you, then venturing into the world of homebrewing is an adventure waiting to happen. Forget the monotonous routine of store-bought beers; with a little patience and our comprehensive guide, you can transform simple ingredients into a unique beverage tailored to your taste. Homebrewing isn’t just a hobby; it’s a creative outlet, a money-saver, and an incredibly rewarding experience that yields far more than just a six-pack.
This detailed tutorial is designed for beginners and seasoned enthusiasts alike, providing clear, step-by-step instructions to ensure your first (or next) batch of beer is a resounding success. We’ll delve into the essential equipment, key ingredients, and the fascinating science behind the brewing process, empowering you to confidently embark on your journey to becoming a skilled homebrewer. Get ready to dive into the frothy world of DIY beer, where every sip tells a story of your own making!
The Fascinating Journey from Grain to Glass: An Overview of the Brewing Process
Before we roll up our sleeves and get started, it’s helpful to understand the fundamental stages that transform humble ingredients into a delightful glass of beer. This quick synopsis, inspired by the wisdom found on How to Brew, outlines the core principles:
- Malt Extraction: Malted barley is steeped or boiled in hot water to release its precious malt sugars. These sugars are the fuel for fermentation, providing the sweetness and body of the beer.
- The Boil & Hopping: The sugar-rich solution, now called “wort,” is boiled with hops for a specific duration. Hops contribute bitterness to balance the malt sweetness, add aroma, and act as a natural preservative.
- Cooling & Yeast Pitching: After the boil, the hot wort is rapidly cooled to a temperature suitable for yeast. Once cooled, yeast is introduced, or “pitched,” into the wort to initiate fermentation.
- Fermentation: The yeast, a microscopic marvel, consumes the malt sugars, converting them into ethyl alcohol and carbon dioxide (CO2). This magical transformation is where the beer truly comes to life.
- Conditioning & Carbonation: Once the primary fermentation concludes, the beer is transferred to bottles or kegs with a small amount of added sugar. This “priming sugar” provides a final feast for the yeast, generating natural carbonation within the sealed container, giving your beer its characteristic fizz.
How to Make Beer: Your Comprehensive Homebrewing Guide
These steps, while seemingly simple, lay the groundwork for a craft that has been refined over centuries. And guess what? You’re about to become part of that rich tradition! With a modest investment of time and effort, you can produce high-quality beer right in your own home. This detailed tutorial, drawing insights from fantastic resources like BeerSmith Home Brewing Blog, will walk you through everything you need to know to brew the beer of your dreams.
Essential Equipment for the Aspiring Brewer
Gathering the right tools is the first crucial step in your homebrewing adventure. Many items can be found in your kitchen, while others are specialized and readily available at local homebrew supply stores or online. Remember, cleanliness and sanitation are paramount in brewing, so ensure all equipment is meticulously cleaned before and after use.
- A Large Brew Pot (Minimum 3 Gallons): A sturdy stainless steel pot is highly recommended. While 3 gallons is a minimum for a 5-gallon batch (as you’ll be adding water later), a larger pot (4-5 gallons or more) will significantly reduce the risk of boil-overs, making the brewing process smoother and safer. Stainless steel is preferred for its durability and ease of cleaning.
- Siphon Tubing & Clamp: A 6-foot section of 3/8-inch ID food-grade plastic tubing is ideal for transferring wort and beer between containers and for bottling. A simple shut-off clamp attached to the tubing offers excellent control over liquid flow, preventing spills and making the process much easier.
- Airtight Fermenting Vessel (5-6 Gallons): This is where your beer will ferment. Options include a food-grade plastic bucket with an airtight lid or a glass carboy.
- Plastic Fermenting Bucket: Economical and lightweight, but can scratch over time, potentially harboring bacteria.
- Glass Carboy: Easier to sanitize and less prone to scratching or flavor absorption, making it a favorite among many brewers. However, they are heavier, fragile, and require careful handling. If using a carboy, a carboy brush is essential for thorough cleaning.
- Air Lock and Stopper/Bung: These components create a one-way valve that allows CO2 to escape during fermentation while preventing airborne contaminants and oxygen from entering your fermenter. Ensure the stopper is sized correctly to create an airtight seal with your chosen fermenting vessel.
- Bottle Filler (Spring-Loaded): This handy tool attaches to the end of your siphon tubing and makes bottling effortless. It features a spring-loaded tip that opens when pressed against the bottom of a bottle and closes when lifted, minimizing splashing and oxidation.
- Brewing Thermometer: A floating or clip-on thermometer with a range covering 0-100°C (32-220°F) is crucial for monitoring wort temperature during cooling and ensuring optimal conditions for yeast pitching.
- Bottles (Approx. 2.5 Cases of 12 oz): You’ll need about 50 high-quality, non-twist-off glass bottles for a 5-gallon batch. It’s best to use bottles designed for carbonated beverages (e.g., from commercial craft beers, not soda bottles). Always use bottles that require a bottle opener. Thoroughly clean and sanitize all bottles before use.
- Bottle Brush: While not strictly mandatory if you meticulously rinse bottles immediately after use, a small bottle brush is incredibly helpful for scrubbing away stubborn sediment and ensuring your bottles are spotless before sanitizing.
- Bottle Capper: A hand-held bottle capper (bench capper or wing capper) is necessary to securely seal your bottles with new caps after filling.
- Bottle Caps (Approx. 50): Always use new, oxygen-absorbing bottle caps purchased from your brewing supplier. They ensure a proper seal and help maintain beer freshness.
- Sanitizing Solution: This is arguably the most critical item. Beer is highly susceptible to infection from wild yeasts and bacteria. Everything that comes into contact with the cooled wort or beer *must* be sanitized. Common choices include:
- Star San: A popular no-rinse, acid-based sanitizer that is effective and leaves no residue.
- Iodophor: An iodine-based sanitizer that requires a short contact time.
- Household Bleach (Caution!): Can be used, but requires extremely thorough rinsing to prevent off-flavors and potential contamination. Generally, dedicated brewing sanitizers are safer and more effective.
Essential Ingredients for Your First 5-Gallon Ale
This ingredient list is tailored for brewing a simple, yet delicious, 5-gallon batch of ale using malt extract – a perfect starting point for beginners. As you gain confidence, you can explore advanced recipes or even formulate your own using tools like BeerSmith or by downloading recipes from their recipe page for different beer styles.
- 6 lbs of Unhopped Pale Malt Extract: Malt extract is the primary source of fermentable sugars and provides the body and flavor base for your beer. It typically comes in 3 lb cans (liquid) or bags (dry). “Unhopped” means it doesn’t contain pre-added hops, giving you full control over the hop profile. Dry Malt Extract (DME) is also an excellent and often preferred alternative for its longer shelf life and ease of use.
- 1 Package of High-Quality Liquid Ale Yeast (e.g., Wyeast American Ale #1056 or White Labs California Ale #WLP001): Yeast is the workhorse of brewing, responsible for converting sugars into alcohol and CO2, and significantly influencing the beer’s flavor profile. Liquid yeast often produces a cleaner, higher-quality beer with specific flavor characteristics. Ensure your yeast is fresh and stored correctly.
- 2/3 cup Priming Sugar (e.g., Corn Sugar/Dextrose): This small amount of fermentable sugar is added just before bottling. It provides the yeast with a final meal, producing the CO2 needed for natural carbonation in the sealed bottles. Corn sugar (dextrose) is a popular choice for its clean fermentation and consistent results. Available at brew stores or some grocery stores.
- 2.25 Oz of East Kent Goldings Hops (Pellets Recommended): Hops are crucial for balancing the sweetness of the malt with bitterness, and for contributing aromatic complexity. East Kent Goldings is a classic English hop, known for its mild, earthy, and floral notes, suitable for many ale styles. Hop pellets are common, easy to measure, and store well. Keep unused hops in airtight bags in the freezer to maintain freshness.
- Good Quality Water: While not explicitly listed with quantities, access to clean, odor-free water is fundamental. If your tap water has a strong chlorine smell, consider using filtered water or treating it with Campden tablets.
The Brewing Process: A Step-by-Step Guide
Now that you have your equipment and ingredients ready, let’s embark on the exciting journey of brewing your very own beer. Each step is critical, so pay close attention to sanitation and temperature control.
Step 1: The Brew Day – Boiling the Wort
This is where the magic begins! The “wort” (the unfermented beer liquid) is created and sterilized during this phase. If you’re using specialty grains for added color and flavor, they would be steeped in warm water prior to this boil. For an extract-only brew, we jump straight to combining the malt and hops.
Combine the malt extract with water in your large brew pot. Bring the mixture to a rolling boil. As the wort heats up, you’ll observe a “hot break,” where proteins coagulate and form a scummy layer – this is normal and will dissipate. Once boiling, add your hops according to the recipe’s schedule (often bittering hops at the start of the boil, and aroma hops later). The boil typically lasts for about an hour, serving to sterilize the extract, extract bitterness from the hops, and concentrate the wort. Always be mindful of boil-overs and keep a close eye on your pot!
(For more detailed insights on the boil, consider exploring resources like Joey Jene’s Home Brew tutorial).
Step 2: Cooling, Transferring, and Fermenting
After the boil, the hot wort needs to be cooled rapidly to yeast-pitching temperature (typically 65-72°F for ales). Rapid cooling, known as “chilling,” helps prevent unwanted bacterial growth and can improve beer clarity. You can achieve this using an ice bath (placing your brew pot in a sink filled with ice water) or a wort chiller.
Once cooled, carefully siphon or transfer the wort into your sanitized fermenting vessel. This is a critical point for sanitation; any contact with un-sanitized surfaces can lead to infection. Add additional cool, clean water to reach your target 5-gallon batch size. Before pitching your yeast, ensure the wort temperature is within the ideal range for your specific yeast strain. “Pitch” the yeast by simply adding it to the wort. Secure the lid with an airlock, fill the airlock with sanitized water, and place your fermenter in a cool, dark place with a stable temperature. Fermentation typically lasts 1-2 weeks, during which you’ll observe bubbling activity in the airlock as CO2 escapes.
(Dive deeper into cooling and fermentation techniques with resources like New Jersey Local’s Brewing 101).
Step 3: Priming and Bottling Your Beer
Once fermentation is complete (indicated by a stable hydrometer reading over several days and no activity in the airlock), it’s time to prepare your beer for packaging. First, thoroughly clean and sanitize all your bottles, bottle caps, siphon tubing, and bottle filler.
Next, prepare your priming sugar solution. Dissolve the corn sugar in a small amount of hot water, then gently pour this solution into a sanitized bottling bucket (or directly into your fermenter if you’re careful not to disturb the yeast cake too much). Carefully siphon the fermented beer from your primary fermenter into the bottling bucket, ensuring you leave the thick yeast sediment (trub) behind. Siphoning gently minimizes oxygen exposure, which can lead to stale flavors. The priming sugar will mix evenly with the beer.
Using your bottle filler and siphon tubing, fill each sanitized bottle, leaving about an inch of headspace at the top. This headspace is essential for carbonation. Finally, securely cap each bottle using your bottle capper.
(For a comprehensive guide on carbonating and bottling, check out Serious Eats’ Homebrewing tutorial).
Step 4: Aging and Carbonation – The Patience Game
After bottling, your beer isn’t quite ready to drink. It needs time to “bottle condition” or age. Store your bottled beer in a dark, cool place (room temperature is generally fine for most ales) for 2 to 6 weeks. During this period, the residual yeast will ferment the small amount of priming sugar you added, producing CO2 that dissolves into the beer and creates natural carbonation.
Beyond carbonation, aging also allows flavors to mellow and mature. Undesirable byproducts from fermentation, such as excess yeast and proteins, will settle to the bottom of the bottle, enhancing the clarity and smoothness of your beer. While most homemade beers are drinkable after about a month, many styles benefit from extended aging, developing more complex and refined flavors over several months. Patience truly is a virtue in homebrewing!
(Learn more about yeast and its role in aging from resources like The Boulder Stand).
Step 5: The Grand Finale – Drinking Your Masterpiece
The wait is over! After weeks of anticipation, your beer is finally ready to be enjoyed. Carefully transfer a few bottles to the refrigerator and allow them to chill thoroughly. When ready to serve, gently pour the beer into a clean glass, being careful to leave the small layer of yeast sediment at the bottom of the bottle. This sediment is harmless but can make the beer cloudy and impart a yeasty flavor if disturbed.
There’s an unparalleled satisfaction that comes with sipping a delicious beer that you meticulously crafted yourself. Share it with friends and family, and bask in the pride of your accomplishment. Each batch brewed is a learning experience, paving the way for even better beers in the future!
The Rewarding Timeline of Homebrewing
While the initial “brew day” typically takes a few hours (mixing, boiling, cooling), and bottling day takes another hour or two, these activities are spread out over several weeks. In total, brewing an extract batch usually involves about 3-4 hours of active participation. The rest of the time is spent waiting for fermentation and conditioning to complete. This makes homebrewing an incredibly attractive hobby for individuals with busy lifestyles who still cherish the joy of creating something from scratch. The result? Roughly 5 gallons of exquisite, personalized beer for a fraction of the cost of commercial alternatives.
Embrace Your Inner Brewer!
And there you have it – your comprehensive guide to brewing your own beer at home! We hope this detailed recipe inspires you to take the plunge into this wonderful hobby. Homebrewing offers endless possibilities for experimentation, from different hop varieties and malt bills to fruits, spices, and even wild yeasts.
Do you have any personal tips, tricks, or favorite recipes for homemade beer that we might have missed? We’d love to hear from you! Share your insights and questions in the comments section below to help our growing community of homebrewers. Don’t forget to sign up for our newsletter to receive the latest updates on exciting craft projects, tips, and inspiration delivered straight to your inbox. Connect with us on social media – like our page on Facebook and pin your favorite projects to Pinterest to share the joy of DIY with friends! Cheers to your brewing success!