
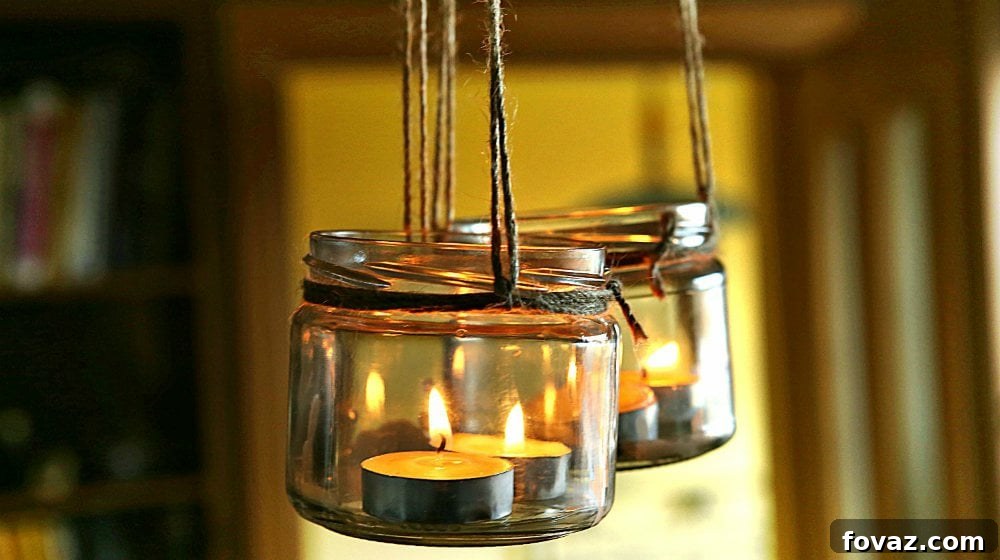
As the aroma of barbecues fills the air and the vibrant anticipation of fireworks draws near, there’s no better way to celebrate America’s independence than with heartwarming, handcrafted decorations. This 4th of July, elevate your festivities with a touch of patriotic charm by creating your very own DIY Mason jar lanterns. These delightful luminaries offer a versatile solution for both indoor and outdoor decor, casting a warm, inviting glow that perfectly complements the spirit of the occasion. Simple to make yet incredibly effective, these Mason jar lanterns are an ideal project for crafters of all skill levels, promising a burst of red, white, and blue without breaking the bank. Get ready to illuminate your Independence Day celebrations with these enchanting, homemade lights!
RELATED: 4th Of July Drink Recipes In Mason Jars To Mix At Home
Illuminate Your Independence Day: A Guide to DIY 4th of July Mason Jar Lanterns
The Fourth of July is a time for joyous celebration, reflection, and, of course, dazzling decorations! While grand fireworks displays capture the night sky, the smaller, more intimate details often create the most memorable ambiance. This year, ditch the generic store-bought decor and embrace the rewarding world of DIY by crafting stunning 4th of July Mason jar lanterns. These charming luminaries are not just lights; they are a testament to your creativity and a heartfelt expression of patriotism, designed to transform any space into a festive haven.
Why Choose DIY Mason Jar Lanterns for Your 4th of July Decor?
Opting for homemade decorations offers a plethora of benefits that ready-made items simply can’t match. Our patriotic Mason jar lanterns are:
- Budget-Friendly: Repurposing readily available Mason jars and inexpensive craft supplies means you can achieve a high-impact look without a hefty price tag.
- Uniquely Personal: Each lantern becomes a reflection of your individual style. You have complete creative control over the design, colors, and embellishments, ensuring your decor is truly one-of-a-kind.
- Environmentally Conscious: Give old Mason jars a new lease on life, contributing to sustainable practices by upcycling materials.
- A Fun Family Activity: Crafting these lanterns can be a fantastic way to engage children and adults alike in a shared, creative project, fostering family bonding and instilling a sense of pride in their creations.
- Versatile Decor: Whether hanging from trees, lining a pathway, gracing a picnic table, or adding a festive touch to your indoor mantle, these lanterns adapt seamlessly to any setting.
- Safe and Sound: While real tea lights offer a classic glow, the option to use LED tea lights provides a flameless, worry-free alternative, perfect for homes with children or pets, or for outdoor use where wind might be a factor.
Beyond these practical advantages, there’s an undeniable joy that comes from crafting something beautiful with your own hands, especially when it contributes to such a significant national celebration. Let’s dive into creating these magnificent 4th of July Mason jar lanterns!
What You’ll Need to Make Your Patriotic Mason Jar Lanterns:
- Mason Jar(s): Any size will do, but pint or quart-sized jars are ideal for lanterns. Clean and dry thoroughly.
- Tissue Paper: Red, white, and blue varieties are essential for a patriotic theme. Consider different shades or patterns for added visual interest.
- Scissors: Sharp scissors are crucial for precise cutting of tissue paper and ribbon.
- Cardboard: A small piece of recycled cardboard (from a cereal box, for example) for the medallion base.
- Ribbons: Red, white, and blue ribbons of varying widths will add texture and flair to your medallion.
- Marker: A permanent marker for detailing your medallion design.
- Craft Glue: Standard white craft glue for adhering ribbons and cardboard elements.
- Mod Podge: This all-in-one glue, sealer, and finish is perfect for adhering tissue paper and providing a protective coat. A matte or gloss finish is suitable.
- Foam Brush or Paintbrush: For smooth application of Mod Podge.
- Wire: Galvanized floral wire or craft wire (16-18 gauge) for creating the jar handle.
- Pliers: Needle-nose pliers or round-nose pliers for bending and shaping the wire handle.
- Tea Candles: Small LED flickering tea lights are highly recommended for safety and longevity, though traditional wax tea lights can also be used with caution.
Detailed Instructions to Craft Your 4th of July Mason Jar Lanterns
Let the crafting begin! Follow these steps to transform simple Mason jars into dazzling patriotic lanterns that will light up your celebrations.
View inspiration for your Mason Jar Lanterns on Pinterest.
Step 1. Craft a Festive Ribbon Medallion
Begin by creating a charming ribbon medallion that will serve as a focal point or an additional embellishment for your lantern. First, take a piece of sturdy cardboard and cut out a perfect circle. The size of this circle can vary depending on your preference, but aim for something that will complement the size of your Mason jar without overwhelming it. Once cut, consider coloring one side of the cardboard circle white using paint or even white paper glued on top; this provides a clean, neutral base for your design.
Next, select an assortment of red, white, and blue ribbons. Cut these ribbons into various lengths, typically ranging from 4 to 8 inches, depending on how long you want your medallion “tails” to be. Turn your white cardboard circle over to the backside. Start gluing the ribbon pieces onto the back of the circle in a crisscross or radial pattern. Overlap them slightly to ensure full coverage and create a rich, layered effect. Continue attaching ribbons until the entire backside of the cardboard circle is adorned with a patriotic burst of color. The goal is to have the ribbons extend outwards, creating a fan-like or starburst appearance.
Step 2. Ensure Thorough Drying and Secure the Ribbons
Patience is a virtue in crafting, and this step is crucial for the durability of your medallion. Allow the glue holding the ribbons to the cardboard to dry completely. This may take a few hours, depending on the type of glue used and the thickness of the application. Once the glue is thoroughly dry and the ribbons are securely fastened, take your scissors and snip small, V-shaped notches or diagonal cuts at the ends of each ribbon. This simple technique not only adds a finished, professional look to your medallion but also helps prevent the ribbons from fraying or unraveling over time, ensuring your festive creation lasts for many celebrations to come.
RELATED: Bedroom String Lights With Origami Paper Lanterns
Step 3. Design and Embellish Your Medallion Front
Now it’s time to bring the front of your medallion to life! Take another small piece of cardboard and cut out a slightly smaller circle than your ribbon base. This piece will be glued onto the front, on top of the layered ribbons. Using a marker, or even paint, unleash your creativity! You can draw festive lines and dots around the outer edge of this smaller circle to mimic fireworks or decorative borders. The most popular addition, of course, is the bold word “4th” inscribed prominently in the center, or perhaps “USA,” a star, or a small flag design. Feel free to explore various fonts, colors, and patterns to make your medallion truly unique. This is your chance to infuse your personality into the decor. Once you’re satisfied with your design, apply a layer of craft glue to the back of this newly designed cardboard piece and carefully center it on top of the layered ribbons from Step 1. Press down gently to secure it and then set it aside to dry completely.
Step 4. Prepare and Apply Star Cutouts to Your Mason Jar
The core decorative element of your lantern will be patriotic cutouts applied to the Mason jar itself. Gather your red, white, and blue tissue paper. Using scissors, carefully cut out various sizes of stars. For a more professional look, you can use star-shaped craft punches or stencils. Don’t limit yourself to just stars; consider cutting out small stripes, tiny fireworks, or even silhouettes of eagles or flags. Experiment with different sizes and arrangements to create an appealing visual composition. You can draw inspiration from other Mason jar decoration ideas, but remember, the goal is to evoke the spirit of the Fourth of July. Lay out your cutouts on a flat surface to plan your design before applying them to the jar.
Step 5. Adhere and Seal with Mod Podge for a Lasting Finish
With your stars and other cutouts ready, it’s time for the Mod Podge! This versatile product acts as both an adhesive and a sealant, creating a durable and attractive finish. Working in small sections, apply a thin, even coat of Mod Podge to a small area of your clean Mason jar using a foam brush or paintbrush. Carefully place one of your tissue paper cutouts onto the wet Mod Podge, pressing it down gently to smooth out any air bubbles or wrinkles. Once the cutout is in place, apply another thin coat of Mod Podge directly over the top of the star. This second layer seals the cutout and blends it seamlessly into the jar’s surface, protecting it from moisture and wear.
Continue this process, working section by section and applying stars one by one, until you are completely satisfied with the design and coverage on your Mason jar. You can overlap stars, create patterns, or scatter them randomly for a whimsical effect. Once all the cutouts are applied and sealed, set the jar aside in a well-ventilated area to dry for at least three to four hours. For maximum durability and a smooth finish, consider applying a final, thin coat of Mod Podge over the entire decorated surface of the jar once the initial layers are dry, allowing it to cure completely.
Step 6. Add a Sturdy Handle and Illuminating Tea Candles
Find more inspiration for your Mason Jar Lanterns on Pinterest.
Now that your Mod Podge is completely dry and the decorations are secure, it’s time to transform your decorated jar into a functional lantern by adding a handle and a light source. For the handle, take a length of sturdy wire (about 12-18 inches, depending on the desired handle height). Using pliers, create a small loop at one end of the wire. Wrap the other end of the wire around the neck of the Mason jar, just under the lip where the lid would screw on, twisting it securely a few times to hold it in place. Then, bend the main length of the wire upwards to form an arch, and create another loop at the top of the arch to connect to your first loop. Alternatively, you can create a U-shape handle, and secure both ends of the wire around the jar’s neck. Ensure the handle is robust enough to support the weight of the jar when hung.
Finally, for illumination, carefully place a tea candle inside your Mason jar. For the safest and most convenient option, we highly recommend using battery-operated LED flickering tea lights. These provide a warm, realistic glow without the fire hazard, making them perfect for outdoor use or in homes with children and pets. If you choose to use traditional wax tea candles, always exercise extreme caution: never leave them unattended, keep them away from flammable materials, and ensure the jar is placed on a stable, heat-resistant surface. You can view our step-by-step tutorial here on how to add the handle and the tea candle.
Unleash Your Creativity: Variations and Display Ideas
The beauty of DIY lies in customization. Don’t hesitate to experiment with different color combinations, perhaps incorporating bolder shades of blue or a subtle antique white. You can switch up the design elements on your mason jar lights too – instead of stars, try stripes, polka dots, or even silhouettes of historical figures. Consider using different sizes of Mason jars to create a dynamic display, or incorporate other embellishments like glitter, twine wrapped around the neck, or even small charms. Your creativity truly is your only limit when it comes to personalizing these patriotic lanterns!
Once your masterpieces are complete, the possibilities for display are endless. Hang them from tree branches in your backyard, line your driveway or porch steps for a welcoming glow, group them as a captivating centerpiece on your outdoor dining table, or use them to accentuate your indoor mantelpiece or bookshelves. The soft, flickering light emitted by these homemade lanterns will undoubtedly add a magical and festive touch to your Fourth of July celebrations, creating an unforgettable ambiance for all your guests.
And you’re done! Get ready to hang your creations and watch them sparkle!
For a visual step-by-step guide to making these Mason jar lanterns, watch this helpful video from iLoveToCreate:
Lighting and decorations should never be overlooked on the 4th of July. While delicious food and spectacular fireworks often take center stage, the ambiance created by thoughtful decor follows a close second. With these simple yet impactful Mason jar crafts, you don’t have to break the bank to achieve a beautifully festive environment. Embrace the joy of crafting and add a personal, patriotic touch to your Independence Day celebrations this year.
Did you enjoy our 4th of July Mason jar lanterns tutorial? We’d love to hear from you! Let us know in the comments section below what your thoughts are on this patriotic decor and lighting idea, and share any unique variations you come up with!
Explore More DIY Projects for Your 4th of July Celebration:
- 4th Of July Backyard BBQ & Party Ideas to Celebrate Independence Day!
- 4th of July | Make Your Own American Flag Hat
- DIY Mason Jar & Balloon Crafts Tutorial
Calling all crafting DIYhards, DIY Projects needs YOU! Click here if you want to contribute for us.
Don’t forget to stay connected with us on Facebook, Twitter, and Instagram for more inspiring DIY ideas and updates!
Editor’s Note: This post was originally published on July 23, 2015, and has been updated for quality, relevancy, and comprehensiveness to provide you with the best possible crafting experience.