
Creative Upcycling: 13 Brilliant DIY Projects for Your Used Plastic Water Bottles
Plastic water bottles are ubiquitous in our daily lives, a common staple found in almost every household, office, and gym bag. While incredibly convenient, their widespread use contributes to a growing environmental challenge. Globally, millions of tons of plastic waste are generated annually, with a significant portion being single-use plastics like water bottles. The good news is that these seemingly disposable items are highly recyclable and possess incredible potential for transformation. Instead of tossing them into the recycling bin (which is still a great step!), let’s unlock their full capacity and discover how they can be repurposed into valuable and creative objects for your home and garden.
The recent global slowdown has given many of us a renewed perspective on sustainability and environmental stewardship. With less industrial activity and reduced pollution in many areas, the planet has shown signs of healing. This period offers an opportune moment to reflect on our consumption habits and embrace practices that contribute to a healthier Earth. Upcycling plastic bottles is a simple yet impactful way to reduce waste, conserve resources, and add a touch of DIY charm to your surroundings. It’s a testament to the idea that with a little imagination, what was once considered trash can truly become treasure.
By giving plastic bottles a second life, we actively participate in lessening the burden on landfills and reducing the demand for new plastic production. This not only benefits the environment but also sparks creativity and provides practical solutions for everyday needs. From functional furniture to whimsical decor, the possibilities are vast. Get ready to embark on a sustainable journey with these inspiring and easy-to-follow DIY projects using your used plastic water bottles.
RELATED: 8 Creative Upcycling Projects for Your Home
Transform Your Used Plastic Water Bottles into Something Amazing
1. DIY Plastic Bottle Chair
Imagine crafting a surprisingly sturdy and comfortable piece of furniture from discarded plastic bottles. This innovative project allows you to create either a small stool perfect for a child’s room or a larger, more robust chair for adults. Depending on your desired size and strength, you might need up to 38 two-liter plastic bottles. The beauty of this DIY chair lies in its deceptive appearance; once covered with fabric or upholstery, most people won’t even realize it’s made from recycled materials until they inspect it closely. This project not only repurposes a significant amount of plastic but also provides a unique, custom-made seating solution that’s both eco-friendly and stylish. Ensure your bottles are clean and uniform in size for the best results, and consider using strong tape and foam padding to create a truly comfortable and durable seat.
2. Eco-Friendly Snack and Kitchen Storage
View on Pinterest
Why spend money on new canisters for your kitchen essentials when you can easily create practical and visually appealing storage solutions from clear plastic bottles? These versatile containers are perfect for organizing a wide array of kitchen supplies, from dry goods like sugar, salt, and coffee creamer to pasta, beans, and grains. The transparent nature of the bottles allows for easy identification of contents, making your pantry more organized and efficient. For added convenience, you can transform them into DIY salt and pepper shakers or spice dispensers by simply poking small holes in the caps. Remember to thoroughly wash and dry the bottles before use, and consider adding custom labels for a polished look. This simple upcycling hack helps reduce clutter, saves money, and extends the life of everyday items.
3. DIY Plastic Water Bottle Planters
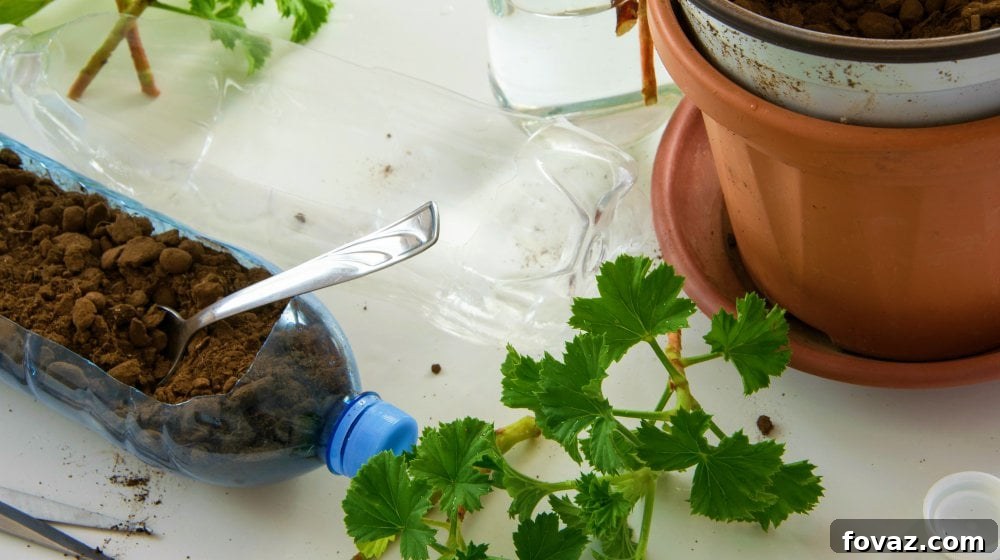
If you’re looking to infuse a touch of greenery and personalized decor into your living space, crafting planters from plastic bottles is an excellent choice. These DIY planters are incredibly versatile and can brighten up any room, balcony, or desk. The process is straightforward, making it a fantastic project for all ages. Here’s how you can make them:
- Start by cutting a two-liter water bottle horizontally, usually near the bottom. The bottom section will serve as the base for your plant.
- Unleash your creativity by painting the exterior with your favorite colors and experimenting with various designs. Think animal faces, geometric patterns, or abstract art – the only limit is your imagination.
- Once decorated, add suitable soil to the bottle and carefully plant your chosen seedling or herb. These planters are ideal for small plants, succulents, herbs, or even starting seeds.
- Finally, ensure you water your plants regularly, providing them with the care they need to thrive.
These customized planters not only add aesthetic appeal but also promote a sustainable approach to home gardening, demonstrating how everyday items can be transformed into functional and beautiful decor.
4. Charming Piggy Bank from a Plastic Bottle
Encourage good saving habits in your children and spark their creativity by making a personalized piggy bank from a plastic bottle instead of purchasing a generic ceramic one. This project is wonderfully simple yet offers endless opportunities for artistic expression. To begin, create a small slot on the side or top of the bottle, large enough for coins to easily slip through. While this basic structure completes the functional aspect, the real fun begins with decoration.
Involve your kids in the crafting process by gathering art materials like paints, markers, googly eyes, and craft paper. Together, you can draw or attach features to transform the bottle into an adorable pig or any other creature they imagine. A simple cap can become a snout, and small plastic ears can be glued on. This hands-on activity not only results in a unique piggy bank but also teaches children about recycling, frugality, and the joy of creating something with their own hands. It’s a rewarding project that combines practicality with imaginative play.
5. Space-Saving Vertical Garden
While plastic bottles can contribute to pollution if improperly disposed of, they also offer a fantastic solution for sustainable urban gardening. Did you know you can transform these containers into effective plant boxes for a stunning vertical garden? This space-saving innovation is perfect for small yards, balconies, or even indoor walls, allowing you to grow herbs, flowers, or small vegetables without taking up much ground space. Impress your guests with a lush, hanging garden that exemplifies eco-conscious living.
For optimal plant growth and stability, it’s advisable to use two-liter plastic bottles, as they provide more room for roots to expand. Beyond the bottles, you’ll need a few additional materials:
- **Clothesline:** Sturdy enough to support the weight of multiple filled planters.
- **Twine:** Useful for hanging individual bottles or adding decorative touches.
- **Picture wire:** Provides strong and discreet support for hanging structures.
To assemble, cut openings in the bottles (either horizontally for individual planters or along the side for a continuous planter) and prepare them for planting. Use wires or strong twine to securely attach these planters to an old, thin ladder or a custom-built frame, creating an organized and visually appealing vertical display. Ensure proper drainage for each bottle to prevent waterlogging. A vertical garden not only looks beautiful but also maximizes your growing potential and breathes new life into recycled materials.
6. Enchanting Water Bottle Tulips with String Lights
Add a magical and whimsical aesthetic to your garden or patio by crafting decorative “tulips” from recycled water bottles. These charming illuminations can transform your outdoor space into an enchanting retreat, especially as dusk settles. The project is surprisingly simple, requiring just a few basic items:
- **Plastic water bottles:** The main component, preferably clear ones for maximum light diffusion.
- **Cutter/Scissors:** For shaping the bottle into petals.
- **Sticks or dowels:** To support your “tulips” in the ground.
- **String lights (preferably solar-powered):** To provide the glowing effect.
To create these tulips, carefully cut the plastic bottles into petal shapes, resembling a blooming flower. You can experiment with different cutting techniques to achieve varied floral forms. Once shaped, attach the plastic flowers to sticks, which can then be poked into your garden beds. The crucial step is to weave solar-powered string lights through and around your plastic creations. As evening arrives, these upcycled tulips will glow softly, creating a captivating ambiance. This project is a beautiful way to combine art, recycling, and garden lighting, ensuring your garden continues to “grow” with creativity long after the sun sets.
RELATED: 63 Things To Never Throw Away For DIY Junkies [2nd Edition]
7. Personalized Upcycled Pencil Case
View on Instagram
Instead of purchasing a new pencil case for your child’s school supplies, why not create a unique and personalized one from upcycled plastic bottles or soda cans? This project is not only environmentally conscious but also provides a fantastic opportunity to teach your child about recycling and resourcefulness. Moreover, a custom-made pencil case will undoubtedly stand out among classmates and teachers, showcasing a blend of creativity and sustainability.
To construct this practical item, you’ll need two plastic bottles. Cut both bottles in half, retaining the bottom sections. These two bottom pieces will form the main compartments of your pencil case. The key to fastening them together is a zipper. Carefully attach a zipper around the cut edges of both bottle halves, creating a durable and functional closure. Once assembled, encourage your child to decorate their masterpiece with paints, stickers, glitter, or fabric to truly make it their own. This project not only yields a cool and useful school supply but also fosters a sense of pride and individuality.
8. Innovative Plastic Bottle Trash Can
View on Pinterest
Take the concept of “going green” to an entirely new level by transforming collected plastic bottle waste into a functional trash can. This ambitious yet incredibly rewarding project demonstrates the potential of discarded materials to create something genuinely useful. It’s a powerful statement about sustainability and resourcefulness, turning the very problem of plastic waste into its own solution.
Here’s how you can embark on this large-scale upcycling endeavor:
- **Establish a Solid Base:** Begin by finding a sturdy, flat base – perhaps a thick piece of plywood or another strong recycled material – that will serve as the foundation for your trash can.
- **Layer and Glue:** Start gluing plastic bottles, upright and tightly packed, onto the base. Use a strong adhesive suitable for plastic. Work in circular layers, ensuring each bottle is securely attached to its neighbors and the layer below.
- **Build Height:** Continue this process, building the walls of your trash can upwards. Aim for a height of at least 2-3 feet, which typically translates to about four or more levels of tightly packed plastic bottles, depending on their size. The more bottles you use, the more robust your trash can will be.
- **Finishing Touches:** Once the structure is complete, you can wrap the interior with a large garbage bag, effectively lining your new, eco-friendly trash receptacle. For added durability and aesthetics, you might consider painting the exterior or covering it with fabric.
This project is not only highly functional but also serves as a striking visual reminder of the sheer volume of plastic waste we can repurpose, making it a fantastic conversation starter and a testament to radical recycling.
9. Exciting DIY Toy Car for Kids
Children often find immense joy in the simplest of creations, and a toy car crafted from a plastic bottle is sure to capture their imagination and provide hours of entertainment. This project is straightforward, budget-friendly, and offers a wonderful opportunity for hands-on creativity with your little ones. All you need are a few basic items: a plastic bottle for the car body, extra bottle caps for wheels, and a sturdy wire or wooden skewer for the axles.
Here’s a simple guide to building their instant toy:
- **Prepare the Axles:** Carefully poke small holes on both ends of the plastic bottle, ensuring they are perfectly adjacent to each other. This precision is crucial for the car to roll efficiently and in a straight line.
- **Attach the Wheels:** Thread the wire or skewer through the holes. Then, attach two bottle caps to each end of the wire, securing them firmly to serve as the wheels. Make sure the wheels can spin freely.
- **Personalize the Design:** The final and most exciting step is decoration! Let your child unleash their creativity with paints, markers, stickers, or craft paper to give their toy car a “killer design.” They can add windows, doors, racing stripes, or even a driver figure.
This DIY toy car is more than just a plaything; it’s a lesson in engineering, design, and the immense potential of recycled materials. It fosters creativity, fine motor skills, and provides a durable, custom-made toy that kids will cherish.
10. Ingenious DIY Sprinkler for Your Garden
Before you rush to the hardware store to purchase an expensive garden sprinkler, consider a remarkably simple and cost-effective alternative using just a two-liter plastic bottle. This ingenious DIY sprinkler can efficiently water a decent area of your garden, saving you money and repurposing an item that would otherwise be discarded. It’s a brilliant hack for summer watering and a testament to practical upcycling.
The construction is incredibly straightforward:
- **Create the Sprinkler Holes:** Using a sharp pen, a small drill bit, or even a heated needle (with extreme caution and adult supervision), poke several small holes all around the body of the two-liter plastic bottle. The pattern and number of holes will influence the spray pattern and coverage, so feel free to experiment.
- **Connect to the Hose:** Once your bottle is perforated, simply plug the open end of the bottle securely onto the nozzle of your garden hose. You might need to use some duct tape or a hose clamp to ensure a tight, leak-free connection, especially if the bottle opening isn’t a snug fit.
- **Water Your Garden:** Turn on the water, and watch as your homemade sprinkler springs to life, distributing water across your lawn or garden beds.
This DIY sprinkler is not only a fantastic way to conserve water but also a remarkably effective tool for keeping your plants hydrated without the need for costly equipment. It covers a respectable area and helps you save a significant amount of money, proving that smart solutions can be found in the most unexpected places.
11. Epic Jetpack Costume for Kids
View on Pinterest
Yes, you read that correctly! If your child needs an instant, imaginative, and eco-friendly costume for playtime or a themed event, a DIY jetpack made from plastic bottles is an absolute winner. This project is quick, fun, and fosters creative play, transforming ordinary household waste into an extraordinary accessory. It’s perfect for little astronauts, superheroes, or adventurers looking to “fly” into action.
Here’s how to construct this fantastic prop:
- **Gather Materials:** You’ll need two large plastic bottles (two-liter soda bottles work perfectly), a sturdy piece of cardboard for the base, gray or silver paint (from your art supplies), and some string or elastic for straps. For an added touch, grab some red, orange, or yellow paper strips.
- **Prepare the Bottles:** Thoroughly clean and dry the two plastic bottles. Paint them gray or silver to give them a metallic, futuristic look. Let the paint dry completely.
- **Assemble the Base:** Attach the two painted bottles side-by-side to the cardboard base using strong glue or tape. Ensure they are securely fastened and spaced evenly.
- **Add Straps:** Create two holes in the cardboard base, positioned appropriately for shoulder straps. Thread string, ribbon, or elastic through these holes, forming loops that your child can slip their arms through to wear the jetpack comfortably on their back.
- **Rocket Flames (Optional but Recommended):** For that authentic propelling effect, cut strips of red, orange, and yellow paper or fabric. Glue these strips to the bottom opening of each bottle, letting them hang down like flames. This detail truly brings the jetpack to life!
This DIY jetpack is an incredibly engaging project that combines crafting with imaginative role-play, offering your child countless hours of high-flying adventures.
12. Unique Bottle Cap Lamp Shade
View on Pinterest
Many upcycling projects utilize the main body of plastic bottles, leaving a surplus of bottle caps. Don’t discard them! These small, colorful discs can be transformed into a truly unique and aesthetically pleasing lampshade. This project is a fantastic way to create distinctive ambient lighting for your room while making the most of every part of a recycled bottle. The resulting lampshade casts an intriguing light, adding a touch of personality and eco-chic flair to any space.
The concept is simple: collect a significant number of bottle caps, preferably of various colors or a cohesive palette, depending on your desired look. Then, using a strong, clear-drying adhesive, meticulously glue the caps together. You can arrange them in circular patterns, spirals, or interlocking designs, gradually building up layers until you form a cylindrical structure. This cylinder will serve as your new lampshade. Once the glue has thoroughly dried and the structure is stable, carefully replace your old lamp’s top or shade with your newly crafted bottle cap creation. Turn on the light and stare in awe as the light filters through the caps, creating mesmerizing patterns and an entertaining glow that will surely be a conversation starter. It’s a brilliant example of how small, overlooked items can combine to form something truly spectacular and functional.
13. Eco-Bricks: Sustainable Building Blocks
Eco-bricks represent one of the most impactful and community-oriented upcycling projects, tackling two significant waste problems simultaneously: plastic water bottles and various forms of soft plastic packaging. An eco-brick is essentially a plastic bottle tightly packed with clean, dry, non-recyclable plastic waste until it reaches a specific density and firmness. These dense, robust bottles then serve as reusable building blocks, offering an innovative solution for constructing various structures.
While you might not immediately know what to build with them yourself, there are numerous organizations, schools, and community projects worldwide that actively collect eco-bricks as donations. These initiatives utilize eco-bricks to construct furniture, garden beds, community buildings, play structures, and even full-scale homes, particularly in areas with limited access to conventional building materials. Creating eco-bricks is a meticulous process that requires patience, as the plastic waste must be packed extremely tightly to achieve the required density and strength. This effort, however, directly diverts significant amounts of plastic from landfills and incinerators, transforming problematic waste into valuable resources. Participating in eco-brick making is a powerful way to contribute to a circular economy, reduce environmental pollution, and support sustainable community development. It’s a project that extends beyond individual creativity, fostering a collective effort towards a greener future.
Thirsty for more recycling ideas for water plastic bottles? Check out this video by Thaitrick to learn more!
Embrace Creativity, Embrace Sustainability
Who would have thought that humble plastic water bottles could be transformed into such a diverse array of useful, decorative, and even artistic creations? From functional furniture and clever storage solutions to enchanting garden decor and impactful building blocks, the potential for upcycling is truly limitless. Each project we’ve explored is a testament to the power of imagination and the tangible benefits of sustainable practices. By choosing to repurpose these readily available materials, you not only reduce waste and lessen your environmental footprint but also cultivate a sense of resourcefulness and creativity within your home.
Embracing plastic bottle recycling and upcycling is more than just a craft; it’s a conscious decision to contribute to a healthier planet. It demonstrates that every individual action, no matter how small, can collectively lead to significant environmental improvements. So, gather your used plastic bottles, unleash your inner DIY enthusiast, and embark on a journey of creative transformation. You’ll be amazed at what you can achieve while making a positive impact on the world around you.
If you have other brilliant recycling ideas for water plastic bottles you feel like sharing, we’d love to hear them! Feel free to comment below and inspire our community!
UP NEXT:
- 13 Cool Recycling Projects With Glass Bottles | DIY Projects
- 10 Cute Recycle Soda Cans To DIY And Sell | DIY Projects
- 27 Easy DIY Projects For Teens Who Love To Craft
Calling all crafting DIYhards, DIY Projects needs YOU! Click here if you want to contribute for us.
Don’t forget to stay connected with us on Facebook, Twitter, and Instagram!