
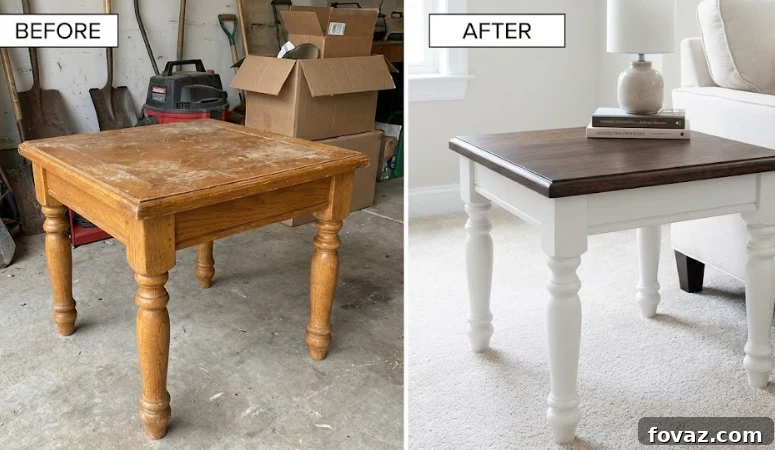
Are you looking to breathe new life into an old piece of furniture, transform a thrift store find, or restore a cherished family heirloom? Learning how to stain wood furniture is an immensely satisfying and eco-friendly way to achieve stunning results. This comprehensive guide will walk you through everything you need to know, from choosing the right products to mastering application techniques, ensuring your finished project looks professionally done.
Whether your vision is a dramatic, dark aesthetic or a bright, airy transformation, we’ll provide the expert blueprint to help you feel accomplished and skilled in your furniture restoration journey. Dive in to unlock the secrets of successful wood staining.
Stain vs. Paint: Which Is Better for Wood Furniture?
The fundamental decision between staining and painting wood furniture hinges on whether you wish to celebrate the natural beauty of the wood grain or completely conceal it. For pieces crafted from genuine wood, staining is often the superior choice. Not only is it generally more cost-effective, but wood stain also offers unparalleled durability, deeply penetrating the wood fibers rather than merely sitting on the surface. This inherent quality means stain is far less prone to chipping, peeling, or flaking over time, issues commonly associated with painted finishes.
If you’re working within a budget but aspire to a high-end, enduring finish that truly showcases the wood’s character, choosing to stain your furniture is undeniably your best bet. It’s an investment in longevity and aesthetic appeal that paint simply can’t match for natural wood.
- Durability on High-Touch Surfaces: Stain typically outlasts paint on frequently used furniture because it soaks into the wood, becoming part of the material. Paint, being a surface coating, is more susceptible to wear and tear.
- Protection Against Elements: While paint provides a thicker, more opaque barrier against moisture and UV rays, high-quality stains, especially when properly top-coated, offer excellent protection, enhancing the wood’s natural resistance while preventing chipping and peeling.
- Cost-Effectiveness: Staining projects are frequently more budget-friendly. They often require fewer coats, eliminate the need for expensive primers, and typically cover more square footage per can compared to paint.
- Aesthetic Appeal: Stains highlight the unique grain patterns and natural variations of the wood, creating a rich, organic look. Paint, conversely, provides a uniform color that covers these natural features, offering a different kind of aesthetic.
- Maintenance: Stained furniture tends to be easier to touch up if minor damage occurs, as the color is absorbed into the wood. Paint repairs can sometimes be more noticeable.
Choosing the Best Product to Stain Wood Furniture
Selecting the “best” wood stain for your project depends heavily on your specific needs, particularly your workspace ventilation and the timeline you have for completion. Understanding the differences between oil-based and water-based stains is crucial for a successful outcome.
Oil-based stains are frequently hailed as the preferred choice for interior wood staining, especially for beginners. They offer a remarkably rich, deep color and feature a longer “working time.” This extended drying period makes them more forgiving, allowing ample time to apply and wipe off excess without worrying about lap marks. However, they do come with a strong odor and require mineral spirits for cleanup. On the other hand, water-based stains are an excellent option for indoor projects where factors like low odor, quick drying times, and easy water cleanup are top priorities. When embarking on a furniture staining project, the initial step to success lies in choosing the right stain base.
Advantages and Disadvantages of Oil-Based Stain
- Pros: Delivers exceptional depth and richness of color, often enhancing the natural warmth of the wood. It generally penetrates deeper, resisting the tendency to raise the wood grain, which minimizes extra sanding.
- Cons: Characterized by a strong, lingering odor, necessitating good ventilation. Oil-based stains also have a longer dry time between coats and before a topcoat can be applied, often requiring 8-24 hours. Cleanup requires paint thinners or mineral spirits.
Advantages and Disadvantages of Water-Based Stain
- Pros: Environmentally friendlier due to lower VOCs (Volatile Organic Compounds) and a significantly reduced odor, making them ideal for indoor use. They dry much faster, allowing for quicker project completion, and cleanup is a breeze with just soap and water.
- Cons: Their rapid drying time can be a double-edged sword, potentially leading to visible “lap marks” if not applied swiftly and evenly. Water-based stains also have a tendency to “raise the grain” of the wood, resulting in a slightly rough or fuzzy surface that often requires an additional light sanding step (scuff sanding) between coats.
Can I Stain Wood Furniture Without Sanding?
While specialized products like gel stains sometimes claim to cover an existing finish without prior sanding, it is almost universally recommended against for optimal, long-lasting results. Sanding is an absolutely critical preliminary step when you stain wood furniture. Its primary purpose is to remove any old varnish, lacquer, wax, or other finish that acts as a protective shield, preventing the new stain from properly penetrating the wood pores.
Without adequate sanding, the stain will merely sit on top of the old finish rather than soaking into the wood fibers. This inevitably leads to an uneven, blotchy, and tacky mess that will never cure properly and will be highly susceptible to chipping and peeling. To successfully stain wood furniture, always start with thorough sanding. A light “scuff sand” with 220-grit sandpaper is often sufficient to create a proper “tooth” for the new stain to adhere to, ensuring deep penetration and a beautiful, consistent finish. Proper surface preparation is the cornerstone of any successful staining project.
- The Absolute Verdict: Always sand the surface before you stain wood furniture to ensure proper adhesion, even penetration, and a durable finish.
- Consequences of Skipping Sanding: If you omit the sanding step before staining, the pigment will inevitably sit on top of the old finish. This will result in an uneven, gummy, and tacky surface that never fully dries or cures. This finish will be prone to scratching, peeling, and will attract dust and debris.
Staining Techniques: Rag vs. Brush for Wood Furniture
The choice between applying wood stain with a rag or a brush is primarily determined by the furniture’s shape and the level of color control you wish to achieve. Each method has distinct advantages, and often, a combination of both provides the most professional, factory-smooth finish when you stain wood furniture.
- The Rag Method: This technique is ideal for large, flat surfaces such as tabletops, dresser tops, or cabinet doors. Rags allow for precise control over the amount of stain applied and facilitate an even wipe-on, wipe-off process. This method helps prevent pooling and allows you to build color intensity gradually by applying multiple thin coats. It’s excellent for achieving a consistent, streak-free look. Use lint-free cotton rags for the best results.
- The Brush Method: Brushes are indispensable for furniture with intricate details, carved sections, turned legs, or tight corners where a rag cannot effectively reach. A good quality natural-bristle brush (for oil-based stains) or synthetic brush (for water-based stains) allows for controlled application into these hard-to-reach areas. Ensure you apply the stain evenly and wipe off excess with a rag immediately, even in detailed areas, to prevent blotchiness or overly dark patches.
- The Professional Detail – Airbrushing: For advanced users seeking truly flawless results, especially in complex areas, a small airbrush can be a game-changer. Using a master airbrush to mist a very fine layer of color into crevices, carvings, or tight corners prevents the common issue of stain “pooling” that often ruins a professional aesthetic. This technique ensures an even, consistent finish across all surfaces, eliminating dark spots and ensuring a uniform appearance.
How To Stain Wood Furniture Darker: Achieving Rich, Deep Tones
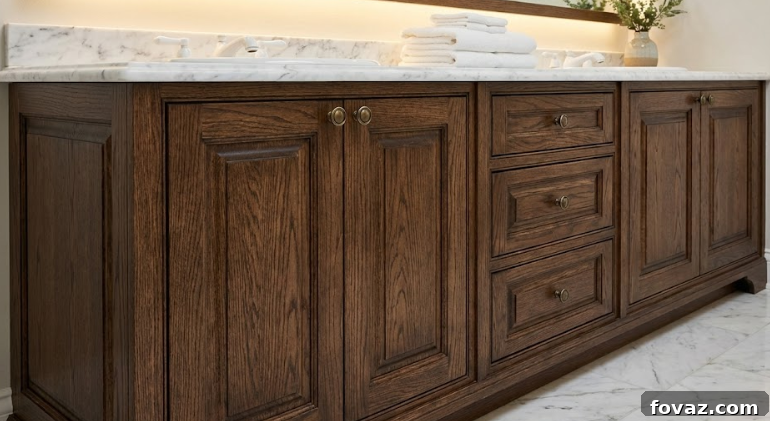
Creating a deep, moody, and luxurious wood tone is an art form that relies on meticulous preparation, careful application, and patient layering. To stain wood furniture darker and achieve maximum depth, you must meticulously sand to open the wood’s pores, apply a pre-stain conditioner to ensure even absorption, and precisely time your “wipe-off” process. Rushing any of these steps can compromise the richness and uniformity of your dark finish.
Step-by-Step Guide for a Darker Wood Stain:
- Thorough Preparation and Sanding: Begin by sanding the wood meticulously in the direction of the grain. Start with 120-grit sandpaper to remove any existing finish and surface imperfections, then progress to 150-grit, and finally, finish with 220-grit for a silky-smooth surface. This progression is crucial for opening the wood’s pores uniformly, allowing the stain to penetrate deeply and evenly. Thoroughly clean the surface to remove all dust particles before proceeding.
- Apply Pre-Stain Conditioner: This is a non-negotiable step, especially when working with porous woods like pine, maple, or birch, which are prone to blotchiness. Apply a pre-stain wood conditioner evenly to the entire surface according to the product instructions. This conditioner helps to seal off some of the more porous areas of the wood, ensuring the stain absorbs consistently and preventing patchy, uneven color.
- Stain Application – Go for Oil-Based: For maximum depth and a rich, saturated color, an oil-based stain is highly recommended. Stir the stain well before and during application. Apply an even coat of stain generously with a brush or rag, working in the direction of the wood grain. Ensure complete coverage across all surfaces.
- The Crucial Wait Time: For a significantly darker and deeper finish, allow the stain to penetrate the wood for 5 to 15 minutes. The longer the stain sits (up to the product’s recommended maximum), the darker and more intense the color will become. Always test on an inconspicuous area first to determine your preferred wait time.
- Proper Wipe-Off Technique: This step is critical. After the desired penetration time, use a clean, lint-free rag to wipe off all excess stain, again working in the direction of the wood grain. It is imperative to remove all surface residue. If excess stain is left on the surface, it will remain tacky, uneven, and will never fully cure, leading to a sticky, problematic finish.
- Optional Second Coat for Deeper Tone: If, after the first coat, you desire an even deeper, more profound tone, you can apply a second coat. However, ensure the first layer is completely dry according to the manufacturer’s instructions (often 8-24 hours) before applying the next. Follow the same application and wipe-off steps. Remember, subsequent coats add more pigment and depth, making the furniture darker.
How To Stain Wood Furniture Lighter: Brightening Your Space
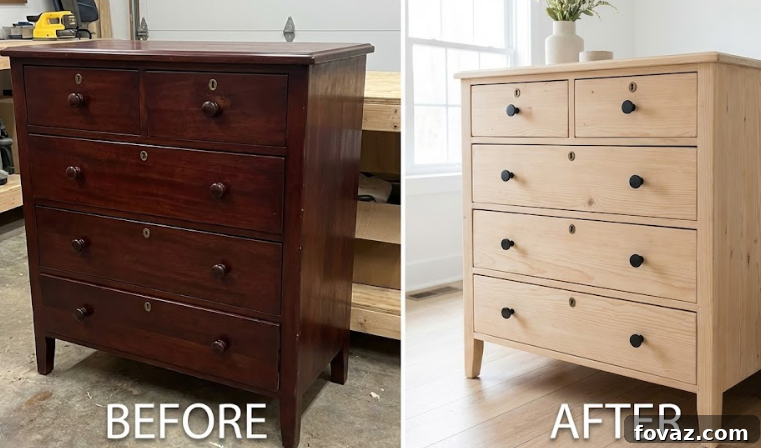
Lightening dark wood furniture represents a complete aesthetic reversal, aiming to create a bright, airy, and contemporary look. Unlike darkening, where you build layers, lightening requires a total “reset” of the wood’s surface. Because you cannot simply apply a light stain over a dark one and expect it to show through, you must completely remove the existing dark pigment and finish. This is achieved through aggressive stripping or heavy sanding, bringing the wood back to its raw, bare state before you apply a whitewash or pickling stain.
Step-by-Step Guide for a Lighter Wood Stain:
- Total Strip and Restore to Raw Wood: This is the most crucial step. You must remove every trace of old dark pigment, previous stains, and the original finish. This can be done through chemical strippers, heavy-grit sanding (starting with 60-80 grit and progressing to 120, then 220), or a combination of both. The goal is to expose the raw, natural wood underneath, creating a clean canvas for your lighter stain.
- Neutralize with Wood Bleach (Optional but Recommended): If, after stripping and sanding, the natural wood still possesses a dark or reddish undertone that you wish to eliminate, apply a two-part wood bleach. This product specifically targets and lightens the wood’s natural pigments, creating a more neutral “blank canvas” that will better accept lighter stains without their natural tones interfering. Always follow manufacturer instructions for safety and application.
- Apply Pickling or Whitewash Stain: Once the wood is raw, clean, and ideally neutralized, apply your chosen white or light gray water-based stain. Water-based stains are often preferred for lighter finishes due to their less ambering effect over time. Apply a thin, even coat, working quickly.
- Crucial Fast Wipe-Off for Clarity: Timing is incredibly critical for lighter stains. Unlike dark stains, where you let the pigment penetrate, with light stains, you often want to apply and immediately wipe off the excess within 1 to 3 minutes. This quick wipe-off prevents the stain from fully obscuring the grain, allowing the natural character of the wood to remain visible and avoiding a heavy, “painted” appearance.
- Master Airbrush Detailing for Evenness: To achieve a perfectly even tone without sacrificing the wood’s natural character, consider using an airbrush for the final touch. Mist a very thin, translucent layer of “white toner” (a diluted white stain or pigment) over the entire piece. This technique helps to unify the color and smooth out any subtle variations without hiding the beautiful wood grain, giving it a soft, bleached, or whitewashed professional finish.
What Happens If You Leave Wood Stain On Too Long?
One of the most common pitfalls when you stain wood furniture is allowing the stain to sit on the surface for an excessive duration before wiping off the excess. When this happens, the excess pigment begins to dry and harden on top of the wood, rather than fully penetrating it. The result is a thick, gummy, and sticky finish that will never properly cure or dry. This tacky layer is not only unpleasant to the touch but also attracts dust, lint, and debris, ruining the aesthetic and making the furniture difficult to use.
The fundamental issue is that stain is designed to soak into the wood fibers, with any unabsorbed pigment needing to be removed. Leftover “puddles” on the surface contain binders that, without full penetration, cannot harden correctly. If you encounter this frustrating issue when you stain wood furniture, don’t despair—it can often be fixed by “re-wetting” the affected surface to lift the stubborn excess pigment.
- The Fix for Tacky Stain: To rectify a gummy, improperly cured stain, apply a fresh, thin layer of the same stain or a rag dampened with mineral spirits (for oil-based stains) or denatured alcohol (for some water-based stains) directly over the tacky area. This will “re-wet” and reactivate the dried excess pigment. Immediately after re-wetting, firmly wipe off all of the liquefied excess with a clean, lint-free rag. You may need to repeat this process several times, using fresh rags, until the surface is smooth and no longer sticky.
Common Mistakes to Avoid When You Stain Wood Furniture
Many DIY furniture refinishing failures can be traced back to rushing the preparation phase, misunderstanding product instructions, or ignoring the natural properties of wood. When you take the time to learn and apply proper techniques, your furniture staining projects will consistently yield professional-looking results.
- Skipping or Insufficient Sanding: This is arguably the most critical mistake. Inadequate sanding leads to poor adhesion, uneven stain absorption, blotchiness, and a finish that easily peels or flakes off over time. Always prepare the surface thoroughly.
- Working in Direct Sunlight or Extreme Temperatures: Staining in direct sunlight or very hot conditions causes the stain to dry too quickly. This rapid drying can lead to permanent streaks, lap marks, and an inability for the stain to penetrate evenly, resulting in a splotchy finish. Work in a shaded, well-ventilated area with moderate temperatures.
- Ignoring the Wood Grain: Always sand and apply stain with the direction of the wood grain. Going against the grain can create visible scratches and an uneven appearance that becomes highlighted once the stain is applied.
- Not Wiping Off Excess Stain: As discussed, leaving excess stain on the surface leads to a sticky, gummy finish that never fully dries and is prone to peeling. Always wipe off thoroughly after the appropriate penetration time.
- Inadequate Cleaning: After sanding, failing to completely remove all dust particles, debris, or old finish residues will result in a gritty, uneven, and poorly adhering finish. Use a tack cloth or vacuum to ensure a pristine surface.
- Shaking the Stain Can: Instead of shaking, gently stir your stain thoroughly before and during use. Shaking introduces air bubbles, which can transfer to your project and create an uneven application.
- Using the Wrong Topcoat: The final protective layer is crucial. Using an incompatible topcoat (e.g., an oil-based poly over a water-based stain without proper dry time) or skipping it entirely will compromise the durability and longevity of your stained finish.
How Long Does Stained Wood Furniture Last?
The longevity of stained wood furniture is remarkably impressive when proper techniques and protection are employed. A meticulously applied and expertly sealed wood stain can easily last 10 to 20 years, or even longer, on interior furniture. The lifespan of your beautiful finish is almost entirely dependent on the application of a high-quality topcoat. Without this crucial protective layer of polyurethane, varnish, or wax, the underlying stain will be vulnerable to the elements and daily wear and tear.
Exposure to UV light will cause the color to fade, moisture can lead to unsightly water spots, and friction from daily use will gradually wear away the finish, exposing the bare wood underneath. To ensure your stained wood furniture stands the test of time and retains its beauty for decades, never, under any circumstances, skip the final protective topcoat. This sealing layer is what safeguards your hard work and preserves the enhanced aesthetics of the wood.
Are you now ready and inspired to stain wood furniture and impress others with your newfound skills and handmade creations? The possibilities are endless! Let us know which project you’re tackling first in the comments section below!
Frequently Asked Questions About Staining Wood Furniture
How long should wood stain sit before wiping off?
For interior wood furniture, stain should typically sit for 5 to 15 minutes to achieve a deep, rich color. This allows sufficient time for the pigment to penetrate the wood fibers. However, if you are applying water-based stains or aiming for a lighter tone, it’s crucial to wipe off the excess within 1 to 3 minutes to maintain the natural wood grain visibility and prevent a “painted” look. Leaving stain on for too long, especially excess surface stain, will result in a gummy, tacky finish that will not cure properly and will be problematic.
How do you fix a wood stain that turned out blotchy or uneven?
To address a blotchy or uneven finish, your best immediate course of action is often to apply a second, slightly darker coat of stain. This can help blend and uniform the inconsistent areas, making them less noticeable. Blotchiness is a very common staining mistake, frequently caused by skipping a pre-stain conditioner, especially on porous woods. For more severe unevenness, you may need to lightly sand the problematic area back down to raw wood. After sanding, re-apply a pre-stain conditioner (this time ensuring full coverage) before you apply the wood stain again. Patience and proper preparation are key to preventing this issue.
Do you need to sand between multiple coats of wood stain?
Generally, you do not need to sand between coats of wood stain, as the primary goal of stain is to penetrate and color the wood fibers, not to build a surface layer. Sanding can remove some of the previously applied pigment, which you want to avoid. However, there’s an important exception: if you are using a water-based stain, it often “raises the grain” of the wood, making the surface feel fuzzy or rough. In such cases, a very light “scuff sand” with 220-grit or finer sandpaper between coats can help knock down the raised fibers and maintain a smooth, professional feel without removing too much color. Always clean dust thoroughly after sanding.
What happens if you leave wood stain on too long without wiping?
If you leave wood stain on the surface for too long without wiping off the excess, the pigment and binders in the stain will begin to dry and cure on the surface instead of penetrating fully into the wood. This creates a thick, gummy, and tacky layer that will never fully harden or cure properly. This sticky residue will attract dust, lint, and other debris, making the furniture unpleasant to touch and impossible to use. Furthermore, this improperly cured layer will be prone to scratching, peeling, and flaking off over time. It is absolutely essential to always wipe off all excess stain to ensure proper penetration, even curing, and a durable finish.
Is it better to use a solid or semi-solid stain for wood furniture?
For interior wood furniture, it is almost always better to use a semi-solid or a penetrating transparent/translucent stain. These types of stains are designed to highlight and enhance the natural character and beautiful grain of the wood. They allow the wood’s unique patterns to show through, creating a rich, dimensional, and high-end aesthetic. Solid stains, on the other hand, behave much more like a thin paint. They sit on the surface and completely hide the wood’s natural beauty and grain. While solid stains have their place for exterior applications where full opacity and maximum UV protection are desired, for interior furniture where you want to celebrate the wood itself, semi-solid or translucent options are vastly preferred to achieve a professional and authentic look.