
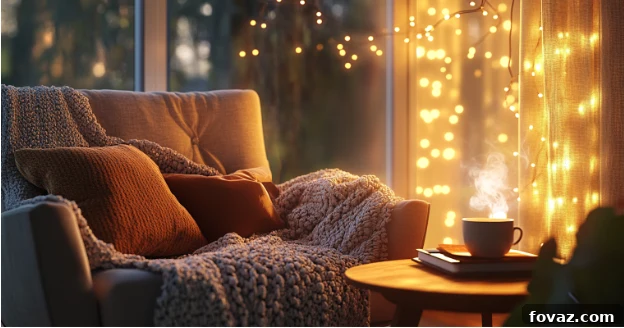
Transforming your living space doesn’t require extensive renovations or a bottomless budget. In fact, some of the most impactful changes can be achieved through simple, one-day home projects. These quick and rewarding updates not only enhance your home’s aesthetic appeal but also boost its functionality and imbue it with a fresh, personalized touch. Imagine the satisfaction of completing a significant home improvement task within hours, enjoying immediate results, and feeling a renewed sense of pride in your environment.
Whether your goal is to infuse a splash of vibrant color with an accent wall, create a serene retreat in a cozy reading nook, or simply streamline your daily routine with a more organized closet, these small home projects are designed to inspire action. They prove that with a little creativity and a few hours of dedicated effort, you can significantly elevate your residence’s charm and comfort. So, gather your tools and get ready to embark on a journey of quick transformations that promise lasting enjoyment.
Achieve Remarkable Home Transformations in a Single Day
Are you eager to infuse your home with renewed energy and style without committing to lengthy, disruptive renovations? These inspiring small home projects are specifically designed for rapid completion, allowing you to witness noticeable improvements in just one day. From budget-friendly makeovers that refresh worn-out surfaces to creative upgrades that inject personality into every corner, each idea offers a unique opportunity to enhance your living space. Dive into these achievable DIY ventures and discover how a focused effort can yield significant aesthetic and functional benefits, making your home a more inviting and enjoyable place to be.
Elevate Your Curb Appeal: Freshen Up Your Front Door
Your front door is the welcoming gateway to your home, a critical first impression that sets the tone for your entire residence. A simple, one-day refresh of this exterior element can dramatically boost your home’s curb appeal, making it more inviting and reflecting your personal style. This project is not just about aesthetics; a well-maintained door can also contribute to your home’s perceived value.
Steps to Expertly Update Your Front Door:
- Thoroughly Prepare the Surface: Begin by cleaning the door meticulously. Use a mild detergent and warm water to wash away all dirt, grime, and cobwebs. For any rough patches, chipped paint, or minor imperfections, lightly sand the surface with fine-grit sandpaper (around 120-220 grit). This ensures optimal adhesion for the new paint and a flawlessly smooth finish. Wipe down with a tack cloth to remove all dust.
- Select a Striking Color Palette: The color of your front door can speak volumes about your home’s character. Consider bold, inviting hues that complement your exterior siding or landscaping. Timeless choices include deep forest green for a natural, sophisticated look, fiery red to symbolize warmth and welcome, or a cheerful yellow for a burst of optimism. Alternatively, a classic navy blue or charcoal gray can offer a sleek, modern touch. Test swatches if unsure.
- Apply High-Quality Exterior Paint: Using a high-quality exterior-grade paint with a semi-gloss or satin finish is crucial for durability and weather resistance. For large, flat surfaces, a small foam roller provides smooth, even coverage, minimizing brush strokes. Use an angled paintbrush for precise work around panels, edges, and intricate details. Apply at least two thin coats, allowing adequate drying time between each, to achieve a rich, vibrant color and robust protection.
- Upgrade Your Hardware for a Polished Touch: Don’t underestimate the power of new hardware. Swapping out an old, tarnished doorknob or handle with a sleek, contemporary model in brushed nickel, matte black, or oil-rubbed bronze can instantly modernize the door’s appearance. Consider adding a stylish door knocker, a new house number, or a smart lock system for both aesthetic enhancement and improved security. This final detail ties the entire refresh together, creating a truly polished entryway.
To further enhance your refreshed front door, pair it with a vibrant, seasonal wreath that changes with the holidays or seasons, or a charming welcome mat that reflects your personality. For an extensive array of color inspirations and styling tips, explore the rich resources available at Better Homes & Gardens, where you can find countless ideas to make your entryway truly shine.
Unleash Your Creativity: Craft a Personalized Gallery Wall
A thoughtfully curated gallery wall is more than just a collection of frames; it’s a dynamic storytelling element that adds immense character, warmth, and personality to any room. This creative small home project allows you to transform a blank wall into a focal point, showcasing cherished memories, inspiring artwork, or unique decorative pieces. It’s an opportunity to express your individuality and make your space truly feel like home.
Steps to Design and Install Your Dream Gallery Wall:
- Gather and Curate Your Collection: Begin by gathering a diverse range of items that hold meaning or visual appeal. This could include framed photographs of family and friends, captivating artwork (prints, paintings, drawings), vintage postcards, children’s drawings, or even unique decorative pieces like small mirrors, woven wall hangings, or interesting typography art. Varying sizes, textures, and mediums will create a more engaging display.
- Strategically Plan the Layout on the Floor: Before putting any holes in your wall, arrange all your chosen pieces on the floor. Experiment with different configurations, playing with symmetry and asymmetry, varying frame sizes, and the spacing between items. Take photos of layouts you like to easily compare them. A good rule of thumb is to start with a central anchor piece and build outwards, ensuring a cohesive visual flow.
- Precisely Map It Out on the Wall: Once you’ve finalized your floor layout, it’s time to transfer it to the wall with precision. Cut out paper templates the exact size of each frame or item. Use painter’s tape to secure these templates on the wall in your desired arrangement. This allows you to visually adjust spacing, alignment, and overall composition without creating unnecessary holes. Step back frequently to assess the balance and make any final tweaks.
- Hang with Confidence and Care: With your layout perfected, carefully remove each paper template, marking the exact spot for your nail or hook. For heavier frames, use sturdy picture hangers. For a damage-free option, especially suitable for renters or those who like to frequently rearrange, high-quality Command strips or similar adhesive hooks work wonderfully. Ensure each piece is level using a small spirit level, and take your time to achieve a professional-looking display that brings joy and inspiration to your space.
Revitalize Your Culinary Hub: Revive Your Kitchen Cabinets
The kitchen is often considered the heart of the home, and its cabinets play a pivotal role in defining its style and atmosphere. Undertaking a cabinet refresh is one of the most impactful yet surprisingly budget-friendly small home projects you can complete in a single day. This transformation can dramatically modernize your entire kitchen, making it feel brighter, cleaner, and more current without the expense or disruption of a full remodel.
Steps to Expertly Refresh Your Kitchen Cabinets:
- Execute a Thorough and Deep Cleaning: Before any paint or primer can be applied, your cabinets must be impeccably clean. Kitchen cabinets notoriously accumulate grease and grime over time. Prepare a potent cleaning solution using a mixture of equal parts white vinegar and warm water, or a dedicated degreaser. Apply it generously, allowing it to sit for a few minutes, then scrub thoroughly with a sponge or soft brush. Rinse with clean water and allow the cabinets to dry completely to ensure a pristine surface for the next steps.
- Sand and Prime for a Flawless Foundation: Proper surface preparation is paramount for a professional-looking and durable finish. Lightly sand all cabinet surfaces with fine-grit sandpaper (180-220 grit) to create a “tooth” for the primer to adhere to. This step smooths out minor imperfections and ensures excellent paint adhesion. After sanding, wipe away all dust with a tack cloth. Next, apply one to two coats of a high-quality, stain-blocking primer. Primer seals the wood, prevents old stains from bleeding through, and creates a uniform base for your new paint color, ultimately extending the life of your cabinet finish.
- Select a Fresh, Enduring Color Scheme: The right color choice can utterly transform your kitchen’s ambiance. Consider timeless and versatile shades that will maintain their appeal for years. Classic white offers a bright, airy, and expansive feel, ideal for smaller kitchens. Sophisticated charcoal gray provides a modern, elegant backdrop, while a rich navy blue can inject a touch of drama and depth. For a softer look, explore light greens or warm beiges. Remember to choose cabinet-specific paint for its durability and resistance to everyday wear and tear.
- Install New, Contemporary Hardware: The hardware on your cabinets—knobs, pulls, and hinges—acts as the jewelry of your kitchen. Swapping out outdated or worn hardware with sleek, contemporary options can instantly elevate the entire space. Consider finishes like brushed brass for a touch of warmth, matte black for a modern industrial vibe, or polished chrome for a classic, clean aesthetic. This small detail provides a significant visual upgrade, tying your newly painted cabinets together with a fresh, cohesive look.
For an extra layer of flair and protection, consider adding peel-and-stick backsplash tiles. These are incredibly easy to install, offer a wide range of styles, and can instantly refresh the area between your countertops and upper cabinets, creating a cohesive and polished kitchen design.
Cultivate Serenity: Design a Relaxing Reading Spot
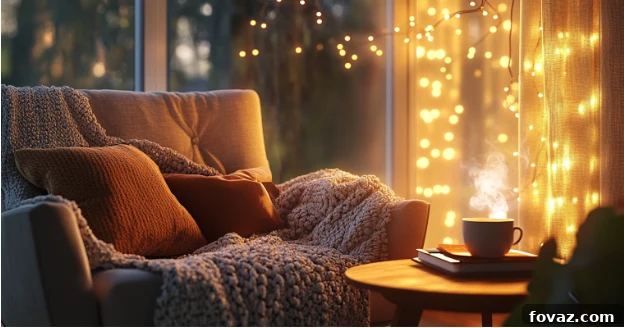
In our fast-paced world, creating a dedicated space for relaxation and contemplation is a true luxury. Transforming an unused corner of your home into a tranquil reading nook is a delightful small home project that adds not only charm and aesthetic appeal but also offers a much-needed personal retreat. This peaceful sanctuary provides an ideal spot to unwind, escape into a good book, or simply enjoy a quiet moment of reflection.
How to Artfully Style Your Personal Reading Space:
- Thoughtfully Choose Your Ideal Location: The foundation of a great reading nook is its location. Seek out a quiet, often overlooked corner of a room where you won’t be easily disturbed. An area near a window is often ideal, offering abundant natural light during the day and perhaps a pleasant view. Alternatively, a tucked-away alcove or the space under a staircase can provide a surprising amount of coziness and privacy.
- Prioritize Comfortable and Inviting Seating: Comfort is paramount for a reading nook. Opt for seating that encourages prolonged relaxation. A plush armchair with deep cushions and supportive armrests is a classic choice. For a more bohemian or flexible approach, consider oversized floor cushions, a comfortable beanbag chair, or even a small, cozy loveseat. Add throw pillows and a soft blanket for extra warmth and texture, making the space feel instantly more inviting.
- Incorporate Soft and Ambient Lighting: Good lighting is essential, both for reading comfort and to set a soothing mood. A floor lamp with an adjustable arm or a soft, diffused light source is perfect for task lighting. For added ambiance, string fairy lights around the perimeter of the nook, or place a few LED candles for a warm, flickering glow. Avoid harsh overhead lighting, favoring softer, warmer tones that promote relaxation.
- Include a Practical and Stylish Side Table: A small, accessible side table is a must-have for any functional reading nook. It provides a convenient surface to place your current book, a warm mug of tea or coffee, a pair of reading glasses, or small decorative items that bring you joy. Choose a table that complements your seating and adds to the overall aesthetic, whether it’s a sleek modern design, a rustic wooden stump, or a charming vintage piece.
To gather even more inspiration and discover creative ways to personalize your tranquil escape, visit the inspiring galleries and articles at House Beautiful, renowned for its exquisite interior design ideas.
Streamline Your Life: Organize Your Closet
A cluttered, disorganized closet can be a daily source of stress and wasted time. Undertaking a closet organization small home project is a remarkably impactful task that can be completed in just one day, yielding immediate benefits. Beyond merely tidying up, an organized closet promotes efficiency, reduces decision fatigue, and creates a more visually appealing space, transforming a chaotic mess into a peaceful sanctuary.
Steps to Systematically Simplify and Streamline Your Closet:
- Empty, Evaluate, and Thoughtfully Sort: The first and most crucial step is to completely empty your closet. Lay all items out on your bed or floor. Then, categorize everything into three distinct piles: “Keep” (items you frequently wear, fit well, and love), “Donate” (items in good condition that you no longer need or wear), and “Discard” (damaged, stained, or irreparable items). Be honest with yourself and let go of anything that doesn’t serve you.
- Strategically Install and Utilize Organizers: Once you’ve decluttered, it’s time to maximize your storage potential. Invest in smart organizing solutions tailored to your needs. Utilize shelf dividers to keep folded items neat, hanging shelves for sweaters or accessories, and clear bins or baskets for smaller items like socks, scarves, or seasonal clothing. Consider a shoe rack or clear shoe boxes to keep footwear off the floor and easily visible.
- Achieve Cohesion with Matched Hangers: While seemingly a small detail, switching to uniform hangers can make a tremendous visual difference in your closet. Flocked velvet hangers are excellent for preventing clothes from slipping and offer a slim profile, maximizing hanging space. Wooden hangers provide a more luxurious feel and are sturdy for heavier garments. Matching your hangers creates a neat, cohesive, and aesthetically pleasing look that instantly elevates the overall feel of your closet.
- Implement an Effective Labeling System: For ultimate organization and easy retrieval, especially for less frequently used or seasonal items, implement a labeling system. Use clear, descriptive labels on bins, baskets, or shelf fronts to identify contents at a glance. For instance, label bins for “Winter Scarves,” “Swimwear,” “Sporting Gear,” or “Memorabilia.” This proactive step ensures that everything has a designated home and prevents future clutter, making your organized closet a sustainable system.
Create an Outdoor Oasis: Add Ambiance to Your Backyard
Your outdoor spaces are an extension of your home, offering opportunities for relaxation, entertainment, and connection with nature. Enhancing your backyard’s ambiance is a delightful small home project that can be completed in a single day, transforming it into a serene escape or a lively gathering spot. With a focus on lighting and comfortable seating, you can create an inviting atmosphere that beckons you outdoors after dusk.
Steps to Gorgeously Enhance Your Backyard Ambiance:
- Gracefully Hang String Lights: String lights are an instant mood-setter, casting a warm, magical glow over any outdoor area. Drape bistro lights in crisscross patterns above a patio or deck, weave them through tree branches, or string them along fences and pergolas. For a festive touch, opt for larger Edison bulb strings. Solar-powered options offer convenience and energy efficiency, eliminating the need for outdoor outlets and complex wiring.
- Craft Enchanting DIY Lanterns: Personalize your outdoor lighting with simple, charming DIY lanterns. Collect mason jars and fill them with battery-operated fairy lights or small LED candles for a soft, diffused glow. These can be hung from shepherd’s hooks, placed on outdoor tables, or grouped together to create a whimsical display. For a rustic look, incorporate punched metal lanterns with LED candles. This adds a unique, handcrafted element to your outdoor decor.
- Thoughtfully Arrange Comfortable Seating Zones: Creating comfortable and inviting seating is key to making your backyard a true outdoor living space. Arrange existing patio furniture with plush outdoor cushions and soft, weather-resistant throw blankets for added coziness. If space allows, introduce a hammock for ultimate relaxation, or a couple of Adirondack chairs for a classic, laid-back vibe. Consider fire pits for warmth and s’mores, or small side tables to hold drinks and snacks, encouraging longer, more enjoyable evenings outdoors.
Inject Bold Personality: Paint a Striking Accent Wall
If you’re looking for a high-impact transformation with minimal effort, painting a bold accent wall is the ultimate small home project. This quick and visually dramatic update can instantly add depth, define zones, and infuse a room with personality, all within a single day. It’s an excellent way to introduce color and flair without committing to painting an entire room, making it perfect for renters or those who love to refresh their decor frequently.
Steps to Flawlessly Complete Your Dynamic Accent Wall:
- Strategically Pick Your Perfect Wall: The success of an accent wall lies in choosing the right one. Select a plain wall that naturally draws attention or serves as a focal point, such as the wall behind your bed, sofa, or dining table. Avoid walls with too many windows or doors, as these breaks can diminish the visual impact of the chosen color or pattern. A well-chosen wall will enhance the room’s architecture and design.
- Thoughtfully Select a Design and Color: This is where your creativity shines. Opt for a bold color that either contrasts dramatically with your existing walls or complements them in a deeper, richer tone. Beyond solid colors, consider stencils to add intricate patterns, geometric shapes for a modern edge, or horizontal stripes to widen a room. Research color psychology to choose a shade that evokes the desired mood for your space.
- Execute Flawless Paint Application: Proper preparation is key for a crisp, clean accent wall. Clean the wall surface, then use high-quality painter’s tape (like FrogTape) along all edges, trim, and ceilings to ensure sharp lines. Apply at least two thin coats of your chosen paint, allowing ample drying time between each. Use a roller for even coverage on large areas and a brush for precise work along taped edges. Remove the tape carefully while the paint is still slightly wet for the cleanest lines.
- Explore Peel-and-Stick Wallpaper for Versatility: For those seeking a less permanent option or wanting to experiment with intricate patterns and textures, peel-and-stick wallpaper is an excellent alternative. It’s incredibly user-friendly, allowing for easy application and removal without damaging the underlying wall, making it ideal for renters or those who enjoy frequent decor changes. Many designs mimic the look of traditional wallpaper, wood panels, or even brick, offering endless creative possibilities.
Transform Your Space and Spirit with Small Home Projects
In conclusion, the journey to a more beautiful and functional home doesn’t always necessitate grand gestures or significant financial outlay. As we’ve explored, a collection of thoughtfully chosen small home projects, each achievable in a single day, can collectively make an enormous difference in how your home looks, feels, and functions. From the immediate curb appeal boost offered by a refreshed front door to the serene escape created in a personalized reading nook, and the organizational harmony brought by a decluttered closet, these ideas are designed to be both simple in execution and profound in their impact.
Embracing these DIY home updates allows you to infuse your living space with renewed energy, reflecting your unique style and enhancing your daily life. They are not just tasks to check off a list, but opportunities to connect with your home, nurture your creativity, and enjoy the tangible rewards of your efforts. The satisfaction of a completed project, the joy of a more organized space, or the peace found in a newly designed sanctuary—these are the true dividends of investing a little time in these inspiring transformations.
What’s Your Next Project? Share Your DIY Adventures!
We’re eager to hear about your own experiences and triumphs! Have you embarked on any of these small home projects, or perhaps discovered another quick and impactful update? Share your tips, showcase your amazing results, or ask any questions you might have in the comments section below. Let’s build a community of enthusiastic DIYers and inspire each other to create homes that are not just lived in, but truly loved.
Frequently Asked Questions About One-Day Home Projects
Q1: Can I genuinely complete these home projects on a tight budget?
Absolutely! One of the greatest advantages of these small home projects is their affordability. Most require only basic materials and tools you might already own or can easily borrow. Focusing on paint, hardware updates, and creative repurposing minimizes costs. For instance, refreshing kitchen cabinets is significantly cheaper than replacing them, and creating a gallery wall often utilizes existing photos and frames. Smart shopping for supplies, like looking for sales on paint or hardware, can further reduce expenses.
Q2: Are these one-day projects suitable for beginners with limited DIY experience?
Definitely! Many of these projects are specifically chosen for their beginner-friendly nature. Tasks like organizing your closet, creating a gallery wall, or even freshening up a front door with paint require minimal specialized skills. The key is to follow the steps carefully, take your time, and not be afraid to learn as you go. Start with simpler tasks to build confidence, and you’ll be surprised at what you can accomplish.
Q3: How do I select the perfect color for my front door to enhance my home’s exterior?
Choosing the right front door color involves considering your home’s existing exterior palette (siding, brick, trim), your landscaping, and your personal style. Opt for a high-quality exterior-grade paint with a semi-gloss or satin finish for optimal durability and easy cleaning. For inspiration, look at your home from the street and consider what color would pop without clashing. Bold choices like deep blues, vibrant reds, or sophisticated greens often work well. You can also consult online tools or paint company apps that allow you to virtually “paint” your door to preview different colors.
Q4: What types of lighting options work best for enhancing ambiance in outdoor spaces?
For outdoor ambiance, the best lighting options are typically energy-efficient and weather-resistant. LED bistro or string lights are highly popular for their warm glow and versatility, ideal for draping across patios or pergolas. Solar-powered lanterns and pathway lights offer an eco-friendly and convenient solution, as they don’t require external wiring. LED candles inside decorative lanterns or mason jars create a charming, flickering effect without the fire hazard. Always ensure any electrical lighting is rated for outdoor use to ensure safety and longevity.
Q5: Is it possible to update my living space effectively without making any permanent changes?
Absolutely! Many impactful updates can be achieved without permanent alterations, making them perfect for renters or those who frequently like to change their decor. Options include using peel-and-stick wallpaper or wall decals for accent walls, hanging gallery walls with damage-free Command strips, utilizing temporary window films for privacy or decor, and investing in versatile furniture pieces that can be easily moved or repurposed. Even simple styling with new textiles, plants, and accessories can dramatically refresh a space without any long-term commitments.