
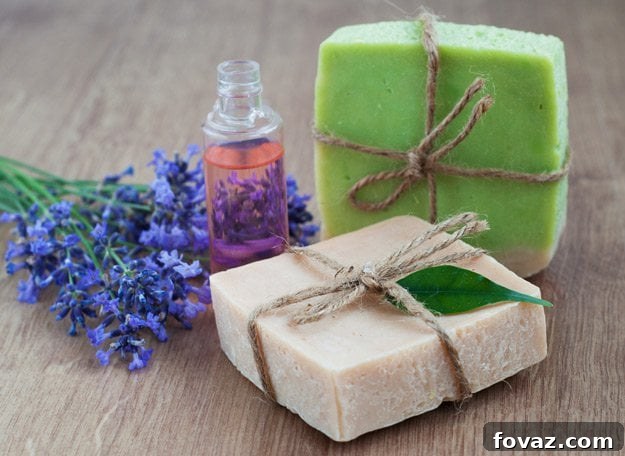
Want to unlock the secrets of creating your own luxurious, natural skincare? Dive into the rewarding world of DIY, where you learn exactly how to make soap from scratch. This comprehensive guide will walk you through the essential basics, empowering you to craft beautifully scented bar soaps that nourish your skin and delight your senses. Say goodbye to mass-produced, chemical-laden products and embrace the purity of homemade.
Mastering the Art of Homemade Soap: Your Ultimate Guide
There’s an undeniable charm and profound satisfaction in creating products with your own hands, especially when it comes to something as fundamental as soap. For enthusiasts of natural living and sustainable practices, homemade items are not just a hobby; they’re a lifestyle choice that guarantees quality, purity, and incredible value. My journey into DIY products has recently led me to the captivating craft of soap making, particularly the creation of custom-scented bar soaps. The ability to control every ingredient, from the base oils to the aromatic essential oils, is truly exhilarating. It allows for endless customization, ensuring that every bar of soap is perfectly tailored to your preferences and skin needs. If you’re eager to embark on this creative and practical adventure and learn how to make your very own exquisite bar soap, you’ve come to the right place. This detailed guide is designed to make the process accessible and enjoyable, transforming you into a confident soap maker in no time.
We extend our sincere gratitude to Fix.com for providing foundational insights that inspired parts of this comprehensive tutorial. Their dedication to practical DIY information is truly commendable.
Soap Making Basics: Crafting Your Own Scented Bar Soap
Soap making, specifically using the cold process method, involves a chemical reaction called saponification, where oils and a lye solution combine to create soap. While it may sound complex, with careful preparation and attention to detail, it’s a remarkably straightforward and incredibly fulfilling process. This guide focuses on equipping you with the knowledge and steps needed to produce a high-quality, scented bar soap that you’ll be proud to use and share. Before we dive into the fun part, remember that safety is paramount when working with lye, so always prioritize protective measures.
Soap Making Preparation: Gathering Your Essentials
Successful soap making begins with meticulous preparation. Having all your ingredients, materials, and equipment ready and organized will ensure a smooth and safe crafting experience. Pay close attention to the specific types of oils and equipment recommended, as they play a crucial role in the final quality of your soap.
Key Ingredients for Your First Batch:
- 2/3 cup Coconut Oil: Renowned for its superb cleansing properties and ability to produce large, fluffy bubbles. Coconut oil contributes significantly to the hardness of your finished soap bar, making it long-lasting and effective.
- 2/3 cup Olive Oil: A staple in traditional soap making, olive oil is deeply moisturizing and creates a very mild, conditioning bar. It contributes to a rich, creamy lather and is particularly beneficial for sensitive skin.
- 2/3 cup Palm Oil: Often used in conjunction with coconut and olive oils, palm oil helps to create a harder, more stable bar of soap with a rich, dense lather. It balances the properties of the other oils, ensuring a well-rounded final product. Ensure you source sustainable palm oil if possible.
- 1/4 cup Lye (Sodium Hydroxide): This is the crucial chemical component that reacts with the oils to create soap. Lye is highly caustic, so extreme caution and proper safety gear are absolutely essential when handling it. Never substitute lye with anything else, as it is indispensable for true soap creation.
- 3/4 cup Water: The liquid medium used to dissolve the lye. Distilled water is often preferred to avoid introducing impurities that could affect the soap-making process or the final product.
- Essential Oil of Your Choice: This is where you infuse your personality into the soap! Essential oils provide natural fragrances and often offer additional therapeutic benefits. Choose an oil that resonates with your desired scent profile and skin type.
Essential Materials for a Smooth Process:
- Rubber Gloves and Safety Glasses: Non-negotiable safety items. These protect your hands and eyes from the caustic lye solution, which can cause severe burns. Always wear them from the moment you start handling lye until the soap is safely in its mold.
- Mold (or Container): A silicone mold or a sturdy plastic container lined with freezer paper or lightly oiled will give your soap its shape. Silicone molds are particularly convenient for easy removal, while lined cardboard boxes can also work. Ensure it’s heat-resistant and durable.
- Spoons and Spatulas: Dedicated utensils for stirring and scraping. Stainless steel or heat-resistant plastic are ideal. Avoid using aluminum, as it reacts negatively with lye.
- Heat-resistant Glass Bowls: At least two are needed: one for mixing the lye solution and another for combining a portion of the oils. Borosilicate glass (like Pyrex) is excellent due to its thermal shock resistance.
- Knife: A sharp knife for carefully slicing your cured soap into individual bars.
- Newspaper or Protective Covering: Spread generously over your work surface to protect against spills and make cleanup much easier.
- Pot Holders or Oven Mitts: To handle hot pots and bowls safely, especially when working with melted oils and the exothermic lye solution.
- Plastic Wrap: Used to cover your soap mold after pouring to help retain heat and promote the gelling process.
- Kitchen Towel: To insulate your molded soap, helping it maintain a consistent temperature for optimal saponification.
Specialized Equipment for Precision:
- Stainless Steel Pan: A medium-sized pan for melting and heating your base oils. The “stainless steel” aspect is crucial, as copper and aluminum can react dangerously with lye and ruin your batch.
- 2 Stainless Steel Thermometers (Candy Thermometers Work Well): Essential for accurately monitoring the temperatures of both your oil mixture and your lye solution. Maintaining specific temperature ranges is critical for successful saponification.
- Hand Blender (Immersion Blender): This tool is a game-changer for soap makers. It significantly speeds up the emulsification process, ensuring your lye solution and oils combine thoroughly to reach “trace” much faster than hand stirring.
- Stove or Hot Plate: For gently heating your oils to the required temperature.
Soap Making 101: Your Step-by-Step Guide to Crafting Bar Soap
Now that your workspace is organized and all your essentials are at hand, let’s dive into the fascinating process of making your own scented bar soap. Remember to follow each step carefully and prioritize safety throughout.
Step 1: Prioritize Safety and Prepare Your Workspace
Before anything else, lay down a generous layer of newspaper or a protective covering over your entire work area. This safeguards your surfaces from spills and simplifies cleanup. Critically, put on your rubber gloves and safety glasses. Lye is a caustic chemical, and these protective items are your first line of defense against potential splashes or contact. Ensure your workspace is well-ventilated, ideally near an open window or with a fan running, to disperse any fumes from the lye solution.
Step 2: Prepare and Melt Solid Oils
Measure out your solid oils (coconut oil and palm oil in this recipe). Place them into your stainless steel pan. Gently heat the pan on your stove over low to medium heat until all the solid oils have fully melted and become a clear liquid. Keep an eye on the temperature; you’re aiming for a consistent heat that will later be matched with your lye solution.
Step 3: Carefully Prepare the Lye Solution
In one of your heat-resistant glass bowls, pour the measured water first. Then, *slowly* and carefully add the lye to the water, stirring gently with a dedicated spoon until the lye dissolves. Remember: always add lye to water, never water to lye, as adding water to lye can cause a dangerous volcanic reaction. As the lye dissolves, it will produce heat and release fumes. This is a highly exothermic reaction. Be extremely careful: this chemical is very toxic if inhaled or touches skin. Maintain good ventilation, avoid leaning over the bowl, and keep children and pets far away from the work area. Use one of your thermometers to monitor the temperature of this solution; it will get very hot. Allow it to cool down to a temperature range similar to your oils, typically between 100°F and 120°F (38°C to 49°C).
Step 4: Combine Liquid and Melted Solid Oils
Once your solid oils are completely melted, add your liquid olive oil to the same stainless steel pan. Stir the mixture thoroughly to ensure all oils are well combined and heated uniformly. Use your second thermometer to check the temperature of your oil mixture, aiming for the same 100°F to 120°F (38°C to 49°C) range as your cooling lye solution. It is crucial that the oil mixture and lye solution are within 10 degrees of each other for optimal saponification.
Step 5: Achieve “Trace” with Blending
When both your oil mixture and lye solution are within the desired temperature range and close to each other, it’s time to combine them. Carefully and slowly pour the lye solution into the oil mixture. Using your hand blender, begin to mix the solution. Blend in short bursts, moving the blender head around the bottom of the pan to ensure even mixing. Blend for at least 5 minutes, or until the mixture thickens and reaches “trace.” Trace is the point where the oils and lye solution have emulsified and are beginning to saponify. It’s identifiable when you lift the blender and a ribbon of the mixture leaves a temporary trail on the surface before sinking back in, much like thin pudding or custard. This stage is critical; do not proceed until trace is achieved.
Step 6: Incorporate Essential Oils and Additives
Once your mixture has reached a light trace, it’s time for customization! Add your chosen essential oils for fragrance. You can also mix in herbs, natural colorants, or exfoliants at this stage if desired. Stir them in thoroughly by hand or with a quick pulse of the hand blender to ensure they are evenly distributed throughout the soap batter. Be mindful that some essential oils can accelerate trace, so work relatively quickly once added.
Step 7: Pour the Mixture into Your Mold
Carefully pour the traced soap mixture into your prepared mold. Gently tap the mold on your work surface a few times to release any trapped air bubbles, ensuring a smooth, uniform bar. Avoid overfilling the mold.
Step 8: Insulate and Allow for Initial Saponification
Cover the mold loosely with plastic wrap, then wrap it with a kitchen towel or blanket. This insulation helps to keep the heat generated by the ongoing saponification process trapped, encouraging the soap to go through a “gel phase.” The gel phase results in a harder, more translucent bar. Let your soap sit undisturbed for at least 24 hours (or up to 48 hours for a harder bar) in a safe, room-temperature location.
Step 9: Unmold and Slice Your Soap
After 24-48 hours, your soap should be firm enough to remove from the mold. Gently unmold it, taking care not to damage the soft soap. Place the block of soap on a clean, flat surface and use a sharp knife to carefully slice it into individual bars of your desired size. Wipe your knife clean between cuts for a smoother finish.
Step 10: The Essential Curing Process
This is a vital, often overlooked step for truly exceptional homemade soap. Arrange your freshly cut soap bars on a drying rack (like a baker’s rack or cooling rack) in a well-ventilated area, away from direct sunlight and excessive humidity. Allow your soap to cure for a minimum of 4 to 6 weeks. During this curing period, excess water evaporates, leading to a harder, longer-lasting bar with a milder lather. The saponification process also fully completes, ensuring a skin-friendly, stable product. Flip the bars occasionally to ensure even air exposure on all sides. Patience during curing is rewarded with superior soap!
Choosing Your Signature Scent: A Guide to Essential Oils for Soap
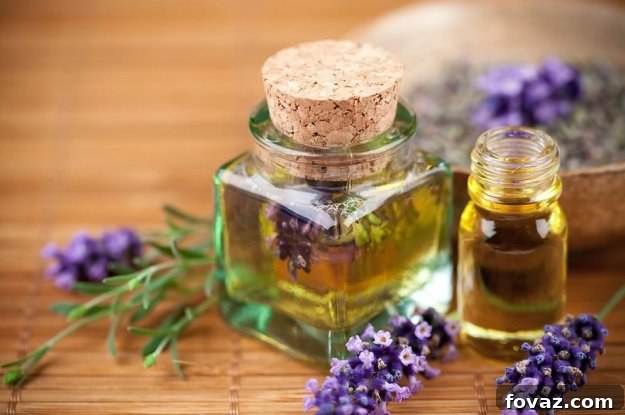
One of the most exciting aspects of making your own soap is customizing the scent and beneficial properties with essential oils. Each oil offers unique characteristics that can enhance your bathing experience and cater to specific skin needs. Here’s a deeper look into some popular choices:
Carrot Seed Essential Oil: A powerhouse for skin rejuvenation. This oil is highly valued for its ability to help fade scars, improve skin tone, and promote a more youthful appearance, making it excellent for mature or damaged skin.
Frankincense Essential Oil: Revered for centuries, frankincense offers potent antibacterial and anti-inflammatory properties. It can soothe irritated skin and promote overall skin health, lending a grounding and meditative aroma.
Geranium Essential Oil: Known for its balancing qualities, geranium oil helps regulate oil production in the skin, making it beneficial for both oily and dry complexions. It can also assist in reducing the frequency and severity of acne breakouts.
Lavender Essential Oil: Perhaps the most popular and versatile essential oil. Lavender is celebrated for its calming and relaxing properties, making it perfect for an evening soap. It also offers mild antiseptic and anti-inflammatory benefits, gentle enough for most skin types.
Lemon Essential Oil: A wonderfully uplifting and clarifying oil. Lemon essential oil is a natural astringent, helping to reduce the appearance of pores and brighten the complexion. Its refreshing scent invigorates the senses.
Neroli Essential Oil: Exquisite and delicate, neroli is derived from orange blossoms. It’s particularly beneficial for sensitive, mature, and oily skin types. Neroli is also lauded for its potential in stretch mark prevention and healing, offering a truly luxurious touch.
Patchouli Essential Oil: With its distinct earthy and musky aroma, patchouli promotes new cell growth and can help smooth the appearance of fine lines and wrinkles. It’s a grounding oil often used in regenerative skincare formulations.
Tea Tree Essential Oil: A powerful natural antiseptic, tea tree oil’s antibacterial properties make it an excellent choice for protecting skin from acne-causing bacteria. It’s a go-to for clarifying and purifying skin.
Ylang Ylang Essential Oil: This exotic floral oil is excellent for balancing skin’s oil production, which can help minimize breakouts and improve overall skin texture. Its rich, sweet aroma is both uplifting and sensual.
Experiment with single oils or create your own unique blends to craft a bar of soap that not only cleanses but also offers a bespoke aromatherapy experience tailored to your daily needs.
Still need a little extra guidance? We highly recommend checking out this comprehensive step-by-step tutorial with visuals from Pioneer Settler, which can provide additional clarity and visual aid through each stage of the soap-making process!
How to Make Soap From Scratch https://t.co/0u5yXdfToX pic.twitter.com/kWGrUmqYZo
— Pioneer Settler (@PioneerSettler) March 28, 2016
Does this comprehensive guide inspire you to try making your own batch of artisanal soap? We’d love to hear about your experiences, challenges, and successes. Share your thoughts, tips, and favorite essential oil blends with us below in the comments section!
For more incredible DIY ideas, craft news, and home project inspiration, be sure to follow us on our social media channels! Connect with our vibrant community on Facebook, Twitter, Pinterest and Instagram! We’re always sharing new ways to enhance your home and lifestyle through creative projects.