
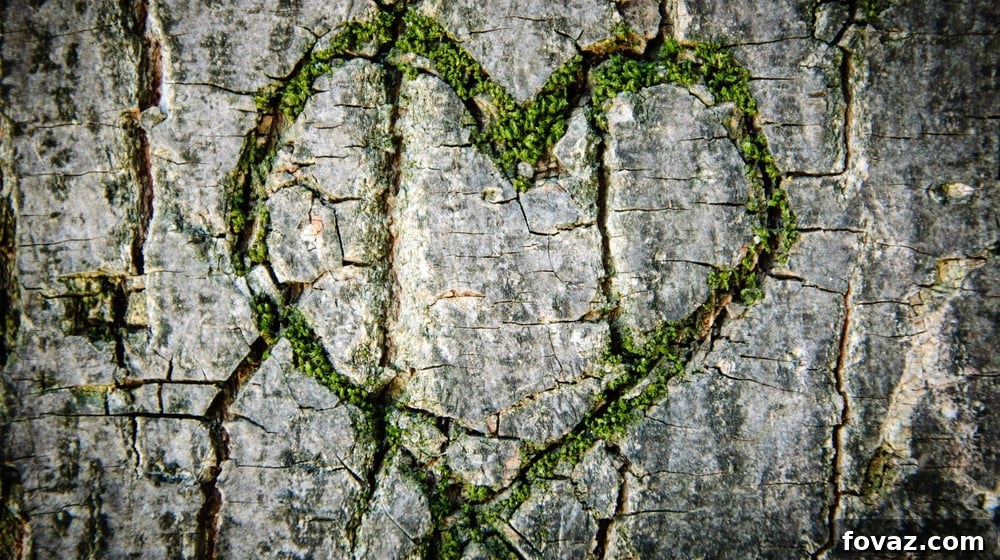
In an era defined by growing environmental consciousness, a revolutionary art form has emerged, captivating artists and eco-enthusiasts alike: moss graffiti. This innovative approach to street art, also known as eco-graffiti or green graffiti, transforms public and private spaces with living, breathing murals. Far from traditional spray paint, which often contains harmful chemicals and aerosols, moss graffiti offers a genuinely eco-friendly alternative. It’s not just visually stunning; its soft, velvety texture invites touch, creating a sensory experience that synthetic paints simply cannot replicate. This sustainable art form is gaining significant traction, proving that creativity and ecological responsibility can beautifully intertwine, making it perfect for unique garden designs, urban greening projects, or simply adding a touch of natural artistry to your surroundings.
The allure of moss graffiti lies in its simplicity and profound impact. Imagine transforming a drab wall into a vibrant canvas of natural greenery, an evolving masterpiece that changes with the seasons and thrives on moisture. It’s a powerful statement against pollution and a celebration of nature’s resilience, offering a non-toxic, biodegradable, and utterly charming way to express artistic vision. If you’re eager to dive into the world of sustainable art and create your own living masterpiece, you’ve come to the right place. This guide will walk you through the brilliant recipe for making your very own moss graffiti paint, ensuring a fun, exciting, and ultimately gratifying DIY project. Get ready to choose a perfect spot, unleash your creativity, and embark on one of the coolest and greenest street art projects imaginable!
Embrace Green Art: Your Guide to DIY Moss Graffiti
The concept of moss graffiti is elegantly simple: blend live moss with a nutrient-rich, adhesive liquid to create a “paint” that can be applied to various surfaces. Once applied, with the right care, the moss continues to grow, effectively becoming part of the surface itself. This living art form challenges conventional notions of graffiti, replacing illicit and often damaging acts with acts of natural beautification. It’s a conversation starter, a natural air purifier (albeit on a small scale), and a testament to the power of biomimicry in design and art. Whether you call it green graffiti, eco-graffiti, or bio-graffiti, its message is clear: art can be alive, beautiful, and utterly sustainable.
Why Choose Moss Graffiti? The Benefits of Living Art
Beyond its aesthetic charm, moss graffiti offers a multitude of benefits that make it an increasingly popular choice for artists and environmentalists:
- Environmental Friendliness: Perhaps the most significant advantage is its non-toxic nature. Unlike traditional spray paints that release volatile organic compounds (VOCs) and aerosols harmful to the environment and human health, moss paint uses natural ingredients. It’s entirely biodegradable and contributes to local ecosystems by adding greenery.
- Aesthetic Appeal: Moss creates a unique, organic texture and a vibrant green hue that changes with moisture and light. It offers a soft, natural contrast to harsh urban landscapes, transforming sterile walls into lush, living tapestries. The tactile quality of moss is also incomparable, inviting viewers to interact with the art on a deeper, sensory level.
- Sustainable and Regenerative: This art form utilizes living organisms that can regenerate and grow. It’s a sustainable practice that celebrates natural processes rather than consuming finite resources or creating waste. With proper care, a moss graffiti piece can thrive for years, evolving and adapting to its environment.
- Creative Versatility: Moss graffiti opens up a world of creative possibilities. From intricate patterns and detailed lettering to expansive murals, the only limit is your imagination. It encourages artists to think differently about their medium and the spaces they interact with.
- Accessibility and Affordability: The materials required for moss graffiti are relatively inexpensive and easy to source. Most ingredients can be found in your kitchen or garden, making it an accessible DIY project for almost anyone, regardless of artistic experience.
- Natural Air Purification: While not a large-scale solution, moss, like all plants, performs photosynthesis, absorbing carbon dioxide and releasing oxygen. Incorporating living greenery into urban environments contributes, even minimally, to improving local air quality.
Before You Begin: Essential Considerations for Your Project
Before you dive into the blending and painting, a few crucial considerations will ensure your moss graffiti project is successful, responsible, and long-lasting:
Legality and Ethics
While moss graffiti is eco-friendly, it’s essential to remember that applying any artwork to property without permission is considered vandalism. Always seek consent from property owners before creating moss art on public or private walls. For personal projects, your own garden walls, fences, or planters are ideal canvases. Prioritizing legal and ethical practices ensures that this beautiful art form maintains its positive reputation.
Location Selection: The Key to Moss Growth
Moss thrives in specific conditions. Choosing the right spot is paramount for the success and longevity of your living art:
- Shade and Moisture: Moss loves damp, shady environments. Walls that receive indirect sunlight or are consistently moist are perfect. North-facing walls, areas under eaves, or spots shaded by trees are often ideal. Avoid direct, intense sunlight, as it can quickly dry out and kill the moss.
- Surface Type: Porous, rough surfaces like concrete, brick, unpainted wood, or stone are best. These textures provide a good grip for the moss mixture and retain moisture, aiding in establishment and growth. Smooth, non-porous surfaces like glass or highly sealed metal are less suitable.
- Protection: Consider areas that are somewhat protected from heavy foot traffic or harsh weather conditions, which could damage delicate new growth.
Moss Types and Sourcing
Not all moss is created equal. While many types will work, certain varieties are more robust and adaptable. You can typically source moss from your own garden, local parks (ethically, taking only small patches), or even garden centers. Look for vibrant, green, healthy moss. If collecting, try to get a mix of different types to see what thrives best in your chosen location. Remember to gather a generous amount – more than you think you’ll need.
Design Planning
Even though it’s natural art, a little planning goes a long way. Sketch your design on paper first. Consider using stencils for intricate patterns or lettering. This preparation will help you apply the moss paint accurately and efficiently, ensuring your vision comes to life beautifully.
The Art of Green: Crafting Your Own Moss Paint
Now, let’s gather your materials and dive into the brilliant recipe for making your very own moss graffiti paint. This process is fun, hands-on, and the foundation for your living masterpiece.
Supplies You’ll Need:
- Live Moss: Approximately 2-3 cups, collected from shady, damp areas. Ensure it’s healthy and vibrant. This is the living pigment of your artwork.
- Buttermilk or Plain Yogurt: 2 cups. These act as a nutrient source and a natural adhesive, providing food and a binding agent for the moss spores to cling to the surface.
- Water: 1.5 – 2 cups. Used to achieve the desired paint-like consistency.
- Sugar (optional, but recommended): 1/2 tablespoon. Sugar acts as an additional nutrient source, further encouraging moss growth.
- Baby Diaper or Water Gel (optional): The absorbent material (sodium polyacrylate) from 1-2 baby diapers (soaked and squeezed out) or a tablespoon of water retention gel. This helps the mixture retain moisture, crucial for initial moss establishment, especially in drier climates.
- Blender: A sturdy blender is essential for achieving a smooth, paint-like consistency.
- Measuring Cups and Spoons: For accurate ingredient ratios.
- Paint Brushes: Various sizes for applying your design, from broad strokes to fine details.
- Spray Bottle: For misting your moss graffiti after application.
Step-by-Step Instructions: Creating Your Moss Graffiti “Paint”
Step 1: Prepare Your Materials
Begin by gathering all your supplies. Wash your moss gently to remove any loose soil, debris, or insects. Breaking it into smaller, manageable pieces will make the blending process easier and ensure a smoother mixture.
Step 2: The Nourishing Base
Pour 2 cups of buttermilk or plain yogurt into your blender. These dairy products contain lactic acid and nutrients that are beneficial for moss growth, providing a rich, organic environment for it to thrive. They also serve as an excellent natural binder.
Step 3: Introduce the Moss
Add the prepared moss pieces into the blender with the buttermilk/yogurt. If using, now is also the time to add the sugar and the water gel/diaper material. The water gel is particularly useful in arid conditions as it dramatically boosts moisture retention.
Step 4: Blend for Perfection
Begin blending the mixture on a low setting, gradually increasing the speed. Your goal is to achieve a consistency similar to a thick milkshake or a creamy paint. It should be smooth enough to apply with a brush but thick enough not to drip excessively. Here’s a crucial tip: If the mixture seems too runny and you fear it will drip, you can add a small amount of corn syrup, a spoonful at a time, until the desired, non-drip consistency is reached. Corn syrup acts as an additional thickener and adhesive. Remember to “whizz around” but do not liquefy the mixture completely – the moss cells must remain intact to ensure future growth. Over-blending can damage the living cells, hindering your project’s success. Once blended, your living paint is ready!
Bringing Your Art to Life: Application and Cultivation
Step 5: Choose Your Canvas and Apply Your Art
With your moss paint ready, it’s time to choose your ideal spot – remembering our earlier discussion on legality and optimal growth conditions. Clean the surface thoroughly to ensure good adhesion. Using your paintbrushes, carefully apply your moss mixture to create your desired design. Whether freehand or using stencils, work methodically, ensuring an even, generous coating. Don’t be shy with the paint; a thicker application will provide a better foundation for robust moss growth.
Step 6: Nurturing Your Living Masterpiece
This is where patience and consistent care come into play. Immediately after application, gently mist your moss graffiti with water using a spray bottle. The key to successful moss growth is consistent moisture. Depending on your climate, you may need to mist your artwork daily, especially during dry spells, or every few days. The surface should remain damp, but not waterlogged. The original tip holds true: Too much direct sun can dry it out quickly. If your moss begins to dry out, it might turn brown or yellow; consistent misting can often revive it.
Growth timelines vary significantly based on climate, moss type, and surface conditions. It can take anywhere from a few weeks to several months for the moss to fully establish and show significant growth. Continue to mist regularly, and periodically check the progress of your moss. If patches seem sparse, you can reapply more moss paint to encourage thicker growth. With a little patience and dedicated care, you will soon have your very own moss graffiti masterpiece, a vibrant testament to the beauty of green art! Welcome to the truly beautiful and sustainable world of living graffiti.
Tips for Success and Advanced Techniques
- Stenciling for Precision: For complex designs or text, create stencils from cardboard or plastic. Secure the stencil to your chosen surface before applying the moss paint, ensuring crisp edges and accurate replication of your design.
- Layering for Dimension: Don’t be afraid to apply multiple layers of moss paint, especially in areas where you want a richer, more textural effect. Let each layer dry slightly before adding the next.
- Seasonal Considerations: The best time to apply moss graffiti is during cooler, wetter months (spring or autumn), as these conditions are most conducive to moss establishment and growth.
- Troubleshooting Common Issues: If your moss isn’t growing, re-evaluate its location. Is it getting enough shade and moisture? Is the surface too smooth? You might need to adjust your watering schedule or even relocate your project if conditions are unsuitable.
- Experiment with Moss Varieties: Different moss species have varying growth habits and tolerances. Experimenting with local mosses can help you discover which types thrive best in your specific environment.
Moss graffiti offers a unique blend of art, nature, and environmental consciousness. It’s a testament to how simple, sustainable practices can lead to profoundly beautiful and impactful creations. This DIY project isn’t just about painting a wall; it’s about fostering life, connecting with nature, and making a positive statement in your community or personal space. We hope you’ve enjoyed learning how to craft your own living art.
Here’s a video tutorial that provides a visual guide on how to make this cool moss graffiti from Sick Science!:
Did you enjoy our cool DIY project on moss graffiti? We’d love to hear your thoughts and see your creations! Let us know in the comments section below what your experience was like, or if you have any additional tips on how to cultivate amazing green graffiti. Do you have any other craft projects you’d like to share with our community? Share it with us and we’ll be thrilled to give it a try. We are passionate about cool DIY projects, from craft creations and home decor ideas to upcycling challenges, delicious recipes, and helpful tutorials – anything you can do yourself! Our mission is to inspire people to connect with their creative side and realize the endless possibilities of self-made endeavors. We believe in building a vibrant community of DIY enthusiasts where every project is just a click away. Stay connected with us on Facebook, Twitter, Pinterest and Instagram for daily inspiration!
Want more cool DIY projects to try? Check out more amazing DIY ideas and outdoor tips below:
How To Stencil A Wall
Build This DIY Multifunctional Outdoor Table
How To Create A Pallet Wood Wall Art Sign