
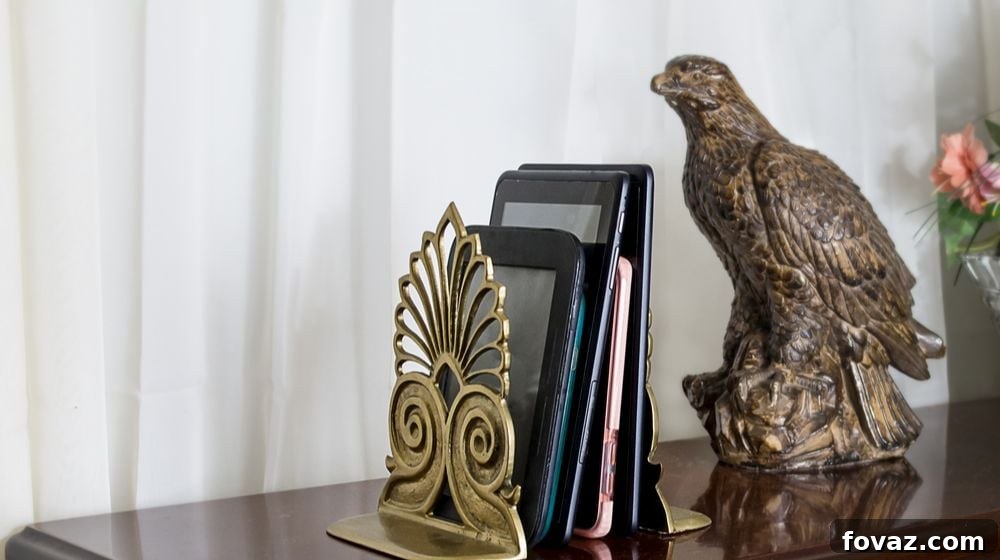
Searching for the absolute best gift for Dad this Father’s Day? This year, transcend the ordinary and create something truly special, memorable, and brimming with personal touch. We’ve curated this comprehensive, step-by-step guide to help you craft a stunning pair of faux copper eagle bookends – a gift that perfectly combines classic elegance, eye-catching style, and the irreplaceable value of a handmade creation. More than just a present, these bookends are a heartfelt testament to your thoughtfulness and effort, destined to become a cherished piece in his office, study, or home library for years to come.
RELATED: DIY Horse Bookends | Cool Bookends
Faux Copper Eagle Bookends: A Distinguished DIY Father’s Day Gift Idea
Crafting a Memorable and Masculine Gift for Dad
Imagine the look of genuine surprise and delight on your dad’s face when he unwraps a meticulously crafted set of bookends, featuring majestic eagles finished with a rich, authentic-looking faux copper patina. This unique DIY project is designed to be a striking and masculine adornment that will elevate the aesthetic of his office desk, study, or bookcase. It’s the perfect last-minute Father’s Day gift idea that truly defies its origins, offering the profound satisfaction of creation and the joy of giving a present that genuinely stands out from mass-produced items. This accessible craft project allows you to express your deepest appreciation with a high-quality, handmade item that looks far more sophisticated and expensive than its actual cost. All it takes is a quick, enjoyable visit to your local craft store to gather the necessary materials for this thoughtful and affordable masterpiece.
Essential Supplies for Your Faux Copper Eagle Bookends Project
Gathering your materials is the exciting inaugural step in bringing these unique and personalized bookends to life. The beauty of this project lies in the fact that most items are readily available at your local craft or hardware store, making it an incredibly convenient and achievable DIY endeavor. Here’s a detailed list of what you’ll need, along with tips for selection:
- Plastic Toy Eagle (or Alternative Figure): While an eagle inherently lends a regal, powerful, and classic aesthetic, feel absolutely free to personalize this by choosing an animal or figure that holds special meaning or directly resonates with your dad’s interests, hobbies, or personality. Perhaps a lion, a bear, or even a vintage-style car or a beloved sports mascot could be his favorite. Look for a sturdy plastic toy, ideally around 6-8 inches in height, which will serve as the captivating focal point of your bookends. Craft stores like Michael’s are excellent places to find such items, and always remember to check their app for valuable coupons – you can often save a significant percentage on single items, making your project even more budget-friendly.
- Solid Wood Block(s): You will need one sturdy block per bookend, totaling two for a complete pair. Opt for stable, adequately heavy wood blocks, ideally measuring approximately 5-7 inches in length, 3-4 inches in width, and 1.5-2 inches in height. These dimensions provide a robust and stable base, crucial for holding books securely. Common and affordable wood choices like pine or birch are widely available at most craft or hardware stores. Again, craft retailers such as Michael’s often stock a variety of unfinished wood items perfectly suited for this type of project.
- Metallic Copper Acrylic Paint: A small bottle (typically 2 fl oz or 59 ml) should be more than sufficient to provide thorough coverage for two eagles. Acrylic paint is highly favored for its fast-drying properties and ease of use. Ensure you select a paint with a “metallic” finish to achieve that authentic, shimmering coppery luster that mimics real metal.
- Wood Stain: A small can (a pint or quart size) of your preferred wood stain. The original recommendation for red mahogany offers a rich, deep tone that beautifully complements the metallic copper. However, feel free to explore other options such as darker walnuts, classic oaks, or even a sophisticated ebony to best match your dad’s existing furniture or personal taste. Always ensure the stain you choose is suitable for indoor use and provides a durable finish.
- Disposable Sponge Applicators or Paintbrushes: It’s wise to have a few of each on hand. Sponge applicators are excellent for achieving smooth, streak-free, and even coats of both paint and stain across larger surfaces. Small detail brushes, on the other hand, are invaluable for reaching into intricate areas and ensuring full, uniform coverage on your chosen figure.
- Plastic Sheeting or Newspaper: Absolutely essential for safeguarding your work surfaces from any accidental paint or stain spills and drips. Old grocery bags, durable garbage bags, or a dedicated drop cloth will all serve this purpose effectively, ensuring easy cleanup and protecting your home.
- Strong, All-Purpose Adhesive: The integrity of your bookends hinges on a powerful glue specifically designed to create a permanent and robust bond between plastic and wood. Products such as 3M Super Strength Adhesive, E6000, or a high-quality, industrial-strength epoxy are excellent choices. Always carefully read the product label to confirm compatibility with your materials and to understand the specific application instructions and recommended drying/curing times.
- OPTIONAL: Indoor Wood Varnish (Spray Can): A general clear wood varnish or a polyacrylic protective finish, ideally in a convenient spray can, is a highly recommended addition. This final layer adds an invaluable protective coating, enhancing the durability and providing a beautiful, professional sheen to your stained wood blocks. This step significantly contributes to the longevity and finished aesthetic of your bookends.
Step-by-Step Guide: Crafting Your Elegant Faux Copper Eagle Bookends
Step 1: Preparing and Staining the Wood Blocks for Durability and Style
The journey begins with your wood blocks, as they require sufficient drying time in two distinct stages. First, establish a well-ventilated workspace. Lay down ample newspaper or a protective plastic sheet to shield your surfaces from any potential spills, drips, or overspray. Before opening your chosen wood stain, ensure it’s thoroughly mixed by shaking or stirring it vigorously to achieve a consistent color. Using a fresh sponge applicator or a disposable paintbrush, apply an even, thin coat of stain to all accessible surfaces of the wood block, making sure to omit only the very bottom at this stage. Always work with the grain of the wood for the smoothest, most professional finish. It’s crucial to avoid applying too much stain at once; multiple thin coats will consistently yield a superior, more even result than one thick, potentially streaky layer. Once coated, carefully set the block aside on a protected, non-stick surface to begin drying. Adequate ventilation is not only vital for your comfort, preventing headaches from fumes, but also absolutely critical for ensuring proper and thorough drying of the stain.
Step 2: Transforming Your Eagle with a Metallic Copper Finish
While the first application of stain on your wood block is in its essential drying phase, gracefully shift your focus to the plastic eagle. Prepare another clean, protected area, ideally with fresh newspaper or plastic sheeting. Using a new sponge applicator or a small paintbrush, begin the meticulous process of applying an even and thorough coat of the metallic copper paint to your eagle. Take your time, ensuring meticulous coverage of all surfaces, carefully working the paint into any intricate crevices or finely detailed areas. The primary objective here is to establish a uniform base coat. This initial layer might appear somewhat translucent or light in color, which is an entirely normal characteristic of many acrylic paints. There’s no need to strive for complete opacity at this stage; subsequent coats will build up the rich color and metallic effect.
Step 3: Completing the Wood Block Stain for a Seamless Look
Throughout the crafting process, periodically check on the drying progress of your stained wood block. Once the top and side surfaces are completely dry to the touch – meaning no stain transfers onto your fingers and there’s absolutely no lingering stickiness – it’s perfectly ready for its final staining step. Carefully and gently flip the wood block over onto a clean piece of plastic sheeting (a common grocery bag, a fresh garbage bag, or even a piece of wax paper works exceptionally well for this). It’s highly advisable to avoid using newspaper for this specific step, as the paper can regrettably cling to the partially dried stain, potentially marring your beautiful, smooth finish. Now, with the bottom exposed, apply a thin, even coat of stain to this previously untouched surface. Once complete, set the block aside once more to dry completely in your well-ventilated area, ensuring an uninterrupted curing process.
Step 4: Achieving a Rich, Authentic Copper Patina on Your Eagle
Return your attention to your painted eagle. By now, the initial coat of metallic copper paint should be fully dry and ready for further enhancement. It is highly recommended, and often essential, to apply a second coat of paint to truly deepen the coppery luster and achieve that rich, opaque, and authentic-looking finish. This second application will significantly enhance the color intensity and amplify the convincing faux metal effect you’re aiming for. Ensure meticulous, even coverage across the entire figure, paying particular attention to any areas that might still appear patchy, thin, or slightly transparent after the first coat. One of the greatest advantages of acrylic paint is its remarkably quick drying time, which means you’ll typically only need to wait a brief 15-30 minutes between coats. For those seeking an even more aged, antiqued, or subtly textured look, consider lightly dabbing certain strategic areas with a very small amount of slightly darker brown or black acrylic paint after the copper has thoroughly dried. This technique can create a beautiful, nuanced antique effect, adding depth and character to your faux copper finish.
RELATED: Make Your Own Secret Hollow Book
Step 5 (Optional but Highly Recommended): Sealing the Wood Block for Enhanced Protection and Longevity
This optional step, while not strictly necessary for functionality, is highly recommended for anyone desiring to ensure their bookends withstand the test of time, maintain their pristine aesthetic appeal, and gain an extra layer of professional finish. Once the wood stain is unequivocally and completely dry (it’s best to allow at least 24 hours, or even more in particularly humid conditions, for full curing), proceed to apply a clear wood varnish or a polyacrylic protective finish. This sealant acts as an invisible shield, safeguarding the wood from potential moisture damage, unsightly scratches, and the general wear and tear of everyday use, while simultaneously imparting a beautiful, subtle sheen that magnificently enhances the richness and depth of your chosen stain. Carefully follow the precise instructions provided on your spray can, which typically involves holding the can 8-10 inches away from the surface and applying thin, even, sweeping coats. Allow each coat to dry fully and completely before applying the next; generally, 2-3 coats are considered ideal for achieving maximum protection and a truly professional finish. Always ensure you perform this step in a very well-ventilated space, ideally outdoors, to dissipate fumes safely.
Step 6: Securely Attaching the Eagle to Its Wooden Base
Now arrives the pivotal moment to unite your two beautifully crafted main components. Using a super-strength, all-purpose adhesive that is specifically formulated for creating a permanent and durable bond between plastic and wood, carefully and generously apply the glue to the entire bottom surface of the eagle’s feet or its designated base. Ensure that all points of contact that will rest firmly on the wood block are thoroughly covered with adhesive. It is crucial to carefully read and strictly adhere to the instructions on your chosen adhesive for specific application tips, recommended quantity, and any vital safety precautions. The unwavering strength and permanence of this bond are absolutely critical for the long-term stability and integrity of your finished bookend, so do not compromise on the quality or application of your chosen adhesive.
Step 7: Positioning and Curing the Eagle for a Permanent Bond
With the adhesive meticulously applied, firmly and steadily press the eagle down onto the exact center of the stained wood block. Carefully position it precisely as you desire, ensuring it stands perfectly upright and is visually balanced and appealing from all angles. Apply firm, consistent pressure for at least a minute or two to facilitate excellent initial adhesion and prevent shifting. Depending on the specific size, weight, and inherent balance of your eagle, and critically, the specific type of glue you are using, you might find it necessary to provide additional support to the eagle while the adhesive fully cures. Strategically placing a few heavy books on either side, gently propping up the eagle’s tail with a small support, or even temporarily securing it with painter’s tape can effectively prevent it from shifting, leaning, or falling over during this crucial and extended drying period. Allow the adhesive to cure for the full duration specified on the glue tube or packaging, which can often range from 24 to 48 hours for a truly permanent, unshakeable bond. Patience during this curing phase will undoubtedly yield a remarkably durable and stable bookend.
Step 8: Presenting Your Masterpiece: The Finished Faux Copper Eagle Bookend!
Congratulations! You have successfully completed the rewarding journey of crafting a magnificent, personalized, and truly impactful Father’s Day gift! Once the adhesive has fully cured and your bookend feels completely stable and robust, it is officially ready for its grand presentation. You can choose to simply slip it into a thoughtful gift bag, elegantly tie a rustic ribbon around its base, or even perfectly pair it with a brand new, engaging book that you know Dad will absolutely adore. This exquisitely crafted faux copper eagle bookend is far more than just a functional item; it’s a stunning, distinctly masculine piece that will undoubtedly become a captivating conversation starter and a deeply cherished display on his bookshelf, executive desk, or mantlepiece. Your dad will unquestionably appreciate the immense effort, the personal creativity, and the abundant love you poured into making such a unique, distinguished, and unforgettable present.
Enhance Your Crafting Skills: More DIY Ideas and Inspiration
To further inspire your creativity and expand your crafting repertoire, watch this insightful video from Dan Alexander. It offers other clever ways to make unique animal bookends and explores even more fantastic DIY Father’s Day gift ideas, providing a wealth of inspiration for your next project:
That truly encompasses everything you need to know to create a memorable, impactful, and deeply personal gift for Dad this Father’s Day. We genuinely hope you thoroughly enjoyed this original tutorial and found the process of crafting these beautiful bookends as rewarding and fulfilling as we did. There’s an unparalleled satisfaction that comes from handcrafting a gift, knowing the thought, effort, and love you’ve personally invested into its creation.
At DIY Projects, our passion lies in sharing innovative ideas and inspiring creative experiences with our vibrant community of crafting enthusiasts. We firmly believe that no DIY project is ever too difficult when approached with clear, comprehensive instructions, a dash of patience, and a willingness to learn. Our unwavering commitment is to continually deliver the most interesting, eclectic, and achievable DIY projects, empowering you to create beautiful, functional, and meaningful items with your own hands. Cheers to your continued crafting success and to many more rewarding DIY adventures!
Join Our Thriving Crafting Community!
Do you possess an amazing craft project or a unique DIY gift idea that you’re eager to share with our expansive community? We’d absolutely love to hear from you! Please feel free to leave your valuable feedback, innovative suggestions, or even links to your own incredible creations in the comments section below. Our dedicated team will be absolutely thrilled to review your ideas and consider transforming your inspiration into a detailed, easy-to-follow tutorial for everyone to enjoy.
Are you eager for even more inspiring projects just like this one? Stay connected and never miss out on new ideas! Pin your favorite DIY projects to Pinterest, give us a like on Facebook (find the button below) to receive instant updates on all the fun, new projects we’re currently developing and perfecting, and make sure to follow us on Instagram for daily doses of crafting inspiration. Your active engagement and invaluable support help us immensely to continue creating high-quality, valuable content for passionate DIYers everywhere. Thank you for being such an integral part of our vibrant crafting journey!
Discover More Creative DIY Projects:
- 35 Super Unique Scrapbook Ideas | 2020 Updated
- DIY Crafty Paper Animal Bookmarks
- How To Make a Shabby Chic Dog Leash and Treat Wall Hanger | DIY Pet Project
Calling all crafting DIYhards, DIY Projects needs YOU! Click here if you want to contribute for us.
Don’t forget to stay connected with us on Facebook, Twitter, and Instagram!Editor’s Note: This post was originally published in June 2014, and has since been thoroughly updated for enhanced quality, improved relevancy, and to provide more detailed, comprehensive instructions for our valued readers.