
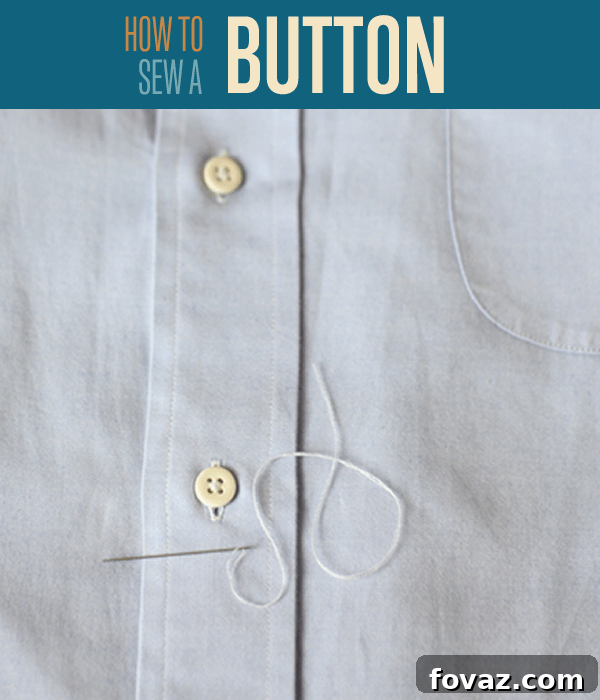
In the intricate tapestry of modern life, certain basic skills stand out as indispensable threads. Knowing how to sew a button is unequivocally one of them. Far from being an outdated domestic chore, this simple act of repair can be a true lifesaver, rescuing you from potential sartorial embarrassment and unexpected wardrobe malfunctions. Imagine you’re about to deliver a crucial presentation, attend a significant corporate event, or simply enjoying a night out, and suddenly you notice your button is gone, or perilously dangling by a single thread. Such moments can induce panic, but they don’t have to define your day. This comprehensive guide is designed to equip you with the essential knowledge and practical steps to expertly sew a button back into place, ensuring you’re always prepared and impeccably presented. Mastering this fundamental sewing technique not only keeps your attire in check but also empowers you with a valuable life skill that fosters self-reliance and saves you time and money. Bid farewell to frantic searches for tailor shops or the awkwardness of a missing button. By following this detailed, step-by-step tutorial, you’ll learn to sew on buttons with the precision and confidence of a seasoned professional, transforming a momentary mishap into an opportunity to showcase your preparedness.
How to Sew a Button: A Comprehensive Beginner’s Guide to Essential Garment Repair
Embark on your journey into basic sewing with this detailed tutorial on how to sew a button. Whether you’re mending a cherished garment, replacing a lost button, or simply wish to learn a vital life skill, this guide offers clear instructions for beginners. You’ll discover the simple yet effective techniques to secure a button firmly, ensuring durability and a polished finish. This skill is foundational for anyone interested in DIY garment care, quick fixes, and sustainable fashion practices.
Watch Our Easy-to-Follow Video Tutorial on Sewing a Button:
Sometimes, seeing is believing! For a visual walkthrough of each step, our video tutorial provides a dynamic demonstration that complements the written instructions perfectly. Follow along as we guide you through the entire process, making button sewing accessible and straightforward:
Essential Supplies You’ll Need to Sew a Button with Confidence:
Before you begin, gather these fundamental tools. Having all your supplies ready ensures a smooth and efficient sewing experience. Each item plays a crucial role in achieving a strong, lasting button attachment.
- Button (Original or Replacement): Select a button that matches your garment in style, size, and color. If you’re replacing a lost button, try to find one from a spare that often comes with new clothing, or choose a similar design that complements the existing buttons. For a cohesive look, measure the diameter of the original button to ensure a perfect fit in the buttonhole.
- Needle (Thin and Sharp): A sharp, relatively thin needle is paramount for piercing fabric cleanly without snagging or damaging the threads. An “all-purpose” or “sharps” needle is usually ideal. The eye of the needle should be large enough to comfortably thread your chosen thread, but not so large that it creates overly visible holes in the fabric.
- Thread (Approximately 12-24 inches): Choose high-quality polyester or cotton thread that matches the color of your fabric or the button itself. For dark fabrics, black or navy thread is versatile. For light fabrics, white or cream often works well. For maximum durability and a quicker task, opt for about 24 inches of thread, which you can double over. Doubling the thread significantly increases the strength of your stitches, making the button less likely to come loose.
- Spacer (A Second Needle, Pin, or Toothpick): This often-overlooked tool is critical for creating a proper “shank” on your button, especially for heavier fabrics. A spacer (like a second needle, a straight pin, or even a toothpick) is placed underneath the button stitches while sewing. This creates a small gap between the button and the fabric, allowing the fabric of the garment to slide easily under the button without straining the threads, thereby preventing premature detachment.
- Scissors: A small pair of sharp sewing scissors or snips is essential for cleanly cutting thread, both at the beginning and the end of your project, ensuring neat finishes.
Step 1: Prepare Your Garment and Pinpoint the Button’s Location
The first crucial step is to determine the precise spot where your button needs to be sewn. If you’re replacing a button, look for residual thread marks or a slight indentation where the original button once sat. For new button placements, use the corresponding buttonhole as your guide. Lay the two layers of the garment flat, align them carefully, and mark the exact center of the buttonhole’s outer edge onto the under-layer of fabric. You can use a fabric marker or a simple pin to clearly indicate the attachment point. Precision here ensures that your button aligns perfectly and functions correctly with the buttonhole, preventing awkward pulling or misalignment.
Step 2: Expertly Thread Your Needle for Seamless Sewing
Threading a needle can sometimes be a fiddly task, but with a few simple tricks, it becomes effortless. Begin by cutting the end of your thread at a sharp angle; this creates a fine point that slides more easily through the needle’s eye. If the thread still frays or proves stubborn, you can moisten the tip slightly with your lips or use a dab of beeswax to stiffen it. For those who frequently struggle, a needle threader is an inexpensive and highly effective tool that quickly pulls the thread through the eye. Once threaded, pull about 12-18 inches of thread through, leaving a tail of a few inches on one side.
Step 3: Determine and Cut the Ideal Thread Length
Carefully measure and cut your thread to the appropriate length. A single strand of about 12 inches is often sufficient for a standard button, offering enough length to work with without excessive tangling. However, for enhanced strength and durability, especially on frequently used buttons or heavier fabrics, doubling your thread is highly recommended. To do this, cut a 24-inch piece of thread, pull both ends even, and knot them together in the next step. This technique effectively doubles the number of stitches and significantly reinforces the button’s attachment, ensuring it withstands more wear and tear.
Step 4: Secure the Thread with a Reliable Knot
Creating a secure knot at the end of your thread is a critical step that prevents your stitches from pulling through the fabric as you sew. If you’ve doubled your thread, align both ends and tie them together using a simple overhand knot. For single-strand threading, tie an overhand knot near the very end of the thread. For added security, especially for buttons on heavier fabrics or those that experience frequent use, you can tie a double knot or a surgeon’s knot. Ensure the knot is small and tight, resting snugly against the fabric’s surface on the underside, providing a solid anchor for your initial stitches.
Step 5: Initiate Stitching from the Back of the Fabric
To ensure a neat and professional finish, always begin sewing from the backside of your garment. This clever technique allows the starting knot to be completely hidden, maintaining the clean aesthetic of the visible side of your clothing. Carefully poke your needle and thread through the fabric from the back, emerging precisely at the marked location on the front of the garment where the button will sit. Pull the thread gently until the knot rests flush against the fabric on the inside, ensuring it’s securely anchored.
Step 6: Form the Initial Anchor Stitch from Front to Back
With your thread now on the front of the fabric, take the needle and insert it back through the fabric a tiny distance (about 1/8 to 1/4 inch) away from where you just emerged. Push the needle all the way through to the backside of the garment. This creates your very first stitch, serving as an anchor point that securely grounds the button to the fabric. Do not pull this stitch too tight initially, as you’ll be forming an ‘X’ in the subsequent step.
Step 7: Complete the Anchor by Creating an ‘X’ Stitch
To fortify your button’s foundation, bring the needle back up through the fabric from the backside, positioning it a small distance from your previous entry point, effectively creating a diagonal stitch across the first one. Then, push the needle back down through the fabric, completing an ‘X’ pattern on the front. This ‘X’ serves as a robust anchor, providing a stable and secure base directly beneath where your button will be placed. This double-reinforced starting point is crucial for preventing the button from tearing away from the fabric, ensuring a long-lasting attachment.
Step 8: Confirm Your ‘X’ Anchor Marks the Spot
Take a moment to inspect your work. You should now clearly see a small, tightly formed ‘X’ stitch on the fabric where your button is destined to reside. This ‘X’ isn’t just a decorative mark; it’s a strategically constructed anchor point, designed to distribute the stress of the button’s attachment over a larger area. This significantly minimizes the chances of the button pulling loose or the fabric tearing around the stitch holes, offering a much more durable and reliable attachment compared to a single starting stitch.
Step 9: Position the Button and Begin Initial Stitches
Carefully align your button directly over the ‘X’ anchor you’ve just created. Ensure the button’s holes are positioned symmetrically over the stitches. With the button held firmly in place, bring your needle up from the back of the fabric, through one of the buttonholes. This initial pierce connects the button to its base. Pull the thread through gently until the fabric on the back is taut, but avoid pulling so tightly that it distorts the fabric or makes the button lie completely flat against the material, as this is where the spacer comes into play soon.
Step 10: Stitching the Right Side of a Four-Hole Button
For a four-hole button, you’ll work in pairs of holes. After bringing your needle up through the top right buttonhole, immediately bring it back down through the lower right buttonhole, piercing through the fabric and emerging on the backside. This creates your first secure stitch. It’s crucial not to pull this thread completely tight just yet. Maintain a slight looseness, as this space will be essential for accommodating your spacer and ensuring the button has enough “wiggle room” later on, which is vital for functionality and preventing strain on the stitches.
Step 11: Stitching the Left Side of a Four-Hole Button
Now, repeat the stitching process for the remaining two holes on the left side of the button. Bring your needle up from the backside of the fabric, piercing through the top left buttonhole. Then, push the needle down through the lower left buttonhole, exiting again through the fabric to the backside. This completes the initial cross-stitch pattern if you’re aiming for that style, or a parallel pattern if you’re sewing them straight. Again, be mindful not to pull these stitches too taut at this stage, as flexibility is key before the spacer is introduced. This ensures even tension across all stitches.
Step 12: Introduce the Spacer to Create Necessary Wiggle Room
This step is crucial for ensuring your button is functional and durable, especially on garments with thicker fabric that needs to slip underneath. Take your chosen spacer (a second needle, a straight pin, or even a toothpick) and carefully place it underneath the line of thread you’ve just formed over the button. The spacer should rest between the button and the fabric. This creates a small gap, which will eventually form the button’s shank. This gap allows for the thickness of the fabric that passes through the buttonhole, preventing undue strain on the stitches and making the button easier to fasten.
Step 13: Reinforce Button Attachment by Continuing to Sew
With the spacer firmly in place, continue stitching through the buttonholes. For a robust and secure attachment, repeat the threading process through each pair of holes approximately 6 to 8 times. Each time, bring the needle up through one hole, down through the other, and back under the button, always ensuring your stitches go over the spacer. After each full round of stitching (e.g., once through both pairs of holes), gently pull the thread tight. This gradual tightening, with the spacer maintaining the gap, ensures consistent tension and a very secure button that won’t easily detach.
Step 14: Carefully Remove the Spacer in Preparation for Shank Creation
Once you’ve completed all your stitches (typically 6-8 repetitions) and the button feels firmly attached to the fabric with the spacer still creating that essential gap, it’s time to remove the spacer. Gently slide it out from underneath the threads on the top of the button. Be careful not to disturb the stitches as you do this. The removal of the spacer reveals the small amount of thread slack you’ve intentionally built up, which is now ready to be transformed into a durable thread shank, further enhancing the button’s stability and longevity.
Step 15: Begin Creating the Thread Shank for Optimal Button Functionality
With the spacer removed, it’s time to create the “shank.” The shank is a small column of wrapped thread located directly beneath the button, providing the necessary space for the fabric to pass through the buttonhole without stressing the button’s attachment. To start, bring your needle up from the back of the fabric, but instead of guiding it through one of the buttonholes, bring it up through the fabric base just beneath the button. Gently pull the thread until it emerges on the front, positioned right next to the button’s base, ready to be wrapped.
Step 16: Continue Wrapping Thread to Form a Strong, Defined Shank
Now, meticulously wrap the thread tightly around the bundle of stitches that connect the button to the fabric. Aim for about 5 to 7 wraps, encircling the threads directly beneath the button. Each wrap should be snug and uniform, creating a compact and sturdy column. This wrapping action not only strengthens the entire attachment but also cinches together the base threads, forming a clean, defined shank. The shank acts as a buffer, ensuring the button can sit proudly and function effectively without pulling or stretching the surrounding fabric.
Step 17: Secure the Shank and Return Thread to the Back of the Fabric
After completing your wraps and forming a tight, neat shank, gently pull your working thread to ensure the shank is firm and securely formed. Once satisfied, guide your needle back down through the fabric, piercing through the base of the shank, very close to where you initially brought the thread up for wrapping. Ensure the needle passes through the garment fabric to the backside, bringing the entire working thread with it. This final stitch pulls the end of your thread to the unseen side of the garment, preparing it for the final knot.
Step 18: Tie a Robust Knot to Permanently Secure Your Button
With your thread now on the backside of the fabric, it’s time to tie a secure knot to lock all your hard work in place. Carefully insert your needle underneath a few of the existing stitches you’ve made on the back of the fabric. This creates a small loop of thread. Avoid piercing the front of the garment. Pull the needle and thread through, but before pulling it tight, proceed to the next step to form the knot.
Step 19: Execute the Finishing Knot for Ultimate Security
Having created the small loop under the existing stitches, pass your threaded needle directly through this new loop. This action forms the initial part of a standard knot. For enhanced security, especially for buttons on items that undergo frequent washing or heavy use, you can repeat this step, forming a double knot. Ensure the knot is formed as close to the fabric as possible to keep it snug and minimize any loose ends.
Step 20: Finalize Your Work: Pull Knot Tight and Snip Excess Thread
With the knot(s) securely formed, pull the thread firmly to tighten the knot completely, ensuring it lies flat and unobtrusive against the fabric on the backside of your garment. Once you’re confident in the knot’s security, use your sharp sewing scissors to carefully snip off the excess thread, leaving only a tiny tail (about 1/4 inch) to prevent unraveling. Congratulations! Your button is now expertly sewn, boasting a strong attachment and a professional finish, ready for countless fastenings.
The Art of Button Sewing: A Fundamental Skill Mastered
You have successfully completed the journey of learning how to sew a button, transforming a potential wardrobe crisis into an opportunity for skill development. With your button now securely attached like the work of a true tailor, you possess a vital everyday survival tool. No longer will a rogue button cause distress or inconvenience. This basic sewing skill ensures you are always prepared, capable of mending your garments efficiently and effectively, thereby extending their life and contributing to a more sustainable lifestyle. Embrace the satisfaction of self-sufficiency and the confidence that comes with knowing you can handle any button emergency that comes your way.
Benefits of Mastering Button Repair
Beyond the immediate fix, learning to sew a button offers a myriad of advantages. Firstly, it’s incredibly cost-effective. Instead of discarding a perfectly good garment or paying for professional repairs, you can fix it yourself for pennies. Secondly, it promotes sustainability by encouraging repair over replacement, reducing textile waste. Thirdly, it’s a quick solution; a button can be sewn on in minutes, saving you time in a pinch. Finally, there’s immense personal satisfaction in knowing you can handle minor garment emergencies, fostering a sense of self-reliance and practicality in your daily life.
Tips for Ensuring Button Longevity
To ensure your newly sewn button stays put for as long as possible, consider these additional tips: always use good quality, strong thread (polyester is often more durable than cotton for buttons). If the fabric around the buttonhole is prone to fraying, you might add a tiny dab of clear fabric glue to the knot on the backside once it’s dry, but this is optional. When fastening buttons, avoid pulling too aggressively. For garments washed frequently, occasionally check the button’s security and reinforce stitches if they start to loosen. The more care you put into the initial sewing, the longer your button will last.
Troubleshooting Common Button Sewing Issues
Even seasoned sewers encounter challenges. If your thread tangles frequently, try using shorter lengths or applying a thin layer of beeswax to the thread. If the button feels too loose after sewing, it likely means you didn’t create a sufficient number of stitches or didn’t pull the thread tight enough during the main stitching phase (Step 13). If it’s too tight and hard to button, the shank might be too short, or you didn’t use a spacer. Don’t be afraid to unpick and re-do; practice makes perfect, and each attempt refines your technique.
Frequently Asked Questions About Sewing Buttons
- Q: How many stitches are truly necessary for a secure button?
- A: For most standard buttons, 6 to 8 passes through each pair of holes (if it’s a 4-hole button) or 6-8 stitches through a 2-hole button is generally sufficient for a strong hold. For heavier fabrics or buttons that experience a lot of stress, you might go up to 10 passes.
- Q: Can I use super glue instead of sewing for a quick fix?
- A: While tempting for a very temporary fix, using super glue is strongly discouraged for permanent button attachment. It makes the fabric stiff, can leave visible marks, and often fails after washing or repeated use. Sewing provides a flexible, durable, and clean finish.
- Q: What if I don’t have a spare needle or pin for a spacer?
- A: If you lack a traditional spacer, you can improvise! A sturdy toothpick, a matchstick, or even a small piece of cardboard folded a few times can serve as an effective substitute to create the necessary gap for the shank.
- Q: How do I sew a button without visible thread on the back?
- A: This tutorial guides you to start from the back to hide the knot. For an absolutely invisible look on the back, you might consider methods where stitches are exclusively within the fabric layers, or using a “sew-through” button where the thread is completely hidden within the button’s structure, but this is more advanced than basic button sewing.
Enjoyed Learning This Essential DIY Skill?
Explore More of Our Favorite Sewing Tutorials to Expand Your Craft:
If you found satisfaction in mending your garments, why not delve into more creative sewing projects? We offer a variety of tutorials designed for all skill levels, from practical repairs to exciting new creations. Unleash your inner crafter and discover the joy of making.