
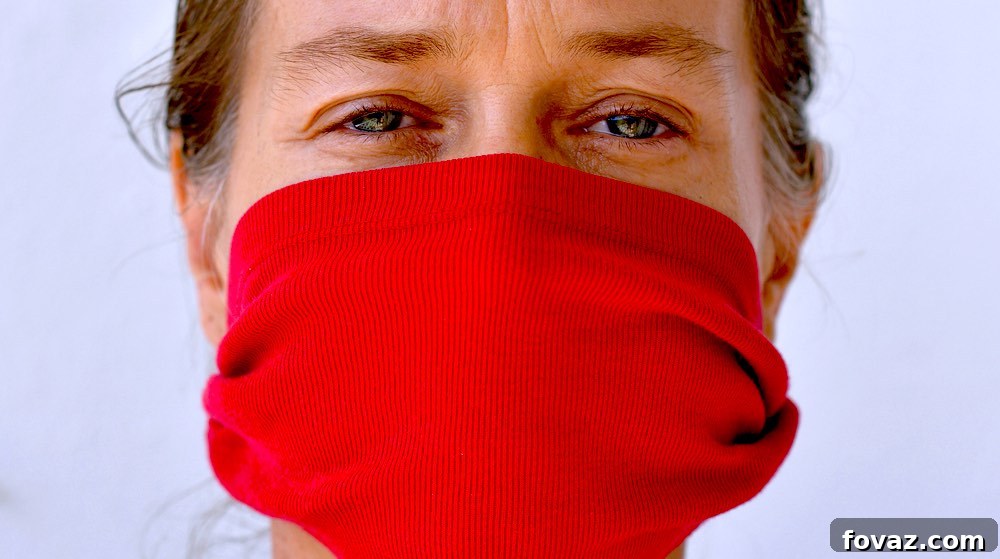
In challenging times, personal safety and community well-being become paramount. The recent global health crisis has underscored the critical importance of simple yet effective preventive measures, one of which is wearing a face covering. While medical-grade masks are reserved for frontline workers, everyday citizens can play a significant role in reducing transmission by adopting universal masking. This guide provides a practical, accessible, and budget-friendly solution: creating your own no-sew half face mask from an old T-shirt. This DIY project not only helps you protect yourself and others but also offers a creative way to repurpose materials you already have at home.
The Imperative of Face Coverings: Protecting Ourselves and Our Communities
The guidance to “act like you have the virus” serves as a powerful reminder of our collective responsibility. By consistently taking proper precautions, such as maintaining physical distance and avoiding crowded spaces, we contribute to a safer environment for everyone. Face coverings add another crucial layer of protection. They primarily function as source control, meaning they help to contain respiratory droplets that you might unknowingly emit when speaking, coughing, or sneezing. This significantly reduces the potential for spreading germs to others. Furthermore, wearing a mask discourages you from touching your face, a common habit that can transfer pathogens from your hands to your eyes, nose, or mouth, which are entry points to your body. Making a habit of wearing a mask whenever you are in public can significantly contribute to your health and the health of those around you.
Why Choose a No-Sew DIY Face Mask? Practicality, Sustainability, and Ease
Opting for a no-sew DIY face mask offers a multitude of benefits, making it an excellent choice for individuals and families alike. First and foremost, it’s incredibly practical. You don’t need specialized skills or equipment, making it accessible to virtually anyone. The materials are often found right within your home, transforming an old T-shirt or bandana into a valuable piece of personal protection. This cost-effectiveness eliminates the need to purchase disposable masks, which can quickly add up, especially during times of high demand or limited supply. Beyond practicality, this project champions sustainability. By repurposing textiles that might otherwise end up in a landfill, you’re engaging in an environmentally friendly craft. It’s a simple act of upcycling that provides a tangible benefit. Moreover, the ease of this project means you can quickly make multiple masks for every member of your household, ensuring everyone has access to a clean face covering when needed. It’s a fast, fun, and functional craft that empowers you to take proactive steps for health and safety.
Repurposing Your Wardrobe: Turn Old T-Shirts into Essential Protection
Before you begin, consider the fabric. The best materials for DIY masks are tightly woven, breathable fabrics like 100% cotton, which are commonly found in old T-shirts, pillowcases, or bandanas. These fabrics offer a good balance of filtration and comfort. An old, clean T-shirt with a fun print or a solid color can be transformed into a stylish and functional mask. This creative reuse of materials not only helps you contribute to public health efforts but also aligns with a sustainable lifestyle. Get ready to give your forgotten garments a new purpose!
RELATED: DIY Commercial Grade Hand Sanitizer Project [VIDEO]
Craft Your Own Half Face Mask from a T-Shirt: A Simple 4-Step Guide
Creating your own no-sew face mask is a surprisingly straightforward process that requires minimal supplies and no sewing expertise. This project is perfect for anyone looking for a quick and effective way to make a reusable face covering. By following these easy steps, you’ll soon have a functional and comfortable mask ready for use. Let’s gather our simple materials and transform an everyday item into an essential protective accessory.
Materials You’ll Need: Gathering Your Supplies for Mask Making
To embark on this quick and easy DIY project, you’ll only need a few common household items. Having everything laid out and organized before you begin will ensure a smooth and enjoyable crafting experience.
- A blank piece of paper (or cardboard for a more durable template)
- Sharp Scissors (fabric scissors are ideal for clean cuts)
- An Old T-shirt or Bandana (preferably 100% cotton with a tight weave)
- A Pen or Fabric Marker
Step 1: Preparing Your Workspace and Materials
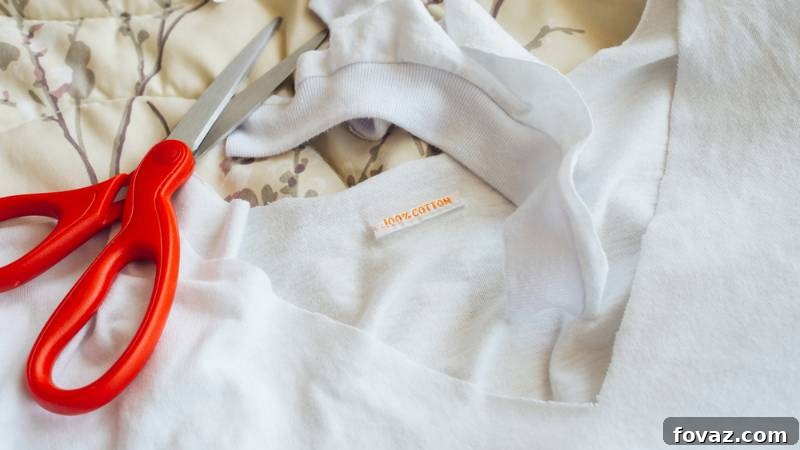
Begin by setting up a clean, flat surface for your project, such as a large table or countertop. Lay out all your gathered materials within easy reach. This ensures a seamless flow as you move from one step to the next. Select an old T-shirt that is clean and made of a breathable, tightly woven fabric like cotton. Darker shirts might show marker less, so consider using a light-colored marker or tailor’s chalk if your shirt is dark. Once your workspace is prepped and your materials are ready, you’re set to proceed with the design phase.
Step 2: Designing and Marking Your Fabric Template
Carefully lay your chosen T-shirt flat on your prepared surface, ensuring there are no wrinkles or creases that could distort your cut. Position the shirt so that any desired prints or patterns are facing upwards, as this will be the front-facing part of your mask. Take your blank paper and use it as a guide to measure the desired dimensions for your mask. A standard piece of letter-sized paper (8.5 x 11 inches) can be a good starting point for an adult-sized mask, but feel free to adjust based on your face size. Place the paper on the shirt, roughly centered, and use your marker to carefully trace around its edges. This outline will serve as your cutting guide, ensuring a symmetrical and appropriately sized mask base. Precision in this step will lead to a better-fitting mask.
RELATED: No-Sew DIY Shirt Scarf | How To Cut T-Shirt Tutorial
Step 3: Precision Cutting and Creating Tie Slots
With your mask outline clearly marked, it’s time to cut the fabric. Using sharp scissors, carefully cut along the lines you’ve drawn. For increased protection, consider cutting through multiple layers of the T-shirt fabric simultaneously. Many T-shirts can be folded in half or even quartered, allowing you to cut through two or four layers at once. This not only speeds up the process, making it easier to create multiple masks for your entire family, but also results in a thicker mask, which can offer enhanced filtration. After cutting the main body of the mask, you’ll need to create slots for the ties. On each of the two shorter sides of your rectangular fabric, carefully pinch the fabric and snip five small holes, approximately 1 inch apart and about 0.5 inches in from the edge. Ensure these holes go through all layers of the fabric. These holes will be where you thread the ties that secure the mask around your ears and the back of your head. Finally, from the remaining cloth of the T-shirt, cut two strips, each about 1 inch wide and long enough to comfortably tie around your head or ears. Avoid using the shirt’s hems for ties, as they might not stretch as much as raw-cut fabric, which is crucial for comfort and adjustability.
Step 4: Assembling Your Mask with Secure Ties
Now that your mask body is cut and the slots are ready, it’s time to attach the ties. Take one of the fabric strips you cut for ties. Starting with the top hole on one side of your mask, begin weaving the tie through the series of holes. Thread the tie into the first front hole, then out through the second, in through the third, and so on, creating a zigzag pattern. This method helps to distribute the tension evenly and create a gathered effect that shapes the mask to your face. Repeat this process on the other side with the second tie strip. Once both ties are threaded, gently bunch the fabric from the sides. You’ll notice the mask beginning to take on the familiar contoured shape of a face mask. Use the ends of the ties to fasten the mask snugly around your head or ears, depending on your preferred style. Try on the mask to check the fit. It should cover your nose and mouth comfortably without large gaps. Adjust the knots in the ties if necessary to achieve a secure yet comfortable fit. Congratulations! You’ve successfully created your own no-sew half face mask, ready to use.
Wearing and Caring for Your DIY No-Sew Face Mask
Once your DIY no-sew face mask is complete, understanding how to wear and care for it properly is just as important as making it. Always ensure your mask covers both your nose and mouth completely and fits snugly against the sides of your face without large gaps. Avoid touching the front of your mask while wearing it, and always remove it by handling the ties. For cleaning, your fabric mask should be washed regularly, ideally after each use, to maintain hygiene. It can be machine washed with regular detergent and hot water, then tumble dried on high heat or air dried in direct sunlight. Having several masks on hand allows you to rotate them while others are being washed. Remember, a clean mask is an effective mask!
Important Disclaimer: DIY Masks vs. Medical-Grade PPE
It is crucial to understand that homemade, no-sew cloth face masks are not medical-grade Personal Protective Equipment (PPE). They are not designed to filter out microscopic airborne particles with the same efficiency as N95 respirators or surgical masks, which are specifically regulated and tested for healthcare settings. DIY cloth masks are primarily intended for source control—meaning they help prevent the wearer from spreading respiratory droplets to others. They offer some degree of protection to the wearer, but their main benefit lies in protecting the community by reducing asymptomatic transmission. Always combine mask-wearing with other essential public health measures, including frequent handwashing, maintaining physical distancing, and avoiding large gatherings, to maximize your safety and that of those around you.
Watch this video from Sarah Suemnig for a visual guide on creating a T-shirt half-face mask:
Beyond the Mask: Sustaining Safe Practices and Community Well-being
While creating and wearing a DIY face mask is a commendable step towards personal and public safety, it’s part of a broader commitment to community well-being. Government recommendations emphasize universal masking for everyone’s safety, making this the perfect time to ensure you and your family are adequately protected. Beyond masks, continue to practice diligent hand hygiene by washing your hands frequently and thoroughly. Minimize unnecessary outings, especially to crowded places like supermarkets; consider having groceries and essential supplies delivered to your home if possible. Prevention is indeed better than cure, and staying home whenever feasible remains one of the most effective ways to slow the spread of pathogens. By combining the simple act of making and wearing masks with other proven safety measures, we can collectively work towards a healthier, safer future for all.
Do you have other creative ideas for repurposing old shirts into face masks or other useful items? Share your insights and tips in the comment section below! We love hearing your innovative DIY solutions.
UP NEXT: Expanding Your DIY Skills for Preparedness and Comfort
- Pill Bottle Survival Kit: Compact Essentials for Emergencies
- Survival Food 101: How to Make Hardtack for Long-Term Storage
- DIY Outdoor Daybed Project: Enhance Your Home While Staying Safe
Calling all crafting DIYhards, DIY Projects needs YOU! If you’re passionate about creating and want to share your expertise, click here to learn how you can contribute to our vibrant community.
Stay informed and inspired! Connect with us on social media for a daily dose of DIY ideas, tips, and community engagement. Follow us on Facebook, Twitter, and Instagram!