
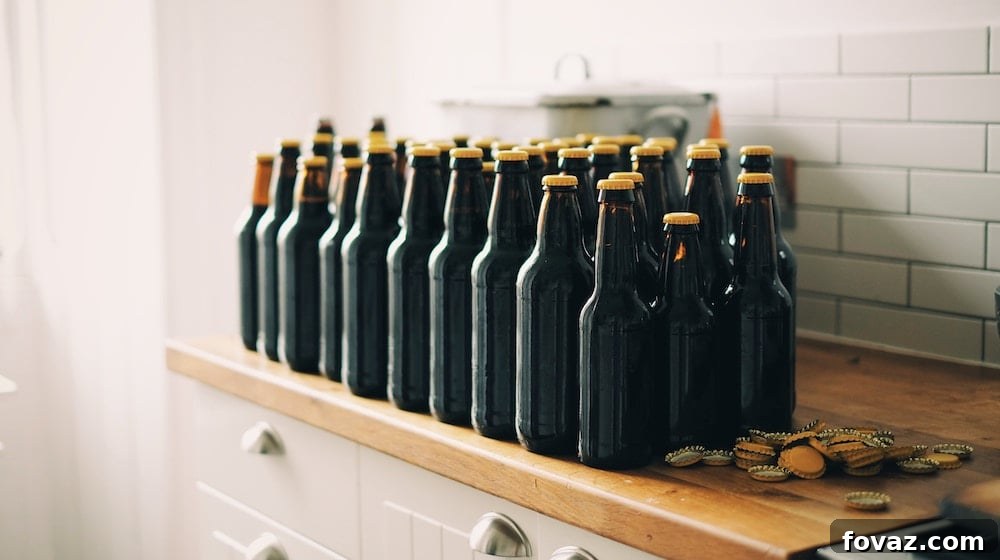
Have you ever considered the profound satisfaction of crafting something incredibly useful, something you might reach for almost every day? While a bottle opener might seem like a trivial item, readily available and inexpensive in any store, the experience of creating one yourself from simple materials, imbued with your unique design, offers a truly fulfilling sense of accomplishment. It’s more than just a tool; it’s a testament to your creativity and ingenuity.
Crafting Your Own Custom Bottle Opener: A Simple & Rewarding DIY Project
The world of DIY is vast and exciting, offering countless opportunities to transform ordinary materials into extraordinary creations. Among these, making your own bottle opener stands out as a wonderfully accessible and enjoyable project. Forget the notion that crafting requires complicated tools or advanced skills. With just a few basic items and a sprinkle of imagination, you can fashion a functional and stylish bottle opener that will not only serve its purpose admirably but also impress your friends and family with its handmade charm.
This comprehensive guide delves into the art of creating a classic wooden bottle opener, a design that marries rustic elegance with practical utility. While there are many improvised methods to open a bottle—from lighters and rings to shell casings, hats, and even sandals—none offer the enduring satisfaction and personalized touch of a custom-built opener. We’ll explore why this project is so rewarding, the simple materials and tools you’ll need, and a detailed step-by-step process, all while emphasizing a smooth, clean aesthetic. Get ready to embrace the joy of hands-on creation and add a truly unique item to your home or gift collection.
Why Craft Your Own Bottle Opener? The Benefits of a Handmade Touch
In a world saturated with mass-produced goods, the appeal of handmade items continues to grow. A DIY bottle opener is more than just a functional gadget; it’s a statement. Here’s why embarking on this simple project is an incredibly rewarding endeavor:
- Personalization and Uniqueness: Unlike store-bought openers, yours will bear the unmistakable mark of your creativity. You can choose the type of wood, the finish, and even add unique carvings or engravings, making it a one-of-a-kind piece. This individuality makes it an excellent conversation starter and a reflection of your personal style.
- Sense of Accomplishment: There’s an undeniable satisfaction that comes from bringing an idea to life with your own hands. Completing a DIY project, especially one as practical as a bottle opener, provides a tangible representation of your efforts and skill, boosting confidence and encouraging further creative pursuits.
- Cost-Effectiveness: While bottle openers aren’t prohibitively expensive, making one often costs next to nothing, especially if you’re repurposing scrap wood or old nails. It’s an economical way to acquire a useful item while engaging in a fun hobby.
- Eco-Friendly Crafting: This project offers a fantastic opportunity for upcycling. Utilizing salvaged wood or repurposing materials reduces waste and promotes sustainable living, aligning with environmentally conscious practices.
- Perfect Gift Idea: A handmade bottle opener makes a thoughtful and personal gift for birthdays, housewarmings, holidays, or as a thank-you. It shows care and effort in a way that a store-bought item simply cannot match, creating a memorable keepsake for the recipient.
- Skill Development: Even simple projects like this one help you develop basic woodworking skills, such as measuring, cutting, drilling, and finishing. These fundamental skills can then be applied to more complex DIY endeavors in the future.
The Anatomy of a Simple Wood & Nail Bottle Opener
At its core, a bottle opener operates on the principle of leverage. The design we’re focusing on—a wooden handle combined with a sturdy nail—is a brilliant example of simplicity meeting effectiveness. The wood block provides a comfortable grip and the necessary counter-leverage, while the nail acts as the critical fulcrum and hook. When positioned correctly, the nail catches the lip of the bottle cap, and with a gentle upward motion of the wooden handle, the cap is effortlessly lifted off. The beauty lies in its straightforward mechanics and the minimal components required to achieve maximum functionality.
Essential Materials You’ll Need
One of the most appealing aspects of this project is the accessibility of its materials. You likely have many of these lying around your garage or workshop, or they can be acquired very cheaply:
- A Block of Wood: Choose a sturdy piece of wood. Hardwoods like oak, maple, or walnut are excellent for durability and aesthetic appeal, but even softer woods like pine or poplar can work. Look for a piece that’s comfortable to hold – typically around 5-7 inches long, 1.5-2 inches wide, and 0.5-1 inch thick. Scrap wood from previous projects is perfect for this.
- A Strong Nail: The nail is the heart of your opener. Opt for a robust, preferably galvanized or stainless steel nail that won’t bend easily. A common 2.5 to 3-inch common nail or a larger framing nail (around 8d or 10d) with a good head will work best. The head will serve as the prying point.
- Sandpaper: Various grits, from coarse (80-120 grit) for shaping to fine (220+ grit) for a smooth finish.
- Wood Glue or Epoxy (Optional but Recommended): For securing the nail firmly in place, especially if you’re worried about it loosening over time.
- Wood Finish (Optional): To protect the wood and enhance its appearance. This could be wood stain, polyurethane, beeswax, or mineral oil.
Tools for the Job
Even for beginner woodworkers, the tools required for this project are typically standard household items or inexpensive to purchase:
- Saw: A hand saw, miter saw, or even a jigsaw for cutting the wood to your desired length.
- Drill: A power drill (corded or cordless) with a drill bit slightly smaller in diameter than your nail. This creates a pilot hole for easier insertion and a tighter fit.
- Hammer: For carefully tapping the nail into its final position.
- Pencil and Ruler/Measuring Tape: For marking your cuts and drill points accurately.
- Safety Glasses: Always protect your eyes when working with tools and wood.
- Clamps (Optional): To secure the wood block to a workbench while cutting or drilling, ensuring stability and safety.
Step-by-Step Guide to Crafting Your Wooden Bottle Opener
Now that you have your materials and tools ready, let’s get started on building your very own custom bottle opener. Follow these steps for a smooth and enjoyable crafting experience:
- Step 1: Design and Measure Your Wood Block
Start by deciding on the ideal length for your bottle opener. A common comfortable size is between 5 to 7 inches. Use your ruler and pencil to mark this length on your chosen piece of wood. Consider the width and thickness as well; a chunkier piece provides a better grip and more leverage. You can also sketch out any desired shaping, such as rounded edges or a tapered handle, at this stage. - Step 2: Cut and Rough Shape the Wood
Carefully cut the wood block to your marked length using your saw. If you’ve sketched any custom shapes, now is the time to make those cuts. Always use clamps to hold the wood steady while cutting and wear your safety glasses. Once cut, use coarser sandpaper (80-120 grit) to smooth out any rough edges or splinters and begin shaping the handle if desired. - Step 3: Mark and Drill the Pilot Hole for the Nail
This is a crucial step for functionality. Measure about 0.5 to 0.75 inches from one end of your wood block. This is where the head of the nail will be positioned. Then, measure about 0.5 to 0.75 inches in from the long edge of the wood, aiming for the center. Mark this point clearly with your pencil. Select a drill bit that is slightly smaller in diameter than your nail – this ensures a snug fit. Carefully drill a pilot hole at your marked point. The depth of the hole should be sufficient to secure the nail, typically about 1 to 1.5 inches deep, depending on the length of your nail and the thickness of the wood. Make sure to drill straight to avoid the nail coming out crooked. - Step 4: Insert and Secure the Nail
With the pilot hole drilled, take your chosen nail. Apply a small amount of wood glue or epoxy into the pilot hole and around the shaft of the nail (this is optional but highly recommended for long-term durability). Carefully insert the pointed end of the nail into the pilot hole. Using your hammer, gently tap the nail until its head is firmly seated against the end of the wood block. The nail head should be positioned in such a way that it can easily catch the lip of a bottle cap, with the shaft extending into the wood and providing the necessary support and leverage. Ensure the nail is perpendicular to the wood for optimal function. - Step 5: Sand and Smooth the Wood
Once the nail is securely in place (and any glue has dried), it’s time to refine the wood. Start with medium-grit sandpaper (150-180 grit) to remove any remaining rough spots, tool marks, or pencil lines. Progress to finer grits (220-320 grit) for a silky-smooth finish. Pay special attention to the edges and corners to ensure there are no sharp points or splinters. The smoother the wood, the more comfortable the bottle opener will be to hold. - Step 6: Apply a Finish (Optional)
To protect your wooden bottle opener from moisture, grime, and general wear, and to enhance its appearance, apply a suitable wood finish. Wood stain can add color and bring out the grain, while polyurethane or lacquer will provide a durable, protective layer. For a more natural and food-safe option (especially if it might come into contact with beverages), consider mineral oil or a beeswax finish. Follow the product instructions for application and drying times. This step truly elevates the look and longevity of your handmade item. - Step 7: Personalize and Enjoy!
Now that your bottle opener is complete, you can add any final personalized touches. This might include engraving initials, painting a unique design, or adding a leather loop for hanging. Once finished, put your creation to the test! You’ll find immense satisfaction in using a tool you crafted yourself, knowing it’s truly one of a kind.
Video Tutorial | How To Make Your Own Cool Bottle Opener
For those who prefer a visual guide or want to see the process in action, the following video tutorial brilliantly demonstrates how to make an elegant bottle opener fashioned from wood and a simple nail. It strips away any complexity, showing you exactly how to utilize basic tools to complete this cool DIY project. It’s an excellent resource for beginners and a great way to visualize each step before you start:
Beyond the Basic Design: Creative Variations & Enhancements
While the wood and nail design is a fantastic starting point, the world of DIY bottle openers is full of creative possibilities. Once you’ve mastered the basic technique, you might consider exploring these variations:
- Wall-Mounted Bottle Openers: Integrate your wooden opener onto a larger piece of wood or a small plaque. Add a magnet catch at the bottom to neatly collect bottle caps as they fall. These are incredibly convenient for entertaining and make a stylish addition to any kitchen or bar area.
- Keyring Bottle Openers: Smaller versions can be crafted from metal or tough resin and attached to keychains, ensuring you always have an opener on hand. These often utilize a different mechanism, typically a specialized metal insert.
- Bottle Openers Integrated into Other Objects: Imagine a cutting board with a built-in opener, or a piece of furniture with a discreetly placed prying mechanism. The possibilities for integration are endless, adding both whimsy and utility.
- Upcycled Material Openers: Get truly creative by repurposing items. Old wrenches can be ground and shaped into robust openers, discarded bicycle parts can be reimagined, or even robust pieces of plastic can be molded. The original article mentions lighters, rings, shell casings, hats, and sandals—these typically work by leveraging a sturdy edge against the cap, often requiring a degree of technique and potentially damaging the improvised tool. Crafting a dedicated opener, however, is much more reliable and elegant.
- Resin Bottle Openers: For those with an interest in resin art, embedding a metal opener insert into a custom resin mold allows for stunning, colorful, and unique designs, often incorporating dried flowers, glitter, or other decorative elements.
- Advanced Finishing Techniques: Experiment with wood burning for intricate patterns, laser engraving for personalized messages, or various painting techniques to create truly artistic openers.
The Joy of DIY: Why Every Home Needs More Handmade Projects
Creating your own bottle opener is just one small step into the expansive and rewarding world of DIY. Engaging in handmade projects offers a wealth of benefits that extend far beyond the finished product:
- Unleashing Creativity: DIY provides an invaluable outlet for self-expression and innovation. It allows you to transform ideas into tangible objects, fostering a sense of artistic freedom and personal style that store-bought items simply can’t replicate.
- Developing Practical Skills: From basic carpentry and measuring to problem-solving and material manipulation, DIY projects hone a wide array of practical skills. These abilities are transferable and can empower you to tackle other home improvements, repairs, and creative endeavors with confidence.
- Budget-Friendly Home Solutions: Many DIY projects offer significant cost savings compared to purchasing ready-made items. Whether it’s building furniture, decorating, or creating functional gadgets like a bottle opener, doing it yourself can stretch your budget further while still achieving high-quality results.
- Promoting Sustainable Living: Repurposing materials, upcycling old items, and creating durable goods are all core tenets of DIY. This approach reduces waste, minimizes consumption, and contributes to a more environmentally conscious lifestyle, giving new life to otherwise discarded resources.
- Mindfulness and Stress Reduction: The focused nature of crafting can be incredibly therapeutic. Engaging in a hands-on project allows you to disconnect from daily stressors, practice mindfulness, and experience the calming rhythm of creation. It’s a wonderful way to decompress and achieve a sense of calm.
- Creating Personalized Gifts and Keepsakes: Handmade gifts carry a special meaning that money can’t buy. They reflect effort, thought, and a personal touch, making them cherished possessions. DIY projects also allow you to create unique home decor that perfectly matches your aesthetic.
- Fostering a Sense of Empowerment: Successfully completing a DIY project, no matter how small, instills a profound sense of self-reliance and accomplishment. It demonstrates your capability to fix, build, and create, empowering you to take on new challenges and transform your living space.
Embrace the DIY spirit! The journey of creation is just as rewarding as the final product. So, whether it’s a simple bottle opener or a more elaborate piece of furniture, dive in and discover the endless possibilities that await your hands.