
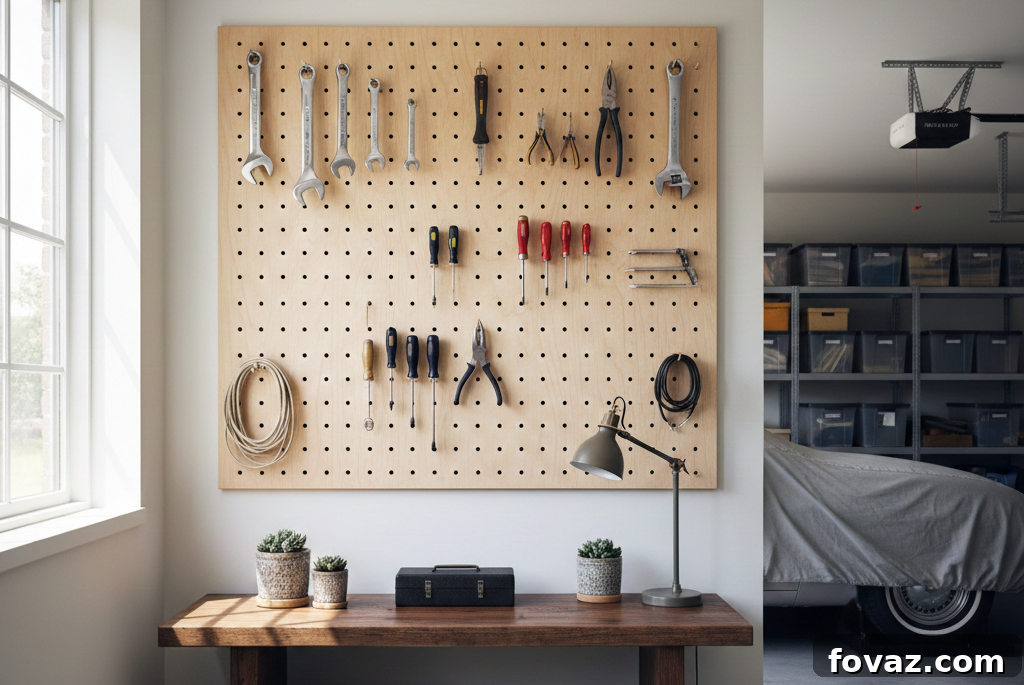
Tired of endlessly searching for misplaced tools in your garage? Is your workbench perpetually cluttered, slowing down every DIY project you tackle? Imagine a workspace where every wrench, hammer, and drill bit is visible, easily accessible, and perfectly organized. It’s not a dream; it’s the power of a well-planned pegboard wall. Transform your chaotic garage into an efficient, productive haven with this incredibly simple, budget-friendly DIY project that can be completed in under an hour.
A disorganized garage is more than just an eyesore; it’s a productivity killer. Precious minutes, even hours, are wasted rummaging through overflowing toolboxes and drawers. This frustration can often deter you from starting or finishing projects. The solution used by seasoned builders and meticulous DIYers alike is elegantly straightforward: a custom-built pegboard wall. It reclaims valuable vertical space, turning unused walls into highly functional storage real estate. Best of all, you can achieve this workshop transformation for less than $75.
This comprehensive guide will walk you through building your very own sturdy and versatile garage pegboard wall in approximately 55 minutes, providing all the tips and tricks you need for a successful installation.
Effortless Garage Transformation: Build Your Pegboard Wall Today
Get ready to revolutionize your workshop with a simple, high-impact project. Here’s a quick overview:
- Total Time: Approximately 55 minutes (5 minutes for stud finding, 30 minutes for mounting panels, 20 minutes for organizing hooks).
- Estimated Cost: $50-$75 for a complete setup, including high-quality pegboard panels, furring strips, essential screws, and a starter set of hooks.
- Immediate Benefits: Instantly triple your usable storage space, eliminating floor clutter. Locate any tool in mere seconds, boosting your efficiency and enjoyment of every project.
Gather Your Essentials: Materials and Tools
Before you begin, ensure you have all the necessary materials and tools. A quick trip to your local hardware store is usually all it takes to get everything you need for this project. Opt for quality materials where possible, as they contribute to the longevity and stability of your pegboard system.
Materials Checklist:
- Pegboard Panels: Standard 4′ x 8′ sheets are common and cost-effective. You can have them cut to your desired size at the hardware store, or do it yourself with a circular saw. Consider tempered hardboard or metal pegboard for extra durability and moisture resistance, especially in a garage environment.
- 1×2 Furring Strips: These wooden strips create the essential standoff space behind the pegboard, allowing hooks to be inserted properly. They also provide a solid mounting surface. Make sure they are straight and free from major warps.
- Wood Screws: You’ll need two sizes.
- 2½” Screws: For securely attaching the furring strips directly into your wall studs.
- 1¼” Screws: For fastening the pegboard panels to the furring strips. These should be long enough to penetrate the pegboard and into the furring strip without going through the entire strip.
- Pegboard Hooks: An assorted set of hooks is ideal to start. Look for kits that include various shapes and sizes to accommodate different tools. Consider specialized hooks like J-hooks, double hooks, and small bins for maximum versatility.
Tools You’ll Need:
- Stud Finder: Non-negotiable for safety and stability. This electronic device helps you locate the wooden studs behind your drywall, ensuring a secure mounting point for your heavy tools.
- Level: A 2-foot or 4-foot level will ensure your furring strips and pegboard panels are perfectly straight, giving your finished wall a professional look and preventing crooked tools.
- Drill/Driver: Essential for pre-drilling pilot holes and driving screws quickly and efficiently. Make sure you have appropriate drill bits for wood screws.
- Pencil: For marking stud locations, screw points, and panel measurements.
The total estimated cost for these materials and tools (assuming you already own basic tools like a drill and pencil) typically ranges from $50 to $75, making this an incredibly cost-effective garage upgrade.
- Over 10 times stronger than conventional pegboard, offering superior strength for more storage.
- Accepts slotted, stable, and secure hooks, brackets, shelves, and standard 1/4-inch pegs.
Buy on Amazon
(As an Amazon Associate, we earn from qualifying purchases.)
Step 1: Locate and Mark Your Wall Studs (5 Minutes)
The foundation of a strong and secure pegboard wall is a proper connection to your wall studs. This step is critical for ensuring your pegboard can safely hold the weight of your tools without pulling away from the wall.
Execution:
- Turn on your stud finder and calibrate it according to the manufacturer’s instructions.
- Slowly move the stud finder horizontally across the wall where you intend to install your pegboard. Listen for the beep or watch for the indicator light that signals the presence of a stud.
- Once a stud is detected, use your pencil to mark its center. Continue scanning to find adjacent studs, which are typically spaced 16 or 24 inches apart on center.
- Draw a vertical line down each identified stud location. These lines will serve as your guides for attaching the furring strips in the next step.
Why this matters: Drywall alone cannot support the weight of tools. Attaching directly to drywall will inevitably lead to your pegboard sagging or even collapsing. By anchoring your furring strips into the sturdy wooden studs, you create a robust mounting system capable of handling substantial weight, ensuring your tools remain safely on the wall.
- Value Package: This pegboard accessories kit comes with 4 pegboard baskets in different sizes (S, M, L, XL), offering versatile storage.
- Fits Any Standard Pegboard: Features a 0.15-inch thick diameter, suitable for both 1/8″ and 1/4″ pegboards with 1″ spacing.
Buy on Amazon
Step 2: Mount the Furring Strips and Pegboard Panels (30 Minutes)
This is where your pegboard wall truly takes shape. Precision in this step will ensure a stable, level, and functional storage system.

Install Furring Strips First:
- Cut and Position: Cut your 1×2 furring strips to the desired length of your pegboard panels. Position the first strip horizontally along the top of where your pegboard will go, aligning it with the stud marks you made.
- Secure Attachment: Using your drill, drive 2½” wood screws through the furring strip and into the center of each wall stud. Ensure the screw heads are flush with the wood but don’t overtighten, which can split the wood.
- Strategic Spacing: Install additional horizontal furring strips approximately 16″ apart down the wall. For most standard pegboard installations, a top, middle, and bottom strip will provide ample support. For larger or heavier loads, you might add more strips. Ensure each strip is attached to at least two studs.
- Level Check: After attaching each furring strip, use your level to confirm it is perfectly horizontal. Even slightly crooked strips will result in a visibly crooked pegboard, diminishing the aesthetic and potentially affecting how hooks sit.
Attach Your Pegboard Panels:
- Positioning the Panel: Carefully lift your first pegboard panel and position it over the installed furring strips. Ensure the edges align properly and the panel covers the strips as intended. The furring strips create the crucial ¼-inch to ¾-inch gap between the pegboard and the wall, which is essential for hooks to slide in and out freely.
- Drilling and Securing: Using your drill, pre-drill pilot holes through the pegboard and into the furring strips at regular intervals, typically every 12 inches along each strip. Then, drive 1¼” screws through these holes to secure the pegboard firmly to the furring strips. Start from the center and work your way out to ensure the panel lays flat.
- Joining Multiple Panels: If you are installing multiple pegboard panels, align their edges precisely. You can place furring strips vertically along the seam where two panels meet to provide additional support and a cleaner look.
Beginner Tip: Enlist a helper for this step! Holding large pegboard panels steady while trying to drive screws can be challenging for one person. An extra set of hands makes the process much smoother and safer.
- Easy to use, with everything required to mount a pegboard to the wall included in one package.
- Eliminates the need to purchase expensive wood framing and additional hardware to mount pegboard to a flat wall.
Buy on Amazon
Step 3: Install Your Pegboard Hooks and Organize (20 Minutes)
With your pegboard securely mounted, the fun part begins: organizing your tools! This step is about optimizing accessibility and creating a logical flow for your workspace.
Strategic Tool Placement:
- Start with High-Use Tools: Begin by placing your most frequently used tools such as your drill, hammer, tape measure, and screwdrivers. Position these items at eye level or within easy reach to maximize efficiency.
- Weight Distribution: Place heavier tools, like circular saws or impact wrenches, on sturdier, lower-level hooks or specialized brackets. This maintains balance and reduces strain on the pegboard.
- Logical Grouping: Group similar tools together (e.g., all wrenches, all pliers, all drilling accessories). This makes it intuitive to find what you need and return it after use.
- Consider Workflow: Arrange tools based on how you use them. If you have a specific workbench area, place the tools used most often at that station within arm’s reach.
Explore Versatile Hook Types:
- J-hooks: Perfect for hanging hammers, mallets, wrenches, and other tools with a handle or a hanging hole.
- Double Hooks: Ideal for power tools like drills, jigsaws, or larger hand tools that require more stable support.
- Shelf Brackets: Transform sections of your pegboard into mini-shelves for paint cans, containers of nails/screws, or other items that can’t be hung directly.
- Basket Hooks/Bins: Essential for organizing small parts, fasteners, nuts, bolts, safety glasses, or even frequently used cleaning supplies.
- Loop Hooks: Great for extension cords, air hoses, or measuring tapes.
Pro Tip for Hook Stability: Not all pegboard hooks are created equal. Some cheaper plastic hooks might slip out under heavy use. Before loading a hook, give it a tug to test its stability. If a hook feels loose, you can often secure it by wrapping a small piece of painter’s tape or a zip tie around the back peg where it meets the pegboard. This provides a tighter fit and prevents unwanted movement.
Maximizing Your Pegboard: Beyond Basic Hooks
Once your basic organization is in place, consider ways to further enhance your pegboard system:
- Custom Cutouts: For specialty tools, you can create custom cutouts in thin plywood or foam sheets that then hang on your pegboard. Trace your tool, cut the shape, and then screw a couple of pegboard hooks into the back of the cutout for a perfect fit.
- Labeling: For ultimate efficiency, consider adding labels above or around where each tool hangs. This is especially helpful for shared workspaces or for ensuring every tool is returned to its designated spot.
- Magnetic Strips: Install magnetic strips directly onto your pegboard for quick access to small metal items like drill bits, hex keys, or small screwdrivers.
- Vertical Storage: Don’t forget the space between hooks. Use small S-hooks or ties to hang smaller items from larger ones, or from the pegboard holes themselves.
- Expansion: Your pegboard system isn’t static. As your tool collection grows or your needs change, you can easily add more panels, reposition hooks, or incorporate new accessories to keep your workspace optimized.
The Transformative Benefits You’ll Gain
Investing a short time in building a pegboard wall yields incredible returns in efficiency, organization, and enjoyment of your DIY projects.
- Triple Your Storage: By utilizing vertical wall space, you effectively expand your storage capacity without taking up precious floor space, making your garage feel larger and more open.
- Instant Tool Visibility: Gone are the days of rummaging. Every tool is prominently displayed, allowing you to visually scan and locate what you need in a single glance.
- Time Saved, Projects Accelerated: Imagine cutting minutes of searching from every single project. This adds up to hours saved over the year, meaning you can complete projects faster and take on more ambitious endeavors.
- Boosted Productivity and Enjoyment: A well-organized space reduces frustration and enhances your focus. You’ll find yourself more motivated to start projects and more satisfied with your productive workspace.
That brand new drill you just bought? It won’t get lost in a drawer; it’ll be hanging proudly at eye level. Your measuring tape? No more frantic digging. Every screwdriver in your collection? Organized and just one glance away. This isn’t just about storage; it’s about creating an environment that fosters creativity and productivity.
- Value Package: This pegboard organizer accessories kit comes with 11 different types of pegboard hooks, providing comprehensive storage solutions.
- Extra Thick Pegboard Hooks: Made from hardened steel construction, these hooks are heavy-duty and designed for durability and strength.
Buy on Amazon
Final Thoughts on Your Organized Workspace
Your journey to a more organized, efficient, and enjoyable workshop begins with this simple project. Dedicate one Saturday afternoon to building this essential pegboard wall, and you’ll immediately start reaping the rewards. No more wasted time hunting for tools, no more cluttered surfaces hindering your work. Instead, you’ll have a clear, functional workspace that inspires productivity and makes every DIY project a pleasure. It’s time to stop searching for tools and start building your next masterpiece.
Frequently Asked Questions (FAQs)
Q: How much does it typically cost to build a functional pegboard wall?
A: For a standard 8-foot section, you can expect to spend between $50 and $75. This estimate covers the cost of pegboard panels, wooden furring strips, the necessary screws, and a basic assortment of hooks to get you started. Opting for specialized metal pegboard or a very large area might slightly increase this cost.
Q: What specific tools are absolutely essential for the installation process?
A: You’ll primarily need a drill/driver for fastening screws, a stud finder to locate wall studs for secure mounting, a level to ensure your pegboard is straight, and a pencil for marking. Most DIY enthusiasts already own these basic tools, making this an accessible project for almost everyone.
Q: How long does the installation of a pegboard wall actually take for an average DIYer?
A: For most individuals, the entire installation can be completed in approximately 55 minutes. This breaks down to about 5 minutes for accurately finding and marking wall studs, 30 minutes for cutting and mounting the furring strips and pegboard panels, and 20 minutes for arranging your tools with hooks. If you’re a first-timer or tackling a larger section, you might add an extra 15-30 minutes.
Q: Can I install a pegboard wall on concrete or brick?
A: Yes, but the installation method will differ slightly. Instead of finding wooden studs, you’ll need to use appropriate masonry drill bits, concrete screws, or anchors. You’d still mount furring strips to create the necessary standoff for hooks, but using hardware designed for masonry.
Q: What type of pegboard should I choose for my garage?
A: Standard hardboard pegboard is cost-effective and good for dry environments. For garages that experience humidity fluctuations, or if you plan to hang heavier tools, consider tempered hardboard (which is denser and more moisture-resistant) or metal pegboard. Metal pegboard is the most durable, fire-resistant, and typically supports more weight, though it’s also the most expensive option.