
Your outdoor space holds incredible potential, often serving as a personal sanctuary or a vibrant gathering spot. Imagine enhancing this beauty and functionality with a captivating water feature that offers both visual appeal and a soothing ambiance. A meticulously designed backyard pond can transform your garden into a picturesque oasis, a haven for relaxation and a focal point for family enjoyment. Far from being a daunting endeavor, creating your own garden pond is a rewarding DIY project that even beginners can master. Get ready to dive into the world of backyard pond building as we guide you through a simple yet comprehensive process, ensuring you can bring this magnificent vision to life with ease.
Transform Your Garden: A Simple DIY Pond Project for Beginners
A backyard pond is more than just a decorative element; it’s an invitation to connect with nature, offering a dynamic ecosystem right in your own backyard. Envision the serene beauty of aquatic plants swaying gently, the calming ripples on the water’s surface, and the graceful movement of fish. This project isn’t just about adding a water feature; it’s about crafting an immersive experience that enriches your outdoor living. With our easy-to-follow guide, you’ll discover how straightforward it is to build a beautiful pond, turning your garden into an enviable retreat.
Why Build a DIY Backyard Pond? Beyond Aesthetics
While the aesthetic enhancement of a garden pond is undeniable, the benefits extend much further. Installing a pond in your garden can:
- Create a Relaxing Ambiance: The gentle sounds of trickling water from a spitter or waterfall are incredibly calming, reducing stress and fostering a peaceful environment perfect for unwinding after a long day.
- Attract Wildlife: A pond becomes a magnet for local wildlife, inviting birds, frogs, dragonflies, and other beneficial insects to your garden, enhancing biodiversity and creating a vibrant natural spectacle.
- Educational Opportunities: For families, a pond offers a living classroom, providing endless opportunities to learn about aquatic ecosystems, plant life, and animal behavior.
- Boost Property Value: A well-designed and maintained water feature is a significant landscape upgrade that can increase the curb appeal and market value of your home.
- Enhance Garden Design: Ponds add depth, texture, and movement to your garden, creating a focal point that complements surrounding landscaping and planting schemes.
- Personal Satisfaction: The pride and accomplishment of building something beautiful with your own hands are incredibly rewarding. A DIY pond is a testament to your creativity and effort.
Considering these compelling reasons, it’s clear that a backyard pond is a valuable addition to any outdoor space. Let’s delve into the practical steps of making this dream a reality.
Planning Your Perfect Pond: Key Considerations Before You Dig
Before you pick up a shovel, a little planning goes a long way in ensuring the success and longevity of your DIY pond. Thoughtful preparation will save you time, effort, and potential headaches down the line.
- Location, Location, Location:
- Sunlight: Choose a spot that receives 4-6 hours of direct sunlight daily if you plan to have lilies or other sun-loving aquatic plants. Too much sun can encourage algae growth, while too little might hinder plant health.
- Trees: Avoid placing your pond directly under deciduous trees, as falling leaves can decompose in the water, impacting water quality and requiring frequent cleaning. If unavoidable, consider a pond net.
- Visibility: Select a location where the pond can be easily enjoyed from your patio, deck, or a favorite window.
- Utility Lines: Before digging, always check for underground utility lines (water, gas, electricity, cable). Contact your local utility company to mark these areas.
- Accessibility: Ensure easy access to electricity for pumps and filters, and a water source for filling and topping off.
- Size and Shape:
- Depth: A minimum depth of 18-24 inches is recommended for a healthy ecosystem, especially if you plan to keep fish, as it provides thermal stability. Consider different depths for planting shelves.
- Overall Dimensions: The size will depend on your available space and desired impact. A larger pond generally offers more stability in water chemistry but requires more initial effort.
- Shape: Use a rope or garden hose to outline various shapes until you find one that complements your garden’s aesthetic and fits the chosen location naturally.
- Pond Type:
- Fish Pond: Requires specific depth, filtration, and aeration to support aquatic life.
- Plant Pond: Can be shallower, focusing on a variety of aquatic flora.
- Wildlife Pond: Designed to attract local fauna, often featuring shallow edges for easy access.
- Budgeting: Factor in the cost of liner, pump, filter, rocks, plants, fish, and any desired decorative elements. DIY projects are often more cost-effective but still require an investment.
Essential Supplies for Your Backyard Pond Project: What You’ll Need
Having the right materials on hand is crucial for a smooth and efficient build. Here’s a detailed list of what you’ll need and why each item is important:
- Rope or Garden Hose: For mapping out the pond’s shape and size. It allows for easy adjustments until you find the perfect outline.
- Pond Liner: This is the waterproof barrier that holds the water. EPDM (ethylene propylene diene monomer) liners are highly recommended for their durability, flexibility, and resistance to UV rays. Calculate the size needed by adding twice the maximum depth plus 2 feet to both the length and width of your pond. For example, if your pond is 5×7 feet and 2 feet deep, you’d need a liner that’s (5 + 2*2 + 2) x (7 + 2*2 + 2) = 11 x 13 feet.
- Pond Underlayment (Optional but Recommended): A protective layer placed beneath the liner. It cushions the liner from sharp rocks, roots, and uneven soil, significantly extending the liner’s lifespan. Old carpet remnants or newspapers can serve as a makeshift underlayment if a commercial product is out of budget.
- Pond Filter Kit (Pump and Filter): Absolutely essential for maintaining water quality.
- Pump: Circulates water, preventing stagnation and feeding the filter. Choose a pump appropriate for your pond’s volume (e.g., capable of circulating the pond’s entire volume every 1-2 hours).
- Filter: Removes debris (mechanical filtration) and converts harmful ammonia/nitrites into safer nitrates (biological filtration). Some kits include UV sterilizers to control algae.
- Stones (Limestones, River Stones, Flagstones, etc.): Used for securing the pond liner, creating natural edges, providing habitat for beneficial bacteria, and aesthetic appeal. River stones are smooth and rounded, perfect for the pond’s interior, while flagstones or larger rocks can create decorative edges and waterfalls.
- Chlorine Remover/Water Conditioner: Tap water contains chlorine or chloramines, which are toxic to fish and beneficial bacteria. This treatment neutralizes these chemicals, making the water safe for aquatic life.
- Pond Spitter or Other Water Feature: A decorative element that also serves a functional purpose by aerating the water, which is vital for fish health and preventing algae. Examples include ceramic frogs, spitting fish, or small waterfall kits.
- Aquatic Plants: Crucial for a healthy pond ecosystem. They provide oxygen, absorb excess nutrients (reducing algae), offer shade, and shelter for fish. Consider marginals, submerged plants, and floating plants.
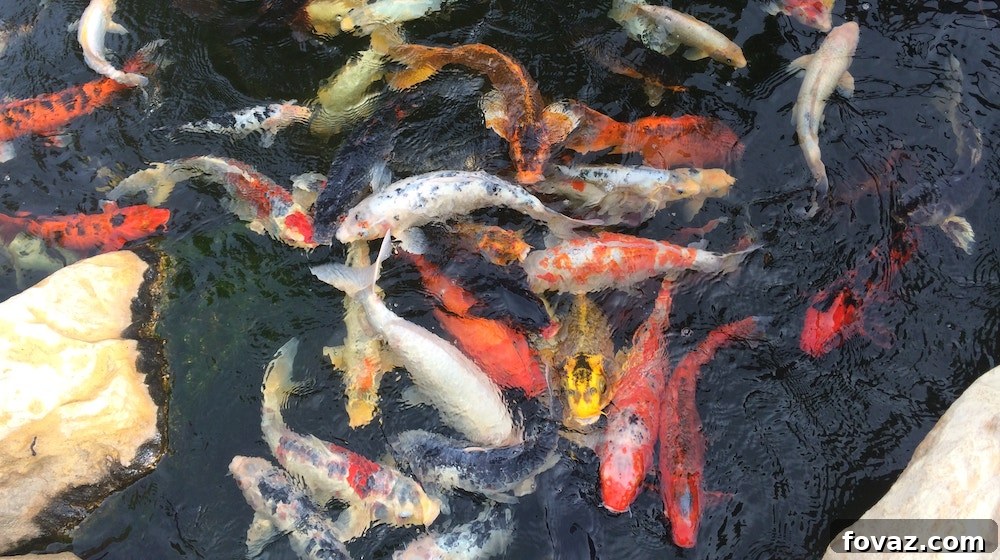
- Fish (Optional): Introduce fish after the pond has established its biological filtration (typically 2-4 weeks after setup). Goldfish and Koi are popular choices, but research species suitable for your pond’s size and climate.
Tools for the Job: Equipping Your DIY Pond Build
The right tools will make the excavation and construction process much easier and more efficient.
- Shovel: A sturdy digging shovel is your primary tool for excavating the pond basin.
- Spade: Useful for shaping edges and creating shelves within the pond.
- Dirt Wagon or Wheelbarrow: Essential for transporting excavated soil to another part of your garden or for disposal.
- Spirit Level (Long): To ensure your pond’s edges are level, preventing water from flowing out unevenly.
- Measuring Tape: For accurate sizing of the pond and liner.
- Utility Knife or Scissors: For cutting the pond liner.
- Work Gloves: To protect your hands during digging and rock placement.
- Buckets: For carrying water, small stones, or temporarily holding water during adjustments.
Step-by-Step Guide: Building Your Dream Backyard Pond
1. Design and Mark the Pond Area
Begin by visualizing your pond. Use your rope or garden hose to lay out the desired shape on the ground. Experiment with different configurations until you achieve an outline that looks natural and fits harmoniously within your existing garden landscape. Walk around the marked area, view it from different angles, and make sure you’re happy with the size and contours. Remember, this is your chance to refine the design before any digging begins.
2. Excavating Your Pond: Digging Deep and Shaping Shelves
This is where the real work begins. Using your shovel, start digging out the pond area. As you dig, think about creating different depths and shelves. Shallow shelves (6-12 inches deep) are ideal for marginal plants and for fish to hide. A deeper central area (at least 18-24 inches) is crucial for fish to overwinter and for overall water stability. Ensure the pond sides have a slight slope rather than being completely vertical, which helps prevent liner damage and allows for a more natural look. Use your spirit level frequently to check that the top edge of the pond is perfectly level; this is vital for ensuring an even waterline once the pond is filled. Remove any sharp rocks, roots, or debris from the excavated hole that could puncture the liner.
3. Preparing the Pond Bed and Laying the Liner
Once your hole is dug and shaped, it’s time to prepare the bed for the liner. This step is critical for preventing punctures. First, add a 1-2 inch layer of sand to the bottom and sides of the pond hole, smoothing it out to create an even surface. Next, lay down your pond underlayment, covering the entire excavated area. This provides an additional protective barrier. Finally, carefully unfold your pond liner and drape it over the hole, ensuring it conforms to the contours of your pond. Allow a generous 10 to 12-inch overhang of the liner around the entire perimeter. This excess material will be used to secure the liner later and provides flexibility during filling.
4. Initial Water Fill and Liner Adjustment
Begin filling the pond with water using a garden hose. As the water level slowly rises, the weight of the water will push the liner into place. This is the opportune moment to gently smooth out any major wrinkles in the liner, pressing them outwards from the center. Avoid pulling the liner too taut. Fill the pond to approximately the halfway point. This partial fill allows you to make further adjustments to the liner and ensures it settles properly before the full weight of the water is applied.
5. Installing the Filtration System
A robust filtration system is the heart of a healthy pond. Unpack your pond filter kit and assemble the pump and filter components according to the manufacturer’s instructions. Position the pump in the deepest part of the pond to ensure it can draw in debris from the bottom. Connect the tubing from the pump to the filter unit, and then position the filter unit just outside the pond’s edge or in a designated filtration area. Ensure all connections are secure to prevent leaks.
6. Integrating Water Features: Attaching a Water Spitter
Now is the time to add your chosen water feature. If using a pond spitter (like a charming ceramic frog or spitting fish), connect its tubing to the output of your pump or filter system. Position the spitter where its stream of water will gently fall back into the pond, creating pleasing sounds and providing vital aeration. Other options include small decorative fountains or even a simple waterfall spillway.
7. Completing the Water Fill and Placing Pump Assembly
With the pump and spitter in place, continue filling the pond with water until it reaches your desired level, typically just below the finished edge. Keep an eye on the liner during this final fill, making any minor adjustments to ensure it lays smoothly. Once full, plug in your pump and filter system to test its operation. Watch the water flow, listen to the sounds, and ensure everything is working as intended.
8. Water Conditioning: Adding Chlorine Remover
Before introducing any precious fish or delicate aquatic plants, it’s absolutely crucial to treat the water. Add the recommended amount of chlorine remover or water conditioner to neutralize harmful chemicals present in tap water. Follow the product instructions carefully regarding dosage and the waiting period before adding life to your pond. This step creates a safe and healthy environment for your pond’s future inhabitants.
9. Securing the Liner with Stones and Creating Natural Edges
Once the pond is completely full and the liner has settled, it’s time to secure the overhang and create a natural-looking edge. Begin by carefully folding or trimming the excess liner around the perimeter, ensuring a neat finish. Then, start placing your chosen stones (limestones, river stones, flagstones, etc.) along the edge of the pond. Overlap the liner with the stones, effectively pinning it down and concealing it from view. Arrange the stones artistically to create a natural transition from your garden to the pond, building up layers for a more organic appearance. You can also use smaller pebbles or gravel along the bottom of the pond or on shelves to provide additional substrate for beneficial bacteria and a more finished look.
10. Adding Life: Introducing Plants and Fish
With your pond structurally complete and water conditioned, it’s time to bring it to life!
- Pond Plants: Introduce a variety of aquatic plants. Marginal plants (like irises, cattails) thrive on the shallow shelves. Submerged plants (like anacharis) oxygenate the water. Floating plants (like water lilies, hyacinths) provide shade, reduce algae, and add beauty. Research which plants are suitable for your climate and pond size.
- Fish: If you plan to add fish, wait a few weeks for the pond’s ecosystem to establish beneficial bacteria. Introduce fish gradually, acclimating them slowly to the pond water temperature before releasing them. Start with hardy species like goldfish. Avoid overcrowding.
Congratulations! Your DIY backyard pond is now complete, a stunning focal point ready to bring years of enjoyment and tranquility to your outdoor space.
Pond Maintenance Essentials for a Thriving Ecosystem
A beautiful pond requires ongoing care to remain healthy and clear. Regular maintenance includes:
- Water Testing: Periodically test pH, ammonia, nitrite, and nitrate levels to ensure optimal conditions for fish and plants.
- Filter Cleaning: Clean your pond filter regularly according to manufacturer instructions to prevent clogging and maintain efficiency.
- Debris Removal: Skim leaves and other debris from the pond surface using a net to prevent decomposition and nutrient buildup.
- Algae Control: Manage algae with a combination of proper filtration, sufficient plants to outcompete algae for nutrients, and potentially a UV sterilizer.
- Water Changes: Partial water changes (10-20%) every few weeks can help dilute accumulated nitrates and replenish essential minerals. Always use a water conditioner.
- Seasonal Care: Prepare your pond for winter (e.g., install a de-icer if fish are overwintering) and perform a thorough spring cleaning.
Enjoying Your New Backyard Oasis
What a beautiful and rewarding addition your new pond will be to your garden! You now have even more reasons to step outside, relax, and enjoy the calming presence of water. This backyard DIY pond is quick and easy enough to tackle over a weekend, offering immediate gratification and lasting joy. So, if you’re looking for a project that blends creativity with nature, creating your very own pond is an excellent choice. Sit back, unwind, and let your new water feature become the backdrop for countless cherished moments in your outdoor sanctuary.
Watch the full video tutorial for this DIY project below:
Click here for more DIY home ideas.
Like this? You’ll also like…
This DIY Succulent Planter Will Make Walls And Gardens Look Beautiful
4 Steps To An Enthralling DIY Puzzled Concrete Walkway Project
15 Easy DIY Fire Pit Ideas
Featured Image Via amerifirst