

St. Patrick’s Day is a joyous celebration brimming with vibrant green, glimmering gold, and the luck of the Irish. While parades and festive gatherings are central to the holiday, nothing adds a personal, heartfelt touch quite like handmade crafts. These DIY projects infuse your home with cheer, entertain family members of all ages, and create lasting memories, making your celebration truly unique and special.
Instead of simply purchasing decorations, imagine the satisfaction of crafting your own vibrant shamrocks, whimsical leprechaun hats, or sparkling pots of gold. Handmade creations allow you to express your individual style and creativity, transforming ordinary materials into festive masterpieces. Luckily, these St. Patrick’s Day crafts are designed to be easy, engaging, and perfect for everyone, from toddlers to seasoned crafters. With just a splash of emerald green, a sprinkle of golden glitter, and a dash of enthusiasm, you can fashion delightful decorations and cherished keepsakes in no time. So, gather your supplies, put on some lively Irish tunes, and let’s embark on a creative journey to celebrate St. Patrick’s Day!
Unleash Your Inner Leprechaun: Easy & Fun St. Patrick’s Day Craft Ideas
Bring the spirit of St. Patrick’s Day into your home with these enjoyable and straightforward DIY projects. Whether you’re aiming to decorate your living space, keep little hands busy, or add a creative flourish to your holiday party, these crafts are the perfect way to infuse some authentic Irish charm. Best of all, they’re not only simple and fun but also adaptable for crafters across all age groups, ensuring everyone can join in the festive making.
1. Shamrock Stamping with Bell Peppers: A Unique Touch of Green Luck
Shamrocks are the iconic symbol of good fortune and St. Patrick’s Day. This ingeniously simple craft allows you to create your own lucky prints using an unexpected tool: a bell pepper! Believe it or not, when sliced correctly, a bell pepper reveals a natural, perfectly shaped shamrock pattern, making it an ideal stamp for festive artwork. It’s a fantastic way to combine art with a touch of culinary creativity.
Materials:
- A firm, round bell pepper (green or red works, but green adds to the theme!)
- Green acrylic or fabric paint (choose fabric paint for wearable items)
- Thick paper, cardstock, fabric, or a canvas for your prints
- A small paintbrush for adding stems and fine details
- A flat dish or plate for the paint
Instructions:
- Carefully slice the bell pepper horizontally across its widest part. You’ll notice the inner core naturally forms three or four distinct sections, resembling a shamrock. Choose a slice that has the most pronounced shamrock shape.
- Pour a generous amount of green paint onto a flat dish or paper plate. Ensure the paint is spread evenly.
- Gently press the cut side of the bell pepper into the paint, ensuring the entire shamrock pattern is coated. Remove any excess paint by lightly dabbing it on a scrap piece of paper.
- Firmly press the paint-covered bell pepper onto your chosen paper, fabric, or canvas. Apply even pressure to ensure a clear and complete print. Carefully lift the pepper straight up.
- Allow the paint to dry slightly. Then, use a small paintbrush to add a distinctive stem to each shamrock. You can also add other small details like veins or shading if desired.
- Let your artwork dry completely. Once dry, your festive shamrock prints are ready to be displayed, framed, or gifted to spread some Irish luck!
💡 Creative Twist: Take this craft to the next level by using fabric paint to stamp shamrocks on plain tote bags, t-shirts, or even kitchen towels. These make wonderful personalized gifts or festive accessories for St. Patrick’s Day! You can also experiment with different shades of green paint for a dynamic look or add glitter to the wet paint for extra sparkle.
2. DIY Leprechaun Hats: Top Off Your Festive Look
No St. Patrick’s Day celebration is truly complete without the whimsical charm of a leprechaun hat! This delightful and straightforward craft is incredibly versatile. It can serve as a charming party favor for guests, a festive decoration to adorn your shelves or tables, or even a fun costume accessory for kids and adults alike. Crafting these hats adds an authentic, playful element to your holiday decor.
Materials:
- Green felt, green construction paper, or green cardstock
- Empty toilet paper rolls or small paper cups (for the hat’s base)
- Gold buttons, gold glitter, gold ribbon, or gold stickers for the buckle
- Black paper, black felt, or black electrical tape for the band
- Scissors
- Craft glue, hot glue gun (with adult supervision), or strong adhesive tape
Instructions:
- Start by creating the base of your hat. Wrap an empty toilet paper roll or a small paper cup (turned upside down) with green felt or paper. Secure it firmly with glue or tape, ensuring a smooth, seamless finish. This will form the main cylindrical part of the hat.
- Next, create the brim. Cut a large circle from green felt or paper. The diameter of this circle should be significantly wider than the base of your toilet paper roll/cup to create a recognizable hat brim. Cut a smaller circle from the center of this brim piece, just large enough to fit snugly around the bottom of your hat base.
- Attach the brim to the base by sliding it up from the bottom of the covered roll/cup and securing it with glue. Ensure it’s centered and firmly attached so it doesn’t wobble.
- Add the iconic black band around the base of the hat. Cut a strip of black paper, felt, or use black electrical tape. Wrap it around the lower part of the hat base, securing it with glue or by pressing the tape firmly. This creates the classic leprechaun hat look.
- Complete your hat by adding a golden buckle. Glue a gold button, a small square of gold paper, a shiny gold sticker, or even draw a buckle with a gold marker onto the center of the black band. This detail truly brings the leprechaun hat to life.
- Allow all glued components to dry completely before handling, wearing, or using your hats as decor.
🎩 Party Tip: Elevate these DIY leprechaun hats into exciting party favors! Fill them with shiny chocolate coins, vibrant rainbow-colored candies, or other small treats for a delightful surprise that your guests will surely adore. You can also make a variety of sizes to decorate different areas of your party space.
3. Pot of Gold Mason Jars: A Treasure Trove of Sweetness
Every St. Patrick’s Day needs its mythical pot of gold! This delightful and straightforward craft captures the essence of the legend and serves multiple purposes. It’s incredibly easy to make, functions perfectly as a charming party favor, a captivating centerpiece, or even a thoughtful gift. Filling it with golden treats makes it an irresistible highlight of your celebrations.
Materials:
- Small mason jars with lids (various sizes can create an interesting display)
- Black chalk paint, black acrylic paint, or black construction paper/felt
- Gold chocolate coins, yellow-wrapped candies (like lemon drops or Starbursts), or vibrant Skittles for a rainbow effect
- Gold ribbon, gold twine, or green ribbon for decorative accents
- Small tags or labels for personalized messages (optional)
Instructions:
- Transform your mason jar into a classic pot. You can either paint the jar entirely black using chalk paint or acrylic paint (apply multiple coats for opaque coverage), or wrap it neatly in black construction paper or felt, securing it with glue or tape. Ensure the paint or paper fully covers the glass for an authentic “pot” look.
- Once the black covering is dry, it’s time to fill your pot with treasure! For a traditional look, fill the jar to the brim with glittering gold chocolate coins. For an extra pop of color and fun, layer rainbow-colored candies like Skittles, creating a vibrant spectrum that evokes the end of a rainbow.
- Add an elegant or festive touch by tying a piece of gold ribbon, gold twine, or green ribbon around the neck of the jar, just below the lid. A simple bow can significantly enhance its decorative appeal.
- For a truly personalized touch, attach a small, handwritten note or tag to the ribbon with a festive message such as “You’re my pot of gold!”, “Happy St. Patrick’s Day!”, or “Wishing you good luck!”.
🎁 Gift Idea & Decor: These pot of gold mason jars are perfect for gifting. Personalize each jar with unique, heartfelt messages for friends, family, or teachers. As decor, arrange several jars of varying sizes on a table as a sparkling centerpiece, perhaps nestled on a bed of green fabric or surrounded by shamrock cutouts.
👉 Need more DIY gift ideas for all occasions? Explore Martha Stewart’s extensive craft collection for inspiration.
4. Rainbow Paper Chain Garland: Brighten Your Space with Color
Rainbows are an integral and magical part of St. Patrick’s Day folklore, symbolizing hope and leading to a mythical pot of gold. This easy and classic paper chain craft is a fantastic way to bring a bright, cheerful, and colorful touch to your holiday decorations. It’s simple enough for even the youngest crafters and creates a striking visual impact wherever it’s hung.
Materials:
- Construction paper in the full spectrum of rainbow colors: red, orange, yellow, green, blue, and purple
- Scissors
- Tape or craft glue stick
- Ruler and pencil (optional, for precise cutting)
Instructions:
- Begin by preparing your paper strips. Using a ruler and pencil for guidance, cut each color of construction paper into strips approximately one inch wide and eight to ten inches long. Ensure you have several strips of each color to create a long, vibrant garland.
- Take the first strip (traditionally red for the start of the rainbow). Form it into a loop and secure the ends together with a dab of glue or a piece of tape, making sure it forms a strong, closed circle.
- Thread the next colored strip (orange) through the center of the first red loop. Bring the ends of the orange strip together to form another loop, securing them with glue or tape. This creates your second link, interlocked with the first.
- Continue this process, threading each subsequent colored strip (yellow, green, blue, purple, and then repeating the sequence) through the previous loop. Secure each new loop firmly. The key is to keep alternating colors to create the iconic rainbow pattern.
- Repeat these steps until your garland reaches the desired length. You can make several shorter garlands to drape across windows or one very long one to span a doorway or wall.
🌟 Enhanced Decor & Variations: For an extra touch of magic and to symbolize the pot of gold at the end of the rainbow, add a few links made from gold glitter paper or metallic gold paper at each end of your finished rainbow chain. You can also experiment with different widths of paper strips or incorporate patterned papers to add more texture and visual interest. Hang your garlands across doorways, windows, mantels, or even spiral them around a stair railing for a truly festive display.
5. Lucky Handprint Clovers: A Cherished Keepsake
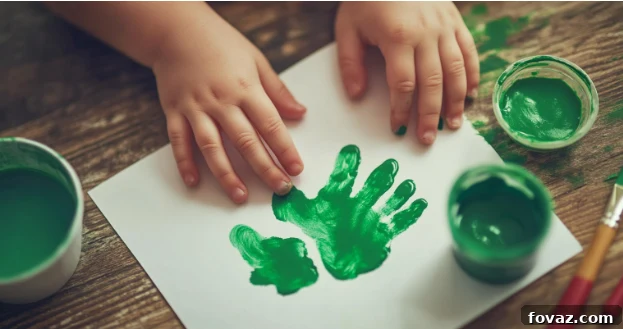
This incredibly endearing craft is an absolute must for creating special, tangible memories with young children. It’s wonderfully simple, immensely fun, and results in a priceless keepsake that captures a moment in time. The handprint clovers aren’t just decorations; they are personalized treasures that will be cherished for years to come.
Materials:
- Non-toxic green acrylic paint (kid-safe)
- White cardstock, sturdy paper, or a small canvas
- Small paintbrush
- Gold marker or glitter glue for details
- Wet wipes or a basin of water for easy cleanup
Instructions:
- Prepare your workspace by laying down newspaper or a plastic tablecloth. Gently paint the palm and fingers of your child’s hand green with a soft paintbrush. Ensure an even, but not too thick, coat of paint.
- Carefully press your child’s painted hand onto the paper or canvas four separate times, arranging the handprints in a circular pattern so that the “palms” meet in the center. Each handprint forms a leaf of the clover. The fingers should point outwards.
- Once you have made four prints to form a clover shape, gently use a paintbrush to add a small stem extending from the bottom center of your clover.
- Before the paint dries completely, you can use a gold marker or glitter glue to add your child’s name and the year within the clover, on the stem, or along the bottom of the paper. This personalizes the keepsake beautifully.
- Allow the handprint clover to dry completely. Once dry, these precious artworks can be framed, displayed, or given as heartfelt gifts to family members.
📜 Memory Maker: Grandparents, aunts, uncles, and close friends will absolutely adore receiving this handmade treasure. It’s a wonderful way to commemorate a child’s growth and the joy of the holiday. Consider making several over the years to see how much your child’s hand has grown!
👉 Curious about the rich history and fascinating traditions behind St. Patrick’s Day? Delve deeper with National Geographic’s comprehensive guide.
Embrace the Spirit: General Tips for St. Patrick’s Day Crafting
To ensure your St. Patrick’s Day crafting experience is as enjoyable and successful as possible, consider these general tips:
- Gather Supplies in Advance: Before you begin, ensure you have all necessary materials laid out. This prevents interruptions and keeps the creative flow going smoothly.
- Prepare Your Workspace: Lay down old newspapers, a plastic tablecloth, or craft mats, especially when working with paints or glues. This makes cleanup much easier and protects your surfaces.
- Involve Everyone: St. Patrick’s Day crafts are wonderful for fostering family bonding. Assign age-appropriate tasks to each family member, encouraging collaboration and shared enjoyment.
- Safety First: When crafting with children, always use non-toxic paints and glues. Supervise younger children, especially when scissors or hot glue guns are involved, to ensure a safe crafting environment.
- Embrace Imperfection: Remember, handmade crafts are all about charm and character. Don’t strive for perfection; instead, celebrate the unique qualities and personal touches that make each creation special.
- Set the Mood: Enhance your crafting session by playing some cheerful Irish folk music. Add some green snacks or drinks to truly immerse yourselves in the festive atmosphere.
- Recycle and Repurpose: Look around your home for items that can be repurposed. Empty toilet paper rolls, mason jars, fabric scraps, and cardboard can all be given a new life as festive St. Patrick’s Day decorations.
Celebrate St. Patrick’s Day with Handmade Crafts!
Crafting for St. Patrick’s Day is more than just making decorations; it’s an immersive experience that infuses your holiday with fun, creativity, and a deeply personal touch. Whether you’re stamping lucky shamrocks with bell peppers, constructing charming leprechaun hats, or assembling vibrant rainbow garlands, each DIY project contributes to making your celebration truly unique and memorable. These handcrafted items not only adorn your home but also become cherished mementos of shared laughter and creative collaboration.
So, don’t hesitate! Grab your craft supplies, turn on some lively Irish music, and let your imagination soar. With these easy and engaging St. Patrick’s Day crafts, you’ll swiftly transform your home into a festive haven filled with vibrant, personalized decorations, ready to welcome the luck of the Irish. May your crafts be joyful and your celebrations be grand!
Frequently Asked Questions About St. Patrick’s Day Crafts
- What are some easy St. Patrick’s Day crafts for kids of different ages?
For younger children, shamrock stamping with bell peppers and lucky handprint clovers are perfect for their simplicity and sensory engagement. Older children can enjoy making rainbow paper chains, DIY leprechaun hats (with a bit more detail), and pot of gold mason jars, which require a bit more precision. - Can I make St. Patrick’s Day crafts using mostly items I already have at home?
Absolutely! Many of these crafts are designed to be budget-friendly and utilize common household items. You can repurpose materials like empty toilet paper rolls, glass mason jars, various types of paper, fabric scraps, and even natural elements like leaves or sticks. - What are some creative ways to decorate with handmade St. Patrick’s Day crafts?
Handmade crafts offer endless decorating possibilities. Hang your rainbow garlands across windows, doorways, or along a mantelpiece. Frame handprint clovers for a personal wall display. Arrange pot-of-gold mason jars as charming table centerpieces or line them up on a shelf. Leprechaun hats can adorn plants or sit playfully on a bookshelf. - How can I make eco-friendly St. Patrick’s Day crafts?
To make your crafts more sustainable, focus on using recycled materials. Instead of buying new, utilize fabric scraps for hats, leftover paper for chains, and glass jars for pots of gold. Opt for reusable decorations, like felt shamrocks that can be stored and brought out year after year, reducing waste. - Are there St. Patrick’s Day crafts that work well as party favors or gifts?
Yes! Pot of gold mason jars, especially when filled with treats or small toys, make excellent party favors that guests can take home. Mini DIY leprechaun hats, also filled with chocolate coins or candies, are another delightful option. Personalized handprint clovers make heartfelt gifts for family members. - What traditional colors should I use for St. Patrick’s Day crafts?
The primary color for St. Patrick’s Day is green, especially emerald or shamrock green. Gold is essential for symbolizing the pot of gold. White is often used as a background or accent. For rainbow-themed crafts, include red, orange, yellow, green, blue, and purple. - How can I adapt these crafts for a classroom setting?
All these crafts are highly adaptable for classrooms. Pre-cut some of the paper strips or felt shapes for younger students to save time. Provide clear, step-by-step visual instructions. Assign small groups to work on different crafts, or have everyone create one type of craft, focusing on fine motor skills and following directions.
💬 Which St. Patrick’s Day craft will you try first? Do you have a favorite DIY tradition that brings good luck and joy to your celebrations? Share your festive ideas in the comments below!