
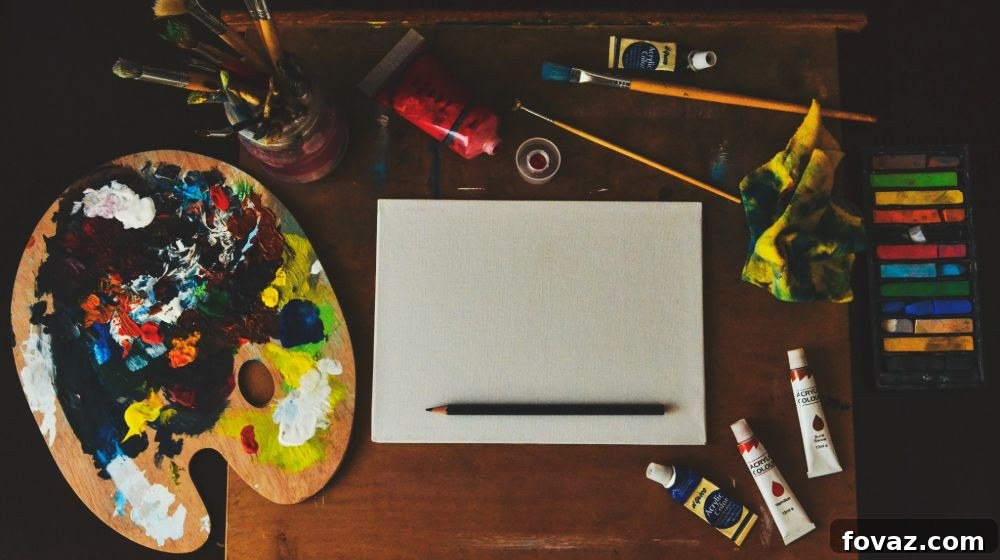
Embarking on the journey of oil painting is a truly inspiring endeavor, connecting you to centuries of artistic tradition, from the grandeur of Raphael to the mastery of the Dutch Golden Age. While the initial thought of acquiring oil painting supplies might seem daunting, especially with a reputation for being among the less inexpensive art forms, with the right guidance, you can assemble a functional and high-quality setup without breaking the bank. This comprehensive guide will walk you through the essential tools and materials every aspiring oil painter needs, ensuring you’re well-equipped to bring your artistic visions to life. We’ll delve into each item, offering insights and tips to help you make informed choices and set a solid foundation for your creative practice.
RELATED: 11 DIY Painting Tricks For A Successful Home Transformation
Mastering the Classics: 11 Essential Oil Painting Supplies for Aspiring Artists
1. Artist-Quality Oil Paint
At the core of your oil painting arsenal is, naturally, the oil paint itself. Investing in artist-quality paints from the outset can significantly enhance your experience and the quality of your finished work. Unlike student-grade paints, artist-quality varieties contain a higher concentration of pure pigment, resulting in richer colors, better lightfastness, and a more consistent texture. While they might be a bit pricier, a little goes a long way, and the vibrancy they offer is unmatched. It’s crucial to select traditional oil paints, not the water-soluble kind, to truly experience the classic oil painting process.
To begin, focus on a core palette of essential shades that allow for a vast range of color mixing. These foundational colors will enable you to create virtually any hue you need:
- Ivory Black: A versatile, deep black perfect for shadows and mixing.
- Titanium White: An indispensable, opaque white for lightening colors and creating highlights. It’s often the most-used color, so consider a larger tube.
- Alizarin Crimson: A beautiful, cool red that’s excellent for vibrant purples and deep, rich tones.
- Cadmium Red: A warm, opaque red, ideal for bright accents and warmer mixes.
- Cadmium Yellow: A brilliant, warm yellow that forms the basis for many greens and oranges.
- Ultramarine Blue: A classic, warm blue, perfect for skies, shadows, and mixing deep greens and purples.
- Viridian Green: A cool, transparent green that can be mixed to create a wide array of natural greens.
While many excellent brands exist, focus on finding those that offer good pigment load and smooth consistency. Starting with 200mL tubes for your most frequently used colors, especially white, is a smart economic choice. Remember, oil paints are very concentrated, so you won’t need a lot for each painting.
Pro tip: To streamline your initial purchase and ensure you have a balanced palette, consider investing in a well-regarded beginner’s oil paint starter kit. These sets are often curated to include essential primary colors, along with black and white, offering a cost-effective way to kickstart your collection. They are designed to provide a comprehensive foundation for learning color theory and mixing.
2. Versatile Paintbrushes
Contrary to what you might imagine, you don’t need a vast collection of paintbrushes to begin oil painting. A small, carefully selected set of high-quality brushes will serve you much better than a large assortment of mediocre ones. Good brushes maintain their shape, hold paint effectively, and offer precise control, contributing significantly to your painting experience.
For oil painting, especially for beginners, hog-bristled brushes or other firm-bristled synthetic brushes are highly recommended. Hog bristles are naturally stiff and resilient, making them excellent for handling the thick consistency of oil paint and creating textured strokes. Synthetic equivalents are also available, often offering similar performance with easier cleaning and greater durability. Always check the brush packaging to ensure it’s compatible with oil paints.
Start your collection with these essential shapes and sizes:
- Small to medium flat brushes: Ideal for blocking in larger areas, creating sharp edges, and applying impasto.
- Small to medium filbert brushes: A versatile shape with a rounded edge, perfect for blending and creating softer transitions.
- A medium round brush: Excellent for detail work, lines, and controlled strokes.
- A medium fan brush: Useful for blending, softening edges, and creating unique textural effects like foliage.
- A large flat brush: Great for priming your canvas, applying washes, and covering large areas quickly.
As you gain experience, you’ll naturally discover which brush shapes and sizes best suit your personal painting style and techniques. Proper care, including thorough cleaning after each use, will extend the life of your brushes significantly.
3. Paint Thinner and Mediums
Oil paint, by its very nature, doesn’t clean up with water, nor does it typically flow well directly from the tube for all applications. This is where paint thinners and painting mediums become indispensable. A paint thinning solution like turpentine is a traditional choice, effectively breaking down oil paint for cleaning brushes and thinning paint for underpaintings or glazes. Many artists now opt for odorless mineral spirits (OMS) as a less toxic and less odorous alternative, which performs similarly for cleaning and thinning.
Beyond simple thinners, painting mediums allow you to alter the paint’s consistency, drying time, and finish. Linseed oil, for example, is a popular medium that increases fluidity, enhances gloss, and extends drying time. Other mediums like stand oil or alkyd-based mediums (e.g., Galkyd) can be used to achieve specific effects, such as increasing transparency, creating smoother brushstrokes, or speeding up drying. Understanding the “fat over lean” rule (applying paint with more oil/medium over paint with less) is crucial for preventing cracking over time.
Pro tip: While art stores carry these products, you can often find high-quality mineral spirits or turpentine at a more economical price in most home improvement or hardware stores. Just ensure you select pure spirits designed for paint thinning, not general household cleaners.
4. Specialized Jar for Cleaning Brushes
Maintaining clean brushes is paramount for successful oil painting. A dedicated jar for cleaning brushes is an essential part of your setup, providing a safe and efficient way to remove excess paint and solvent. Ideally, look for a jar that features a silicoil or spring coil inside. These coils create a scrubbing surface at the bottom of the jar.
To use, simply pour your chosen thinner (turpentine or mineral spirits) into the jar, covering the coil. After each use, gently rub the bristles of your brush against the coil. This action helps to dislodge paint particles trapped deep within the bristles, allowing them to settle at the bottom of the jar. This method keeps your cleaning solution cleaner for longer and prevents pigment from spreading unnecessarily. Jars designed for this purpose are widely available at art supply stores, making them a convenient and effective tool for preserving your valuable brushes.
When the solvent becomes murky, allow the paint particles to settle overnight, then carefully pour the clear solvent into a clean container for reuse, properly disposing of the sludge at the bottom.
5. Functional Paint Palette
A palette is a fundamental tool for any painter, serving as the workspace where you lay out your colors and mix them to achieve the perfect shades. While palettes don’t need to be extravagant, they must be functional and provide ample space. The most important considerations are size and ease of cleaning.
Ensure your palette is large enough to comfortably hold all the colors you’re currently using, with plenty of extra room for mixing. Cramped mixing areas can lead to muddy colors and frustration. There’s a wide variety of palettes available:
- Disposable palettes: Convenient paper pads that you simply tear off and discard after use, ideal for those who prefer minimal cleanup.
- Wooden palettes: Traditional, lightweight, and comfortable to hold, but require seasoning with oil and consistent cleaning to prevent paint from staining.
- Glass or ceramic tiles: Excellent choices for durability and easy cleaning. Their non-porous surfaces prevent paint absorption, making cleanup a breeze with a palette knife or scraper.
- Plastic palettes: Often inexpensive and lightweight, but can stain over time.
For budget-conscious beginners, a piece of tempered glass, a ceramic plate, or even a sturdy plastic lid can serve as an effective, easy-to-clean alternative to a store-bought palette. Arrange your colors logically around the edge, usually from light to dark or according to the color wheel, leaving the center clear for mixing.
RELATED: 20 Awesome Chalk Paint Furniture Ideas
6. Indispensable Palette Knives
Often overlooked by beginners, palette knives are incredibly versatile tools that extend beyond simply mixing paints. They are indispensable for handling thick oil paint on your palette and can also be used directly on the canvas to create unique textures and effects that are difficult, if not impossible, to achieve with brushes alone.
When selecting palette knives, look for ones that offer a balance of flexibility and firmness. A flexible blade allows for smooth mixing and scraping, while sufficient firmness ensures control when applying paint or building texture. Palette knives come in various shapes and sizes, each suited for different tasks:
- Trowel shape: Excellent for mixing large quantities of paint and scraping paint off the palette.
- Tear-drop shape: Versatile for both mixing and applying paint to the canvas, offering a range of marks from broad strokes to fine lines depending on the angle.
- Small, pointed knives: Ideal for delicate details or scraping away small areas of paint.
Having a small set of palette knives with different shapes will equip you for various mixing and application techniques, allowing you to experiment with impasto (thick paint application) and create dynamic surfaces in your work.
7. Diverse Painting Surfaces
While canvas is the most iconic and popular surface for oil painting, it’s certainly not your only option. Understanding the various surfaces available can help you choose the best fit for your budget, skill level, and artistic goals. Each surface offers a unique texture and absorbency that influences the final look of your painting.
- Stretched Canvas: The classic choice, offering a slight give and a satisfying texture. Available in cotton or linen, stretched canvas comes in various weights and weaves. Pre-primed canvases are incredibly convenient for beginners.
- Canvas Panels/Boards: More rigid and often less expensive than stretched canvas, these are excellent for studies, practice, and artists on a budget. They are also easier to store.
- Wood Panels/Masonite: Offer a perfectly rigid and smooth surface, ideal for detailed work and artists who prefer no canvas texture. They are durable and less prone to warping if properly prepared.
- Oil Painting Paper: Specifically designed for oil paint, this heavy, oil-resistant paper is a fantastic, economical option for beginners and for sketching or quick studies. It’s much more affordable than canvas and easy to store.
Beginners and young artists just starting to explore oil painting might find canvas panels, wood panels, or even specially prepared oil paper to be excellent starting points. These options are less intimidating and more forgiving for initial experimentation.
Pro tips:
- Prime with Gesso: Regardless of your chosen surface (unless it’s specifically marked as “pre-primed for oils”), it is absolutely crucial to prime it with gesso. Gesso creates a barrier that prevents the oil from soaking into the fibers of the canvas or wood, which can cause the material to rot or degrade over time. It also provides a consistent, slightly textured surface (“tooth”) that helps the paint adhere better.
- Application: Use a large, flat brush to apply 2-3 thin, even coats of acrylic gesso, allowing each coat to dry thoroughly and lightly sanding between coats if you desire a smoother surface. This creates a solid and long-lasting foundation for your oil paint.
- Convenience: Many art stores offer canvasses and panels that are already pre-primed and stretched, saving you valuable preparation time and allowing you to dive straight into painting.
8. Reliable Sketching Pencil
Before any paint touches the canvas, most artists prefer to establish their composition with a preliminary sketch. This allows you to plan out shapes, proportions, and placement, ensuring your painting has a strong underlying structure. A reliable sketching pencil is an essential tool for this initial phase of your artwork.
When working on a textured surface like canvas, broad-tipped pencils are particularly effective. Charcoal pencils are an excellent choice, as they provide soft, easily erasable lines that blend well and can be quickly painted over without leaving harsh marks. Graphite pencils (such as a 2B or 4B) also work well, offering more precise lines. Avoid very hard graphite pencils (like 2H or H) as they can indent the canvas and may resist being painted over completely.
Remember, your preliminary sketch doesn’t need to be a masterpiece in itself. Its primary purpose is to provide a clear, confident outline of your composition and major elements before you commit to paint. It’s your roadmap for the painting ahead.
9. Ergonomic Easel
An easel is more than just a stand for your canvas; it’s a tool that significantly enhances comfort, posture, and freedom of movement during the painting process. Painting vertically allows you to step back and assess your work from a distance, which is crucial for achieving accurate perspective and proportions.
For beginners, there’s no need to invest in a professional studio easel immediately. Secondhand easels or tabletop easels are excellent, affordable options to start with. Tabletop easels are compact and perfect for smaller spaces, while H-frame or A-frame easels offer more stability and adjustability for larger canvases.
Pro Tip: Ensure the easel you choose is adjustable to your height and preferred working position. Some artists prefer to stand while painting, allowing for full-body movement and perspective, while others find sitting more comfortable for detailed work. An adjustable easel accommodates both preferences, promoting better ergonomics and reducing strain during long painting sessions.
10. Absorbent Rags and Newspapers
The painting process, especially with oils, can be messy. Rags and newspapers are surprisingly crucial and often underestimated items on an oil painter’s supply list. They are indispensable for various tasks throughout your painting session and during cleanup.
Dedicated cotton rags are excellent for wiping excess paint off brushes, correcting small mistakes on the canvas, or even creating unique textural effects by dabbing or wiping paint. Newspapers, being highly absorbent and inexpensive, are fantastic for protecting your workspace from spills and drips. They are also ideal for a quick preliminary wipe of your brushes before moving to a cleaning jar or switching colors, effectively squeezing out the bulk of the paint.
Using newspapers or rags allows you to manage paint efficiently, keeping your palette and brushes cleaner, and preventing unwanted color transfer. Always have a generous supply on hand; you’ll find yourself reaching for them constantly.
11. Dedicated Painting Clothes

If there’s one certainty in oil painting, it’s that paint will find its way onto your clothes, regardless of how careful you are. To avoid ruining your favorite garments, designate a specific set of “painting clothes” that you don’t mind getting stained. This simple act of preparation can save you a lot of frustration and laundry woes.
Choose comfortable attire that allows for a full range of movement. An old t-shirt, a pair of worn jeans, or a dedicated art apron are perfect choices. The key is to select clothing you’re comfortable getting messy. This mindset shift frees you from worrying about accidental drips or smears, allowing you to fully immerse yourself in the creative process without hesitation.
Now that you have all the oil painting supplies you need, check out these insightful tips and techniques for beginner oil painters shared by Florent Farges:
Oil painting, while initially appearing to be a more involved and perhaps costly hobby compared to some other art forms, offers unparalleled depth, richness, and permanence. It’s a deeply rewarding experience that allows for incredible detail and vibrant color. By carefully selecting your initial oil painting supplies from this comprehensive checklist, you’re not just buying tools; you’re investing in your artistic journey. With these essentials in hand, you’re ready to pick up your paintbrush, don your painting clothes, and begin exploring the captivating world of oil painting. Embrace the learning process, experiment with your new tools, and most importantly, enjoy the beautiful, timeless art you’re about to create.
Are there other essential oil painting supplies we may have missed or unique tips you’ve discovered? We’d love to hear from you! Share your thoughts and insights in the comments section below!
Up Next:
- Leftover Paint Projects | Repurpose Your Paint
- Chalk Paint Ideas For Rustic Home Decor
- DIY Acoustic Panels For Better Sound Absorption For Your Entertainment Room
Calling all crafting DIYhards, DIY Projects needs YOU! Click here if you want to write for us.
Don’t forget to stay connected with us on Facebook, Twitter, and Instagram!