
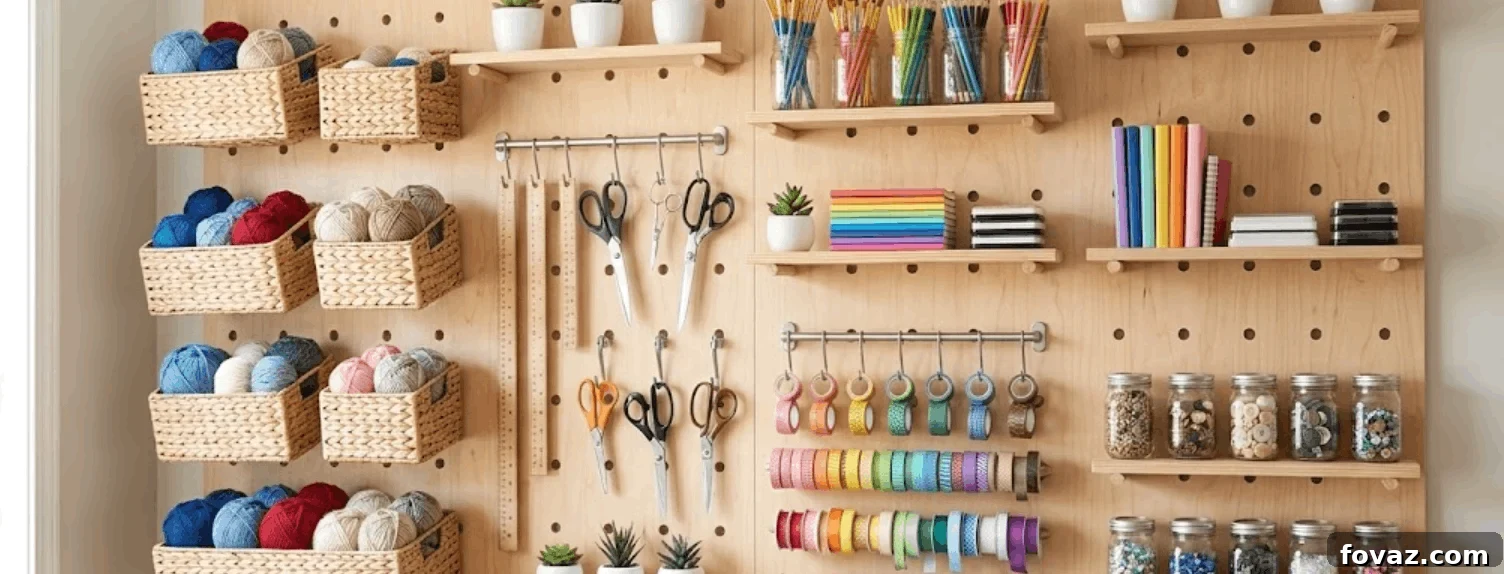
Transform Your Craft Room: The Ultimate DIY Pegboard Organization Guide
Are you constantly battling a chaotic craft room, where stray art supplies threaten to engulf your workspace? It’s time to reclaim your creativity and transform your environment. The secret? Looking up! Harnessing your empty vertical space with a custom pegboard system can revolutionize your organization, making clutter a distant memory. This comprehensive guide will walk you through building and mounting a bespoke pegboard that brings lasting order to your crafting sanctuary.
Crucial Insights: Avoid These Two Common Pegboard Installation Mistakes
Before you even pick up a tool, understanding these common pitfalls can save you significant frustration and ensure your craft room pegboard project is a resounding success.
- Mistake #1: Mounting the pegboard flush against the wall. This is perhaps the most fundamental error. Many new DIYers mistakenly install their pegboard flat, believing it will look neater. However, a pegboard requires a crucial gap between its back surface and the wall for hooks to function. Without at least 1/2 inch of space, no pegboard hook will be able to fully seat and secure your items. This oversight renders your entire organizational system unusable from the start, as nothing will stay hung.
- Mistake #2: Overbuying accessories on day one. It’s tempting to envision a fully outfitted, Pinterest-perfect pegboard from the get-go, leading to an immediate purchase of dozens of specialty hooks, bins, and baskets. Resist this urge! Your true workflow and organizational needs will only become clear after you’ve used the pegboard for a period. Begin with a basic variety pack of hooks. After a week or two of real-world use, you’ll have a much clearer understanding of the types and quantities of specific bins, baskets, and specialty holders that truly enhance your creative process.
Essential Materials for Your DIY Pegboard System
Gathering the right materials is the first step towards a perfectly organized craft space. Choose wisely based on your aesthetic preferences and budget.
- Pegboard Panel: Available in various materials, each with its own advantages.
- Hardboard: Economical and easy to cut, but can warp if exposed to moisture.
- Pre-painted: Saves you a step, often with a smooth, durable finish.
- Steel/HDPE (High-Density Polyethylene): Extremely durable, moisture-resistant, and ideal for heavy-duty applications, often featuring locking hook systems.
- 1×2 Furring Strips: These are essential for creating the necessary wall gap.
- Wood Glue: For securely attaching the furring strips to the pegboard.
- 3″ Screws: Robust screws are needed to anchor the framed pegboard firmly into wall studs.
- Washers: To prevent screws from pulling through the pegboard or furring strips, distributing pressure evenly.
- Paint (Optional): To customize the color of your pegboard to match your room’s decor.
- Hook Variety Pack: A great starting point to experiment with different hook types.
- Bins & Baskets: For holding smaller items, tools, or supplies that don’t hang easily.
- Dowel Rod: Perfect for holding spools of ribbon, thread, or rolls of washi tape.
- L-Hooks: To support the dowel rod or hang items with loops.
Key Tools for a Successful Pegboard Installation
Having the right tools on hand will make this DIY project much smoother and safer.
- Power Drill: Absolutely critical for driving screws efficiently and creating pilot holes. Invest in a reliable model for best results.
- Stud Finder / Multi-Scanner: Non-negotiable for locating wall studs, ensuring your pegboard is securely mounted and can bear the weight of your supplies.
Craft Room Pegboard: Step-by-Step Installation Instructions
Follow these detailed steps to build and install a custom pegboard system that will bring order and efficiency to your creative space.
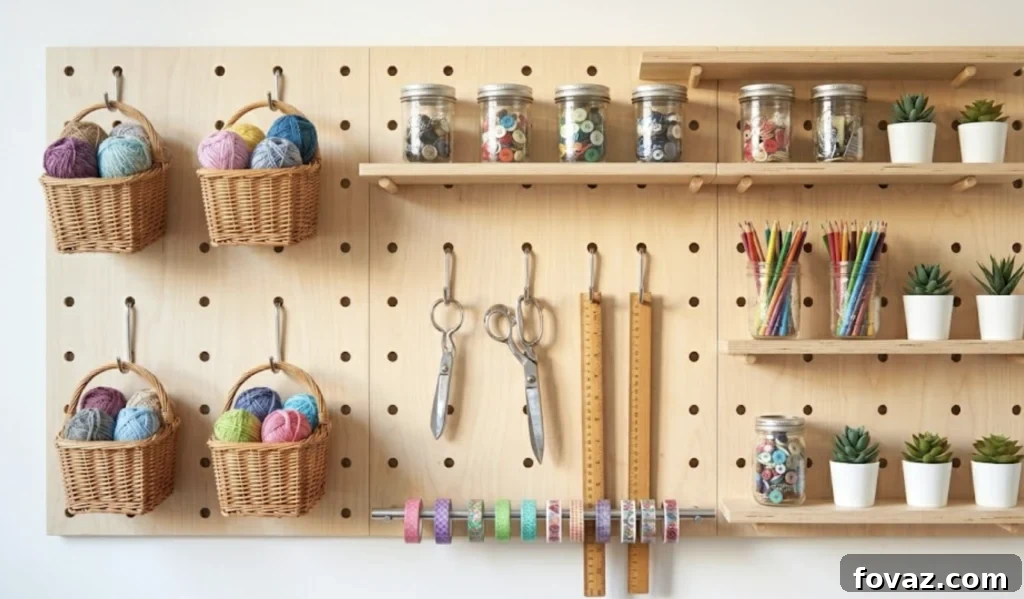
1. Strategic Planning: Visualize Your Setup
Before making any purchases or cuts, dedicate time to planning your pegboard. This crucial initial step will prevent costly mistakes and ensure your system truly meets your needs. Begin by taking an inventory of all the supplies you intend to store on the pegboard. Group these items into logical categories to understand their volume and how frequently you access them:
- Daily Essentials: These are the tools and materials you reach for during almost every crafting session (e.g., scissors, rulers, favorite pens, frequently used adhesives).
- Project-Specific: Items used for particular types of projects, but not necessarily daily (e.g., specialized paints, carving tools, specific yarn colors).
- Occasional Use: Supplies or tools that are rarely needed but must be accessible (e.g., seasonal decorations, backup glues, obscure craft components).
By visually organizing your supplies into these piles, you’ll gain a clear understanding of the actual size and layout your pegboard system requires. Consider the dimensions of your available wall space, factoring in surrounding furniture or doors. Think about the overall aesthetic you want to achieve – will the pegboard blend in, or be a colorful focal point? This thoughtful planning stage ensures you buy the correct size pegboard and set the foundation for an efficient, personalized organization system.
2. Precise Cutting and Framing the Board
Cutting pegboard can be dusty work, but you don’t necessarily need specialized tools. Many large home improvement stores, such as Lowe’s or Home Depot, offer complimentary wood-cutting services. Take advantage of this convenience to get your pegboard cut to your exact, pre-planned dimensions.
- Revisiting the Beginner’s Mistake: The Crucial Gap: We cannot overstate this: *do not mount the pegboard flat against the wall!* This is the number one reason pegboard installations fail. Pegboard hooks require a minimum of ½ inch of space behind the board to insert and hold securely. Without this gap, your hooks will be useless, and your supplies won’t stay put.
- The Essential Fix: Building the Frame: To create this necessary spacing, you will construct a simple frame using 1×2 furring strips. These strips should be glued and screwed around the entire back perimeter of your pegboard. This frame effectively pushes the pegboard away from the wall, providing the exact gap needed for all standard pegboard hooks to seat properly. Use a strong wood glue and then reinforce with small screws (e.g., 1-inch screws) from the back of the furring strips into the pegboard to ensure a solid bond.
- Painting Your Pegboard (Optional, but Recommended): If you choose to paint your pegboard to match your craft room decor, proceed with caution. The key to a successful paint job that doesn’t clog the holes is to apply very thin, even coats. Multiple light coats are always better than one thick coat. Allow each coat to dry completely before applying the next. You may also want to paint the furring strips to ensure a cohesive look once mounted. This attention to detail will keep your pegboard functional and aesthetically pleasing.
3. Locate and Mark Your Wall Studs for Maximum Security
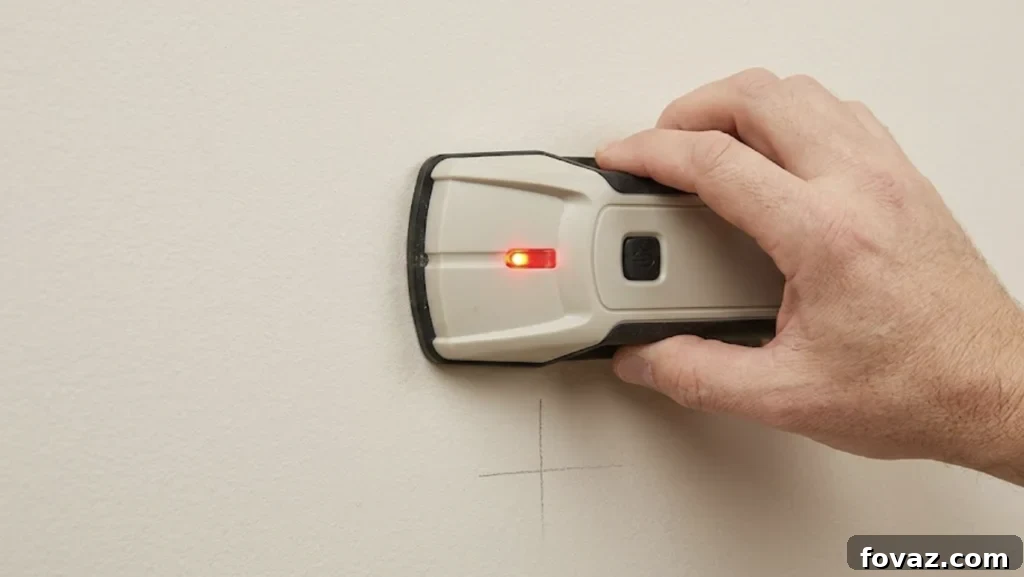
Properly anchoring your pegboard is paramount, especially if you plan to store heavier items. For any pegboard larger than approximately 24” x 24”, it is absolutely critical that it be securely fastened into at least one wall stud. Wall studs are the vertical wooden (or sometimes metal) framing members inside your walls, typically spaced 16 inches apart on center. These provide the structural integrity necessary to support significant weight.
Relying solely on basic drywall anchors for a loaded pegboard is a recipe for disaster. Drywall itself is not strong enough to hold the cumulative weight of a pegboard plus all your craft supplies over time. When drywall anchors inevitably fail under stress, they can pull out large chunks of your wall, causing costly damage and creating an unsafe environment.
To avoid this, invest in a reliable stud finder or multi-scanner. You don’t need the most expensive model; even a basic electronic stud finder can accurately locate the edges and center of studs. Some multi-scanners also detect electrical wiring and metal pipes, which is an added safety bonus, preventing you from drilling into hazards. Always scan the area thoroughly and mark the stud locations with a pencil before drilling. This simple step will ensure your pegboard is mounted safely and securely for years to come.
Recommended Tool: Consider a reliable stud finder like the Stud Finder Wall Scanner – 5 in 1 Stud Finder Tool with Smart Chip and HD LCD Display for accurate results.
As an Amazon Associate, we may earn from qualifying purchases.
RELATED: The Best Stud Finders for Hanging Heavy Wall Projects (2026 Guide)
4. Mount Your Framed Pegboard Safely and Securely
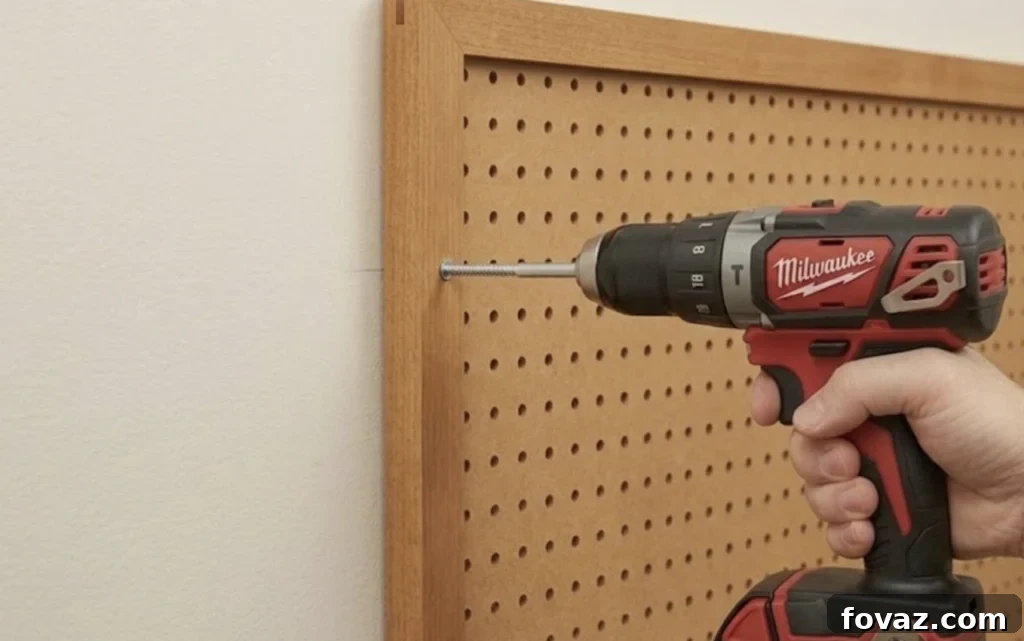
With your pegboard framed and your studs located, it’s time for the most critical step: mounting. This must be done correctly to ensure stability and safety. Before attaching any hooks or loading your board, carefully position the framed pegboard against the wall. Use a level to ensure it is perfectly straight, then mark the points on your furring strips where they align with the wall studs.
Pre-drill pilot holes through the furring strips and into the marked stud locations. This prevents wood splitting and makes driving the screws much easier. Then, using your power drill, drive the 3-inch screws through the furring strips and firmly into the wall studs. Ensure you use washers beneath the screw heads to prevent them from pulling through the furring strip, distributing the pressure evenly and creating a stronger hold. A high-quality power drill, like the Milwaukee model often seen in professional settings, will provide the necessary torque and control for this step, making the job efficient and secure. Once all screws are in place and tightened, give the pegboard a gentle tug to confirm it is firmly attached and doesn’t wobble. Only then is it safe to proceed with organizing.
(Speaking of power tools, we’re currently giving away a $1,000 Milwaukee Tool Prize Package! No purchase necessary to enter or win. Here’s the link.)
5. Smart Organization: Zone Your Supplies for Efficiency
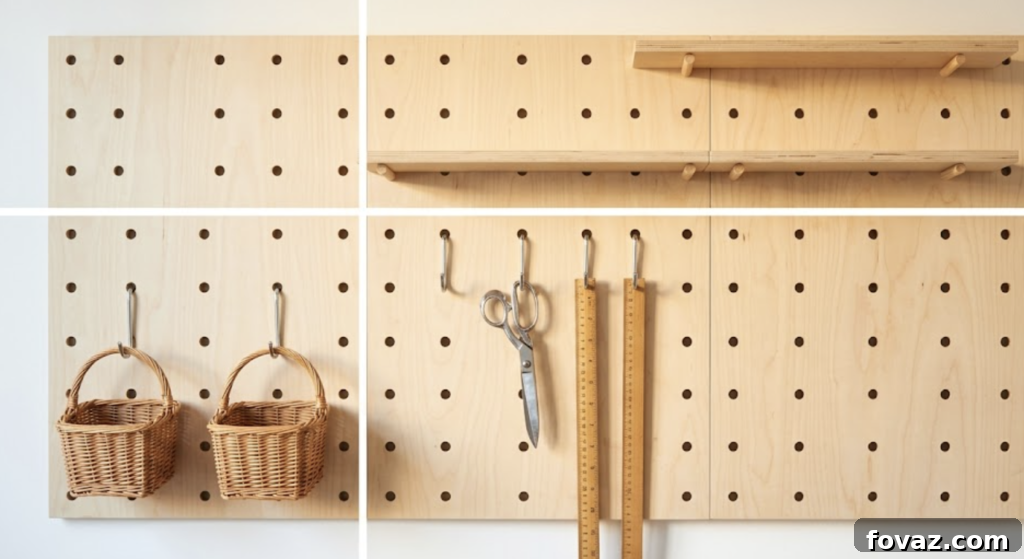
Once your pegboard is securely mounted, the real fun begins: organizing your supplies! The key to an efficient pegboard is thoughtful zoning, which means assigning specific areas of the board based on frequency of use and accessibility. This maximizes productivity and keeps your workspace tidy.
- Eye Level (The Prime Zone): This is your most valuable real estate. Reserve this area for your daily tools and frequently used items. These are the things you grab almost every single crafting session. Examples include your go-to scissors, rulers, pens, adhesive, and cutting tools. A crucial tip for this zone: leave a small section of empty space. This flexible area is perfect for holding supplies related to your *current* active project, allowing for easy access and tidying as you work.
- Middle Zone (Project-Based Tools): Just below eye level, this zone is ideal for project-specific tools and supplies. These are items you use regularly, but perhaps not every single day. Think specialized paints, particular brushes, stamps, specific threads, or carving tools. Organizing them here keeps them accessible when needed, without cluttering your immediate workspace.
- Upper Zone (Seasonal & Specialty Items): The top section of your pegboard is perfect for items you use less frequently or for seasonal projects. This might include specialty glitters, holiday-themed embellishments, rarely used tools, or bulk supplies. Placing them higher keeps them out of the way but still within reach when their time comes. Ensure that items stored here are either lightweight or securely held to prevent accidental falls.
By logically zoning your supplies, you create an intuitive system where everything has a designated home, improving your workflow and making your craft room a joy to work in.
6. The “One-Week” Rule: Refine Your Organization
Resist the urge to immediately buy every pegboard accessory under the sun and attempt to fill every single hole on day one. This often leads to a static, inefficient setup that doesn’t truly reflect your actual habits. Instead, start simple. Begin by installing only a basic variety pack of hooks and hang your most essential, everyday items.
Now, here’s the crucial part: use this minimalist setup for a full week. Engage in your regular crafting activities, paying close attention to what you intuitively reach for, what feels out of place, or what you wish was closer. After this trial period, you’ll have invaluable insights into your actual workflow. Use this information to rearrange items, move hooks, and identify exactly which specialty bins, baskets, or holders would genuinely enhance your organization. This iterative approach ensures that every accessory you add serves a real purpose, creating a highly personalized and efficient system tailored to your unique crafting style.
7. The Finishing Touch: Elevate Functionality and Style
Once your pegboard is organized, consider adding a few finishing touches that elevate both its functionality and aesthetic appeal. A simple yet highly effective addition is a dowel rod. Resting on two L-hooks positioned at eye level, a dowel rod becomes an elegant and practical solution for storing spools of washi tape, ribbon, or thread. Arranging these items in color order not only makes them easy to find but also adds a professional, visually appealing element to your craft space.
This simple upgrade typically costs under $5 but makes a significant impact, turning a purely functional pegboard into a curated display. Beyond a dowel rod, consider other small, thoughtful additions: tiny clips for notes or inspiration photos, small decorative hooks for jewelry or charms, or even a mini shelf for a small plant to add a touch of greenery. These small details can personalize your pegboard, making it both a highly efficient organizational tool and a source of creative inspiration.
Project Budget Tiers: Tailor Your Pegboard to Your Wallet
Whether you’re looking for an ultra-affordable solution or a premium setup, there’s a pegboard option for every budget. Here’s a breakdown of estimated costs and what you can expect at each tier:
| Tier | Estimated Cost | Includes |
| Budget Build | Under $35 | A 2’x4’ hardboard panel, 1×2 furring strips, a basic 50-piece hook pack, and utilizing existing paint or no paint for simplicity. Focuses on core functionality at minimal cost. |
| Mid Build | $35–$75 | A pre-painted pegboard panel (saving time on painting), a more comprehensive hook and basket kit, slightly thicker 1×3 backing boards for enhanced stability, dowels for organization, and optional MDF moulding for a finished look. Offers improved aesthetics and utility. |
| Quality Build | $75–$120+ | Premium steel or HDPE panels (such as Wall Control or IKEA systems) for maximum durability and moisture resistance, specialized locking hooks for superior hold, coordinated bins and accessories for a cohesive look, and an optional custom wood border for a high-end finish. Designed for heavy use and long-term investment. |
If you’re pressed for time but still crave the satisfaction of a DIY room upgrade, an all-in-one pegboard kit can be a perfect shortcut. For instance, the FZK Pegboard Kit from Amazon provides an instant organizational solution. These kits typically come with multiple mount-ready panels and a variety of accessories, giving you an immediate win without the need to break out heavy power tools for cutting or framing.
While an all-in-one kit streamlines the process by handling much of the prep work, you still get to roll up your sleeves and install it yourself. This means you skip straight to the enjoyable part: customizing your layout and finally bringing order to your craft supplies! It’s a fantastic option for those who want a functional, stylish pegboard without the extensive DIY commitment.
Convenient Kit Option: Explore all-in-one solutions like the FZK Peg Board with Hooks, Plastic Pegboard Kit with 4 White Pegboards and Accessories for quick setup.
Let’s build something together! Join the community on YouTube, Instagram, Pinterest, and Facebook.
Frequently Asked Questions About Craft Room Pegboards
Can I use drywall anchors to hang my pegboard?
While it might seem convenient, it is highly recommended that you do not rely solely on drywall anchors for hanging your pegboard, especially if it’s larger than 24″ x 24″ or will hold substantial weight. Drywall anchors alone are insufficient to support a loaded board long-term. The cumulative weight of the pegboard and all your craft supplies will eventually cause the anchors to fail, often ripping out significant chunks of your drywall in the process. For proper support and safety, any pegboard of a reasonable size must be securely anchored into at least one, preferably two, wall studs. Always prioritize finding and utilizing wall studs for a robust installation.
Do I absolutely need a gap between the pegboard and the wall?
Yes, absolutely! This is one of the most critical aspects of a functional pegboard system. Mounting the board completely flat against the wall is a common mistake that renders your entire system unusable. Standard pegboard hooks are designed with a back lip that needs space to slide behind the board and engage with the holes. Without at least a 1/2-inch gap between the wall and the back of the pegboard, no hook will fit properly, and nothing will stay hung. You can easily create this essential gap by gluing and screwing 1×2 furring strips around the entire perimeter of the back of your pegboard before mounting it to the wall.
How do I paint my pegboard without ruining the holes?
Painting your pegboard is an excellent way to customize it and integrate it seamlessly into your craft room decor. The secret to preventing the holes from clogging is to apply very thin, even coats of paint. Instead of trying to achieve full coverage in one or two thick layers, opt for multiple light coats, allowing each layer to dry completely before applying the next. You can use a spray painter for the most even application, or a roller with minimal paint. If using a brush, dab lightly and avoid pushing paint into the holes. Periodically inspect the holes while painting and use a small, pointed tool (like a toothpick or skewer) to clear any paint that might be drying in them. Don’t forget to paint the furring strip frame as well for a polished, cohesive look.
What are the best types of hooks for a craft room pegboard?
The “best” hooks depend on the items you’re storing. A good starting point is a basic variety pack, which usually includes straight hooks, angled hooks, and sometimes U-hooks. Straight hooks are versatile for hanging tools with holes or loops. Angled hooks are great for items that lean against the board. For small, loose items like beads, buttons, or embellishments, invest in clear plastic bins or small baskets that attach to the pegboard. Specialty hooks for specific tools (like plier holders or spool holders) can be added as you refine your system. For heavier items or high-traffic areas, consider locking hooks that secure firmly into the pegboard to prevent accidental dislodgement.