
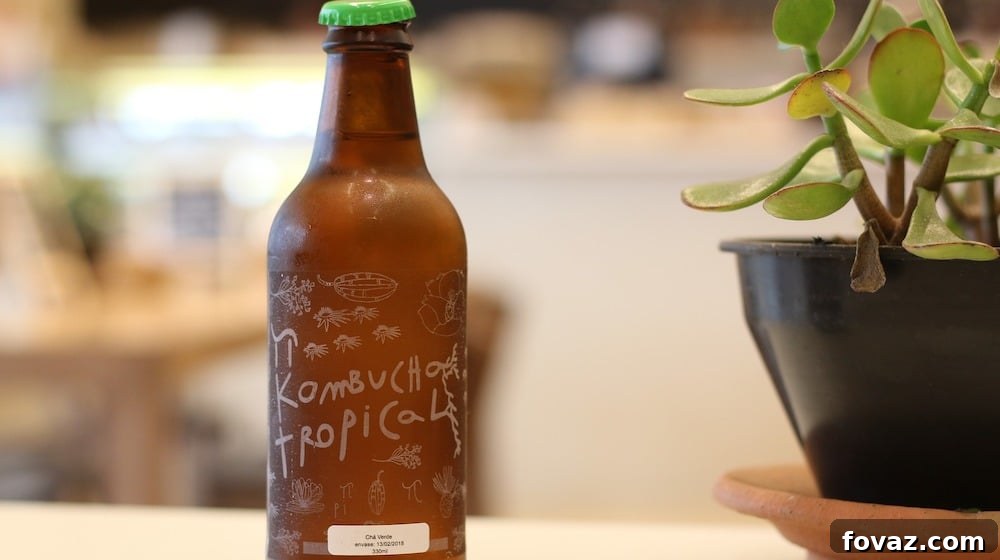
Embarking on the rewarding journey of homemade kombucha begins with understanding its most vital component: the SCOBY. Often described as a “mother” culture, this fascinating, gelatinous disc might look peculiar, but it’s the living engine that transforms simple sweet tea into a vibrant, probiotic-rich beverage. SCOBY is an acronym for Symbiotic Culture of Bacteria and Yeast, a perfect description for the collaborative micro-organism community that drives fermentation. This unique biological marvel is responsible for kombucha’s distinctive tangy flavor and its celebrated health benefits. Through its metabolic process, the SCOBY consumes organic sugar and caffeine present in black or green teas, yielding a drink packed with beneficial enzymes, amino acids, essential vitamins (including B and C), and billions of probiotics – all crucial for supporting a healthy gut microbiome and overall well-being. If you’re ready to dive into the world of home brewing and craft your own effervescent, gut-friendly kombucha, cultivating a robust SCOBY is your foundational first step. This comprehensive guide will meticulously walk you through the entire process, empowering you to create the perfect, thriving culture for endless batches of delicious kombucha.
The Power of Probiotics: Why Cultivate Your Own SCOBY for Homemade Kombucha?
The rising popularity of kombucha is a testament to its refreshing taste and touted health benefits. While buying bottled kombucha is convenient, growing your own SCOBY and brewing at home offers a multitude of compelling advantages that elevate the experience and the final product:
- Unmatched Cost-Effectiveness: Commercial kombucha can be quite a premium product. Regular consumption can quickly add up. By growing your own SCOBY and brewing at home, you dramatically cut down on costs. The initial, modest investment in ingredients and basic equipment is quickly recouped after just a few batches, making it a highly economical choice for kombucha enthusiasts.
- Complete Control Over Ingredients: Home brewing grants you absolute authority over the quality and type of ingredients used. You can conscientiously select organic teas, specific sugar varieties, and filtered water, ensuring your kombucha is free from undesirable additives and perfectly tailored to your dietary preferences and taste. This control also opens up opportunities to experiment with various tea blends and natural flavorings, creating unique brews not found in stores.
- Guaranteed Freshness and Potency: A homemade SCOBY and freshly brewed kombucha deliver maximum potency in terms of probiotics and other beneficial compounds. You control the fermentation time, allowing you to achieve the optimal balance of flavor, acidity, and probiotic activity. This direct oversight ensures you’re consuming the freshest, most vibrant brew possible.
- The Deep Satisfaction of DIY: There’s an immense sense of accomplishment and connection that comes from creating something healthy and delicious from scratch. Observing your SCOBY flourish and your kombucha ferment is not just educational; it’s a truly fascinating process that deepens your appreciation for fermented foods and beverages.
- Environmental Sustainability: Embracing home brewing is an eco-conscious choice. By reusing your SCOBY for batch after batch, you significantly reduce the waste associated with single-use bottles and packaging, contributing positively to environmental sustainability. Furthermore, excess SCOBYs can be repurposed or composted, minimizing their ecological footprint.
While the idea of growing a SCOBY might initially seem complex, it is a surprisingly straightforward and immensely gratifying process. With just a few basic ingredients, some simple equipment, and a dash of patience, you will be well on your way to brewing an abundant supply of your very own delicious, gut-friendly kombucha.
Your Comprehensive Recipe: Cultivating a Healthy SCOBY from Store-Bought Kombucha
Ready to bring your very own Symbiotic Culture of Bacteria and Yeast to life? This meticulously detailed recipe, thoughtfully compiled and adapted from respected sources such as The Kitchn and Bonzai Aphrodite, offers a reliable and foolproof method for growing a robust SCOBY. The process leverages the active cultures found in commercial kombucha, making it accessible even for beginners. This recipe is designed to yield one healthy, thriving kombucha SCOBY, perfectly poised to kickstart your exciting home brewing adventure.
Essential Supplies: Ingredients & Equipment Checklist
Gathering all your necessities before you begin ensures a smooth and successful SCOBY cultivation process. Pay attention to the details of each item to optimize your chances of success.
Ingredients
- 7 cups Filtered Water: This forms the pure base for your sweet tea. Using filtered or non-chlorinated water is crucial because chlorine and other chemicals commonly found in tap water can be detrimental to the delicate bacterial and yeast cultures essential for SCOBY growth and health.
- 1/2 cup Organic White Granulated Sugar: This is the primary and indispensable food source for your SCOBY. White granulated sugar is highly recommended for initial SCOBY growth because it offers a readily available carbohydrate source without introducing complex flavors or additional micro-organisms that might interfere with the culture’s development. Avoid alternative sweeteners like honey, maple syrup, or artificial sweeteners for your first SCOBY, as they may contain competing bacteria or lack the necessary nutritional profile for optimal growth.
- 4 bags Organic Black Tea, or 1 tablespoon Organic Loose-Leaf Black Tea: Black tea provides vital nutrients, nitrogen, and tannins that are conducive to a healthy and vigorous SCOBY. It is imperative to select plain, unflavored black tea. Specialty teas with essential oils, artificial flavorings, or herbal ingredients can potentially harm the SCOBY or impart undesirable flavors to your brew. Opting for organic tea further minimizes the introduction of pesticides or other chemicals.
- 1 cup Unflavored, Unpasteurized Store-Bought Kombucha: This is your essential starter liquid. It contains the active bacteria and yeast cultures required to initiate and sustain your new SCOBY’s growth. It is absolutely critical that this kombucha is both unflavored and unpasteurized. Pasteurization destroys the beneficial microbes, rendering it useless as a starter. Look for a raw, original-flavor kombucha, ideally one that displays some sediment or floating bits at the bottom – these are excellent indicators of an active and healthy culture.
Equipment
- 2-quart or Larger Saucepan: Necessary for boiling your filtered water and steeping your sweet tea concoction.
- Long-handled Spoon: For thoroughly stirring your ingredients and ensuring the sugar dissolves completely.
- 2-quart or Larger Glass Jar: A wide-mouth canning jar is ideal. Glass is the material of choice for kombucha brewing because it is non-reactive; it will not leach chemicals into your brew or react with the acidic kombucha over time. Strictly avoid plastic or metal containers, which can corrode, scratch, or introduce harmful compounds that could jeopardize your SCOBY’s health.
- Cheesecloth, Clean Napkin, or Paper Towel: This permeable cover is vital. It allows for essential airflow, enabling the SCOBY to “breathe” during fermentation, while simultaneously acting as a barrier against airborne contaminants like dust, mold spores, and notorious fruit flies.
- Rubber Band: To securely fasten the cheesecloth (or chosen cover) tightly around the opening of your glass jar, ensuring it remains in place throughout the fermentation period.
Step-by-Step Instructions: Nurturing Your SCOBY from Scratch
Embark on this exciting journey with confidence, following these detailed steps to successfully cultivate your very own healthy SCOBY:
Step 1: Preparing the Sweet Tea Base
Your SCOBY’s home begins with a carefully prepared sweet tea. In your 2-quart or larger saucepan, bring the 7 cups of filtered water to a vigorous boil. Once it reaches a rolling boil, remove the pan from the heat. Immediately stir in the 1/2 cup of organic white granulated sugar until it is completely dissolved, leaving no granules. This sugar, while seemingly abundant, is the primary and critical nutrient for the bacteria and yeast. Next, add your 4 tea bags or 1 tablespoon of loose-leaf black tea. Allow the tea to steep undisturbed until the liquid has cooled down entirely to room temperature. This cooling phase is absolutely crucial; introducing the delicate kombucha starter cultures to hot tea would irreparably damage or kill them. Once the tea is cool, remove and discard the tea bags, or strain out the loose-leaf tea. For those seeking to expedite the cooling process, an alternative method is to boil half the amount of water, dissolve the sugar and steep the tea at double strength, then add the remaining cold filtered water to bring it to the full volume and desired temperature more rapidly.
Step 2: Combining the Sweet Tea and Kombucha Starter
Once your sweet tea has reached room temperature, carefully pour it into your clean 2-quart or larger glass jar. Now, it’s time to introduce the active cultures. Gently pour the 1 cup of unflavored, unpasteurized store-bought kombucha on top of the sweet tea. As you decant the store-bought kombucha, observe the bottom of the bottle; it’s quite common to find a small, blobby “baby SCOBY” or visible strands of yeast sediment. If you spot these, ensure they are transferred into your jar, as they provide an excellent inoculum and a head start for your new culture. However, do not be concerned if you don’t see any; your SCOBY will still develop successfully. Using your long-handled spoon, gently stir the mixture to ensure the starter culture is evenly distributed throughout the sweet tea. This creates an optimal and consistent environment for your new SCOBY to begin its growth.
Step 3: Covering and Establishing the Fermentation Environment
With your sweet tea and starter combined, cover the opening of your glass jar with a piece of cheesecloth, a clean napkin, or a paper towel. Secure this cover firmly in place with a rubber band, ensuring there are no gaps for contaminants to enter. This type of cover is essential for proper air circulation, allowing the SCOBY to breathe oxygen (which is vital for initial acetic acid fermentation) while simultaneously forming a protective barrier against fruit flies, dust, and airborne mold spores. Position the jar in a location where it can remain undisturbed at a consistent average room temperature, ideally between 70°F and 75°F (21°C-24°C). Direct sunlight must be avoided, as it can inhibit the fermentation process and hinder SCOBY formation; if sunlight is unavoidable, wrap the jar in a light cloth to create a darker environment. A stable, quiet spot in your pantry or a less-trafficked corner of your kitchen is typically ideal.
Step 4: Observing the Initial Signs of Activity – Bubble Formation
For the initial few days following setup, you might not perceive any immediate, dramatic changes. This period of seeming inactivity is entirely normal, and patience is a virtue in kombucha brewing! Typically, after approximately 3 to 7 days, you will begin to notice the very first indications of fermentation: tiny, effervescent bubbles starting to gather and cling to the surface of the tea. These minute bubbles are carbon dioxide, a natural gaseous byproduct produced by the yeast as they actively consume the sugar in the tea. Their appearance is a profoundly positive signal, confirming that your culture is alive, active, and diligently commencing the intricate process of transforming your sweet tea into a thriving environment for your SCOBY.
Step 5: The Emergence of a Jelly-like Film
As the fermentation progresses steadily over the subsequent days, you will observe these initial clusters of bubbles gradually beginning to connect and coalesce. This will lead to the formation of a thin, translucent, jelly-like film that starts to spread and form across the entire surface of the tea. This nascent, delicate layer is, in fact, your SCOBY in its earliest stages of development! You may also continue to notice additional small bubbles forming actively around the edges of this developing film and subtly underneath its surface. This continuous production of carbon dioxide is an excellent indicator that the fermentation process remains vigorous and robust. Although the film may appear fragile and almost ethereal at this juncture, it is steadily and surely growing into the substantial, healthy culture you need for brewing.
Step 6: The SCOBY Thickens and Matures into a Solid Layer
Over the course of the following days and weeks, the jelly-like layer you observed will continue its remarkable transformation. It will progressively thicken, gradually losing its translucency and becoming increasingly opaque and more solid in consistency. This is your SCOBY developing into its mature form. Your SCOBY is considered ready to be harvested and utilized for brewing your first batch of kombucha tea when it achieves a thickness of approximately 1/4 inch (about 0.6 cm). The exact timeframe for this maturation can fluctuate significantly, typically ranging anywhere from 1 to 4 weeks, largely dependent on the ambient temperature and the specific conditions within your kitchen. Warmer environments generally tend to accelerate the growth process. Once your SCOBY has reached this desired thickness, carefully remove it from the jar. The liquid it grew in will, by this stage, be quite vinegary and highly acidic, likely too strong for pleasant direct consumption. However, this potent liquid is invaluable! It can serve as an exceptionally strong starter tea for your next batch of kombucha, or it can be repurposed for other uses, such as a natural cleaning agent, a clarifying hair rinse, or added to compost.
Step 7: The Appearance of Your Finished SCOBY
It’s important to manage expectations regarding the appearance of your newly grown SCOBY, especially your very first one. It might not present as a perfectly smooth, uniformly colored, or flawlessly shaped disc straight away. It is entirely common and perfectly healthy for your inaugural SCOBY to appear somewhat nubbly, rough in texture, patchy in color, or to possess uneven edges. These cosmetic variations are normal indicators of a healthy, active culture. Rest assured, as you continue to use your SCOBY in successive batches of kombucha, it will typically evolve, becoming smoother, more uniform in texture, and adopting a more consistent color. Consider this first cultivation as your “baby SCOBY” – a vibrant, living organism that will mature and flourish with each subsequent brew. Its appearance can naturally vary, but its fundamental functionality, the ability to transform sweet tea into delicious kombucha, remains constant.
Kombucha Clinic: Troubleshooting Your SCOBY & Ensuring a Healthy Brew
While the process of growing a SCOBY is generally quite resilient, it’s entirely normal for new brewers to have questions or encounter perceived issues. Knowing what to look for can alleviate concerns and help you ensure a consistently healthy brew. Here are crucial pointers to help you distinguish a thriving SCOBY from one that might be facing challenges:
- Clear Indicators of a Healthy and Normally Forming SCOBY:
- Consistent Bubbles: The presence of small, steady bubbles on the surface is an excellent sign of active yeast respiration.
- Evolution of Jelly-like Masses: Your SCOBY will commence as a thin, clear film and progressively thicken, becoming more opaque. Irregular shapes, varying thicknesses, or slightly bumpy textures are all perfectly normal developmental stages.
- Presence of Stringy or Gritty Brown Bits: These are not contaminants but rather healthy strands of yeast. They might appear suspended within the liquid, hanging down from the SCOBY, or collecting at the bottom of the jar. They are integral to the fermentation process.
- Aroma: Fresh, Tart, and Distinctly Vinegary: The smell should transition pleasantly from sweet tea to a distinctly tart, slightly acidic, cider-like, or vinegary aroma as fermentation progresses. This characteristic scent will become more pronounced and robust over time, which is a positive sign.
- Characteristics of a Fully Formed and Healthy SCOBY:
- Optimal Thickness: A robust, mature SCOBY typically measures about a quarter-inch thick or more. This thickness indicates sufficient microbial mass for efficient fermentation.
- Acceptable Appearance Variations: It is absolutely fine for your SCOBY to have bubbles trapped within it, possess a nubbly or uneven surface, or exhibit rough edges. It may also be thinner in certain sections or even feature a small hole. These are cosmetic variations and do not impede its ability to brew high-quality kombucha. With continued use, your SCOBY will often smooth out and achieve a more uniform appearance.
- Typical Color Spectrum: Healthy SCOBYs can range in color from a creamy white to a yellowish-brown. Occasionally, darker pigments from the tea may be incorporated into the SCOBY, which is also a normal occurrence.
- Critical Warning Signs of a Problematic SCOBY (When to Discard):
- Fuzzy Black, Green, or Dry Mold: This is the most critical and undeniable sign of contamination. Mold typically manifests as distinct, fuzzy, dry, circular patches appearing on the surface, often in shades of black, green, blue, or even bright white. If you observe any mold, you must immediately discard the entire batch (both the SCOBY and the liquid) and thoroughly sanitize all your equipment before attempting a new brew. Do not try to salvage a moldy batch, as mold can produce harmful toxins.
- Offensive or Rancid Odor: While a pleasantly vinegary smell is a good indicator, any aroma that is overtly cheesy, putrid, rancid, intensely yeasty (like stale beer or rotten fruit), or generally unpleasant signals that undesirable bacteria or yeasts have taken over the tea. In such cases, discard the entire batch and begin again with fresh ingredients.
- Navigating Uncertainty: If You’re Unsure About a Problem:
- Observe with Patience: New brewers sometimes mistake normal yeast formations (which can be stringy, slimy, or sediment-like) for mold. Remember, true mold is typically fuzzy and dry, and usually appears in circular patterns. If you are genuinely uncertain, allow the tea to continue fermenting for a few more days. If it’s a genuine problem, it will almost certainly worsen and become more distinctly recognizable as mold. If it’s a normal part of the process, it should stabilize or not deteriorate further. When confronted with doubt, prioritizing safety is paramount; it is always wiser to discard the batch and initiate a fresh one.
Your First Brew & Beyond: Harnessing the Potential of Your New SCOBY
Congratulations! You have successfully cultivated your very own robust and healthy SCOBY. This marks the exciting threshold to brewing your inaugural batch of homemade kombucha. To commence your first brew, you will need this newly formed SCOBY and at least one cup of the strong, vinegary liquid it grew in – this serves as an incredibly potent starter tea for your subsequent batches. The process is straightforward: simply prepare a fresh batch of sweet tea, allow it to cool completely, combine it with your thriving SCOBY and the starter liquid in a meticulously cleaned jar, cover it appropriately, and allow it to ferment. Your SCOBY is a living, growing entity; it will continue to flourish and reproduce with each successive batch, often creating “baby SCOBYs” that can be gently separated. These additional cultures can be shared with fellow enthusiasts, or used to establish multiple brewing vessels, allowing you to scale up your production. For periods when you might pause brewing, or for long-term storage of excess cultures, you can comfortably house your SCOBYs in a “SCOBY hotel” – a dedicated glass jar filled with sweet tea and starter liquid – ensuring they remain alive and ready for your next brewing adventure. The world of homemade kombucha is expansive and creatively limitless, offering possibilities from delightful secondary fermentations with fruits, herbs, and spices, to experimenting with diverse tea types. Your newly grown SCOBY is not merely an ingredient; it is the living foundation of a fulfilling and delicious journey into the art of fermented beverages.
We sincerely hope this comprehensive guide has thoroughly demystified the process of growing your own SCOBY and has profoundly inspired you to immerse yourself in the enriching world of homemade kombucha. The deep satisfaction derived from brewing your own probiotic-rich, health-enhancing drink is truly unparalleled. Do you possess any additional wisdom, ingenious uses for excess SCOBYs, or unique personal insights gleaned from your own brewing experiences? We are eager to learn from your journey! Please generously share your thoughts and tips in the comments section below. To ensure you never miss out on our latest DIY projects, innovative guides, and inspiring content, don’t forget to sign up for our exclusive newsletter. Furthermore, connect with our vibrant community of makers and discover even more exciting projects by following us on our social media channels!