
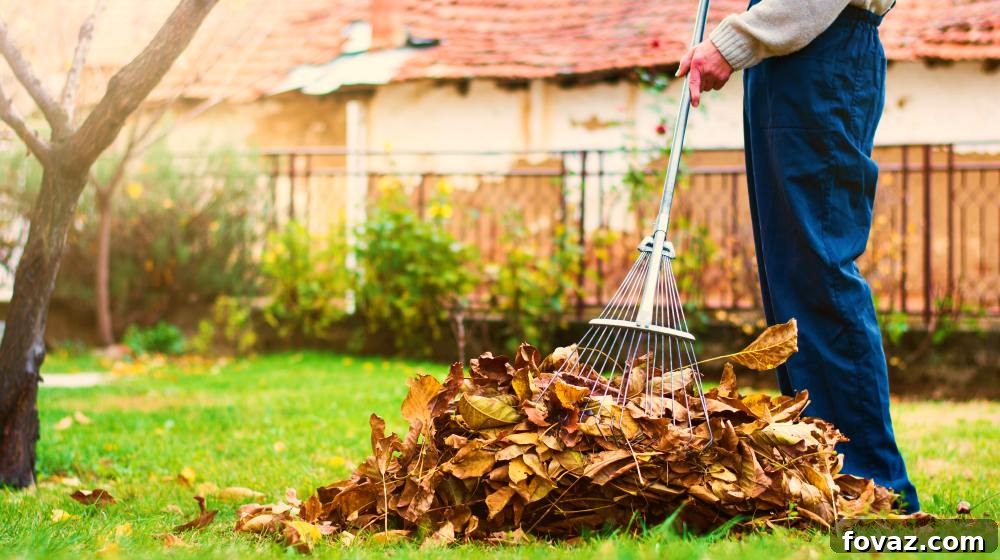
As the vibrant hues of summer gradually begin to soften, we find ourselves on the cusp of autumn. Soon, the lush greens will transform into a breathtaking tapestry of fiery reds, brilliant oranges, and golden yellows. While the beauty of fall is undeniable, it also serves as a crucial reminder to prepare your home for the impending colder months. Proactive home maintenance during autumn is not just about aesthetics; it’s about protecting your investment, ensuring your family’s safety and comfort, and potentially saving significant money on costly repairs down the line. This comprehensive fall home maintenance checklist is designed to guide you through essential tasks, ensuring your house is robustly prepared for the autumn season and the deep freeze of winter that follows.
RELATED: 21 Enchanting Fall Door Decorations: DIY Wreaths, Door Hangers, and More to Welcome Autumn
Prepare Your Home for Fall and Winter: The Ultimate Checklist
Roof and Gutter Maintenance Checklist: Protecting Your Home from the Top Down
1. Thoroughly Clean and Inspect Gutters and Downspouts
With fall approaching, leaves, twigs, and other organic debris will inevitably accumulate in your gutters and downspouts. This accumulation can lead to severe blockages, preventing rainwater and melting snow from draining away from your home’s foundation. Clogged gutters can cause water to overflow, damaging fascia boards, siding, and even leading to extensive roof damage and unsightly indoor leaks. Furthermore, standing water in gutters can become a breeding ground for insects and, when temperatures drop, can freeze and expand, putting immense stress on your gutter system.
Beyond simply clearing debris, take this opportunity to carefully inspect the entire gutter system. Look for any loose fasteners, bent sections, or signs of rust and corrosion. Even a small bend or a slightly loose section can compromise the system’s effectiveness and lead to bigger issues. Repair or replace any damaged parts immediately. Ensuring your gutters and downspouts are clean and fully functional is one of the most critical steps you can take to protect your home’s exterior and foundation from water damage during the wet and icy seasons.
2. Inspect Your Roof for Missing, Damaged Shingles, and Moss Growth
Your roof is your home’s primary shield against the elements. Before winter arrives, a meticulous inspection is essential. Look for any shingles that are cracked, curled, loose, or entirely missing. Strong winds and heavy rain can weaken shingles, making them susceptible to further damage during winter storms. Damaged shingles expose the underlying roofing materials to moisture, significantly increasing the risk of leaks and structural damage.
Pay particular attention to any moss or algae growth. Moss thrives in damp, shaded areas and can retain significant moisture, especially as temperatures fluctuate. As moss cultivates on your roof, it can strip away the protective granules from your shingles, reducing their lifespan and effectiveness. Moreover, the moisture absorbed by moss can freeze and expand, lifting shingles and creating direct pathways for water penetration. If left unaddressed, this persistent moisture can lead to wood rot in your roof decking and attic, compromising your home’s structural integrity. Addressing these issues now can prevent expensive emergency repairs in the dead of winter.
3. Clean the Chimney and Verify Flashing Integrity
For homes with fireplaces, fall marks the beginning of chimney season. Before you light your first fire, it is paramount to ensure your chimney is clean and in excellent working order. Creosote buildup from previous fires poses a significant fire hazard and can impede proper ventilation, leading to dangerous carbon monoxide accumulation. Consider hiring a certified chimney sweep for a thorough cleaning and inspection.
Beyond cleaning, meticulously check the chimney structure for any visible cracks in the masonry or mortar joints. These cracks can allow water to seep in, causing further damage and potential leaks. If your chimney lacks a cap, installing one is highly recommended. Chimney caps prevent rain and snow from entering the flue, deter debris from falling in, and, crucially, act as a barrier to keep unwanted critters like birds, squirrels, and bats from nesting inside your chimney, which can block airflow and create fire hazards.
Equally important is inspecting the chimney flashing—the metal strips that seal the junction between the chimney and the roof. Damaged or deteriorated flashing is a common source of roof leaks. Look for signs of rust, cracks, or loose seams. In most cases, minor flashing issues can be repaired with sealant, but don’t hesitate to replace it entirely if it shows significant wear or damage. Proper flashing ensures a watertight seal, protecting your home from water intrusion.
4. Install or Inspect Gable Vent Screens
Gable vents play a vital role in ensuring proper attic ventilation, allowing hot, humid air to escape during summer and preventing moisture buildup in winter. However, these openings can also serve as inviting entry points for small animals, particularly as temperatures drop and they seek warm, sheltered spaces. Birds, bats, squirrels, and even larger rodents can use unprotected gable vents to access your attic, creating noise, damage, and potential health hazards.
To prevent these unwelcome guests, ensure all gable vents are fitted with sturdy, intact screens. If your vents lack screens or if existing screens are damaged, take steps to install or repair them before the cold truly sets in. This simple preventative measure can save you from the hassle and expense of animal removal, pest control, and repairing damage caused by nesting or chewing. Proper screening maintains crucial ventilation while safeguarding your attic from intrusions.
Garden and Yard Maintenance Checklist: Preparing Your Landscape for Winter
5. Strategic Pruning of Trees and Shrubs
Pruning is an essential aspect of garden care, but during the fall, it must be approached with strategic intent. While pruning generally promotes healthy growth, extensive pruning in late fall can leave your flora vulnerable. With colder months rapidly approaching, plants may not have sufficient time to heal from large cuts before the frost sets in, potentially causing more harm than good.
Instead, focus on removing dead, diseased, or decaying branches from trees and shrubs. These compromised branches are weak points that can become entryways for pests and diseases, and they are more likely to break under the weight of snow or ice. Additionally, identify and prune any branches that are overhanging your roof, power lines, or other structures. Heavy snowfall or strong winter winds can cause these branches to snap, leading to property damage or power outages. Strategic fall pruning ensures the health and safety of your landscape and home throughout the winter.
6. Disconnect Garden Hoses and Shut Off Outdoor Faucets
Even though you might still be watering some plants in early fall, it is critically important to prepare your outdoor plumbing for freezing temperatures. Disconnect all garden hoses from outdoor faucets. While daytime temperatures might still be mild, nighttime temperatures will steadily drop below freezing. Water trapped inside a hose can freeze and expand, blocking the hose and potentially causing it to burst.
More importantly, you must locate and shut off the interior shut-off valve that supplies water to your outdoor faucets (known as hose bibs or spigots). After turning off the valve, open the outdoor faucet to drain any residual water from the pipe. Water left in these pipes can freeze, expand, and exert immense pressure, leading to burst pipes not only in the outdoor faucet itself but potentially within your home’s wall, resulting in costly water damage. This simple step is vital for preventing serious plumbing emergencies during winter.
7. Properly Store and Maintain Your Lawn Equipment
The cold, damp conditions of winter are harsh on outdoor equipment. To extend the lifespan of your lawnmower, leaf blower, trimmer, and other gas-powered tools, proper winterization is essential. Before storing them, empty all fuel tanks or add a fuel stabilizer to prevent gumming and corrosion, which can occur if gasoline sits unused for months. Clean air filters and sharpen mower blades; dull blades tear grass, making your lawn more susceptible to disease.
Perform any necessary repairs or maintenance now rather than waiting until spring. Lubricate moving parts, inspect belts, and clean all surfaces to prevent rust and deterioration. By preparing your lawn equipment for dormancy, you not only protect it from the ravages of winter but also ensure it’s ready for immediate use when spring arrives, saving you time and effort when you’re eager to get back to yard work.
8. Aerate and Overseed Your Lawn
Fall is the optimal time for rejuvenating your lawn, particularly through aeration and overseeding. Over time, heavy foot traffic, mowing, and environmental factors can compact your lawn’s soil. Compacted soil prevents essential elements like air, water, and nutrients from penetrating the grass roots effectively, leading to shallow root growth, weakened turf, and a patchy appearance. Aeration, the process of removing small plugs of soil, helps to alleviate this compaction, creating channels for these vital elements to reach the root zone, promoting deeper, healthier root development.
Following aeration, overseeding is a crucial step. Spreading new grass seed over existing turf helps to fill in bare spots, improve lawn density, and enhance the overall health and resilience of your grass. Doing this immediately after aeration is highly effective because the new seeds have direct contact with the soil through the aeration holes, ensuring quicker germination and better establishment. These two procedures are best performed in early to mid-fall, giving the new grass enough time to germinate and develop a robust root system before the first hard frost arrives, ensuring a thicker, greener lawn next spring.
RELATED: 15 Creative Ways to Decorate Your Home with Pumpkins This Fall
Home Exterior Maintenance Checklist: Fortifying Your Home’s Shell
9. Inspect and Insulate Exposed Pipes
Exposed water pipes, whether in basements, crawl spaces, or along exterior walls, are highly vulnerable to freezing and bursting when temperatures plummet. The consequences of a burst pipe—extensive water damage, mold growth, and costly repairs—can be catastrophic. To mitigate this risk, thoroughly inspect all exposed pipes. Any pipes that are not adequately insulated should be wrapped with foam pipe insulation sleeves, readily available at hardware stores.
Insulating pipes does more than just prevent freezing; it also reduces heat loss from hot water pipes, meaning your water heater won’t have to work as hard, which can lead to noticeable savings on your energy bills. This preventative measure is a small investment that offers significant protection and energy efficiency benefits throughout the colder months.
10. Examine Your Foundation for Cracks
Your home’s foundation is its bedrock, and even minor cracks can escalate into significant structural problems, especially when subjected to the freeze-thaw cycles of winter. Water can seep into these small cracks, and as temperatures drop, this water freezes and expands, exerting immense pressure that can widen existing cracks and create new ones. This process, known as “frost heave,” can compromise the structural integrity of your foundation, leading to settling, bowing walls, and severe damage throughout your home.
Before winter sets in, conduct a careful inspection of your foundation, both inside your basement/crawl space and around the exterior perimeter. Look for hairline cracks, wider fissures, or any signs of moisture penetration. Small, non-structural cracks can often be repaired with a concrete caulk or patching compound. However, larger or spreading cracks may indicate more serious issues and warrant evaluation by a structural engineer or foundation specialist. Addressing these issues proactively is critical to preventing costly and extensive structural damage.
11. Repair Cracks and Damages on Concrete Steps, Driveways, and Walkways
Just like your foundation, concrete surfaces such as steps, driveways, and walkways are susceptible to damage from freezing water. Any existing cracks, chips, or potholes will worsen significantly during winter due to the expansion and contraction of freezing water and ice. These damaged surfaces pose a serious safety hazard, especially when covered by snow or ice, increasing the risk of slips, trips, and falls for residents and visitors.
It is crucial to patch these cracks and repair damaged areas before the first snowfall. Use appropriate concrete repair compounds for cracks and larger patches. Not only does this proactive repair prevent accidents and injuries, but it also makes the arduous task of shoveling snow considerably easier. Smooth, even surfaces are much simpler to clear, and repairs made now will help extend the life of your concrete surfaces for years to come.
12. Protect Patio Furniture: Cover or Bring Them Indoors
While your patio furniture might still be enjoyable in the mild early days of fall, it’s vital to prepare it for the harsh winter ahead. Prolonged exposure to snow, ice, rain, and extreme cold can cause significant damage to most outdoor furniture materials, including wood, metal, wicker, and fabric. Wood can rot or warp, metal can rust, fabrics can fade or grow mildew, and plastic can become brittle and crack.
Before the projected snowfall or sustained freezing temperatures, take steps to protect your investment. The ideal solution is to clean and store patio furniture indoors, in a garage, shed, or basement. If indoor storage isn’t feasible, invest in high-quality, waterproof patio furniture covers. Ensure the covers fit snugly and are secured to prevent wind from dislodging them. Taking these measures will preserve your furniture’s appearance and extend its lifespan, ensuring it’s ready for enjoyment next spring.
Home Interior Maintenance Checklist: Enhancing Safety and Comfort Indoors
13. Test Smoke Alarms and Carbon Monoxide Detectors
As colder weather arrives, your home’s heating systems, including furnaces, fireplaces, and space heaters, will be in constant use. While these systems provide essential warmth, they also introduce potential hazards. Fireplaces and wood-burning stoves can lead to house fires if not properly maintained, and all combustion-based heating systems emit carbon monoxide (CO)—an odorless, colorless, and highly toxic gas that can be fatal.
Before increased heater use, take a moment to test all smoke alarms and carbon monoxide detectors in your home. Press the test button on each unit to ensure it’s functioning correctly. Replace batteries annually, or immediately if the low-battery warning sounds. It’s also wise to keep a few extra batteries on hand. These life-saving devices are your first line of defense against potential fires and carbon monoxide poisoning, providing critical early warning to protect your family.
14. Ensure All Heating Equipment is in Peak Condition
There’s nothing worse than a malfunctioning heating system when the temperatures plummet. To avoid shivering through winter, conduct a thorough check of all your home’s heating equipment. For furnaces, schedule a professional inspection and tune-up. A technician can clean components, check for leaks, test efficiency, and ensure all parts are working safely. Change furnace filters regularly (every 1-3 months) for optimal performance and air quality.
For fireplaces, ensure the flue is clear and operating correctly (following chimney cleaning). Inspect electric heaters for frayed cords or damaged elements. Verify that your heating systems have sufficient fuel sources, whether it’s checking your oil tank, ensuring gas lines are secure, or confirming electrical connections are safe. If you’re not confident in performing these checks or repairs yourself, do not hesitate to hire a qualified professional. Preventative maintenance now can prevent inconvenient breakdowns and ensure efficient, safe heating throughout winter.
15. Adjust Ceiling Fan Direction to Clockwise for Warmth
Many homeowners are unaware that ceiling fans can be used effectively in winter to enhance warmth and reduce heating costs. During warmer months, ceiling fans typically rotate counter-clockwise, pushing cool air down. However, for colder seasons, you should switch your ceiling fan’s direction to clockwise (usually via a small switch on the fan motor housing).
When rotating clockwise, the blades gently push cool air upwards, which in turn draws the warm air that naturally rises and collects near the ceiling downwards into the living space. This redistributes the heated air more efficiently throughout the room, creating a warmer feeling without significantly increasing thermostat settings. This simple adjustment can make a noticeable difference in comfort and contribute to reduced electricity bills by decreasing the reliance on primary heating systems.
16. Detect and Seal Air Leaks Around Window and Door Frames
Air leaks are silent energy thieves, allowing warm air to escape your home in winter and cool air to escape in summer, leading to significantly higher utility bills. Cold drafts around windows and doors are not only uncomfortable but also indicate substantial heat loss. A simple test to detect leaks involves holding a lighted candle or an incense stick near the joints and connections of window and door frames on a breezy day. If the flame flickers or the smoke wavers, you have an air leak.
Fortunately, these leaks are relatively easy and inexpensive to fix. Common solutions include:
- Caulking: Use exterior-grade caulk to seal gaps around window and door frames on the outside. For interior gaps, use paintable acrylic latex caulk.
- Weatherstripping: Apply weatherstripping around the movable parts of windows and doors to create a tighter seal when they are closed. Various types are available, including foam, rubber, and metal.
- Sealant: For larger gaps or cracks, expanding foam sealant can be an effective solution, particularly in hard-to-reach areas.
Addressing these air leaks can dramatically improve your home’s energy efficiency, reduce drafts, and keep your indoor spaces significantly warmer and more comfortable throughout the winter.
Want to keep pests away from your house during the fall? This video by TERRO will show you how:
Always remember: proactive preparation is paramount when it comes to home maintenance. By systematically tackling these tasks before the full onset of colder weather, you can significantly reduce the likelihood of unexpected repairs, improve your home’s energy efficiency, and ensure a comfortable, safe living environment for your family throughout fall and winter. This comprehensive fall home maintenance checklist provides a valuable roadmap, reminding you of the critical steps needed to fortify your home against the elements.
No matter how large or seemingly small a task may be, being two steps ahead is always a wise strategy. Investing a little time and effort now can save you substantial headaches, expenses, and discomfort later. It’s always better to be safe and well-prepared than to face the consequences of neglect!
Is your house ready for the beauty and challenges of fall? Share your essential fall maintenance tips with us in the comments below!
Up Next for Your DIY Inspiration:
- Soffit Problem Might Indicate a Serious Roof Leak: A Guide to Detection and Repair
- 10 Outstanding DIY Fall Projects to End the Season with Creativity and Style
- Fun DIY Projects For Everyone: A Basic Guide on Building Your Own Enchanting Hobbit House
Calling all crafting DIY enthusiasts, DIY Projects needs YOU! Click here if you want to share your expertise and write for us.
Don’t forget to stay connected with our vibrant community on Facebook, Twitter, and Instagram for more inspiration and tips!