
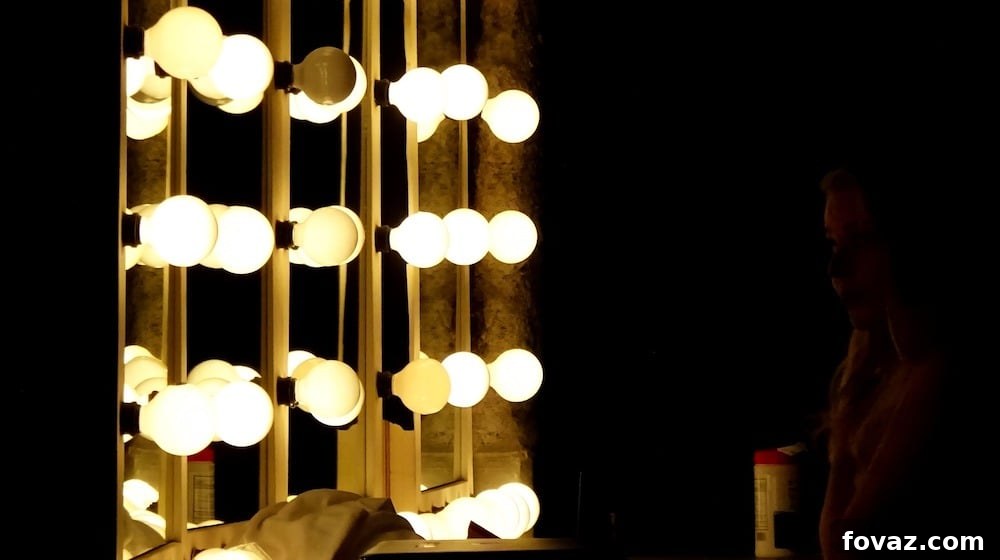
Illuminate Your Beauty Space: The Ultimate DIY Vanity Mirror Lights Guide
A beautifully lit vanity mirror isn’t just a luxury; it’s an essential tool for flawless makeup application, hair styling, and achieving that perfect look. Whether you’re a beauty enthusiast, a professional makeup artist, or simply someone who appreciates a well-designed personal space, optimal lighting can transform your daily routine. For years, I’d admired those dazzling Hollywood-style mirrors, but never thought about building one myself until a family member asked for help. This project, initially a challenge, turned into an incredibly rewarding experience, demonstrating that with a little guidance, anyone can create stunning, custom vanity mirror lighting.
This comprehensive guide will walk you through every step of crafting your own professional-grade vanity mirror lights. We’ll cover everything from selecting the right supplies to intricate wiring techniques and secure installation. Our goal is to empower you to build a system that not only looks fantastic but also provides the perfect illumination for all your beauty needs, all while being budget-friendly and tailored to your specific aesthetic. Get ready to brighten up your makeup table and elevate your entire beauty experience!
Why DIY Your Vanity Mirror Lights?
While numerous pre-made vanity mirrors and lighting kits are available, taking the DIY route offers a multitude of benefits that often outweigh off-the-shelf options:
- Cost Savings: Building your own vanity lights can be significantly more affordable than purchasing high-end commercial setups. You have control over material costs, allowing you to choose components that fit your budget without sacrificing quality.
- Customization: This is arguably the biggest advantage. You’re not limited by standard sizes, styles, or bulb types. You can perfectly match the lighting to your mirror’s dimensions, your room’s decor, and your preferred lighting temperature (warm, cool, or natural white).
- Personal Satisfaction: There’s immense pride in creating something functional and beautiful with your own hands. Every time you sit down at your vanity, you’ll appreciate the effort and craftsmanship you put into your personalized setup.
- Quality Control: By selecting each component yourself, you can ensure higher quality materials and bulbs that might not be standard in mass-produced kits, potentially leading to better performance and longevity.
- Adaptability: DIY allows you to adapt the lighting to unusual mirror shapes or unique spaces that off-the-shelf solutions might not accommodate.
This project is perfect for those who enjoy a hands-on approach and want to add a unique, personalized touch to their beauty station.
Essential Supplies for Your Vanity Lighting Project
Before diving into the construction, gathering all your materials is crucial. Careful selection of each item will ensure a safe, efficient, and aesthetically pleasing result. Here’s a detailed list of what you’ll need:
- Vanity Light Bar (6 units recommended): Opt for a chrome finish for a classic, reflective look that complements most decor styles. The number of bars will depend on the size of your mirror and desired light density. Ensure they are designed for easy wiring and bulb installation. (Example: Light Chrome Vanity Light Bar)
- Command Large Picture Hanging Strips (6+ packs): These adhesive strips are excellent for damage-free installation, making it easy to position and adjust your light bars without drilling or leaving marks. They come in various strengths; ensure you choose “Large” for sufficient holding power. (Example: Command Large Picture Hanging Strips)
- GE 60 Watt Incandescent Globe Light Bulbs (2 packs – total 12+ bulbs): Globe bulbs (G25 or G30 are common) provide a soft, diffused light, ideal for makeup application without harsh shadows. While the original suggests incandescent, consider LED globe bulbs for energy efficiency, cooler operation, and longer lifespan, often available in various color temperatures (e.g., 2700K warm white, 5000K daylight). Make sure to match the bulb wattage and base type (e.g., E26 standard base) to your light bars. (Example: GE 60 Watt Incandescent Globe Light Bulbs)
- Frameless Mirror: The centerpiece of your vanity. A frameless design offers a clean, modern aesthetic, allowing the lights to be the focal point. Ensure it’s securely mounted or positioned on your table.
- Extension Cord (heavy duty): Essential for powering your light setup. Choose a heavy-duty cord with a suitable gauge (e.g., 16-gauge or 14-gauge) to handle the cumulative wattage of all your bulbs without overheating.
- Outlet Adapter (Multi-outlet power strip or single adapter): Depending on your setup and how many light bars you’re combining into one power source, you may need an adapter or a small power strip. A remote-controlled power strip can add convenience.
- Remote Lamp Control (Optional but Recommended): A remote control adds a touch of sophistication and convenience, allowing you to turn your lights on/off or even dim them (if using dimmable bulbs and a compatible dimmer switch/remote) without reaching for a wall switch.
- Wire Nuts/Connectors: For securely joining electrical wires. Choose appropriate sizes for the wire gauge you’re using.
- Electrical Tape: Essential for insulating connections and securing wires.
- Heat Shrink Tubing (Optional): For a more professional and durable insulation of wire connections.
Essential Tools for the Project
Having the right tools makes the job easier, safer, and ensures a cleaner finish:
- Scissors: For cutting Command strips and other non-electrical materials.
- Wire Strippers: Absolutely critical for safely and cleanly removing insulation from electrical wires without damaging the conductors.
- Utility Knife or Box Cutter: For carefully splitting the extension cord and opening packaging.
- Screwdriver Set (Phillips and Flathead): Necessary for opening light bars and tightening any terminal screws.
- Multimeter (Optional but Recommended): For checking voltage and continuity, especially useful for troubleshooting electrical connections.
- Measuring Tape and Pencil: For precise placement of light bars around your mirror.
Step-by-Step Guide to Installing Your Vanity Mirror Lights
This project involves basic electrical work. Always prioritize safety. If you are unsure about any steps, consult a qualified electrician.
1. Setting Up the Vanity Light Bars: Preparing for Wiring
The first step involves preparing your light bars to house the internal wiring discreetly. This ensures a clean look and prevents exposed wires.
- Access the Wiring Compartment: Carefully examine the back of each vanity light bar. You should find a compartment or series of screws that allow access to the internal wiring for the bulb sockets. Gently remove any covers or loosen screws as needed.
- Remove Socket Holders (If Applicable): Some light bars may have pre-installed socket holders that can be removed to give you more room to work. If so, temporarily remove them.
- Route Internal Wires: The goal here is to keep all wiring as hidden as possible. Guide the individual wires from each socket holder into the main body of the light bar. Ensure they are neatly tucked away and won’t interfere with reassembly. This is crucial for a professional finish.
- Prepare for External Connection: Identify the main input wires for each light bar – these are the wires you’ll connect to your extension cord. Leave a sufficient length protruding for easy connection in the next step.
2. Managing the Extension Cord and Wiring Connections
This is the most critical part of the project, requiring careful attention to detail and electrical safety. You will be modifying an extension cord to power your series of light bars.
- Cut the Extension Cord Plug: Using heavy-duty scissors or wire cutters, carefully cut off the female end (the receptacle end) of your extension cord. Set this piece aside; you might need it for other projects or simply discard it. You will be working with the remaining length of the cord that still has the male plug (the one that goes into the wall outlet).
- Split the Cord: At the cut end, gently use a utility knife or box cutter to split the outer insulation of the extension cord, separating the two individual wires. Split it back about 6-8 inches. Be extremely careful not to cut into the insulation of the individual wires themselves.
- Identify Wires: Most extension cords have two distinct wires. One side typically has a smooth insulation, while the other might have a ribbed or raised ridge texture. For the purpose of this project, it’s important to consistently treat one as the “common” (neutral) and the other as the “hot” (live) wire, even if not color-coded internally like household wiring. For consistency, let’s designate the smooth wire as one connection point and the ridged wire as the other.
- Strip Wire Ends: Using wire strippers, carefully remove about 1/2 to 3/4 inch of insulation from the ends of both the split extension cord wires and the corresponding input wires from your first vanity light bar. Twist the strands of each exposed wire tightly to prevent fraying.
- Connect Extension Cord to First Light Bar: Twist together the stripped ends of one wire from the extension cord with one input wire from the first vanity light bar. Repeat for the second set of wires. Ensure these connections are tight and secure.
- Secure Connections with Wire Nuts: After twisting, cap each connection with an appropriately sized wire nut. Twist the wire nut clockwise until it is snug and secure, ensuring no bare wire is exposed.
- Connect Subsequent Light Bars (Parallel Wiring): For each subsequent light bar, you will connect its input wires in parallel to the main extension cord line. This means you will strip a small section of the extension cord’s main wires (without cutting through them) at the point where you want to connect the next light bar. Twist the stripped wires from the light bar around the exposed section of the extension cord, then cover with a wire nut. Alternatively, you can daisy-chain them: from the first light bar’s output wires, extend to the next, and so on. The key is to ensure all corresponding “smooth” wires are connected together, and all “ridged” wires are connected together, maintaining polarity.
- Insulate Exposed Wiring: After all connections are made and secured with wire nuts, wrap each connection with electrical tape, starting from the insulation of one wire, covering the wire nut entirely, and extending onto the insulation of the other wire. This provides an extra layer of insulation and secures the connection. For a more robust finish, you can use heat shrink tubing.
- Conceal Wires within Light Bars: Carefully tuck all connected wires, including the insulated connections, back inside the body of the vanity light bar. Reattach any covers or screws you removed earlier. The goal is to make the wiring invisible from the front.
Important Safety Note: Always ensure your connections are secure and fully insulated. Loose or exposed wires are a significant fire hazard. If you are unfamiliar with electrical wiring, consider consulting a professional or seeking detailed tutorials on parallel wiring for light fixtures.
3. Test Your Newly Wired Vanity Lights
Before proceeding with permanent installation, it’s absolutely crucial to test your wiring setup to ensure everything is functioning correctly and safely.
- Insert Light Bulbs: Screw all your chosen globe light bulbs into their respective sockets on each vanity light bar. Ensure they are snug but do not overtighten.
- Plug It In: Carefully plug the male end of your modified extension cord into a working wall outlet.
- Check for Illumination: Observe all the bulbs. They should illuminate uniformly. If any bulb doesn’t light up, immediately unplug the cord and troubleshoot the connection for that specific light bar or bulb. Check for loose wires, faulty bulbs, or incorrect wiring.
- Test Remote Control (If Applicable): If you opted for a remote lamp control, test its functionality. Ensure it can turn the lights on and off. If it’s a dimmable system, test the dimming feature as well.
- Inspect for Heat: After the lights have been on for a few minutes, carefully (without touching the hot bulbs) check for any unusual heat or burning smells from the wires or connections. Any excessive heat indicates a problem that needs immediate attention. Unplug and re-examine your wiring.
This testing phase is vital for safety and peace of mind. Do not skip or rush through it.
4. Install the Vanity Light Bars Around Your Mirror
With your lights successfully tested, it’s time to bring your vision to life by installing them securely around your mirror.
- Plan Placement: Lay out your light bars around your mirror. Use a measuring tape and a pencil to mark the desired positions. Consider even spacing and ensuring they frame the mirror beautifully. For a rectangular mirror, you might place bars vertically on the sides and horizontally across the top and bottom. For a circular mirror, you might arrange them in an arc or at equidistant points.
- Apply Command Strips: On the back of each vanity light bar, attach the Command Large Picture Hanging Strips. Follow the manufacturer’s instructions carefully for proper adhesion. Typically, this involves pressing them firmly together and then applying them to the surface. Use multiple strips per light bar to ensure maximum stability.
- Clean Surface: Before sticking the light bars, ensure the surface around your mirror (wall or mirror frame) is clean, dry, and free of dust or grease. This will ensure optimal adhesion of the Command strips.
- Mount Light Bars: Carefully align each light bar with your pre-marked positions. Press firmly against the wall/surface for the recommended time (usually 30 seconds) to allow the Command strips to adhere properly.
- Conceal External Wires (Optional but Recommended): For the most professional look, you’ll want to conceal the extension cord and any connecting wires running between the light bars. You can use adhesive wire clips, cable raceways, or simply run the cord discreetly behind the mirror or along the edge of your vanity table. Paintable raceways can be used to blend seamlessly with your wall color.
Tips for Customization and Enhancing Your Vanity Lighting
Once you’ve completed the basic installation, consider these ideas to further personalize and optimize your vanity setup:
- Bulb Choice: Experiment with different types of globe bulbs. While incandescent offers a classic warm glow, LED bulbs are more energy-efficient and come in a wider range of color temperatures (Kelvin ratings). “Daylight” (5000K-6500K) bulbs are excellent for true-to-life makeup application, while “Soft White” (2700K-3000K) offers a cozier ambiance. Ensure any LED bulbs are compatible with your dimming system if you choose one.
- Dimmer Switch: Incorporating an inline dimmer switch (compatible with your bulbs) allows you to adjust the brightness to suit different needs, from bright application lighting to a soft glow for winding down.
- Mirror Shapes: As mentioned, these steps serve as a template for any mirror shape. For curved or circular mirrors, you might need to adjust the number of light bars or opt for flexible LED strip lights (which would require a different wiring approach but offer immense versatility).
- Wire Management: Beyond concealing the main extension cord, consider how to manage any excess wire from within the light bars or between them. Zip ties and adhesive clips can be your best friends for keeping everything neat and tidy.
- Aesthetic Additions: Consider adding decorative elements to your vanity, such as a comfortable chair, small storage solutions for makeup, or even a small plant, to complete the look of your personalized beauty station.
Safety Precautions and Troubleshooting
Working with electricity always carries risks. Please keep the following in mind:
- Always Unplug: Before making any adjustments, connections, or repairs, always unplug your extension cord from the wall outlet.
- Correct Wire Connections: Ensure all wire connections are secure, twisted together properly, and fully covered by wire nuts and electrical tape. Loose connections can cause arcing, overheating, and fire.
- Avoid Overloading: Ensure the total wattage of all your bulbs does not exceed the capacity of your extension cord or the circuit it’s plugged into.
- Check for Damage: Regularly inspect your wiring for any signs of fraying, cuts, or damage to insulation.
- Troubleshooting Non-Lighting Bulbs: If a bulb doesn’t light up:
- Check if the bulb is screwed in tightly.
- Test the bulb in a known working socket.
- Unplug and check the wiring connection for that specific light bar.
- Ensure the main extension cord is plugged in and receiving power.
Conclusion: Light Up Your World with DIY Vanity Perfection
Creating your own vanity mirror lights is a project that offers immense satisfaction and a truly transformative upgrade to your beauty routine. From the initial challenge of understanding electrical connections to the final moment of plugging in your custom-built setup, each step brings you closer to a perfectly illuminated space tailored exactly to your needs. This guide has provided you with the detailed knowledge and practical steps to achieve a professional, seamless, and stunning result.
No more struggling with poor lighting or uneven makeup application. With your new DIY vanity lights, you’ll enjoy a well-lit environment that empowers you to look and feel your best every day. Embrace the power of DIY, personalize your space, and revel in the glow of your own creation!
And there’s far more from where that came from! For more useful DIY Projects and inspiration to transform your home, click here!
Like this? You’ll also like…
Bedroom String Lights With Origami Paper Lanterns
DIY Teen Room Decor Projects
DIY Decorating Ideas With Actual Fall Leaves