
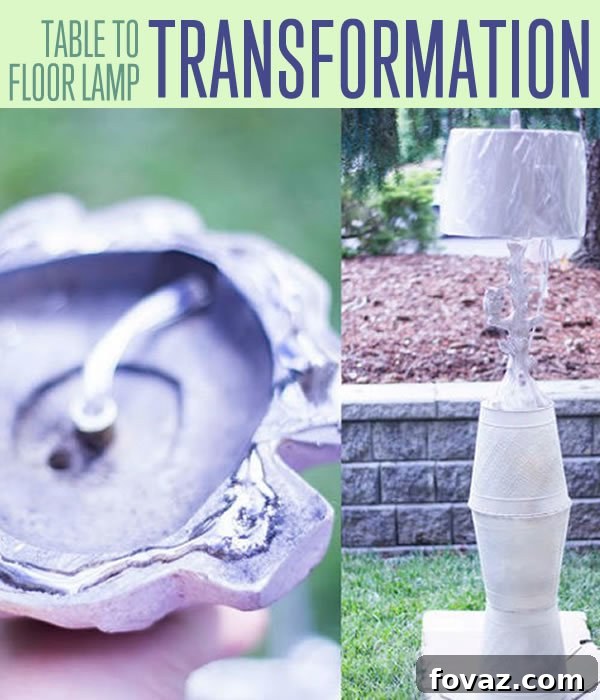
Tired of your beautiful table lamp getting lost in the shadows, longing for a grander stage? Imagine transforming that beloved piece into a striking floor lamp, casting a warm, luxurious glow across your entire living space. What if we told you that this elegant upgrade requires absolutely no power tools or advanced woodworking skills? That’s right! With just a few common household items and a dash of creativity, you can craft a unique, custom-made floor lamp that not only illuminates your room but also serves as a captivating statement piece. This DIY project is perfect for adding a touch of personalized style to your home, all while being incredibly budget-friendly and immensely satisfying. Get ready to embark on a creative journey and give your favorite lamp the prominent position it deserves, elevating your interior decor effortlessly.
Supplies for Your DIY Floor Lamp Transformation
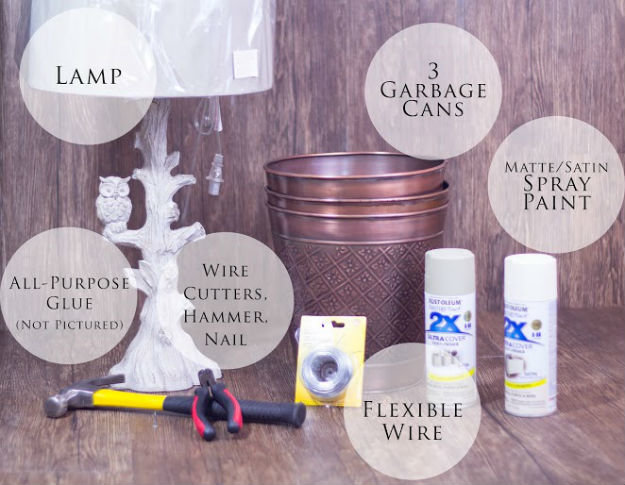
Before diving into the creative process, gathering your materials is the first crucial step. The beauty of this project lies in its simplicity and the accessibility of its components. Here’s a detailed look at what you’ll need to turn your vision into a radiant reality:
-
A Table Lamp: This is the star of our show! Choose a lamp that you genuinely love – one with a shade and base design that already appeals to your aesthetic. Consider its size and style; a lamp that might feel a bit bulky on a side table could be perfectly proportioned as a floor lamp. Ensure it’s in good working condition, as we’ll only be modifying its base, not its electrical components. This project is about giving your existing lamp a new foundation, so pick one that you’re excited to showcase!
-
All-Purpose Super Strength Glue: This isn’t just any adhesive; you’ll need a heavy-duty, industrial-strength bonding agent capable of creating a robust, long-lasting connection. Look for glues designed for metal, plastic, or multi-surface applications, often found in tubes or cartridges. The integrity of your new floor lamp’s base relies heavily on this glue, so don’t compromise on quality. Brands like E6000, Gorilla Glue (clear), or a strong construction adhesive are excellent choices for ensuring maximum durability.
-
Three Small, Patterned Metal Bins (or Decorative Trash Cans): Forget the mundane “garbage can” label; we’re talking about those affordable, often faux-copper aluminum bins, typically found at discount stores for around $5-6. The key here is to find three that are identical in size and feature some appealing texture or pattern. This texture will not only add visual interest but also provide a surface for your paint to adhere to beautifully, giving your finished lamp a high-end, bespoke feel. Matching patterns and sizes are essential for a cohesive and stable base.
-
Spray Paint: Your choice of spray paint is where personalization truly shines. If you adore your lamp’s existing colors, select spray paints that match it closely – you’ll be using these to unify the metal bins with your lamp’s aesthetic. If you’re looking for a complete overhaul, pick a base color and an accent color that complement your room’s decor. Consider finishes like matte, satin, or metallic to achieve your desired look. A good quality primer spray paint can also be beneficial, especially if your bins are particularly shiny or have a slick finish, ensuring better paint adhesion and longevity.
-
Steel Wire (Strong, Yet Flexible): This wire will be the silent architect of your lamp’s stability. It needs to be robust enough to securely “stitch” the metal bins together, providing structural integrity, yet flexible enough to be easily manipulated and tied. A gauge around 16-20 is often ideal, striking a balance between strength and workability. You can typically find this in hardware stores or craft supply stores. This wire is critical for joining two of your bins firmly, so ensure it’s durable.
General Tools: Essential Aids for Your Project
While this project boasts its “no power tools” advantage, a few basic hand tools will be indispensable for precise execution and safe handling of materials. These common household items will make the assembly process smooth and efficient:
-
Hammer: Essential for carefully pounding holes and ensuring the initial pierce through the metal bins. Choose a standard claw hammer for comfort and control.
-
Wire Cutters: Absolutely crucial for snipping and shaping the steel wire, as well as for making the necessary cuts into the metal bins. Opt for a pair with comfortable grips and sharp blades for clean cuts and to prevent hand fatigue.
-
Nail: A sturdy nail, preferably medium to large in size, will serve as your primary piercing tool. It’s used to create pilot holes in the metal bins, providing a starting point for your wire cutters and for threading the steel wire. Ensure the head of the nail is robust enough to withstand repeated hammering without bending.
Step 1: Preparing the First Bin for Wiring
Let’s begin by preparing the foundation of your new floor lamp. Take one of your decorative metal bins and flip it upside down, exposing its base. Using your hammer, carefully pound a sturdy nail through the center of the tin or aluminum bottom. The goal here is not to create a large hole immediately, but rather a precise starting point. This small nail hole will act as the perfect entry point for your wire cutters, allowing you to insert the tip of the shears and begin cutting a larger opening. This initial puncture is vital for safely and efficiently progressing to the next stage of creating a necessary access point for your hand.
Step 2: Crafting the Access Hole for Assembly
With the pilot hole established, it’s time to create a more substantial opening. Utilizing your wire cutters, carefully snip, rip, and sheer away at the aluminum around the nail hole. Don’t worry about perfection here; the appearance of this hole is not critical, as it will eventually be hidden. The primary objective is to create a hole that is large enough for you to safely and comfortably insert your entire arm into and out of the bin without scraping or injuring yourself. This generous opening is absolutely essential for the upcoming steps, where you’ll need to manipulate and tie wire from inside the bin, so prioritize safety and functionality over aesthetics.
Step 3: Perforating the Rims for Interconnection
Now, take the same metal bin (the one with the large access hole) and, using that trusty nail from Step 1, begin pounding holes around the entire rim of the *top* opening of the bin. These holes are critical for the structural integrity of your lamp base. Aim for consistent spacing, roughly one finger’s width apart, ensuring an even distribution around the circumference. After creating your first hole, test it by trying to slide your steel wire through to ensure the nail you’re using creates a hole wide enough for the wire to pass through easily. Once you’ve completed this meticulous process on the first bin, repeat this exact step with a *second* one of your decorative metal bins. The third bin will remain untouched at this stage, serving a different purpose later in the assembly.
Step 4: Initiating the Wire Stitching Process
With two of your metal bins now expertly perforated around their top rims, it’s time to begin the actual assembly. Select a convenient starting point on one of the bins, perhaps near a seam or a distinctive pattern. Carefully insert one end of your strong steel wire through one of the holes you meticulously spaced out around the upper rim. This initial insertion marks the commencement of our “stitching” process, where we will artfully weave the two bins together using a robust criss-cross pattern. This method will not only provide immense stability but also add a charming, industrial-chic detail to your lamp’s base.
Step 5: Weaving the Bins Together with Steel Wire
Once the wire is inserted, tie a simple yet tight knot on the *inside* of the first bin, using the end of the wire that you’ve just fed through the hole. This secures your starting point. Now, bring the two hole-pierced metal bins together, pressing their rims firmly against each other. This is where the large access hole you created earlier truly becomes invaluable! Reach your hand down into the bin with the access hole and begin weaving the steel wire in and out of the corresponding holes on both rims in a criss-cross pattern. As you weave, ensure you pull the wire tightly after each pass to minimize slack and keep the rims perfectly aligned. This part requires patience and a steady hand, but the effort will result in an incredibly stable and beautifully integrated seam. Continue this weaving process all the way around the joined rims until both bins are securely stitched together. Take your time; the tighter and more consistent your weaving, the stronger and more aesthetically pleasing your finished base will be.
Step 6: Securing the Third Bin and Establishing Stability with Glue
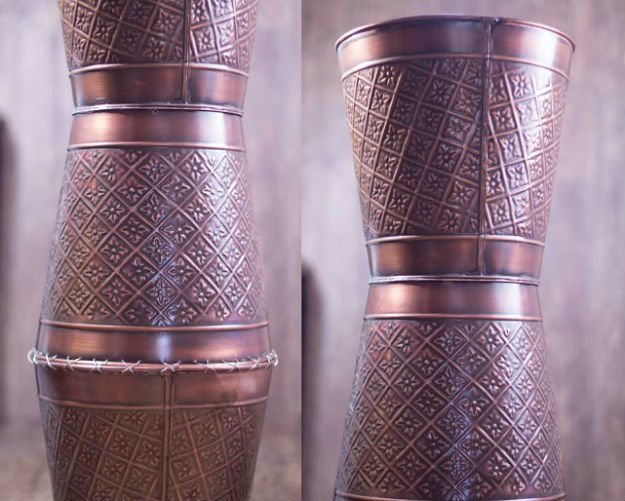
Phew! Congratulations on completing the intricate weaving step – you’ve successfully joined two bins, creating the initial segment of your lamp base. When you reach the end of your wire weaving, simply tie off the steel wire securely on the inside of the bin and trim any excess. Now, let’s move on to integrating the third, untouched bin to complete the base. Take your newly wired two-bin assembly and the remaining single bin. This single bin will form the top section of your floor lamp base. For optimal stability, we want the widest part of the combined structure to be the base that rests on the floor. Therefore, place your wired two-bin section upside down (so the wider ends are facing up) onto your work surface. Then, take the third bin, also oriented so its wider opening is facing the wider opening of the two-bin section, and prepare to join them. This positioning ensures that when your lamp is upright, the widest circumference of the original bins forms the very bottom, providing a much larger footprint and superior stability. This strategic placement is crucial for a sturdy, wobble-free floor lamp.
Now, with this orientation in mind, apply a generous amount of your all-purpose super-strength adhesive along the rim of the single bin and press it firmly and precisely onto the corresponding rim of the already-joined two-bin section. Ensure the edges are perfectly aligned. The upside-down positioning during this gluing phase is intentional: it prevents any downward pressure on the fresh glue seam, allowing it to cure without stress. Let the glue dry and set for the prescribed amount of time indicated on its packaging (many strong adhesives require 24 hours for a full cure). This curing time is non-negotiable for a truly robust and durable bond, so resist the urge to move or test your lamp base during this period.
Step 7: Applying the Base Coat of Paint
Once your heavy-duty glue has fully dried and set, providing an unyielding bond between all three bins, we can finally move on to the exciting stage of painting! This step allows you to unify the structure and personalize its appearance. In a well-ventilated area (preferably outdoors or in a garage with open doors), lay down a drop cloth to protect your surroundings. Using your chosen base spray paint color, apply a nice, even coat over the entire newly formed lamp base. Maintain a consistent distance from the surface, moving in smooth, sweeping motions to avoid drips and ensure uniform coverage. Depending on the original color of your metal bins and the shade of paint you’ve selected, your base coat may require two lighter applications rather than one heavy one to achieve optimal opacity and a flawless finish. Always allow the first coat to dry to the touch before applying a second. Patience in this step will yield professional-looking results.
Step 8: Adding the Accent and Achieving a Shabby Chic Finish
With your base coat completely dry, it’s time to infuse character and depth with your accent color or by employing a distinctive finishing technique. This is where your creativity truly comes alive, allowing you to achieve a beautiful, customized look. You have a few fantastic options for giving your lamp base that coveted shabby chic aesthetic, or simply adding a complementary accent:
-
Mottled or Cloud-like Spray: For a soft, ethereal look, lightly spray your top color over the base coat in an uneven, almost cloud-like pattern. Hold the can a bit further away and use quick, intermittent bursts of spray to create a textured, distressed appearance rather than a solid second coat. This method was used in the original project to achieve a subtle, layered effect.
-
Rag Distressing: Immediately after applying a light coat of your top color, grab a clean, lint-free rag. Gently rub away some of the wet top coat, particularly focusing on the raised patterns and textures of the metal bins. This technique allows the base color to peek through, creating an aged, worn-in effect that is quintessential shabby chic.
-
Light Sandpaper Distressing: If you prefer to work with dry paint, wait until your top coat has fully dried. Then, using a very fine-grit sandpaper (around 220-320 grit), lightly rub away the top coat from the raised patterns, edges, and other textured areas of the bins. This subtly exposes the base color underneath, mimicking natural wear and tear and adding beautiful dimension to your lamp base.
Experiment with these techniques on a scrap piece of metal or an inconspicuous area if you’re unsure. The key is to play around until you achieve a look that you absolutely adore and that perfectly complements your chosen lamp and home decor.
Step 9: Attaching Your Table Lamp to Its New Pedestal
You are just one step away from completing your stunning DIY floor lamp! With your beautifully painted pedestal now fully dry and cured, it’s time to unite it with your chosen table lamp. Turn your painted pedestal right side up, so the widest part of the base rests firmly on your work surface. Recall that we only created a large access hole in *one* of the bins, which means the very top of your newly crafted pedestal presents a nice, solid, and untouched surface. This flat, sturdy area is the perfect platform for securely attaching your lamp. Retrieve your all-purpose super-strength glue once more. Apply a generous amount of this powerful adhesive to the very bottom surface of your table lamp’s base. Ensure full coverage, especially around the perimeter. Then, carefully center your table lamp onto the solid top of your painted pedestal and press it down firmly. Hold it in place for a minute or two to allow the glue to begin bonding. This crucial step permanently transforms your table lamp into a majestic floor lamp, so ensure perfect alignment before the glue sets.
Step 10: The Grand Reveal and Enjoyment
The moment of truth has arrived! After firmly attaching your lamp in Step 9, it is absolutely essential to allow the glue to set completely for the maximum recommended time, usually 24 hours, to ensure an unshakeable bond. This final curing period is critical for the long-term stability and safety of your new floor lamp. Once the glue has achieved its full strength, your gorgeous new, custom-crafted floor lamp is ready for its debut! Carefully place it in any room of your house where you desire warm, luxurious illumination and a captivating focal point. Plug it in, switch it on, and bask in the glow of your accomplishment. You’ve not only upcycled a beloved item but also created a unique piece of home decor that reflects your personal style and ingenuity. Enjoy the ambiance and the endless compliments that are sure to follow!