
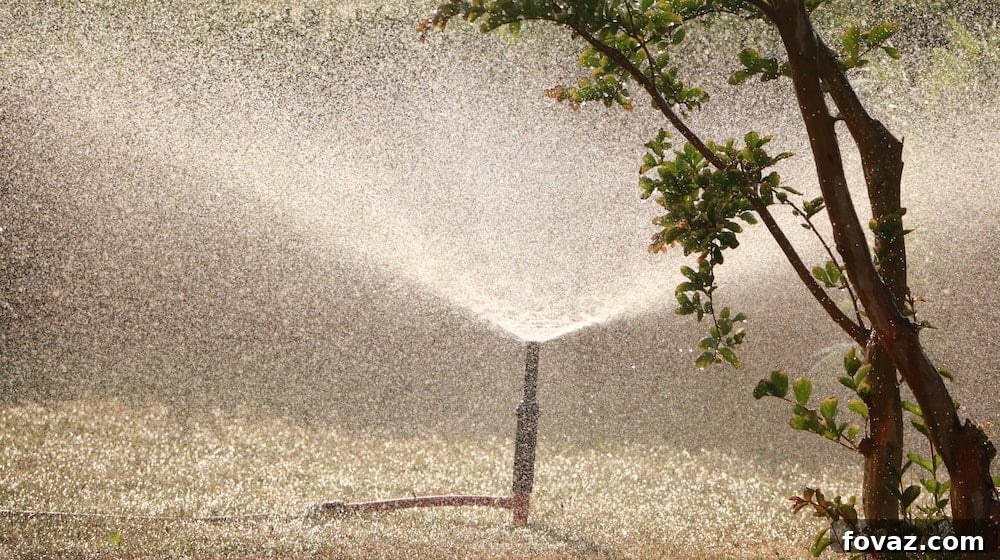
A properly functioning sprinkler system is the backbone of a vibrant, healthy garden. Yet, even the most robust irrigation setups can falter, often due to a broken sprinkler head. Discovering a geyser-like spray or a stubbornly dry patch in your lawn is a common frustration, particularly as the rejuvenating spirit of spring breathes new life into your landscape. Neglecting a damaged sprinkler head can lead to significant water wastage, uneven irrigation, and ultimately, a less-than-ideal garden. This comprehensive guide will walk you through the simple, yet crucial, steps to replace a broken sprinkler head, ensuring your plants receive the precise hydration they need. Embrace the DIY spirit this spring, and restore efficiency to your watering system!
Why Spring is the Ideal Time for Sprinkler Head Replacement
Spring serves as a critical period for garden maintenance, and your irrigation system is no exception. After enduring the harsh conditions of winter, sprinkler heads are particularly susceptible to damage. Freezing temperatures can cause water inside the lines to expand, leading to cracks in plastic components or even dislodging heads from their risers. Additionally, general wear and tear, or accidental encounters with lawnmowers and other equipment, often manifest as visible damage once the snow thaws. Addressing these issues in spring ensures your system is primed for efficient operation throughout the warmer months, preventing unnecessary water loss and promoting consistent plant growth.
Common Reasons Sprinkler Heads Fail
Understanding why sprinkler heads break can help in preventing future issues. Here are some of the most frequent culprits:
- Freeze Damage: As mentioned, residual water in the sprinkler lines or heads can freeze and expand, leading to cracks, burst casings, or internal mechanism damage.
- Lawn Mower Impact: Sprinkler heads that are set too high or that pop up unexpectedly can easily be struck by lawnmowers, causing them to break or shear off entirely.
- Vehicle Traffic: Driving over sprinkler heads, even with light vehicles, can crush or dislodge them, especially in turf areas or along driveways.
- Wear and Tear: Over time, components like springs, seals, and nozzles can degrade due to constant exposure to water, dirt, and UV radiation, leading to leaks or improper spray patterns.
- Clogging and Debris: Sediment, dirt, or mineral deposits in the water can clog the nozzle or internal mechanisms, hindering performance or causing parts to jam and break.
- High Water Pressure: Excessively high water pressure can strain the internal components of sprinkler heads, leading to premature failure, leaks, or even blow-outs.
- Improper Installation: Incorrectly installed heads, such as those overtightened or not properly sealed, can develop leaks or break under normal operating conditions.
Essential Tools and Materials for Sprinkler Head Repair
Before you begin, gather the following items. Having everything on hand will make the replacement process smoother and more efficient:
- New Sprinkler Head: Ensure it’s the correct type (spray, rotor, bubbler) and spray pattern/arc (e.g., 90-degree, 180-degree, 360-degree) to match your existing system and garden’s watering needs. Consider upgrading to a brass model for increased durability, as plastic heads are more prone to damage.
- Flathead Screwdriver: Useful for adjusting spray patterns, water pressure, and sometimes for prying.
- Trowel or Small Shovel: To carefully dig around the broken head without damaging nearby pipes or plants.
- Channel Lock Pliers or Adjustable Wrench: For removing stubborn old heads and tightening new ones, particularly if they are deeply embedded or overtightened.
- Thread Seal Tape (Teflon Tape): Essential for creating a watertight seal on the threads of the new sprinkler head, preventing leaks.
- Work Gloves: To protect your hands from dirt, sharp edges, and potential contaminants.
- Bucket or Small Container: To collect dirt and debris, keeping your work area tidy.
Step-by-Step Guide to Replacing Your Broken Sprinkler Head
Step 1: Locate the Problem and Prepare the Area
First, identify the exact location of the broken sprinkler head. Turn off the water supply to that specific zone or your entire irrigation system to prevent accidental sprays and water damage during the repair. Clear away any grass, dirt, or mulch covering the faulty head using your trowel or small shovel. Gently dig a circular trench around the head, exposing its base and the surrounding pipe connection. Be cautious not to damage any nearby wires or pipes. This initial clearing will give you ample space to work.
Step 2: Carefully Remove the Broken Sprinkler Head
Once exposed, grasp the top of the broken sprinkler head firmly and turn it counterclockwise. If it’s a pop-up head, try to pull it up slightly before twisting. Sometimes, older heads can be quite stubborn due to accumulated dirt or rust. If hand-twisting isn’t enough, use your channel lock pliers or an adjustable wrench for extra leverage. Be gentle but firm to avoid snapping the riser pipe below. As you unscrew it, be mindful that dirt, small rocks, or water may fall into the open pipe. Take care to prevent this, as debris in the line can cause future blockages or damage to other heads.
Pro Tip: If the head is completely sheared off and only the threaded portion remains, you might need a specialized sprinkler head removal tool or carefully use a screwdriver to pry out the remaining pieces.
Step 3: Inspect the Riser and Clear Any Debris
After removing the old head, inspect the exposed riser pipe (the vertical pipe extending from the main lateral line). Check for any cracks, damage, or debris inside the pipe. Use a clean cloth or a small stick to remove any dirt or gravel that may have fallen in. If the riser itself appears damaged or too short/tall for your new head, it’s an opportune moment to replace it. Risers are typically inexpensive and screw directly into the underground pipe. Ensure the threads on the riser are clean and in good condition for a proper seal with the new head.
Step 4: Install the New Sprinkler Head
Before attaching the new sprinkler head, wrap the threaded end of the head (or the riser, if replacing it) with 2-3 layers of thread seal tape. This tape is crucial for creating a watertight seal and preventing leaks. Align the new sprinkler head with the riser pipe and carefully begin to screw it in clockwise. Hand-tighten it until it feels snug. Avoid overtightening, as this can crack the plastic components of the head or the riser. The goal is a firm, watertight connection, not an extremely tight one. Ensure the top of the sprinkler head is flush with the ground level when it’s retracted to minimize the risk of damage from lawnmowers.
Important Consideration: When selecting your new sprinkler head, consider the surrounding landscape. A head that is too tall risks being damaged by lawn care equipment, while one that’s too short might have its spray obstructed by tall grass or plants. For high-traffic areas or zones prone to damage, brass spray heads offer significantly greater durability and longevity compared to their plastic counterparts, making them a worthwhile investment despite a higher initial cost.
Step 5: Adjust the Spray Pattern and Water Pressure
Once the new head is securely in place, it’s time for adjustments. Turn on the water supply to the zone and observe the spray. Most modern sprinkler heads allow for various adjustments:
- Spray Pattern/Arc: If you have an adjustable head, you can typically twist the top or use a small flathead screwdriver to set the desired spray angle (e.g., 90, 180, or 360 degrees). Aim to cover your designated watering area without spraying sidewalks, driveways, or buildings, which wastes water and can cause damage.
- Spray Distance (Radius): Some heads have a screw on top that allows you to adjust the water pressure and, consequently, the spray distance. Tightening the screw will reduce the flow and distance, while loosening it will increase them. Calibrate this to ensure overlapping coverage with adjacent sprinkler heads for even watering, without creating oversaturated spots or dry areas.
Make these adjustments while the water is running to see the immediate effect. It might take a few minor tweaks to get it just right.
Step 6: Backfill the Hole and Final Checks
After all adjustments are complete and you’re satisfied with the spray, carefully backfill the hole around the new sprinkler head with the dirt you initially removed. Gently pack the soil around the base of the head to secure it in place and prevent erosion. Ensure the head remains flush with the ground. Turn the water on one last time to double-check for any leaks around the base of the head and to confirm the spray pattern is still correct. If everything looks good, your broken sprinkler head replacement is complete!
Troubleshooting Common Sprinkler Head Issues
Even with careful installation, you might encounter minor issues. Here’s how to address them:
- Leaking Around the Base: If you notice water pooling around the base of the new head, it likely indicates a poor seal. Turn off the water, dig up the head, and reapply thread seal tape more generously before screwing it back in. Ensure it’s hand-tightened firmly.
- Uneven Spray or Low Pressure: This could be due to a clogged nozzle (check and clean it), or debris in the line. If it’s a system-wide issue, it might indicate a problem with your water main or pressure regulator.
- Head Not Popping Up: Debris might be inside the riser, or the internal spring mechanism could be faulty. Remove the head and inspect the riser for obstructions. If the head is new, it might be defective.
- Water Hammering: A banging noise when the system turns on or off can indicate high water pressure or issues with valves. Consult a professional if this persists.
Preventative Maintenance for a Healthy Sprinkler System
Replacing a broken head is a great start, but regular maintenance can prevent future issues:
- Winterization: Properly blow out your sprinkler lines before winter freezes to prevent damage.
- Regular Inspections: Periodically check all sprinkler heads for signs of wear, damage, or clogs. Do this at the beginning of each watering season and monthly thereafter.
- Mowing Practices: Adjust your mower height to avoid hitting pop-up heads. Consider marking head locations with small flags for visibility.
- Clean Filters: Some sprinkler heads and valves have small filters that can be cleaned to prevent clogs.
- Adjust as Landscape Grows: As plants mature, they might obstruct spray patterns. Adjust heads or prune foliage as needed.
When to Call a Professional
While replacing a sprinkler head is a manageable DIY task, some situations warrant professional assistance:
- Major Pipe Breaks: If the main lateral line or manifold is damaged, it requires more extensive repair.
- Persistent Low Pressure or Zone Issues: If an entire zone or your whole system has pressure problems, it could indicate a deeper issue with valves, pumps, or the main water supply.
- Electrical Malfunctions: Problems with the controller, wiring, or solenoid valves are best left to experienced technicians.
- Extensive System Overhaul: If you’re looking to redesign your irrigation layout or install a new system, professional expertise is invaluable.
That’s all there is to it! You’ve now successfully learned how to replace a broken sprinkler head. This essential DIY skill not only saves you money but also empowers you to maintain a thriving, efficiently watered garden.
Here’s a helpful reminder: Spring is truly the prime season to give your entire irrigation system a thorough check-up. The freezing temperatures of winter are notorious for causing damage, so an early spring inspection can catch problems before they lead to bigger issues.
Watch a visual tutorial to reinforce your learning:
Now that you’re equipped with the knowledge to replace a broken sprinkler head, take a moment to inspect your existing system. A quick check can save you from potential headaches and ensure your garden remains well-hydrated. If you discover any issues, you know exactly what steps to take!
We’d love to hear from you! Have you dealt with a broken sprinkler head this Spring? Share your experiences and tips in the comments below.
Looking for more ways to make the most of the season? Explore 17 creative DIY crafts you can make and sell this Spring!
Stay connected with our community and get daily inspiration on Facebook, Twitter, Pinterest and Instagram!
Feature image via Neponset Stormwater Partnership