
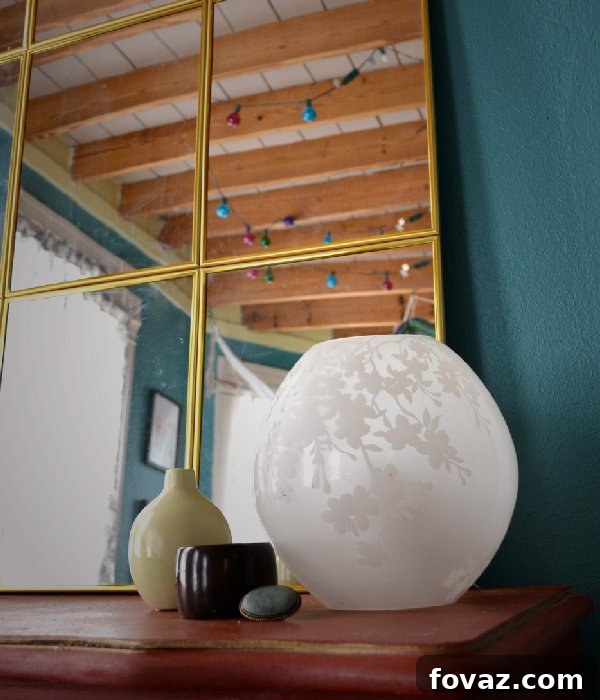
Unlock Your Inner Designer: Craft a Stunning Tiled Mirror for Under $15!
At DIY Projects, we believe that transforming a new space should be an exhilarating journey of self-expression and creative discovery. There’s nothing quite like the satisfaction of infusing your personality into your surroundings, especially when you can achieve a high-end look without breaking the bank. The design world offers an endless wellspring of inspiration, and with a little ingenuity, you can bring those sophisticated ideas to life yourself. Among our favorite go-to decorations for adding instant allure to any room, mirrors stand out as a versatile and impactful choice. They’re a quick and effective way to introduce depth, amplify light, and create the illusion of more space, making any room feel larger and more inviting.
The timeless elegance of a tiled mirror has always captivated us. Its geometric appeal and ability to reflect light from multiple angles can transform a plain wall into a captivating focal point. Traditionally, such custom pieces might come with a hefty price tag. However, driven by our passion for budget-friendly decor, we’ve unearthed a brilliant method to craft a beautiful tiled mirror using everyday items found at your local dollar store. This comprehensive guide will walk you through creating your very own stunning tiled mirror for less than $15 – an absolute steal! If you already have some common household supplies like duck tape and craft glue on hand, your cost could be even lower, proving that exceptional home decor is accessible to everyone.
Get ready to unleash your creativity and make a statement piece that will impress your guests and bring a touch of personalized style to your home. This project is not just about saving money; it’s about the joy of making something beautiful with your own hands, and the pride of showcasing a unique piece of art that reflects your personal flair.
Why a DIY Tiled Mirror is Your Next Must-Have Project
Before we dive into the creation process, let’s explore why a tiled mirror is such an invaluable addition to your home decor arsenal, especially when you craft it yourself on a budget:
- Budget-Friendly Elegance: Achieve a high-end, custom look typically seen in expensive boutiques or design magazines without the extravagant cost. Using dollar store mirrors allows for significant savings.
- Enhanced Space and Light: Mirrors are masters of illusion. By strategically placing a tiled mirror, you can make smaller rooms appear more expansive and brighter, bouncing natural and artificial light throughout the area.
- Unique Focal Point: A large, multi-faceted mirror instantly draws the eye and becomes a captivating centerpiece in any room. The tiled design adds a modern, architectural element that stands out.
- Personalized Touch: While this tutorial focuses on a specific aesthetic, the DIY nature allows for future customization. You can choose different mirror frames, paint the frames, or even experiment with various arrangements to match your unique style.
- Rewarding DIY Experience: There’s immense satisfaction in creating something beautiful and functional with your own hands. This project is simple enough for beginners but yields impressive results, boosting your DIY confidence.
Crafting Your Dollar Store Tiled Mirror: A Step-by-Step Guide
This project is designed to be straightforward and enjoyable, making it perfect for an afternoon craft session. Follow these instructions carefully to ensure your tiled mirror is sturdy and stunning.
Essential Supplies: Gathering Your Materials
The beauty of this project lies in its simplicity and affordability. Here’s what you’ll need to gather to create your magnificent tiled mirror:
- Duck Tape: Essential for securely joining the mirrors. Choose a strong, durable brand. Any color will work as it will be hidden.
- 9 Mirrors (with frames): The core of your project. We recommend using identical square or rectangular framed mirrors from a dollar store for a cohesive look. Ensure they are the same size and have sturdy frames.
- Foam Board: This will serve as the backing for your mirror, providing stability. A standard large sheet (e.g., 20×30 inches or larger, depending on mirror size) should suffice.
- Craft Glue: A strong adhesive suitable for bonding foam board to mirror frames. Options like E6000, Gorilla Glue, or heavy-duty craft glue are ideal for a secure hold.

Pro Tip on Supplies: When selecting your mirrors, pay close attention to the uniformity of their frames. Slight variations can become noticeable in a tiled arrangement. If you plan to hang your mirror, consider opting for a sturdier backing like a thin sheet of plywood instead of foam board, which we’ll discuss in Step 3.
Step 1: Assembling the Mirror Rows with Duck Tape
Your journey begins by connecting the individual mirrors into sturdy rows. Precision here ensures a professional finish.
Start by laying your mirrors face down on a clean, flat surface. This ensures the mirrored surface is protected and allows you to work freely on the backs of the frames. Take your first three mirrors and arrange them side-by-side, pressing them together so their frames are perfectly flush. The goal is to create a seamless connection between them.
Once aligned, begin applying generous strips of duck tape across the seams where the mirror frames meet. Don’t be shy with the tape – the more secure this initial connection, the more stable your final piece will be. While the back won’t be visible, ensure the tape is applied smoothly to prevent bulges. The key here is strength and stability, not aesthetics.

Repeat this process for the remaining mirrors, creating two more identical rows of three. Each row should be a self-contained unit of three securely taped mirrors. Double-check that all mirrors within each row are perfectly aligned before you move on.


Step 2: Connecting the Three Rows into a Complete Tiled Mirror
Now that you have three individual rows, it’s time to bring them together to form your full 3×3 tiled mirror. This step requires careful alignment to ensure a seamless grid.
Lay out your three completed rows of mirrors on your workspace, still face down. Arrange them so that one row is above the other, forming a 3×3 grid. Carefully push the rows together, ensuring all the vertical and horizontal seams are perfectly aligned. Take your time here; a slight misalignment at this stage will be noticeable in the final product.
Once the entire 3×3 grid is perfectly aligned, start applying long strips of duck tape across the horizontal seams, connecting the rows to each other. Overlap the tape to maximize adhesion and strength. Extend the tape beyond the edges of the mirror frames for added security, wrapping it around the outer edges if possible. Continue to tape liberally, ensuring every seam is thoroughly covered and reinforced. This comprehensive taping is what will hold your entire mirror assembly together, making it a cohesive and stable unit.


After taping, gently lift the mirror a few inches off the table to check its rigidity. It should feel like one solid piece. If there are any wobbly areas, apply more tape until it feels completely secure.
Step 3: Reinforcing the Mirror for Stability and Longevity
The final step is crucial for the longevity and stability of your tiled mirror: adding a sturdy backing. This not only reinforces the duck tape connections but also provides a flat, rigid surface.
Measure the dimensions of your assembled 3×3 mirror grid. Carefully cut your foam board to match these dimensions precisely. You want the foam board to cover the entire back surface of the mirror assembly.
Apply a generous, even layer of craft glue to the entire back surface of your taped mirror assembly. Focus on getting glue onto the frames and the tape where they meet. Immediately and carefully place the cut foam board onto the glued surface, aligning it perfectly with the edges of your mirror grid. Press down firmly across the entire surface of the foam board to ensure maximum contact and adhesion. You can place heavy books or other flat weights on top of the foam board while the glue dries to create a strong bond.

Allow the glue to cure completely according to the manufacturer’s instructions, which could take several hours or even overnight. Patience here will pay off with a robust mirror.
Choosing Your Backing: Leaning vs. Hanging
Our design for this dollar store tiled mirror assumes it will be leaned against a wall, making the foam board backing perfectly adequate. Foam board is lightweight and provides sufficient rigidity for a leaning mirror.
If you intend to hang your tiled mirror on a wall, a more robust backing is absolutely essential. We strongly recommend using a piece of thin plywood (e.g., 1/4 inch or 1/2 inch thick) instead of foam board. Plywood offers superior strength and durability, which is critical for hanging a potentially heavy mirror safely. Once the plywood is securely glued and perhaps even screwed onto the back of the mirror assembly, you can then attach appropriate hanging hardware. For a mirror of this size and potential weight, using D-rings or heavy-duty picture wire attached with a staple gun (or small screws for maximum security) to the plywood backing is advisable. Always use wall anchors appropriate for the weight of your mirror and the type of wall you are hanging it on.
Safety Note: Mirrors, even small ones, can be surprisingly heavy when combined. Always prioritize safety when selecting hanging methods and hardware. If in doubt, consult with a hardware store expert or professional.
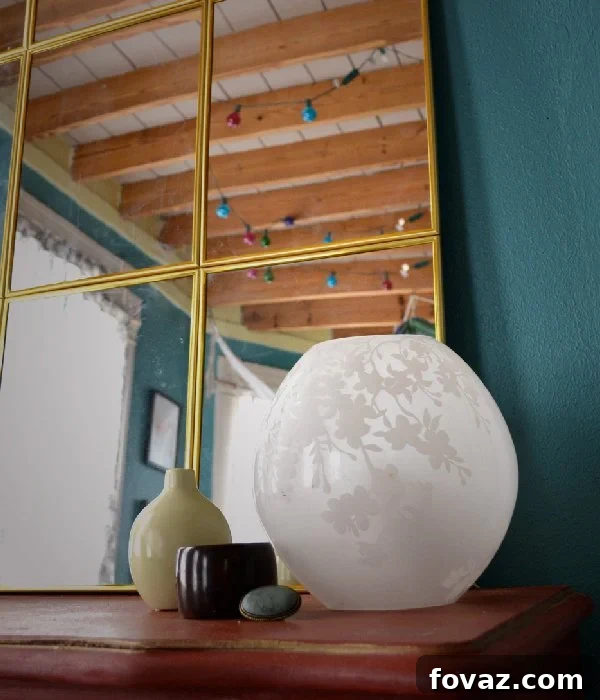
Bringing Your Tiled Mirror to Life: Finishing Touches and Placement
Congratulations! You’ve successfully created a stunning, budget-friendly tiled mirror. Now, it’s time to refine its appearance and find the perfect spot in your home.
Cleaning and Polishing
Once your mirror is fully assembled and the glue has dried, gently clean the mirrored surfaces. Use a soft, lint-free cloth and a glass cleaner to remove any dust, fingerprints, or smudges accumulated during the crafting process. A clean mirror truly shines and enhances the overall aesthetic.
Customization Ideas
While the basic dollar store frames offer a sleek, minimalist look, don’t hesitate to personalize your tiled mirror further:
- Paint the Frames: Use spray paint or craft paint to change the color of the frames. Matte black for a modern industrial vibe, gold for a touch of glam, or a vibrant color for a playful accent.
- Distress the Frames: For a rustic or farmhouse feel, gently sand parts of the painted frames to reveal the original color underneath, creating a distressed look.
- Add Embellishments: Consider gluing small decorative elements like faux pearls, metallic studs, or even thin strips of wood trim to the frames for added texture and detail.
Optimal Placement for Maximum Impact
Where you place your tiled mirror can significantly impact a room’s feel:
- Entryway: Create a grand first impression and offer a last-minute check of your appearance before heading out.
- Living Room: Position it opposite a window to maximize natural light, or behind a sofa as a striking focal point.
- Dining Room: Reflect candlelight and create an intimate, elegant ambiance during dinner parties.
- Bedroom: Adds depth and light, perfect above a dresser or as a standalone decorative piece.
- Hallway: Brighten up narrow hallways and make them feel less confined.
Safety Considerations for Your DIY Mirror Project
While this is a fun and simple DIY, it involves handling glass and adhesives. Please keep the following safety tips in mind:
- Handle Glass with Care: Mirrors can have sharp edges, especially if any glass gets chipped. Consider wearing gloves during assembly.
- Ventilation with Adhesives: Work in a well-ventilated area when using craft glue, as some can have strong fumes.
- Secure Hanging: If you choose to hang your mirror, ensure you use appropriate hardware and secure wall anchors. Test the stability of the hanging before leaving it unattended.
- Clear Workspace: Maintain a tidy workspace to prevent accidents and make the crafting process smoother.
Troubleshooting Common Issues
- Mirrors Not Aligning: If mirrors shift during taping, carefully peel back the tape, re-align, and re-tape. Precision in the early steps saves headaches later.
- Tape Not Holding: Ensure mirror frames are clean and dry before applying tape. If needed, use a stronger, heavy-duty duck tape or consider adding a thin layer of adhesive under the tape for extra grip.
- Glue Not Drying: Make sure you’re using enough glue, but not so much that it oozes excessively. Ensure adequate air circulation and give it plenty of time, especially in humid conditions.
- Mirror Feels Flimsy: This usually means insufficient taping or an inadequate backing. Go back and add more layers of tape, particularly around the seams, and ensure the foam board (or plywood) is very securely glued across the entire back surface.
Your DIY Tiled Mirror: A Testament to Creativity and Budget-Savvy Style
We truly hope you’ve enjoyed this detailed tutorial on how to make your own stunning tiled mirror using simple, affordable items from the dollar store! This project proves that beautiful home decor doesn’t require a hefty investment – just a little imagination and a willingness to get hands-on. By following these steps, you’ve not only created a magnificent accent piece for your home but also tapped into the rewarding world of DIY.
Your new tiled mirror will undoubtedly add character, depth, and a touch of personalized elegance to any room, serving as a constant reminder of your creative capabilities. We encourage you to display your creation with pride and perhaps even inspire others to embark on their own DIY adventures. Don’t forget to share your finished dollar store tiled mirror with us!
Happy crafting, and may your new mirror reflect endless compliments!