
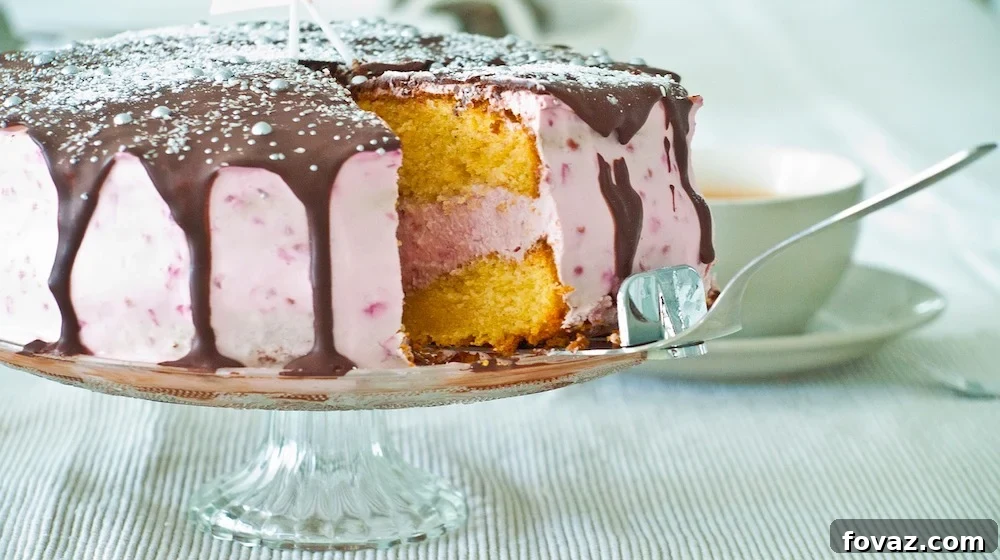
DIY Cake Stand: Craft Your Own Elegant Dessert Display on a Budget
Every baker knows that the magic of a delicious dessert isn’t just in its taste; it’s also in its presentation. A beautifully adorned cake, a platter of perfectly piped cupcakes, or an assortment of delicate pastries can truly captivate an audience even before the first bite. If you’re passionate about baking for friends, family, or special occasions, you understand the desire for your creations to look as exquisite as they taste.
Recently, I stumbled upon a breathtaking vintage cake stand in a charming boutique window. Its intricate design and timeless elegance instantly spoke to my aesthetic, promising to elevate any dessert to a work of art. My enthusiasm, however, quickly deflated when I saw the price tag: a staggering $80! While the stand was undeniably gorgeous, that price was far beyond what I was willing to spend, especially when I could invest that money into premium baking ingredients instead.
That moment sparked an idea: why buy when you can DIY? I decided to embark on a creative quest to craft my own elegant cake stand. What I discovered was not only a significant cost-saving solution but also an incredibly rewarding and surprisingly simple project. It turns out that making a DIY cake stand is super easy, and the most enjoyable part is often the treasure hunt for unique pieces at your local thrift store!
Inspired by fantastic instructions like those shared by Diane Cowen, this guide will walk you through creating a one-of-a-kind dessert display that perfectly complements your baked goods. Get ready to transform ordinary tableware into an extraordinary centerpiece. Let’s get started!
Why Craft Your Own Homemade Cake Stand?
Beyond the simple joy of creating something with your own hands, a DIY cake stand offers a multitude of benefits:
- Unbeatable Affordability: The most immediate advantage is the significant cost savings. Instead of shelling out a hefty sum for a store-bought stand, you can create a customized piece for a fraction of the price, leaving more room in your budget for quality ingredients or other baking tools.
- Unique Personalization: Your homemade cake stand will be truly one-of-a-kind. You get to choose the style, colors, and components that perfectly reflect your personality, your home decor, or the theme of your event. No mass-produced item can match that level of individuality.
- Embrace Upcycling and Sustainability: This project is a fantastic way to give new life to forgotten items. By repurposing old dishes, teapots, and cups, you’re not only saving money but also contributing to a more sustainable lifestyle by reducing waste.
- The Joy of Creation: There’s immense satisfaction in looking at something beautiful you’ve made yourself. Each time you display a dessert on your custom stand, you’ll feel a sense of pride and accomplishment.
- Versatility Beyond Cakes: While perfect for cakes, these stands are incredibly versatile. Use them for cupcakes, cookies, appetizers, fruit, or even as decorative elements in your home – a jewelry holder, a candle display, or a plant stand.
Thrifting for Treasures: Finding Your Perfect Pieces
The first and arguably most exciting step in making your DIY cake stand is gathering the components. This is where your inner treasure hunter comes out! Heading to a thrift store is an adventure, and finding the right pieces can be incredibly rewarding. Here’s what to look for and where:
Where to Hunt for Your Supplies:
- Thrift Stores & Charity Shops: These are goldmines for unique, affordable tableware. You’ll find a wide variety of styles, from classic to quirky.
- Garage Sales & Estate Sales: Often offer great deals on entire sets or individual pieces, sometimes with interesting vintage character.
- Antique Stores: While potentially pricier, they can offer truly special, high-quality vintage items if you’re looking for a particular aesthetic.
- Dollar Stores & Discount Retailers: Don’t overlook these for new, inexpensive dishes that can be easily customized with paint.
What to Look For:
- Sturdiness is Key: For your base (like a cereal bowl) and any connecting pieces, ensure they are robust and have a stable footprint to prevent wobbling or toppling.
- Interesting Shapes and Designs: Don’t be afraid to mix and match! A quirky teapot, a teacup with an elegant handle, or a plate with a unique rim can add character.
- Good Condition: Check for chips, cracks, or significant damage. While paint can cover some imperfections, structural integrity is paramount.
- Mix & Match Potential: Think about how different pieces will stack. Does that bowl pair well with that teapot? Will the cup fit snugly on the saucer?
- Consider the “Unpainted” Surface: If you’re painting your stand, remember that the top surface where food will sit should remain unpainted for food safety. Choose a plate or platter that has an appealing original color or design, or one that is naturally white/neutral.
Supplies You’ll Need:
Once you’ve embarked on your thrifting adventure and gathered your unique pieces, you’ll need a few common crafting supplies:
- Cereal Bowl: This will form the sturdy base of your stand. Look for one with a wide, stable bottom.
- Teapot (without lid): Provides height and an interesting central element.
- Cup: Adds another tier and visual interest.
- Saucer: To complement the cup and provide a small platform.
- Dinner Plate or Round Platter: This will be the main display surface for your desserts.
- Sandpaper (fine-grade): Essential for preparing surfaces for optimal glue adhesion.
- E-6000 Glue (clear): A strong, durable adhesive perfect for bonding ceramics and glass.
- Primer or Adhesion Promoter: Crucial if your spray paint doesn’t have a built-in primer, ensuring the paint adheres well to slick surfaces.
- Spray Paint: Choose your desired color and finish to bring your vision to life!
Step-by-Step Instructions: Creating Your Masterpiece
Step 1: Gathering & Preparing Your Components
Begin by collecting all your chosen items. The cereal bowl is your foundation, so select one that’s robust and broad enough to provide excellent stability, preventing your finished stand from becoming wobbly. The teapot is key for adding elegant height and presence. The cup and saucer will introduce an intriguing intermediate element, sitting just beneath your main display plate or platter.
A critical consideration is the dinner plate or platter you choose for the top tier. Since you won’t want to paint the surface where food will directly rest, opt for a piece that is already white, a desirable base color, or features a design that complements your overall aesthetic. Thoroughly clean all pieces with soap and water, ensuring they are completely dry before proceeding.
Step 2: Designing Your Structure & Surface Preparation
This is the fun, experimental stage! Arrange your chosen pieces in various configurations until you find a stack that you love. Try different orientations for handles – perhaps opposing each other for visual balance, or aligned for a uniform look. Experiment with other items too, such as mugs instead of teacups, or even stacking some pieces upside down for a unique silhouette.
Once you’ve settled on your preferred structure, it’s time for crucial preparation. Using fine-grade sandpaper, lightly sand the bottom rim of each piece that will be glued together. This creates a slightly rougher surface, allowing the glue to adhere much more effectively. Additionally, use a level to ensure that your stacked pieces will be perfectly straight, preventing any lean or instability in your final cake stand.
Step 3: Securely Gluing Your Layers
With your structure finalized and pieces prepped, it’s time to bond them together using E-6000 clear adhesive. This industrial-strength glue is ideal for ceramics, providing a strong, flexible, and clear bond.
Begin by applying a thin, even bead of E-6000 glue to the bottom rim of the first piece (your base cereal bowl) and firmly attach the next component (e.g., the teapot). Press down gently but firmly for about 30 seconds to ensure good contact. Allow each piece to dry for at least 5-10 minutes before carefully adding the next layer. This prevents the previous layer from shifting as you work. Continue this process, building your stand from the bottom up. Once all pieces are glued, allow the entire structure to dry thoroughly for a minimum of 24 hours (or according to the glue manufacturer’s instructions) before moving on to painting. Full cure time for E-6000 is typically 72 hours, so handle gently until then.
Step 4: Painting and Finishing Touches
Now for the transformation! Prepare your work area in a well-ventilated space, ideally outdoors, and lay down newspaper or a drop cloth to protect surfaces. If your chosen spray paint does not include a primer, it is essential to apply a coat of primer or adhesion promoter first. This step ensures that your paint adheres smoothly and evenly to the slick surfaces of the ceramic or glass.
Once the primer is dry, you can begin spray painting. Remember, you want to keep the top surface of your main display plate or platter unpainted for food safety. To achieve this, turn your entire structure upside down. This allows you to easily paint the underside of the plate/platter and all other components from the bottom up. Apply the spray paint according to the directions on the can, typically holding the can 8-10 inches away and applying thin, even coats. Multiple thin coats are always better than one thick coat, as this prevents drips and ensures a smoother finish. Allow each coat to dry to the touch before applying the next.
Once you’ve achieved your desired coverage and color, allow the painted cake stand to dry completely for at least one hour before handling, and preferably several hours, or even overnight, before heavy use or placing food on it. This ensures the paint is fully cured and durable.
Creative Customization Ideas for Your DIY Cake Stand
The beauty of a DIY project is the endless possibility for personalization. Here are some ideas to make your cake stand truly shine:
- Color Schemes:
- Monochromatic Elegance: Paint everything a single color (e.g., matte black, glossy white, or a soft pastel) for a sophisticated look.
- Bold Contrast: Use two contrasting colors – perhaps a dark base with a metallic gold top, or a vibrant color paired with white.
- Metallic Glamour: Gold, silver, or rose gold spray paint can instantly add a touch of luxury and vintage charm.
- Embellishments:
- Stenciling: Once the paint is dry, use stencils and a contrasting paint color to add patterns or monograms.
- Decoupage: Apply decorative paper, fabric, or even napkin designs using decoupage glue for a unique texture.
- Rhinestones & Beads: Adhere small rhinestones, pearls, or beads to the edges or details for a touch of sparkle.
- Themed Stands:
- Rustic Chic: Use distressed paint techniques or earthy tones.
- Holiday Specific: Paint in festive colors (red/green for Christmas, pastels for Easter) and add themed accents.
- Modern Minimalist: Clean lines, simple shapes, and a single, understated color.
- Multi-Tiered Creations: With more pieces, you can create two or even three-tiered stands for grander displays. Ensure stability by using larger, heavier bases for taller stands.
Care and Maintenance for Your Handmade Stand
To ensure your beautiful DIY cake stand lasts for many celebrations to come, follow these simple care tips:
- Hand Wash Only: Avoid the dishwasher. The high heat and harsh detergents can damage the paint and weaken the glue bond over time. Gently wipe the stand with a damp cloth and mild soap, especially the painted areas.
- Wipe Down Food Surfaces: For the unpainted food-contact surface, simply wipe clean with a sponge or cloth after use.
- Avoid Abrasives: Do not use abrasive cleaners or scrubbers on any part of the stand, as they can scratch or dull the paint finish.
- Gentle Handling: Always lift the stand from its base, not by the top plate, to prevent stress on the glued joints.
- Storage: Store your cake stand in a safe place where it won’t be easily knocked over, perhaps wrapped in tissue paper for added protection if stored with other items.
- Touch-Ups: If your stand gets a minor scuff or chip, a small amount of matching spray paint can often be used for a quick touch-up.
Beyond Cakes: Creative Uses for Your Versatile Stand
While designed for cakes, your DIY stand is far more versatile than you might imagine. Here are some inspiring alternative uses:
- Dessert Bar Hero: Perfect for displaying cupcakes, cookies, macarons, tarts, or even small parfaits.
- Appetizer & Charcuterie Display: Arrange cheeses, crackers, olives, or small bites for an elegant party spread.
- Fruit Platter: Elevate a simple fruit arrangement into a sophisticated centerpiece.
- Jewelry Organizer: Use it on your dresser to elegantly display necklaces, bracelets, and rings.
- Vanity Tray: Keep perfumes, cosmetics, or hair accessories neatly organized on your bathroom counter.
- Candle Display: Arrange pillar candles or votives for a stunning flickering centerpiece.
- Plant Stand: A small potted plant or succulent can look charming on a smaller stand.
- Seasonal Decor: Change out decorative items based on holidays or seasons – small pumpkins for autumn, ornaments for winter.
Frequently Asked Questions About DIY Cake Stands
- Q: What type of glue is best for this project?
- A: E-6000 clear adhesive is highly recommended. It provides a very strong, durable, and flexible bond suitable for ceramics, glass, and other materials. Make sure to allow adequate drying time.
- Q: Can I use any type of dishes for my stand?
- A: Most ceramic, porcelain, or glass dishes will work well. Focus on stability for the base and ensuring the pieces can be securely glued together. Avoid overly delicate or easily breakable items.
- Q: How long does it take for the glue and paint to dry?
- A: E-6000 glue typically needs 24 hours to dry to the touch and up to 72 hours for a full cure. Spray paint usually dries to the touch within an hour, but multiple coats and complete hardening can take several hours to overnight. Always refer to the specific product instructions.
- Q: Is the DIY cake stand food safe after painting?
- A: To ensure food safety, the surface where food will directly contact should NOT be painted. This is why we recommend choosing a plate with an appealing original finish or masking the food-contact area before painting. If you absolutely must paint the top surface, use a food-safe sealant over the paint, though it’s generally best to avoid direct contact.
- Q: Can I make a multi-tiered stand using this method?
- A: Absolutely! The same principles apply. Just ensure your base is wide and heavy enough to support additional tiers and that each glued joint is stable before adding the next. Plan your design carefully before gluing.
Ready to Elevate Your Desserts?
Creating your own DIY cake stand is more than just a craft project; it’s an opportunity to infuse your passion for baking with your personal style. It’s a statement piece that not only saves you money but also tells a story of creativity and resourcefulness. From the thrill of finding unique pieces at the thrift store to the satisfaction of seeing your vision come to life with a fresh coat of paint, every step of this project is rewarding.
So, gather your supplies, unleash your creativity, and get ready to display your delicious creations in style. Your handmade cake stand will undoubtedly be a conversation starter and a cherished addition to your kitchen or entertaining arsenal.
Love this tutorial on how to make a DIY cake stand? Then you’ll also love exploring more creative ideas and recipes:
-
How To Decorate A Cake With Fondant Flowers
-
How To Bake Cake in a Jar
-
46 Awesome Baking Hacks
-
Triple Berry Pie Recipe for You DIY Dessert Divas
-
32 Easter Desserts Recipes to Make this Year
For those inspired to explore artistic expression further, consider delving into the world of ceramic art and pottery. You might find a new passion at resources like Soul Flame Pottery.