
Unlock Your Home’s Potential: A DIY Home Makeover Tutorial
Lesson 12: Mastering Grommet Curtains for a Modern Aesthetic
Welcome to Lesson 12 of our comprehensive ‘How to Make Curtains’ online course! Today, we’re diving into the sleek and contemporary world of Grommet Curtains. If you’re looking to infuse your living space with a modern, minimalist vibe and enjoy effortless functionality, then this curtain style is precisely what you need. Grommet curtains offer a clean, uncluttered look, allowing your fabric to fall in elegant, uniform waves from top to bottom. This creates a polished finish that instantly elevates any room’s decor. Best of all, we’ll show you how to easily add grommets to your curtains with a quick, no-sew solution – perfect for DIY enthusiasts of all skill levels. Whether you’re working with rustic burlap, luxurious linen, or a vibrant cotton print, this technique is incredibly versatile. Grab your grommets, prepare your fabric, and let’s get ready to transform your windows!
Why Choose Grommet Curtains for Your Home Makeover?
Grommet curtains have soared in popularity for a multitude of reasons, making them a top choice for contemporary home makeovers. Their distinctive style isn’t just about aesthetics; it also offers significant practical benefits. Unlike traditional curtain headings that might create a more ruffled or formal appearance, grommet curtains provide a crisp, tailored look that complements modern, minimalist, industrial, and even updated farmhouse interior designs. The metal rings, or grommets, thread directly onto your curtain rod, allowing the fabric to glide smoothly and stack neatly when open. This creates an uninterrupted flow of fabric that emphasizes clean lines and an open, airy feel in your room.
Beyond their visual appeal, grommet curtains excel in functionality. The smooth movement along the rod makes them exceptionally easy to open and close, ideal for high-traffic windows or rooms where you frequently adjust light and privacy. The even spacing of the grommets ensures consistent, beautiful folds, adding a touch of architectural detail to your window treatments. Moreover, the durable metal grommets reinforce the fabric, extending the lifespan of your curtains, especially in homes with active families or pets. For those embarking on a DIY home decor journey, the simplicity of adding grommets, especially with our no-sew method, means you can achieve a professional-grade finish without the need for advanced sewing skills. It’s a rewarding project that promises high impact with relatively low effort, making it an excellent starting point for anyone looking to personalize their space.
The DIY Grommet Curtain Process: A Step-by-Step Guide
Creating your own grommet curtains is a surprisingly straightforward process, especially when utilizing a no-sew method that bypasses the complexities of a sewing machine. This approach is fantastic for a wide range of fabrics, from the rustic charm of burlap to the refined elegance of heavier drapery materials. Here’s a detailed breakdown of how you can achieve stylish, custom grommet curtains for your home:
1. Gather Your Essential Materials
- Curtain Fabric: Choose a fabric that complements your room’s decor. Consider weight, drape, and light-blocking properties. Burlap, linen, cotton, velvet, or even canvas are excellent choices.
- Grommet Kit: These kits typically include a set of two-part metal grommets, a punching tool, and a setting tool. Ensure the grommet size is appropriate for your curtain rod’s diameter.
- Measuring Tape and Fabric Scissors: For accurate measuring and precise cutting.
- Fabric Marking Pen or Chalk: To mark grommet placement.
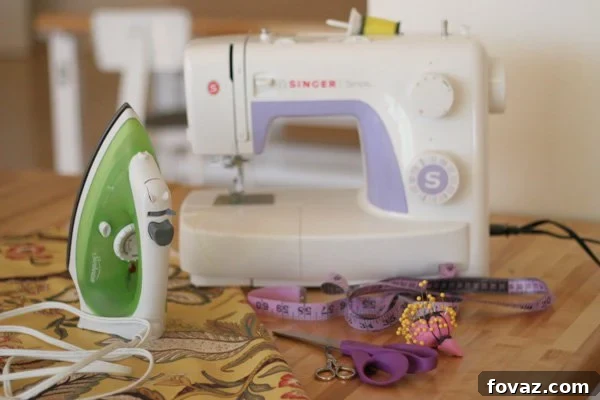
- Iron and Ironing Board: For pressing hems and ensuring a crisp finish.
- Optional (for no-sew hemming): Fabric adhesive tape (like fusible webbing or no-sew hem tape) or a strong fabric glue.
2. Fabric Preparation and Measuring
Start by determining the desired finished length and width of your curtains. Remember to add extra fabric for hems and the top heading where the grommets will be placed. For the length, consider how you want your curtains to fall: just above the floor, kissing the floor, or slightly puddling. For the width, a general rule of thumb is to have your curtain panels be 1.5 to 2 times the width of your window or rod to ensure a full, gathered look when closed. Once measured, carefully cut your fabric. Iron out any wrinkles before proceeding. If you’re using a no-sew method for hemming, apply your fabric adhesive tape or glue along the edges (sides and bottom) and fold them over, pressing firmly with an iron according to product instructions to create neat, finished edges. For the top edge, fold down about 3-4 inches to create a sturdy heading, which will accommodate the grommets.
3. Marking Grommet Placement with Precision
This step is crucial for achieving a professional, evenly spaced look. Lay your curtain panel flat. Along the top folded hem, mark the precise locations for each grommet. A good starting point is to place the first and last grommet approximately 2-3 inches from the side edges of the curtain. For spacing between grommets, aim for 6-8 inches apart on average, but always ensure an even number of grommets for a balanced appearance when hanging. Measure carefully and use your fabric marking pen or chalk to draw a small circle for the center of each grommet opening. Make sure the centers are equidistant from the top edge (typically 1.5 to 2 inches from the very top fold, depending on your grommet size). This consistency will ensure your curtains drape beautifully.
4. Punching and Attaching the Grommets
Once all your grommet centers are marked, it’s time to punch the holes. Follow the instructions that come with your grommet kit. Typically, you’ll place the punching tool over your marked circle and strike it with a hammer to create a clean hole in the fabric. Be sure to do this on a protected, sturdy surface. After the holes are punched, take one half of a two-part grommet (usually the raised or “male” side) and push it through the front of the fabric hole. Then, take the other half (the “female” side) and align it over the male side on the back of the fabric. Place the grommets onto the setting tool (if provided in your kit) and use a hammer to firmly tap them together until they snap securely into place. Work your way across the curtain, attaching all the grommets, ensuring each one is firmly secured to the fabric.
5. The Finishing Touches and Hanging Your New Curtains
With all your grommets in place, give your curtains a final press with an iron to remove any lingering creases and ensure a crisp, polished appearance. Now, the most exciting part – it’s time to hang them! Thread your chosen curtain rod through the grommets. Adjust the gathers and folds to your liking, ensuring the curtains drape beautifully and evenly. Step back and admire your handiwork! You’ve successfully created stunning, modern grommet curtains that will enhance your home’s aesthetic and functionality. This quick, no-sew method is incredibly satisfying and proves that beautiful home decor can be achieved with a little creativity and effort, even without a sewing machine. Enjoy your personalized, stylish space!
Designing with Grommet Curtains: Tips for an Impressive Finish
While the process of making grommet curtains is straightforward, achieving an impressive, designer-quality look involves a few key design considerations. These elements will help you maximize the sleek appeal and functionality of your new window treatments.
1. Curtain Rod Selection
The curtain rod plays a pivotal role in the overall aesthetic of grommet curtains. Because the grommets slide directly onto the rod, the rod itself becomes a visible design element. Opt for sturdy, decorative rods that complement your room’s style and the grommet finish. For a modern look, choose metal rods with simple finials. Ensure the rod’s diameter is smaller than the grommet’s inner opening to allow for smooth gliding. A high-quality rod will enhance both the appearance and durability of your setup.
2. Fabric Choices and Their Impact
The type of fabric you choose significantly influences the drape and function of your grommet curtains. For a crisp, defined wave, medium to heavy-weight fabrics like linen blends, cotton duck, or even velvet work wonderfully. These materials hold their shape well and provide excellent light control and privacy. If you desire a softer, more ethereal look, lighter fabrics such as sheer linen or voile can also be used, though their folds will be less pronounced. Don’t shy away from patterns; grommet curtains beautifully showcase geometric, abstract, or even large floral prints due to their smooth, ungathered top edge. Our original content highlights burlap as a fantastic option, and it’s true! Burlap offers a unique texture and rustic charm that pairs surprisingly well with the modern lines of grommets, creating an interesting juxtaposition.
3. Perfect Length and Width for Optimal Impact
The finished length and width of your curtains are critical for achieving a professional and stylish appearance. For a clean, contemporary look, measure your curtains to just skim the floor (about 1/2 inch off the ground). Alternatively, a slight “break” (where the curtain lightly touches and pools slightly on the floor, about 1-2 inches) adds a touch of casual elegance. Avoid curtains that are too short, as this can make your windows look awkward and unfinished. For width, ensure that when your curtains are closed, they cover the entire window and have enough fullness to create those characteristic grommet folds. As mentioned, 1.5 to 2 times the width of your window opening is a good starting point.
4. Color and Pattern Integration
Consider how your grommet curtains will integrate with your existing decor scheme. Solid colors in neutral tones (grays, whites, creams, blues) offer a versatile backdrop that can blend seamlessly or provide a subtle pop of color. If your room is largely monochromatic, curtains with a bold pattern or texture can become a striking focal point. Conversely, if your room already features strong patterns, opt for solid curtains in a complementary hue to provide balance. The clean lines of grommet curtains make them an ideal canvas for showcasing beautiful fabrics, so choose wisely to enhance your overall room design.
Grommet Curtains vs. Other Heading Styles: Why They Stand Out
In the vast world of curtain headings, grommet curtains have carved out a significant niche, offering distinct advantages over traditional styles. While each heading type has its charm, understanding these differences can help you make the best choice for your home makeover project.
- Rod Pocket Curtains: These feature a channel sewn into the top of the curtain panel, through which the rod is threaded. While simple and classic, they tend to gather tightly on the rod, making them harder to open and close smoothly. The fabric also often bunches rather than forming defined pleats, resulting in a less formal or structured look compared to grommets.
- Tab Top Curtains: As we’ll explore in our next lesson, tab top curtains feature fabric loops at the top that slide over the rod. They offer a casual, relaxed aesthetic and are easy to move. However, the tabs themselves create a distinctive visual that might not suit all modern decor styles, and they can sometimes sag or become uneven over time.
- Pinch Pleat Curtains: These are a very traditional and formal style, characterized by sewn-in pleats that create a tailored, elegant drape. While beautiful, they require more intricate sewing skills to create and typically hang from hooks attached to a traverse rod, making them a more complex and often more expensive option than grommet curtains.
- Back Tab Curtains: Similar to rod pocket, back tab curtains have loops on the back of the curtain panel, creating a clean front. They offer a relatively smooth glide but can sometimes still sag between the tabs, and the folds are less uniform than those of grommet curtains.
Grommet curtains stand out by combining ease of use with a sophisticated, modern aesthetic. Their unique design ensures a smooth glide, consistent, beautiful folds, and a clean, minimalist top edge that seamlessly integrates with contemporary interiors. The no-sew application further democratizes this stylish option, making high-end window treatments accessible to every DIY enthusiast. They offer a perfect blend of form and function, providing durability, ease of operation, and a polished appearance that is hard to match with other heading styles, especially for those seeking a modern home makeover.
Your Home Makeover Journey Continues with DIY Projects
This exploration into grommet curtains is just one exciting step in your ongoing home makeover adventure with DIY Projects. Our mission is to empower you to fill your living spaces with incredible, handmade crafts and personalized touches that reflect your unique style and passion. We believe that everyone possesses the creativity to transform their home into a dream sanctuary, and our free online tutorials, sewing patterns, and inspiring ideas are designed to guide you every step of the way.
Imagine returning to a home that feels uniquely yours, where every detail, from the curtains on your windows to the decorative pillows on your sofa, embodies your vision and effort. There’s an unparalleled sense of satisfaction that comes with saying, “I made this!” Here at DIY Projects, we’re dedicated to fostering that accomplished feeling, sparking dreams, and encouraging craftiness in all facets of life. We’re not just about teaching techniques; we’re about building a community of creators who share a love for handmade beauty.
This lesson, focusing on the modern charm of grommet curtains, is Part 3 of 4 curtain headings in our comprehensive series. Next up, we’ll delve into the casual elegance of Tab Top Curtains, providing you with even more options to customize your window treatments. Don’t miss out on any of our fantastic tutorials and creative ideas. Keep watching, learning, and creating! To stay connected with our latest projects, inspiration, and a vibrant community of fellow DIY enthusiasts, be sure to follow us on social media. Join us on Facebook, Pinterest, Instagram, and Twitter. Let’s make your dream home a reality, one handmade project at a time!