
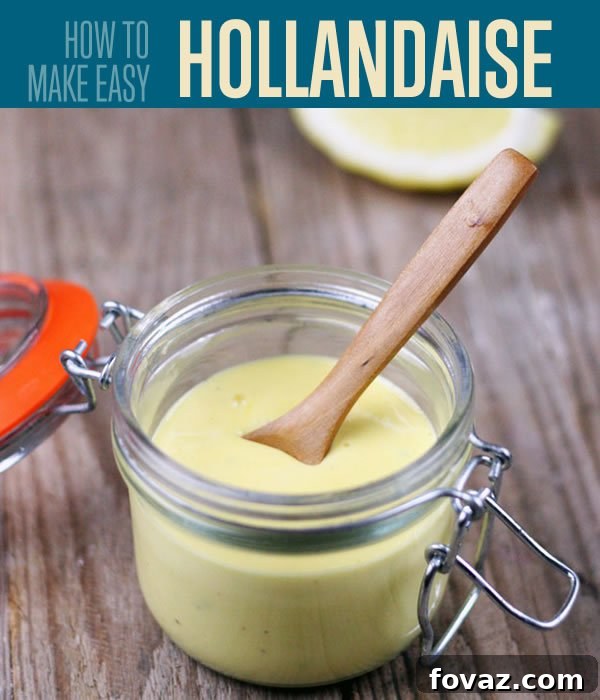
Foolproof Blender Hollandaise Sauce: Your Easy Guide to Creamy Perfection
For many, Hollandaise sauce evokes images of gourmet brunches and sophisticated French cuisine, often synonymous with classic Eggs Benedict. I must confess, for a long time, my perception of this rich, buttery sauce was similarly confined. Despite having a thriving backyard flock supplying me with fresh eggs daily, I’ve never been a huge enthusiast of most egg-centric dishes. While a perfectly crafted omelette or a hearty frittata certainly has its appeal, the thought of a poached or hard-boiled egg has always been, to me, rather uninspiring. Consequently, dishes like Eggs Benedict, traditionally adorned with Hollandaise, never quite captured my culinary imagination.
However, the sauce itself held an undeniable intrigue. As a passionate advocate for unprocessed, wholesome ingredients, the idea of crafting a sauce from real butter, fresh eggs from my own hens, and zesty lemons harvested from my very own tree was incredibly appealing. I love the alchemy of transforming simple, quality components into something extraordinary in my own kitchen. After some initial research, I realized Hollandaise was far more versatile than just an accompaniment to eggs. Its creamy texture and vibrant flavor profile make it an exquisite partner for a wide array of seafood and fresh vegetables. This was a game-changer! With a husband who is an avid fisherman, I’m constantly seeking innovative and delicious ways to elevate our seafood meals, and Hollandaise sauce presented a magnificent new avenue.
Traditionally, Hollandaise is notorious for being finicky, demanding a meticulous double boiler setup and constant, careful whisking to achieve its velvety emulsion. This reputation often intimidates home cooks, making it seem like a professional-chef-only endeavor. But what if I told you there was a method so simple, so reliable, that it virtually eliminates the risk of failure? Enter the blender method, popularized by none other than the culinary icon Julia Child herself. For anyone who, like me, prioritizes ease and foolproof results without compromising on flavor, this technique is an absolute revelation. If you’ve ever successfully made your own mayonnaise, then preparing blender Hollandaise will be a breeze; it’s essentially a close cousin, substituting melted butter for oil, resulting in a luscious, stable emulsion that will impress every time.
The Magic of Blender Hollandaise: A Recipe for Success
Making Hollandaise in a blender transforms a daunting task into a simple, enjoyable process. This method leverages the power of modern kitchen appliances to create a smooth, stable emulsion that rivals its traditionally made counterparts. The key lies in slowly incorporating hot, melted butter into rapidly whisked egg yolks, allowing the butter to emulsify and thicken the sauce to perfection. The result is a luxurious, tangy, and rich sauce that tastes incredibly gourmet yet comes together in minutes.
Why Choose the Blender Method?
- Speed: Traditional methods can take 15-20 minutes of active whisking. The blender method takes less than 5 minutes.
- Simplicity: No need for a double boiler or precise temperature control over a stovetop.
- Consistency: The high-speed blending action helps create a more stable emulsion, reducing the chances of the sauce “breaking” or curdling.
- Foolproof: As the name suggests, this method is incredibly forgiving, making it ideal for first-time Hollandaise makers or those short on time.
Once your sauce is complete, you can pour it into a mason jar or a similar container for immediate use. To keep it warm while you finalize the rest of your meal, simply place the jar in a larger bowl filled with warm (not hot) water. However, I must emphasize that Hollandaise sauce, in all its glory, is truly at its peak when served fresh, right after it’s made. Its delicate emulsion and vibrant flavor are best enjoyed moments after preparation.
That being said, I am always one for experimentation, and curiosity led me to explore storage options. When refrigerated, Hollandaise sauce solidifies significantly, taking on a consistency akin to a soft, flavored butter. In this state, it can actually be quite delightful as a spread, perhaps on toast or a warm biscuit, offering a rich, tangy twist.
I also tried to revive some refrigerated sauce by gently warming it up. My approach involved pouring a small amount of warm water into the cold, solidified sauce and stirring vigorously. This did help to thin it out and bring back some of its pourable quality. While it worked reasonably well, I found the sauce’s texture and overall vibrancy to be superior on the day it was originally made, when it was at its thickest and freshest. Some people report success carefully reheating Hollandaise in a microwave on very low power, stirring frequently, but I haven’t personally attempted this method due to the delicate nature of the egg yolks.
Given that Hollandaise sauce contains raw egg yolks, proper handling and storage are paramount for food safety. This is yet another compelling reason to prepare the sauce immediately before you intend to serve it. When a recipe is this easy and virtually foolproof, there’s simply no need to make it ahead of time and risk compromising either flavor or safety.
So, let’s dive into creating this delightful sauce!
Essential Tools:
- Immersion blender (also known as a hand blender)
- Tall jar or mixing container (just wide enough for your immersion blender)
- Small saucepan
- Measuring cup with a pouring spout (optional, but highly recommended)
Ingredients:
- 3 large Egg Yolks (fresh and high quality are best)
- 125 g (½ cup or 1 stick) Unsalted Butter
- ½ medium-sized Lemon, freshly squeezed
- Pinch of Salt, to taste
- Pinch of freshly ground Black Pepper, to taste
- Optional: Dash of Hot Sauce (e.g., Tabasco) for a subtle kick
Preparation: Step-by-Step Guide
Step 1: Melt the Butter
Begin by melting your butter in a small saucepan over very low heat. The goal is to melt it completely without browning it. Once melted, set it aside for a moment to allow it to cool slightly, making it warm rather than scorching hot. This gentle warmth is crucial for the emulsion process.
Step 2: Prepare Egg Yolks and Lemon Juice
While your butter is melting, crack your eggs and carefully separate the yolks from the whites. Place the three egg yolks into your tall jar or mixing container. Add a generous squeeze of fresh lemon juice – approximately 1 to 2 tablespoons, depending on your preference for tanginess. The acidity from the lemon juice is essential for balancing the richness of the butter and contributing to the sauce’s stability.
Step 3: Clarify the Butter (Optional but Recommended)
Carefully pour the melted butter into a container that allows for easy, controlled pouring, such as a measuring cup with a spout. As you do this, you’ll observe that the butter will naturally separate into two distinct layers: the golden clarified butter (pure butterfat) will rise to the top, leaving the milk solids and water at the bottom. For the silkiest Hollandaise, you’ll want to use primarily the clarified butter. This step isn’t strictly necessary for a “foolproof” version, but it refines the sauce’s texture and prevents it from having a slightly gritty mouthfeel.
Step 4: Begin the Emulsion
Submerge your immersion blender completely to the bottom of the jar, ensuring it covers the egg yolks. Pour just a small amount – about 1-2 tablespoons – of the warm clarified butter directly over the egg yolks. Immediately turn on your immersion blender to high speed. While the blender is continuously running and emulsifying, slowly and steadily pour the remaining clarified butter in a thin, constant stream over the top of the egg yolks and blended mixture. This gradual incorporation is critical for forming a stable emulsion.
Step 5: Monitor Consistency
As you continue to pour the butter and blend, you will notice a magical transformation: the sauce will begin to thicken rapidly, developing its characteristic creamy, velvety consistency. Once it reaches your desired thickness – whether you prefer it slightly thinner or lusciously thick – stop blending. If a few butter solids from the bottom of your melted butter container inadvertently make their way into the sauce, do not worry; it will not negatively impact the final product or flavor profile. You can briefly pulse the blender to incorporate any last bits, but avoid over-blending once it’s emulsified.
Step 6: Season to Perfection
Now comes the enjoyable part: tasting and adjusting the seasoning. Gently lift your immersion blender out and give the sauce a taste. This is your opportunity to truly make the sauce your own. Check for acidity; you might want to add another splash of lemon juice to brighten the flavor. If you used unsalted butter, adding a good pinch of salt is essential to enhance all the other flavors. For an intriguing complexity and a gentle kick, consider adding a dash of hot sauce. Freshly ground black pepper is also a classic addition. Feel free to experiment with other additions like finely chopped fresh herbs – tarragon, chives, or parsley would all be wonderful – to customize your Hollandaise to perfectly complement your dish.
Step 7: Final Blend and Serve
Give everything one final, quick blend to ensure all the seasonings are thoroughly incorporated. And just like that, your exquisite, homemade Hollandaise sauce is ready to be served! Drizzle it generously over your chosen meal, and prepare to savor the rich, creamy, and tangy flavors you’ve created in mere minutes.
Tips for Hollandaise Success
- Use Fresh Ingredients: The quality of your eggs and butter will significantly impact the final flavor. Fresh, pasture-raised eggs tend to yield a richer color and flavor.
- Warm, Not Hot Butter: Ensure your melted butter is warm to the touch, but not boiling hot. Too hot butter can scramble the egg yolks.
- Constant Stream: The slow, steady stream of butter is crucial. Don’t rush this step, as it’s key to forming a stable emulsion.
- Taste and Adjust: Hollandaise is all about balance. Don’t be shy about tasting and adding more lemon, salt, or pepper until it’s just right for your palate.
- Immersion Blender Placement: Keep the immersion blender at the bottom of the jar for the first few seconds to thoroughly emulsify the yolks and initial butter before slowly moving it up as the sauce thickens.
Creative Serving Suggestions
While Eggs Benedict is the classic pairing, this versatile sauce can elevate countless dishes:
- Seafood: Drizzle over pan-seared scallops, grilled salmon, baked cod, or steamed crab legs.
- Vegetables: Transform simple steamed asparagus, blanched broccoli, roasted potatoes, or even artichokes.
- Meats: A dollop of Hollandaise can add richness to steak (think Steak Oscar), pan-fried chicken breast, or pork tenderloin.
- Sandwiches & Toast: Use it as a gourmet spread for open-faced sandwiches or a luxurious topping for toasted bread.
That’s all there is to it, culinary adventurers! We genuinely hope you’ve enjoyed discovering just how incredibly easy and satisfying it is to make this foolproof Hollandaise sauce right in your own kitchen using a simple mason jar and an immersion blender. We’re eager to hear about your experiences! Please share your comments, tips, and any creative variations you’ve tried in the comments section below. Your feedback inspires us to create more of the content you love!
And if Hollandaise isn’t quite what you’re craving today, don’t worry – our culinary archives are brimming with a plethora of other delicious recipes waiting for you to explore. Check out our related posts for more kitchen inspiration. The more you tell us what kind of recipes and projects spark your interest, the better we can tailor our future content to your tastes!
Don’t forget to Connect with Us!
Be sure to Like Us on Facebook to get all the latest project updates, new recipes, and DIY inspiration delivered straight to your feed. And if you find a project or recipe you love, Pin it to Pinterest to share with your friends and save for later!
Thanks for stopping by and happy cooking!