Transforming the ambiance of your living space doesn’t have to be a daunting or expensive endeavor. In fact, one of the most impactful and budget-friendly ways to inject new life into your home is by updating your lighting. Worn-out, outdated, or mismatched lampshades can cast a literal shadow on your interior design, making rooms feel less cohesive and inviting. But what if you could redesign those tired old shades into fresh, new lighting elements with just a bit of paint and creativity? Get ready to discover an incredibly easy and cheap method to give your home lighting a complete refresh, making old look new again in a snap!
Every corner of your home tells a story, and lighting plays a crucial role in setting the mood and enhancing the narrative. From a cozy reading nook to a vibrant living room, the right lighting can define spaces, highlight decor, and even influence your mood. Yet, investing in new lamps and shades can often come with a hefty price tag, especially when you’re aiming for a particular style or trying to unify a collection of existing pieces. This is where the magic of DIY comes in, offering a sustainable and personalized solution to elevate your home’s aesthetic without breaking the bank.
DIY Project: The Ultimate Guide to Painting Lampshades for an Instant Home Refresh
Whether you’ve just settled into a new apartment, are looking to update your existing décor, or simply crave a creative outlet, this project is perfect for you. This comprehensive guide will walk you through the simple yet effective process of painting lampshades, originally inspired by a fantastic tutorial from ForRent.com, first published on December 9, 2015. With their permission, we’ve expanded upon the core idea to bring you even more tips, techniques, and inspiration to achieve professional-looking results.
Lighting undeniably holds significant sway in interior design. It illuminates, defines, and transforms. However, the cost of acquiring stylish and coordinated lighting fixtures can often be prohibitive. The good news? You don’t need a hefty budget to achieve a designer look. One of the most ingenious, cost-effective, and enjoyable ways to update your lighting is to simply upgrade your existing lampshades with a fresh coat of paint. This method is particularly effective if you’ve accumulated an eclectic mix of lampshades over time and are searching for a clever way to unify their appearance. Painting all your shades a cohesive color or design will instantly create a harmonious and polished look throughout your home.
While the process is straightforward, achieving a chic, streak-free finish requires a little more finesse than merely slapping on some paint. But don’t worry, it’s still incredibly easy! By following this detailed tutorial, you’ll be able to transform your lampshades with confidence, creating custom pieces that reflect your personal style and enhance your home’s aesthetic. Let’s gather our materials and dive into this exciting DIY adventure!
Essential Supplies for Your Lampshade Transformation:
Before embarking on your lampshade painting project, ensure you have all the necessary items at hand. Having everything ready will make the process smooth and enjoyable:
- A Lampshade: Both cloth and paper lampshades are excellent candidates for this project. Consider the texture and existing color, as these factors might influence the number of paint coats required.
- A Quality Paintbrush: The type of brush matters for a smooth finish. A synthetic brush with soft bristles (like an angled sash brush for edges or a flat brush for larger areas) will work best with acrylic paints, helping to minimize brush strokes.
- Acrylic Paint: Opt for acrylic craft paints, which are widely available, come in an extensive range of colors, and dry relatively quickly. They offer good coverage and adhere well to various surfaces. Consider matte, satin, or gloss finishes depending on your desired look.
- Newspaper or Drop Cloth: Essential for protecting your workspace from accidental spills and drips. Lay down several layers of newspaper, old towels, or a plastic drop cloth.
- Optional but Recommended:
- Painter’s Tape: Crucial for creating crisp lines if you plan to add stripes, geometric patterns, or color blocks.
- Fine-Grit Sandpaper: (e.g., 220-grit) For lightly scuffing glossy or slick surfaces on certain lampshades to improve paint adhesion.
- Primer: Especially useful if you’re painting a dark lampshade a significantly lighter color, or if the lampshade material is very absorbent. A white acrylic primer will help ensure even, vibrant color with fewer coats.
- Clear Acrylic Sealer (Matte or Satin): A spray or brush-on sealer can protect your painted lampshade from dust, minor scuffs, and fading, enhancing its durability.
- Small Detail Brush: Handy for touch-ups and intricate designs.
- Damp Cloth: For immediate cleanup of any paint mishaps.
Step-by-Step Guide to a Flawless Finish:
1. Prepare Your Workspace and Lampshade:
Begin by spreading a generous number of newspaper sheets or a drop cloth on a flat surface in a well-ventilated area. This ensures any errant paint drops or spills are contained, making cleanup a breeze. Next, prepare your lampshade. If it’s dusty or dirty, gently wipe it down with a slightly damp cloth and allow it to dry completely. For smoother, less porous surfaces, a light sanding with fine-grit sandpaper can create a better “tooth” for the paint to adhere to. If you’re going from a very dark shade to a very light one, applying a coat of white primer will dramatically improve coverage and color vibrancy.
2. Apply the First Coat of Paint:
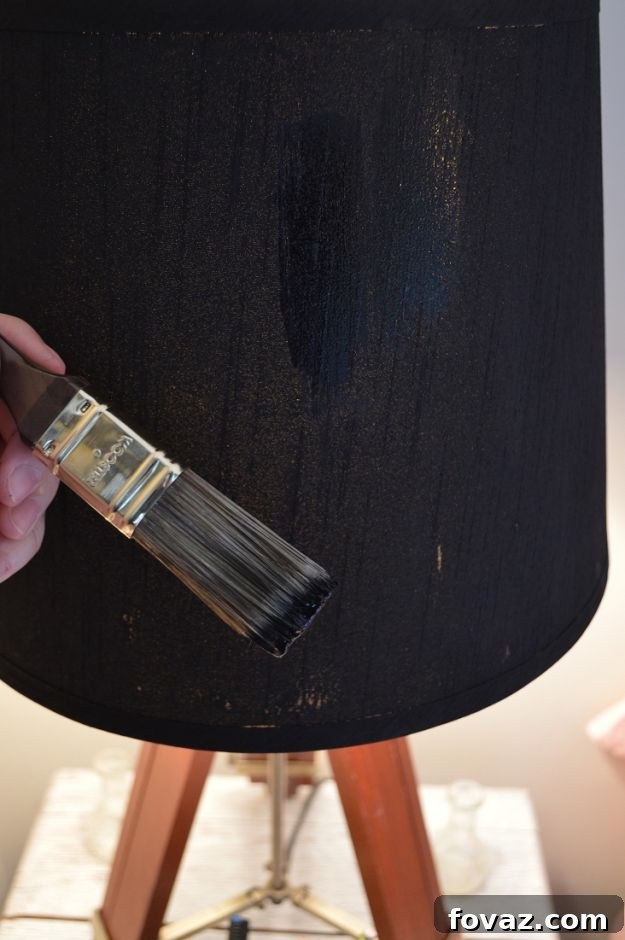
Once your lampshade is clean and prepped, it’s time to start painting. Using even, vertical strokes, begin applying your acrylic paint. It’s often best to start from the top edge and work your way down, rotating the lampshade as you go to ensure consistent coverage. The key here is to apply thin, even coats rather than thick, heavy ones, which can lead to drips, uneven texture, and longer drying times. For many projects, one complete coat will suffice, especially if you’re painting a similar or darker color over the original. However, if you’re transforming a dark lampshade into a lighter hue, or if the material is particularly absorbent, you might need two or even three coats for complete, opaque coverage. Allow each coat to dry thoroughly according to the paint manufacturer’s instructions before applying the next.
3. The Secret to a Streak-Free Finish: The Light Test!
Here’s a professional trick for achieving that coveted streak-free, flawless finish on your newly-painted lampshade: Once your final coat of paint feels completely dry to the touch (give it ample time, perhaps a few hours or even overnight), carefully place the lampshade back onto its lamp base. Now, turn the lamp on. The light emanating from the bulb will be your ultimate guide. By doing so, you’ll be able to instantly identify any spots that need a dab of more paint, as the light from the lamp will shine more brightly through these areas, revealing inconsistencies in paint coverage or subtle streaks.
This “light test” is invaluable because it mimics the real-world condition of the lampshade, making imperfections visible that might otherwise go unnoticed in regular daylight. It’s a game-changer for ensuring a truly professional result.
4. Perfecting Your Lampshade with Touch-Ups:
After performing the light test, carefully remove the lampshade from the lamp. Using your paintbrush (a smaller detail brush can be very helpful here), gently dab a little bit of paint onto any of the spots where you observed the light shining through. Be meticulous in your approach, using light, controlled dabs rather than broad strokes, to blend the new paint seamlessly with the existing layer. Make sure you rotate the lampshade all the way around, examining it from all angles with the light source, so you don’t miss any subtle spots on the sides or back of the shade. Allow these touch-up areas to dry completely, and if necessary, repeat the light test and touch-up process until you are entirely satisfied with the evenness of the coverage.
Beyond Solid Colors: Creative Design Ideas for Your Lampshade
While a solid color offers a sleek and contemporary look, the possibilities don’t end there! Your painted lampshade can become a true work of art:
- Stripes: Use painter’s tape to create crisp horizontal or vertical stripes. Ensure the tape is firmly pressed down to prevent bleeding, and remove it while the paint is still slightly tacky for the cleanest lines.
- Geometric Patterns: masking tape can also be used to create chevrons, diamond patterns, or other geometric designs. Plan your design carefully with a ruler and pencil before applying tape.
- Stenciling: Purchase or create your own stencils to add intricate patterns, monograms, or motifs. Dab paint through the stencil with a sponge or stencil brush for best results.
- Ombre Effect: Create a beautiful gradient by blending two or more colors. Start with the darkest color at the bottom and gradually lighten it as you move up, or vice versa, blending the colors while they are still wet.
- Two-Tone or Color Blocking: Divide your lampshade into sections and paint each a different, complementary color.
- Embellishments: Once the paint is completely dry, consider adding decorative trim, ribbon, fringe, or even small studs using fabric glue for an extra touch of sophistication.
Remember, your lamp base can also be painted to match or contrast with your new shade, creating a truly unified and custom fixture that perfectly complements your room’s décor. For example, the transformation of an ordinary wooden lamp into a unique piece is a testament to the power of DIY, as seen in many inspiring projects.
Tips for Success and Troubleshooting Common Issues:
- Avoid Over-Saturating Your Brush: Too much paint on the brush can lead to drips and uneven application. Load your brush lightly and apply thin coats.
- Maintain Consistent Strokes: For a smooth finish, try to maintain consistent pressure and direction with your brush strokes.
- Patience is Key: Allow adequate drying time between coats and for final curing. Rushing the process can result in smudges or an inferior finish.
- Fixing Drips: If you notice a drip, gently wipe it away with a damp cloth immediately. If it dries, you might need to lightly sand the area and reapply paint.
- Uneven Texture: If your paint dries with an uneven or bumpy texture, it might be due to too many thick coats or paint drying too quickly. Lightly sand the area and apply thinner coats.
- Enhance Durability: For added protection and longevity, consider applying a thin, even coat of clear acrylic sealer once your lampshade is completely dry. This will protect your paint job from dust and minor wear.
- Cleaning Your Painted Lampshade: Dust your painted lampshade regularly with a soft, dry cloth or a feather duster. Avoid harsh cleaners or excessive moisture, which could damage the paint.
And that’s it! With just a few simple supplies, a couple of bucks, and a few hours of enjoyable work, you’ve got a whole new lighting look. Your apartment has never looked better, reflecting your personal style and creativity. This project is not just about saving money; it’s about the satisfaction of creating something beautiful with your own hands and bringing a unique touch to your living space.
Still searching for more innovative ways to spice up your apartment’s lighting and overall décor? Dive deeper into the world of DIY home improvement. Check out these other creative lighting options featured on the ForRent.com blog, or explore other projects like the satisfaction of creating your own furniture.
We absolutely love hearing from you! How have you added cool design details or unique touches to your apartment’s lighting and décor? Share your brilliant ideas, tips, and experiences with us in the comments below. Your insights could inspire fellow DIY enthusiasts!
Stay connected with us for more exciting DIY projects, home decor inspiration, and practical tips on Facebook, Twitter, Pinterest, and Instagram!
Next, unleash your inner craftsman and explore: Easy Woodworking Projects that can further personalize your home.