
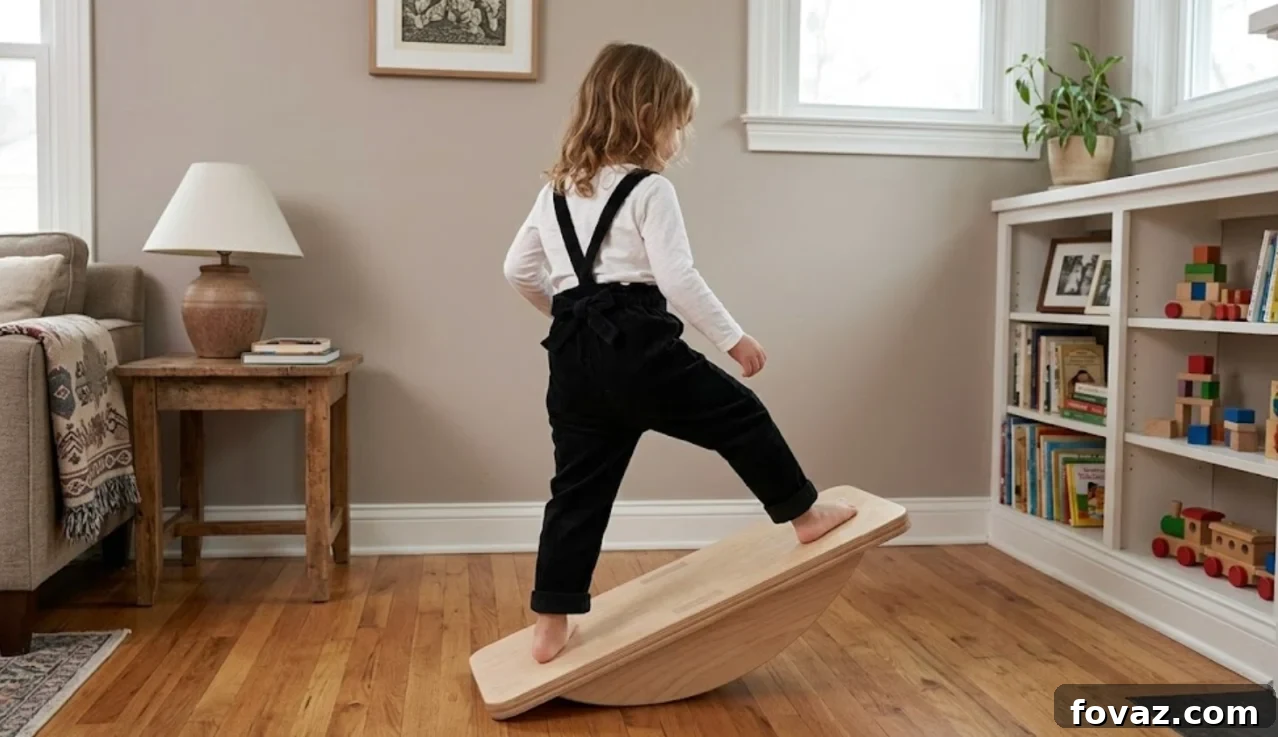
Project At-A-Glance: DIY Balance Rocker
- Skill Level: Intermediate — beginner-friendly when adults and children divide tasks.
- Time Investment: 3 to 5 hours of active build time, plus overnight glue curing.
- What This Guide Includes: Clear family-collaborative milestones, metric cut lists, and kid-safe finishing methods.
RELATED: Woodworking Toy Projects for Kids and Parents
Screen-Time Blues? Let’s Build a Solution!
Every season brings the same challenge: kids glued to screens and parents searching for engaging, active alternatives. Instead of another lecture, turn that energy into a hands-on family project.
The DIY Balance Rocker is more than a toy — it’s a collaborative build that encourages balance, core strength, and sensory play while teaching basic woodworking skills. This staggered rocker balance board is designed so adults handle the power-tool and safety-critical steps while kids participate in measuring, sanding, and finishing.
Gather your tools, put on safety gear, and enjoy the process together: plan, cut, sand, and finish. The result is a durable, child-safe rocker that doubles as quality family time.
⚠️ Safety First!
Safety Reminder: Always wear appropriate PPE — gloves, eye protection, hearing protection, and a dust mask. Use sharp tools carefully, work in a well-ventilated area, and minimize dust. For load-bearing or structural projects consult local building codes or a professional. Keep finishes child-safe and low-VOC.
Materials & Tools List
🪵 Materials
- Main Deck (A): One hardwood panel or premium Baltic Birch plywood, 90.0 cm x 40.0 cm x 2.7 cm. If 2.7 cm stock is unavailable, laminate a 1.8 cm sheet to a 0.9 cm sheet.
- Rockers/Runners (B): Two hardwood or laminated plywood rocker blanks, 45.0 cm x 8.0 cm x 3.65 cm. Achieve 3.65 cm by gluing two 1.8 cm sheets together if necessary.
- Fasteners: Six heavy-duty flat-head countersunk wood screws, approx. 6.0 cm length.
- Glue: Premium, non-toxic PVA wood glue.
- Finish: Eco-friendly, child-safe low-VOC finish such as natural oil, beeswax, or a commercial product labeled safe for toys.
🛠️ Tools Needed
- Jigsaw or band saw
- Power drill/driver with a countersink bit
- Orbital sander and hand-sanding blocks (coarse and fine grit)
- At least four long bar clamps
- Tape measure and combination square
- Compass or a round template such as a small jar lid
- Pencil
Complete Cut List
| Component | Quantity | Description | Dimensions (Metric) |
| Main Deck (A) | 1 | Top platform | 90.0 cm x 40.0 cm x 2.7 cm |
| Rocker Blanks (B) | 2 | Curved runners (pre-cut) | 45.0 cm x 8.0 cm x 3.65 cm |
Step-by-Step Build Instructions
Step 1: Mark the Corner Radii on the Main Deck
Kids can help: lay the main deck flat and use a small jar lid or compass set to a 4.0 cm radius to trace rounded corners on all four edges with a pencil.
Step 2: Cut and Round the Deck Corners
Adult task: clamp the board securely and cut along the traced lines with a jigsaw or band saw. Smooth the cuts with sandpaper to remove sharp spots.
Step 3: Laminate the Rockers (If Using Plywood)
Kids can spread glue on the mating faces of two plywood blanks while an adult aligns and clamps them. Allow glue to cure fully, typically overnight.
Step 4: Trace the Rocker Arc (Radius = 35.0 cm)
Kids mark the center point along the top edge of each rocker at 22.5 cm. Adults set a makeshift beam compass to a 35.0 cm radius and draw a smooth arc across the bottom profile while keeping the runner height at 8.0 cm.
Step 5: Cut the Rocker Arcs
Adult task: secure the rocker blanks and cut along the pencil arc with a jigsaw. Take care to keep cuts smooth for a predictable rocking motion.
Step 6: Pre-Drill the Rocker Mounting Holes
Adult task: on the flat top edge of each rocker, mark three mounting holes. Place the center at 22.5 cm, with outer holes 18.0 cm to either side. Drill straight pilot holes to accept countersunk screws.
Step 7: Layout the Underside of the Deck
Kids can flip the deck and draw two layout lines 6.0 cm in from each long edge. Adults mark the longitudinal centers: front rocker centered 30.0 cm from the left edge and back rocker centered 30.0 cm from the right edge, creating the staggered layout.
Step 8: Drill Countersinks and Join the Deck to the Rockers
Adult task: transfer rocker hole locations through the deck and drill countersinks from the top so screw heads sit flush. Apply a consistent bead of wood glue on the rocker tops, align them to the layout lines, clamp if needed, and drive the screws from the top down into the runners. Wipe away squeeze-out immediately.
Step 9: Sand All Components Smooth
Kids can use hand-sanding blocks (medium grit) to round edges and smooth corners. Adults finish with an orbital sander (fine grit) to ensure the top surface is flat and splinter-free.
Step 10: Apply the Child-Safe Finish
Kids can apply a clean cloth and help rub on a child-safe oil or wax. Allow appropriate drying time between coats and follow manufacturer directions for any commercial finish.
Eco-Tip
For a sustainable build, seek FSC-certified Baltic birch offcuts or reclaimed hardwood such as an old butcher block. Using a natural oil or wax keeps the project free of toxic paints and protects indoor air quality.
DIY Balance Rocker FAQs
1. What wood species is best for this project?
Hardwoods like white oak, hard maple, or Baltic birch plywood offer the best durability and resistance to damage. Avoid soft construction pine for the deck, as it can flex or splinter more easily.
2. What weight limit can a 2.7 cm deck support?
A well-built deck made from quality Baltic birch or hardwood at 2.7 cm thickness can typically support about 100 kg (220 lbs). Always inspect fasteners and glue joints regularly for wear.
3. Will this board damage my hardwood or tile floors?
To avoid scuffs and reduce noise, attach a strip of heavy-duty adhesive felt or a thin cork sheet to the bottom curved edge of the runners.
4. How difficult is the staggered layout to ride?
The staggered runners create a dual-axis wobble that is slightly more challenging than a single-curve rocker. It’s excellent for improving balance, core control, and spatial awareness.
5. Can I use this balance rocker outdoors?
Yes, but for outdoor use choose exterior-grade glue and finish the piece with a marine-grade oil or outdoor polyurethane to resist moisture and UV exposure.