
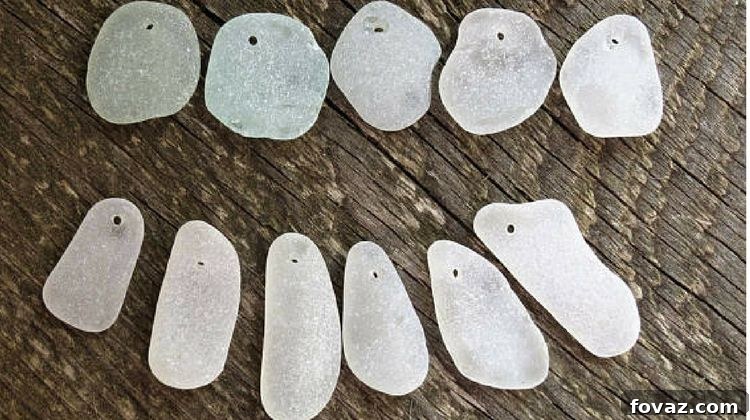
Unlock Your Creativity: The Ultimate Guide to Drilling Sea Glass for Stunning DIY Jewelry
The DIY jewelry movement is thriving, empowering enthusiasts to craft unique and personal accessories. If you’re eager to elevate your DIY skills and delve into a truly rewarding craft, learning how to drill sea glass is an exceptional starting point. This summer, transform found treasures into exquisite, one-of-a-kind jewelry pieces that carry the serene beauty of the ocean wherever you go.
Embrace the Charm of Sea Glass: Easy-to-Make DIY Jewelry
Imagine carrying a piece of the beach with you, infused with memories of sun-drenched shores and ocean breezes. This comprehensive jewelry-making tutorial will guide you through the process of transforming that collection of sea glass (and even seashells or small stones) you’ve gathered into captivating jewelry items. It’s an art form that’s far simpler than you might imagine, and the techniques you’ll master here can be applied to a variety of other materials, including stone, ceramic, and even bone. This versatility opens up a world of creative possibilities, allowing you to express your unique style, whether it’s bohemian, rustic, or even a touch of gothic flair.
Sea glass is not just broken glass; it’s a testament to time and nature’s artistry. Each piece has been tumbled and smoothed by waves and sand for decades, sometimes even centuries, resulting in frosted textures and captivating shapes. Crafting DIY sea glass jewelry allows you to preserve these natural wonders, turning them into wearable art that tells a story. From delicate pendants to eye-catching earrings, the potential for personalized accessories is limitless. This guide provides all the knowledge you need to start creating beautiful, bespoke pieces right from your home workshop.
What You’ll Need: Essential Tools for Drilling Sea Glass
Before embarking on your sea glass drilling adventure, gathering the right tools is paramount. Having everything at hand ensures a smooth and safe crafting experience. Here’s a detailed look at what you’ll need:
- Rotary Tool: Often referred to as a Dremel, this versatile handheld power tool is the heart of your drilling operation. Its high-speed rotation is crucial for drilling through tough materials like glass. Ensure it’s comfortable to hold and that you’re familiar with its speed settings.
- Diamond-Tipped Drill Bits: Regular drill bits won’t cut it (literally!) when it comes to glass. Diamond-tipped bits are essential as they are designed to abrade rather than cut, making them perfect for drilling precise holes without cracking the sea glass. A variety of sizes will allow for different wire gauges and design aesthetics.
- Rotary Grinding Bits (Optional but Recommended): While not strictly for drilling, these bits can be incredibly useful for smoothing rough edges around your drilled holes or for lightly shaping your sea glass if desired. They offer extra refinement to your finished piece.
- Duct Tape: A simple yet ingenious tool for this project. It provides a cushioned, non-slip base within your drilling container, protecting both your sea glass and the container itself from the drill bit once it penetrates the glass.
- Small Plastic Container: Choose a container that is deep enough to submerge your sea glass completely in water. A clear container is ideal so you can see your progress. This setup is crucial for cooling the drill bit and glass and for containing dust.
- Water: An indispensable element! Water acts as a coolant for the drill bit and the sea glass, preventing overheating that can cause the glass to crack. It also significantly reduces airborne glass dust, which can be harmful if inhaled.
- Sea Glass or Shells: The stars of your project! Gather a variety of shapes, sizes, and colors. If you’re just starting, practice with less prized pieces first.
- Safety Mask (N95 or higher): Even with water, some microscopic glass dust can become airborne. A good quality safety mask is non-negotiable for protecting your respiratory health.
- Safety Glasses: Protect your eyes from any potential errant glass fragments or splashes.
- Copper Wire (or other jewelry wire): Once your sea glass is drilled, you’ll need wire to create a bail or loop for hanging. Copper is affordable and malleable, perfect for beginners, but you can also use sterling silver, gold-filled, or craft wire.
- Metal Chain and Clasp: To turn your drilled sea glass into a beautiful necklace, you’ll need a chain and a clasp for closure.
- Jewelry Pliers: Essential for manipulating and shaping wire. Round-nose pliers for creating loops, flat-nose pliers for gripping and bending, and wire cutters for trimming are a basic but necessary set.
Having these items ready will set you up for a successful and enjoyable sea glass jewelry-making experience. Remember, safety always comes first!
“It’s SUMMERTIME!!! #tassels #summerjewelry #summerstyle #bohostyle #bohojewelry #africanbeads #jewelry #create #diyprojects #summerdiy #beads #summerbeading #boho #zenstyle #gyspyjewelry” || Amazing craft! And yes, these will be perfect for summer! Keep using the hashtag #diyprojects to get featured. 🌺 || 📷: @beadboutiquela
A post shared by DIY Projects (@diyprojectsdotcom) on
How To Drill Sea Glass: A Step-by-Step Guide to Perfection
Step 1: Set Up Your Drilling Container for Safety and Stability
The foundation of a successful drilling project lies in a properly set up workspace. Begin by preparing your drilling container. Take a small piece of duct tape and roll it into a thick cushion, then firmly press it onto the center of the bottom of your chosen plastic container. This duct tape serves a critical dual purpose: it acts as an inexpensive yet effective bumper, preventing your drill bit from directly hitting and potentially damaging the container once it passes through the sea glass. More importantly, it provides a stable, slightly cushioned surface for your sea glass, minimizing movement and reducing the risk of cracking as you apply pressure during drilling. This simple step ensures both the longevity of your tools and the integrity of your precious sea glass.
Step 2: Submerge Your Sea Glass: The Crucial Role of Water in Drilling
Once your container is prepared with the duct tape bumper, carefully place your chosen sea glass piece onto the tape. Now, fill the container with enough water to completely submerge the sea glass and the drill bit during operation. The presence of water is absolutely vital for several reasons: Firstly, it acts as a coolant, dissipating the heat generated by friction between the diamond drill bit and the glass. Without this cooling, the sea glass could quickly overheat, leading to thermal shock and potential cracking or shattering. Secondly, the water traps almost all of the fine glass dust created during drilling, preventing it from becoming airborne. Inhaling glass dust can be extremely harmful to your lungs, so this dust suppression is a critical safety measure. Even with water, it’s paramount to wear a safety mask to protect against any residual airborne particles. Remember, safety is always your top priority!
Step 3: Drill the Hole in Your Sea Glass with Precision and Patience
Before attempting to drill your prized piece of sea glass, I highly recommend practicing on a scrap piece of glass or a less valuable shell. This initial practice run will familiarize you with the feel of the rotary tool and the pressure required, as it’s quite common for beginners to break their first few attempts. I certainly did!
Once you feel comfortable, select the appropriate diamond-tipped drill bit size for your project. Consider the thickness of your wire and the desired aesthetic. Place the tip of the drill bit over the exact spot on the sea glass where you want the hole. Aim for a relatively flat surface on the glass; this could be an existing indentation along an edge for a more rustic look, or a roughly centered area for a classic pendant, depending on the unique shape of your sea glass. Hold the sea glass firmly in place with one hand, ensuring your fingers are well clear of the drill bit’s path – a slip could result in a painful injury! With your other hand, gently begin drilling with your rotary tool set to a medium speed. Do not apply excessive force immediately.
The key to successful drilling is a combination of steady, light pressure and patience. Resist the urge to push down hard, as this will likely crack the glass. Instead, allow the diamond bit to slowly abrade its way through the material. Lift the drill bit periodically to allow water to flow into the hole and flush out glass particles, further aiding cooling and preventing clogging. This step typically takes anywhere from 10 to 20 minutes per hole, depending on the thickness of your sea glass and the quality of your drill bit. “Slow and steady wins the race” is truly the mantra here. You’ll often feel a slight change in resistance as the drill bit breaks through the underside. Once the hole is complete, take a moment to admire your meticulous work!
Pro Tips for Drilling Success:
- Start Slow, Increase as Needed: Begin with a lower RPM on your rotary tool and gradually increase it as you gain confidence. High speeds generate more heat.
- Wiggle Gently: Occasionally, a very slight circular or side-to-side motion of the drill bit can help clear debris and allow fresh water into the cut, making the process more efficient.
- Flip the Glass: For thicker pieces or if you encounter resistance, consider drilling halfway through from one side, then flipping the sea glass and drilling from the other side until the holes meet. This can prevent breakout on the backside.
- Keep it Wet: Always ensure the drill bit and the area being drilled are fully submerged in water throughout the entire process. Never dry drill glass.
- Practice Makes Perfect: Don’t get discouraged if your first attempts aren’t perfect. With each piece, your technique will improve.
Step 4: Attaching Your Sea Glass: Transforming Raw Beauty into Wearable Art
Once your sea glass piece has been successfully drilled, you’ll appreciate the clean workspace provided by the water-submerged drilling method. The water effectively captures nearly all of the fine glass dust, minimizing cleanup and ensuring a safer environment. Carefully remove your drilled sea glass from the container and rinse it thoroughly under running water to remove any remaining dust or debris. Pat it dry with a soft cloth.
Now comes the exciting part: transforming your drilled sea glass into a piece of jewelry. The most common method is to create a wire bail. Take a piece of copper wire (or your chosen jewelry wire) and gently thread it through the freshly drilled hole. The length of wire you need will depend on the type of bail you want to create.
For a simple loop bail, thread the wire through the hole, bring both ends together, and use round-nose pliers to twist or wrap the ends to secure them, forming a loop at the top. You can make a more elaborate coiled bail by wrapping one end of the wire tightly around the other end, just above the sea glass, creating a decorative and secure attachment. Use your jewelry pliers to shape, bend, and trim any excess wire, ensuring there are no sharp edges that could snag clothing or skin. Make sure your loop is securely closed to prevent the sea glass from falling off its chain.
Once the wire bail is securely attached, your sea glass pendant is ready to be added to a metal chain or a leather cord. A simple jump ring can connect the bail to your chosen necklace material. Our sea glass has now been transformed into a unique necklace, ready to be worn and admired wherever you go, carrying a piece of the ocean’s tranquility with you.
Want to see drilling the sea glass in action? Check out this video from Michelle Lamude:
Beyond the Necklace: Creative Applications for Your Drilled Sea Glass
The beauty of drilling sea glass extends far beyond creating simple necklaces. Each piece of sea glass is inherently unique, shaped by years of ocean tumbling, meaning no two finished projects will ever be identical. This inherent individuality makes sea glass a truly special medium for a multitude of creative endeavors. Once you’ve mastered the drilling technique, a world of possibilities opens up for crafting distinctive, rustic, and profoundly personal items. Consider these inspiring ideas for your drilled sea glass:
- Elegant Earrings: Drill smaller, matching pieces of sea glass to create dangle earrings. Attach them to ear wires using jump rings and delicate wire wraps. The light passing through the frosted glass creates a mesmerizing effect.
- Charming Bracelets: Combine several drilled sea glass pieces with beads, shells, or small metal charms to design a unique bracelet. You can string them on elastic cord, or connect them with jump rings to a chain for a more intricate design.
- Handmade Keychains: Turn a slightly larger, sturdier piece of drilled sea glass into a personalized keychain. It’s a lovely way to carry a piece of the beach with you everywhere, or to offer as a thoughtful, handcrafted gift.
- Beautiful Wind Chimes: Drill multiple pieces of sea glass, varying in size and color, then string them together with fishing line or fine wire onto a piece of driftwood. The gentle clinking of the glass in the breeze creates a soothing, natural sound.
- Unique Suncatchers: Similar to wind chimes, drilled sea glass can be arranged and hung in a window. When sunlight passes through the frosted glass, it creates a stunning display of diffused light and color, adding a tranquil ambiance to any room.
- Decorative Ornaments: Create seasonal or year-round ornaments for your home. Small drilled pieces can be adorned with ribbons and hung on a Christmas tree, from a lampshade, or incorporated into a decorative mobile.
- Gift Tags and Embellishments: Use tiny drilled pieces as unique gift tags for special occasions, or as embellishments for handmade cards, scrapbooks, or coastal-themed crafts.
- Customized Charms for Bags or Zipper Pulls: Attach a drilled sea glass piece to a zipper pull or as a charm for a handbag, adding a touch of personalized style to everyday items.
No matter what you choose to create, your drilled sea glass pieces are guaranteed to be beautiful, rustic, and truly one-of-a-kind. Just like you, each piece tells its own unique story.
The Joy of DIY Jewelry Making: Personalization, Purpose, and Connection
Engaging in DIY jewelry making, especially with natural elements like sea glass, offers a profound sense of satisfaction that mass-produced items simply cannot match. It’s more than just a hobby; it’s an opportunity to infuse your personality and passion into tangible objects. Each piece of sea glass jewelry you create carries the narrative of its journey from the ocean to your hands, imbued with your effort and creativity.
Beyond personal gratification, crafting your own jewelry opens doors to meaningful gift-giving. A handcrafted sea glass necklace or a pair of earrings becomes a cherished present, a unique token of affection that conveys thoughtfulness and effort. Imagine the joy of gifting a friend a piece that reminds them of a shared beach vacation, or presenting a loved one with a bespoke item tailored specifically to their style.
Furthermore, working with sea glass fosters a deeper connection to nature and a commitment to sustainability. You are taking discarded fragments of human history and transforming them into objects of beauty, giving them a new lease on life. It’s an act of upcycling that celebrates the natural processes of erosion and reclamation. This connection to the environment, coupled with the meditative process of crafting, can be incredibly therapeutic and grounding.
Finally, DIY jewelry allows you to cultivate a truly distinctive personal style. In a world of fast fashion and fleeting trends, wearing a piece of jewelry you made yourself – or one crafted from natural elements – stands out. It’s an expression of individuality, a conversation starter, and a testament to your hands-on creativity. So, will you give this fulfilling DIY jewelry project a try this summer? We’d love to hear about your experiences and see your creations in the comments section below!
What’s currently missing from your jewelry box? Perhaps a stunning necklace to complete an outfit? Or maybe a charming bracelet that adds a touch of bohemian elegance? The choice is entirely yours to create!
Stay connected with us for more DIY inspiration and tutorials on Facebook, Twitter, Pinterest, and Instagram!
Editor’s Note – This post was originally published in May 2014 and has been updated for quality, relevancy, and to provide a more comprehensive guide to drilling sea glass.
Featured Image Via ShopAtTheSeaside