
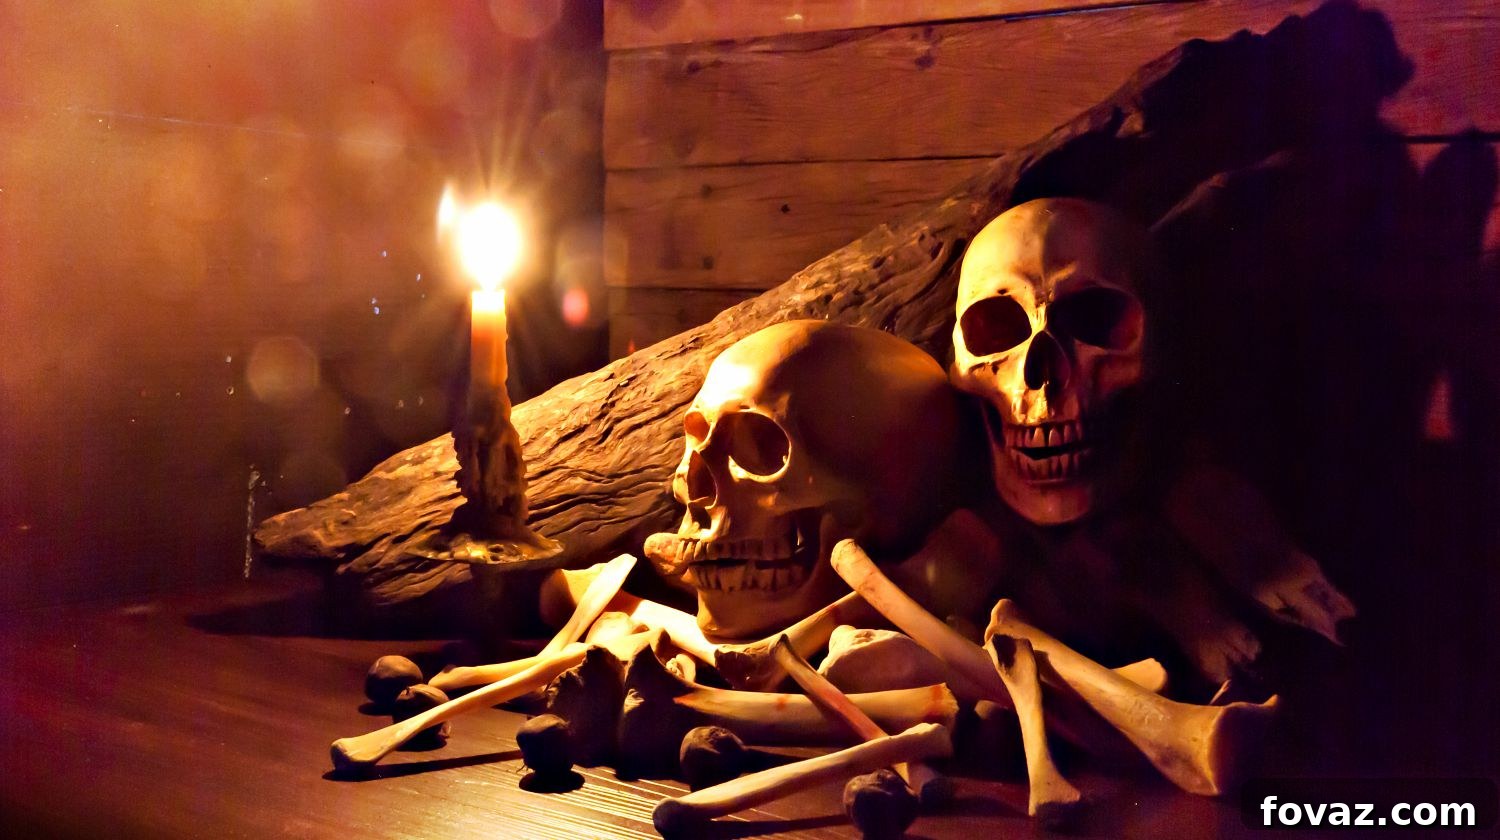
Transform your home this Halloween into a chilling chamber of classic spookiness with captivating homemade decor! Forget generic store-bought items and embrace the eerie charm of DIY. This year, we’re diving deep into crafting timeless Halloween skull and bones decorations that will impress all your ghoulish guests and add an unforgettable touch to your seasonal setup. Prepare to unleash your inner mad scientist and create frightfully fun pieces that are both budget-friendly and incredibly satisfying to make.
RELATED: 10 Easy Dollar Store Halloween Decorations You Should Try for Spooktacular Savings
Mastering the Art of Homemade Skull and Bones Decorations
Crafting Spooky Halloween Decor Without Breaking the Bank
Why splurge on overpriced Halloween decorations when the most impactful and unique pieces can be created right in your own home? DIY Halloween decor isn’t just about saving money; it’s about infusing your personal touch into every creepy corner and macabre detail. From show-stopping outdoor displays like this ultra-creepy rotting corpse that will send shivers down spines, to intricate indoor accents such as this haunted specter mirror, the possibilities for customization are endless. Your creativity is the only limit to the eerie atmosphere you can conjure.
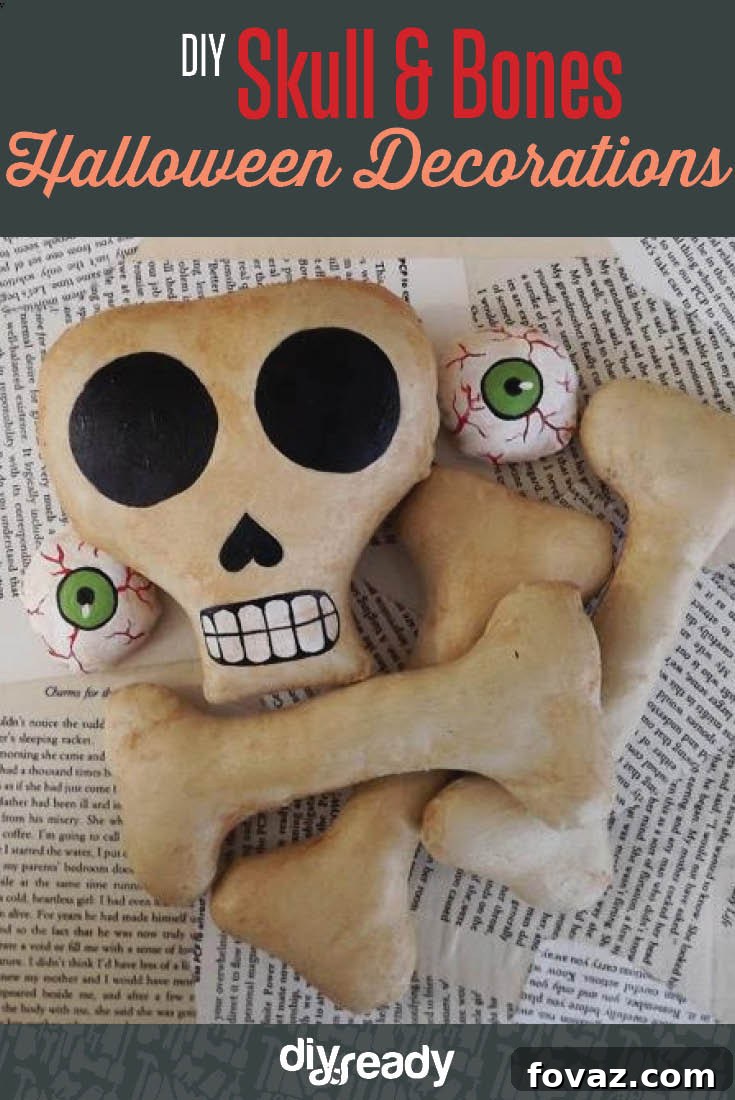
For Halloween, few things evoke the spirit of the season quite like the classic imagery of skulls and bones. They are universally recognized symbols of the spooky and the supernatural, making them perfect candidates for DIY projects. This comprehensive guide will walk you through creating a set of aged skulls, realistic bones, and even bloodshot eyeballs – elements that are guaranteed to elevate your Halloween table centerpiece, wall display, or even costume accessories to a chilling new level. Imagine the compliments when your guests discover these unique, handcrafted pieces!
This project, while yielding professional-looking results, is surprisingly low-stress, especially if you have access to a sewing machine. The process is straightforward, allowing you to focus on the artistic details and enjoy the creative journey. I’ve personally made several of these with varying expressions and levels of grimness for past Halloween parties, and they were always a huge hit, becoming instant conversation starters. In fact, one of these creations even helped me win a prize in a “Best Costume” contest, as it served as a perfect accessory. So, gather your materials, prepare your workspace, and let’s embark on this fun, spooky, and incredibly rewarding DIY adventure!
Essential Materials You’ll Need for Your DIY Halloween Skull and Bones Project:
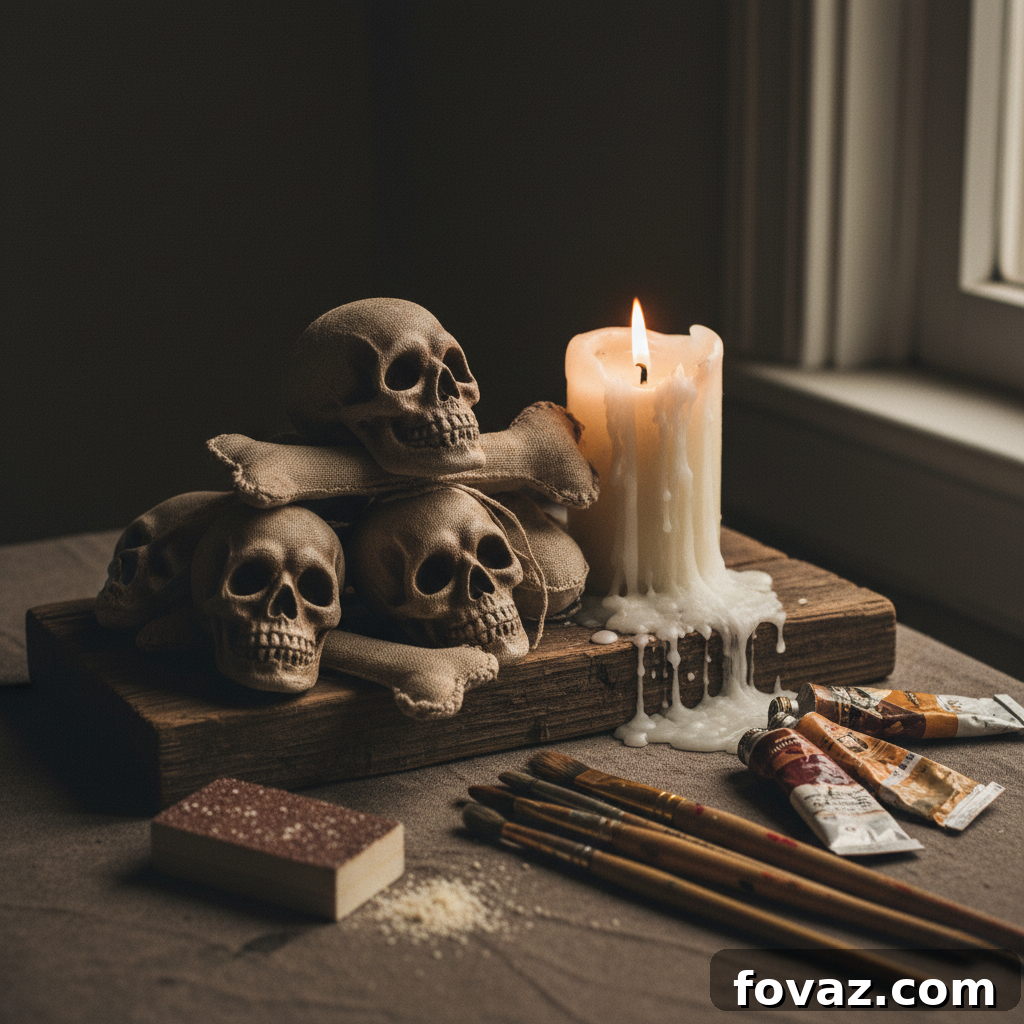
To ensure a smooth and enjoyable crafting experience, gather all your supplies before you begin. Here’s a detailed list of what you’ll need to bring your spooky vision to life:
- Muslin Fabric: A durable and versatile cotton fabric that’s perfect for creating the base shapes of your skulls and bones. Its natural texture also lends itself well to the aging process.
- Fiberfill: Essential for stuffing your fabric creations, giving them a three-dimensional, plump, and realistic appearance. Choose a quality fiberfill that maintains its shape.
- Sewing Machine: While hand-sewing is possible, a sewing machine will make this project significantly faster and easier, ensuring consistent seams and a professional finish.
- Needle and Thread: Necessary for closing the small openings after stuffing, and for any intricate hand-sewing details or repairs.
- Acrylic Paints: A selection of black, white, off-white, red, and brown paints will be crucial for adding color, detail, and an aged effect to your creations.
- Assorted Brushes: You’ll need a range of brush sizes, from broader brushes for base coats to fine-tipped brushes for intricate details like eye veins and teeth.
- Gesso: A primer that prepares the muslin surface for painting, ensuring better paint adhesion, vibrant colors, and a smoother finish.
- Skull and Bone Patterns: These essential templates (which you will find or create) will guide you in tracing the correct shapes and sizes for your decorations.
Step-by-Step Guide: Crafting Your DIY Halloween Skull And Bones Decorations
Follow these detailed instructions to transform simple materials into captivating, creepy decor that will be the highlight of your Halloween display.
Step 1. Precision Tracing and Expert Sewing
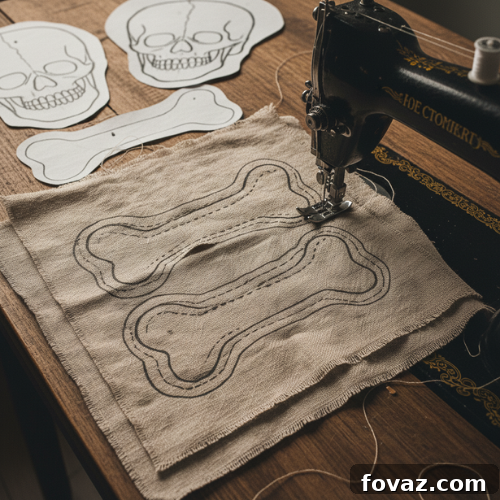
Begin by carefully selecting or drawing your desired skull and bone patterns. Place two layers of your muslin fabric right sides together. This double layer is crucial for creating a robust and symmetrical finished piece. Pin your pattern securely onto the fabric, then meticulously trace around each design using a fabric marker or pencil. Precision here is key for well-shaped final products. Once traced, using your sewing machine, carefully sew along the traced lines, completely around each piece. Remember to leave a small, unsewn opening on each piece – typically 1 to 2 inches – in an inconspicuous area. This opening will be vital for turning the fabric right side out and later for stuffing your creations. Backstitch at the beginning and end of your sewing to secure the stitches.
Step 2. Careful Trimming and Curve Clipping
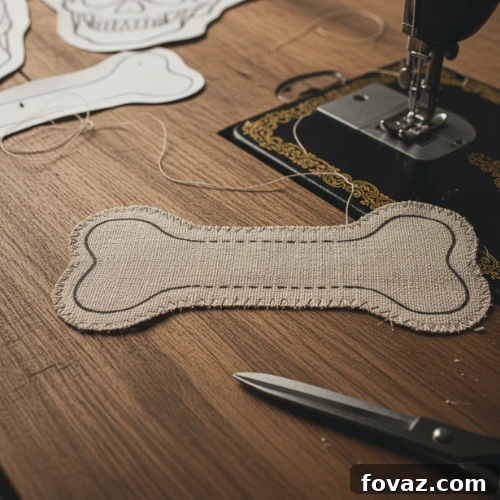
After all your pieces are sewn, it’s time to refine their shape. Using sharp fabric scissors, carefully trim the excess fabric from around your sewn lines. Aim to leave a narrow seam allowance of about 1/4 inch. This prevents bulkiness and ensures crisp edges when the pieces are turned. For all curved sections – and there will be many in skull and bone shapes – make small, perpendicular snips into the seam allowance, almost up to the stitch line but without cutting through the stitches. These “clips” are essential as they allow the fabric to stretch and lay smoothly once turned right side out, preventing puckering and giving your shapes a much more refined and natural contour. Finally, gently turn each piece right side out through the opening you left. Use a blunt tool, like a chopstick or a turning tool, to carefully push out all the seams and curves, ensuring the best possible shape.
RELATED: 31 Breathtakingly Easy-to-Make DIY Halloween Decorations for Every Skill Level
Step 3. Stuffing for Form and Preparing with Gesso
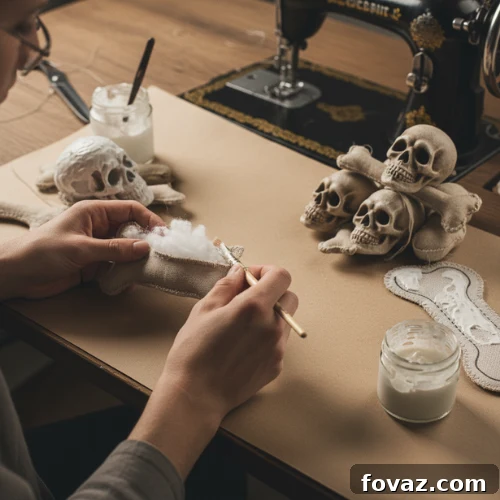
Now, bring your fabric forms to life by stuffing them generously with fiberfill. Use small amounts at a time, working the fiberfill into all the crevices and corners to ensure a smooth, firm, and evenly distributed filling. Avoid overstuffing, which can distort the shape, but ensure they are plump enough to hold their form. Once satisfied with the firmness, carefully hand-sew the small opening on each piece closed using a ladder stitch or invisible stitch for a seamless finish. Next, prepare the surface for painting by applying a coat of gesso to all the stuffed pieces. Gesso acts as a primer, creating an ideal smooth, opaque base for your paints, enhancing their vibrancy and ensuring better adhesion. Apply an even coat, let it dry completely, and then lightly sand the gessoed surface with fine-grit sandpaper. This creates a slightly textured surface that will further help the paint adhere and can also give a subtle aged feel.
Step 4. Layered Painting for Depth and Realism
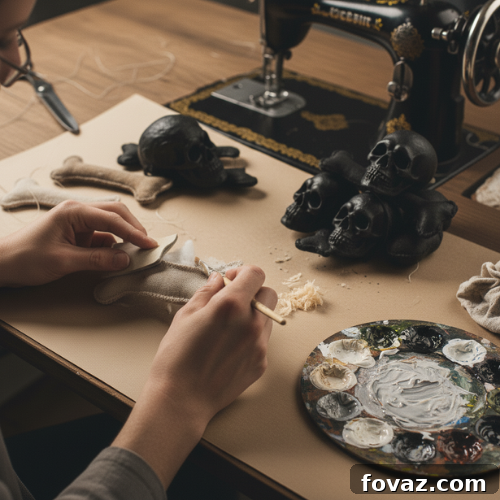
The painting process begins with a base coat that will add depth and character to your finished pieces. First, paint all the gessoed pieces entirely black. This dark undercoat will create shadows and dimension, making the subsequent white layers appear more natural and aged. Allow the black paint to dry completely. Once dry, lightly sand the pieces again. This subtle sanding can expose hints of the gesso beneath the black, creating a slightly worn look even before the next paint layer. Next, apply a coat of white or off-white paint over the black. Don’t aim for perfect, opaque coverage; rather, allow some of the black to show through, especially in the recessed areas. This layering technique is crucial for achieving that authentic, weathered bone appearance. Let this white/off-white layer dry thoroughly before proceeding.
Step 5. Outlining the Spooky Face Details
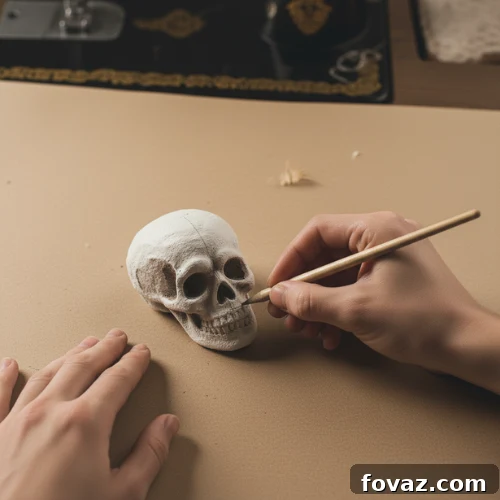
With your base layers complete, it’s time to bring your skulls and eyeballs to life (or death!). Carefully transfer your chosen face patterns – outlines for the eye sockets, nose cavity, and teeth – onto the skull and eyes. You can do this by gently tracing over carbon paper, using a light pencil sketch, or even freehand if you’re confident in your drawing skills. Pay close attention to the placement and proportions to ensure your skulls have the desired spooky expression. For the eyeballs, outline the iris and pupil. This step sets the stage for precise painting, ensuring all the distinct facial features are clearly defined before you apply the final colors. Take your time here; a well-outlined face is the foundation for a truly striking skull.
Step 6. Detailed Painting of Facial Features
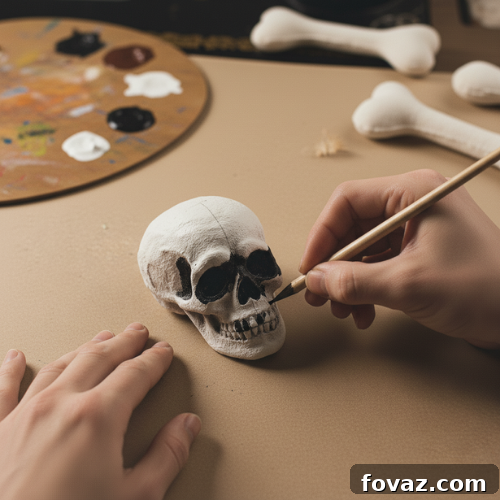
Now for the intricate work! Using a fine brush, carefully paint the eye sockets and teeth of your skull bright white. This stark contrast against the off-white bone color will make them pop. For the eyeballs, paint the iris with any color you prefer – perhaps a menacing red, an eerie green, or a classic haunted yellow. Then, paint the pupils black, ensuring they are perfectly centered. Finally, go back to the skull and fill in all the designated black areas of the face pattern, such as the nose cavity and the deep shadows of the eye sockets, with black paint. This careful detailing will give your skull its distinct and menacing character. Allow all these painted areas to dry completely before moving on to the next step, as smudging can easily ruin your precise work.
Step 7. Highlighting Features and Adding Realistic Veins
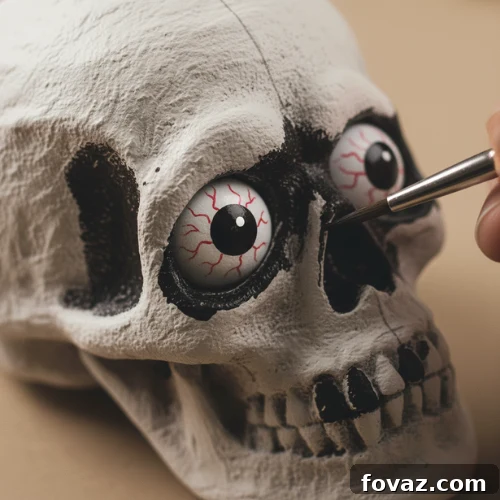
To truly elevate your bloodshot eyeballs, grab your thinnest brush and some red paint. Carefully paint delicate, jagged veins across the white part of the eyes, radiating from the iris. If you find freehand challenging, you can lightly sketch the vein lines with a pencil first as a guide. This detail will make your eyeballs appear truly gruesome and fresh from the grave. Next, use black paint to finish off the pupils, ensuring they are sharp and intense. For an added touch of realism and a subtle gleam, apply a tiny dot of white paint to the eyes as a highlight – this mimics light reflection and makes them seem more lifelike (or, in this case, death-like!). For the skull, you can also add very subtle white highlights to the edges of bone structure to create more dimension and texture.
Step 8. Achieving an Authentic Aged or Weathered Look
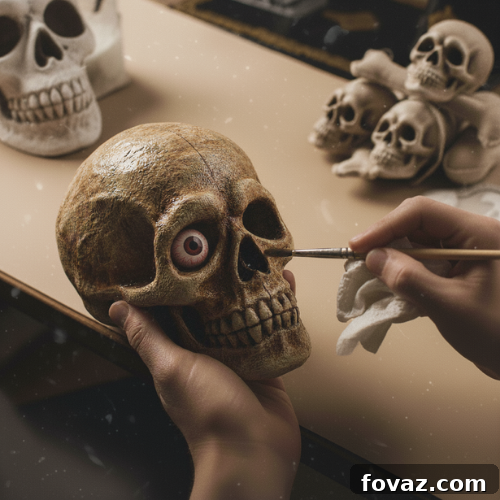
The final touch for truly convincing skull and bone decorations is the aging process. To create a weathered, antique, or grimier look, water down some brown acrylic paint until it has a consistency similar to ink or a thin wash. Using a brush, apply this diluted brown paint liberally over all your pieces, ensuring it settles into all the crevices and textured areas. Immediately after applying, use paper towels or a soft cloth to gently wipe away the excess paint. The diluted paint will leave behind a subtle stain, particularly in the recesses, giving the impression of dirt, age, and decay. You have complete control over the degree of aging – apply more watery paint and let it sit longer for a darker, more intense aged effect, or wipe it off quickly for a lighter, subtly weathered appearance. Experiment with different amounts until you achieve your desired level of spooky antiquity.
Complete your ensemble with a full skeleton decoration! Watch this video from Waylight Creations to learn how to make easy DIY skeleton hands, perfect for complementing your new skulls and bones:
Dressing up your home for Halloween is an incredibly exciting and liberating experience. There are truly no rules and no reservations – just pure, unadulterated fun in creating a world of spooky enchantment. Each handmade decoration carries a piece of your creativity and passion, making your Halloween display truly unique and memorable for everyone who experiences it.
We have an interesting and practical proposition for you, too: preserve your amazing homemade Halloween decor carefully! By storing your handcrafted skulls, bones, and other creations properly, you’ll be able to reuse them year after year, making your Halloween preparations progressively less costly and more sustainable. Imagine the tradition you can build, adding a new handmade piece each year to an ever-growing collection of spooky masterpieces!
Will you be taking on the challenge of crafting these homemade Halloween skull and bones decorations this year? Share your plans, ideas, and any unique twists you’re considering in the comments section below! We’d love to hear how you’re bringing classic Halloween horror to life in your home!
Up Next for More Spooky DIY Inspiration:
- 25 Creepy Halloween Decor Ideas To Increase Your BOO Factor This Season
- 19 Spooky And Fun DIY Ideas To Throw A Halloween Party At Your House
- Build Your Own Floating Deck | Step-By-Step Guide To A More Relaxing Backyard (A Project for All Seasons!)
Stay connected with the DIY community and get more creative inspiration by following us on Facebook, Twitter, and Instagram! Join the conversation and share your amazing DIY projects!
Editor’s Note: This post was originally published on October 22, 2015, and has been updated for quality, relevancy, and to provide even more detailed instructions for our crafting enthusiasts.