
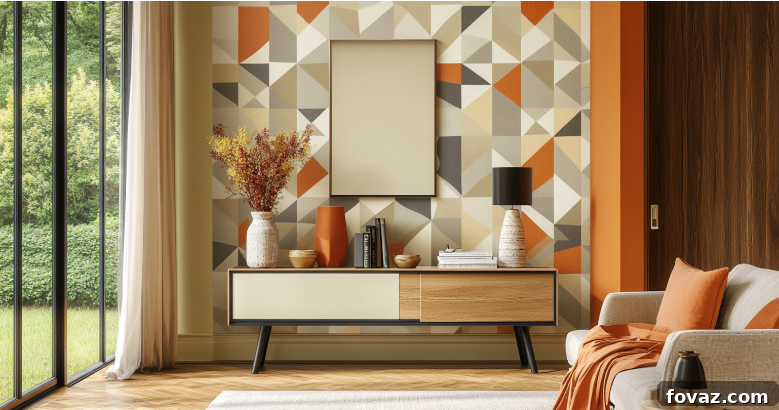
Transform Your Home in 2025: Creative & Budget-Friendly New Year DIY Projects
The dawn of 2025 brings with it the perfect opportunity for a fresh start – not just for you, but for your home too! Embracing New Year DIY projects offers an exciting and incredibly rewarding way to rejuvenate your living space without breaking the bank. Whether your goal is to declutter, redecorate, or simply infuse your home with more personality and charm, these inspiring ideas will empower you to begin the year with creativity and style. Designed to be approachable for all skill levels, from complete beginners to seasoned DIY enthusiasts, each project promises a profound sense of accomplishment and a visibly refreshed environment.
Get ready to unlock your inner decorator and explore how effortlessly you can elevate every corner of your home, making it a true reflection of your renewed spirit and aspirations for 2025. This comprehensive guide will walk you through innovative ways to transform your surroundings with ease and enjoyment.
Start Your DIY Adventure This New Year: A Guide to Home Transformation
Are you yearning to refresh your home’s aesthetic without committing to costly and time-consuming major renovations? Look no further! This carefully curated collection of creative and budget-friendly DIY projects provides simple yet impactful ways to transform your space, breathing new life into every room. From creating stunning focal points with minimal effort to implementing smart, functional storage solutions, there’s an ideal project for everyone. Whether you’re a seasoned DIYer looking for your next challenge or just dipping your toes into the rewarding world of home improvement, these ideas will guide you toward a more beautiful, organized, and personalized home for 2025.
Essential Tips for a Successful DIY Project
Before you dive into the specifics of each exciting project, a little preparation can go a long way in ensuring smooth sailing and achieving professional-looking results. Here are some general tips to keep in mind, empowering you to approach each task with confidence and efficiency:
- Plan Ahead Thoroughly: Clearly define your project scope, gather all necessary tools and materials beforehand, and set a realistic timeline. A detailed plan helps prevent unexpected delays and multiple trips to the hardware store.
- Prioritize Safety First: Always wear appropriate safety gear, such as gloves, eye protection, and masks, especially when sanding, painting, or using power tools. Read and strictly follow all product instructions and warnings.
- Prepare Your Workspace: Clear the work area completely, cover furniture, and protect floors with drop cloths or old newspapers to prevent accidental damage or spills. Ensure adequate ventilation, particularly when working with paints, glues, or strong chemicals.
- Start Small and Build Confidence: If you’re new to DIY, begin with smaller, less intimidating projects to build your skills and confidence before tackling larger, more complex tasks. This approach allows you to learn as you go without feeling overwhelmed.
- Embrace the Beauty of Imperfection: Remember that DIY is about adding unique, personal charm to your home. Don’t strive for absolute, factory-perfect results; often, the slight irregularities and handmade touches are what make your creations truly special and distinctive.
Inspiring New Year DIY Projects for Every Room
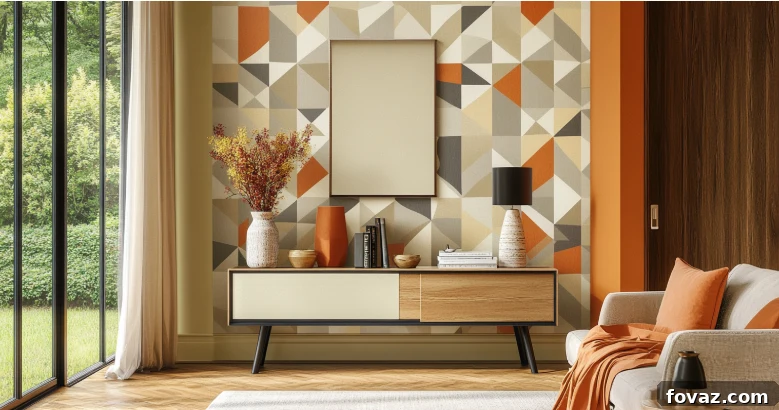
1. Create a Stunning Statement Wall with Peel-and-Stick Wallpaper
Are you looking for an incredibly easy yet dramatically effective way to make a room feel brand new and reflect your unique personal style? A statement wall can instantly elevate the mood and visual appeal of any space, transforming it from ordinary to extraordinary. Utilizing peel-and-stick wallpaper not only simplifies the application process to a remarkable degree but also keeps your project refreshingly budget-friendly. What’s more, it’s an absolute dream for renters, as it’s designed to be easily removable without causing any damage to your walls, offering commitment-free creativity.
Steps to Effortlessly Transform Your Space:
- Pick a Bold and Complementary Design: Dive into the vast and exciting world of patterns! Select a design that truly resonates with your aesthetic and complements your existing decor. Think vibrant florals, striking geometric prints, serene watercolor textures, or sophisticated neutral hues that add subtle depth. Consider the scale of the pattern relative to the size of your room for the best visual impact.
- Thoroughly Prepare the Wall Surface: The key to a flawless and long-lasting finish lies in meticulous preparation. Ensure your chosen wall is impeccably clean, dry, and smooth. Wipe down the surface thoroughly with a damp cloth and mild soap, then allow it to dry completely. Patch any small holes or imperfections with spackle and sand them smooth for an unblemished foundation.
- Measure, Peel, and Smooth with Precision: Begin from the top corner, carefully aligning the first panel of wallpaper. Slowly peel away the backing paper in sections as you go, smoothing the wallpaper onto the wall with a plastic scraper, a specialized wallpaper smoother, or a clean, dry cloth. Work out any air bubbles by pushing them towards the edges, moving from the center outwards. Use a sharp utility knife and a straight edge to trim any excess wallpaper along the ceiling, baseboards, and corners for a crisp, professional-looking finish.
With just one thoughtfully designed feature wall, you can completely refresh an entire room, creating a powerful visual impact that feels both custom and contemporary. For endless design ideas, detailed application tutorials, and tips on choosing the perfect pattern, explore resources like HGTV’s comprehensive wallpaper guide, which offers expert advice and inspiration from top designers.
2. Refresh Outdated Furniture with Vibrant Paint
Do you have a cherished piece of furniture that’s seen better days, showing signs of wear, or perhaps it just no longer aligns with your evolving home decor style? Instead of discarding it, consider giving it a remarkable and cost-effective facelift with a fresh coat of paint! This approach is not only an excellent way to save money on new purchases but also a highly eco-conscious choice, significantly reducing waste and extending the life of your existing items. A simple paint job can completely transform an old dresser, a worn-out chair, a tired bedside table, or even a dated bookshelf into a stylish, custom piece that feels brand new.
How to Revitalize Your Furniture with Paint:
- Choose Your Perfect Paint & Color Scheme: The possibilities for transformation are truly endless! Select a shade that beautifully complements your room’s palette, whether it’s a bold, eye-catching jewel tone, a subtle and calming pastel, or a timeless neutral that adds understated elegance. Consider different paint types for your desired finish: chalk paint for a rustic, matte, or distressed look; latex paint for a durable and versatile finish; or spray paint for quick, even coverage on intricate pieces and a smooth, modern surface.
- Thoroughly Prepare the Surface for Adhesion: Proper surface preparation is the absolute key to achieving a lasting, professional-quality finish. Begin by cleaning the entire piece thoroughly with a degreaser or mild soap and water to remove all dirt, grime, and oils. Lightly sand any glossy areas, chipped paint, or imperfections to create a smooth, adhesive surface for the paint. If the piece is dark or has a slick finish, a primer coat is highly recommended to ensure proper paint adhesion and vibrant color payoff. Allow all surfaces to dry completely before proceeding.
- Apply Paint in Thin, Even Layers for Perfection: Patience is a true virtue in furniture painting. Apply several thin, even coats rather than attempting one thick one, which can lead to drips, uneven coverage, and a less durable finish. Allow each coat to dry completely according to the paint manufacturer’s instructions before applying the next – this typically takes a few hours. For added durability and protection against wear and tear, especially on high-use items, consider applying a clear topcoat or sealer, such as polycrylic or wax.
To truly elevate your newly painted piece and give it a high-end, custom-made look, finish with new, decorative hardware. Think antique brass pulls, sleek modern minimalist knobs, quirky ceramic handles, or elegant crystal accents. These small details can make a significant difference, adding polish and personality. For expert tips on various furniture painting techniques, including distressing, glazing, and color washing, visit The Spruce’s comprehensive furniture painting guide.
3. Declutter and Organize with Creative DIY Storage Solutions
Starting the New Year fresh often begins with a thorough and satisfying decluttering of your home. But why simply hide things away in generic boxes when you can create stylish and functional storage solutions that double as beautiful decor elements? Thoughtful and aesthetically pleasing storage not only brings order and efficiency to your space but also significantly enhances its overall ambiance, making your home feel more spacious, peaceful, and inviting. Embrace organization not just as a chore, but as an art form that transforms your environment!
Innovative and Practical Ideas to Try:
- Modular Crate Shelving Systems: Repurpose plain wooden crates into versatile and attractive storage units. Sand, paint, or stain them in colors that match your decor or add a pop of contrast. Stack them vertically, arrange them horizontally, or even mount them to the wall to create custom shelving for books, records, linens, craft supplies, or pantry items. These modular units are incredibly flexible, portable, and can be rearranged as your storage needs evolve, making them perfect for evolving spaces.
- Personalized Decorative Baskets and Bins: Baskets are a timeless storage solution, but you can give them a unique DIY twist to match your personal style. Enhance plain woven baskets by wrapping them in colorful fabric strips, attaching playful pompoms or elegant tassels, or even painting geometric patterns directly onto them. Use them to stylishly store blankets, pillows, children’s toys, magazines, laundry, or even pantry essentials, adding a touch of handmade charm and texture to any room.
- Elegant and Space-Saving Floating Shelves: Simple yet incredibly effective, floating shelves provide a sleek and modern way to display items without consuming valuable floor space. Install sturdy wooden planks (from reclaimed wood for a rustic look or new lumber for a crisp finish) to showcase your favorite books, small potted plants, cherished decorative accents, or family photos. They add a sense of lightness and openness, perfect for de-cluttering surfaces while keeping your most treasured items accessible and on display.
- Custom DIY Pegboard Organization: Ideal for craft rooms, home offices, kitchens, garages, or even entryways, a custom pegboard can keep tools, utensils, craft supplies, or small accessories neatly organized and within reach. Paint the pegboard to seamlessly match your wall color or choose a contrasting hue for a bold statement. Then, use various hooks, small baskets, and mini shelves specifically designed for pegboards to create a highly customizable and ever-changing storage display that adapts to your needs.
With these practical yet incredibly stylish DIY storage solutions, you can maintain impeccable organization throughout your home without ever sacrificing aesthetic appeal. An organized space not only looks better but also contributes significantly to a calmer, more focused, and less stressful living environment, allowing you to truly enjoy your home.
4. Brighten Your Space and Boost Wellness with Indoor Greenery
One of the simplest, most effective, and certainly most invigorating ways to infuse life, vibrant color, and tranquility into your home is by thoughtfully incorporating indoor greenery. Plants do far more than just look good; they actively purify the air, naturally boost mood, reduce stress, and create a serene, inviting atmosphere that connects you with the rejuvenating power of nature. Bringing the outdoors in is a powerful and accessible way to enhance your overall well-being and elevate your home’s aesthetic.
Simple and Creative Plant Projects for Every Skill Level:
- Handcrafted Macramé Plant Hangers: Learn a few basic macramé knots – it’s a surprisingly easy and therapeutic craft that yields beautiful results! – to create stunning, bohemian-inspired plant hangers. These not only add beautiful texture, visual interest, and dimension to your space but also allow you to utilize vertical space, making your plant display truly unique and maximizing natural light exposure for your plants. There are countless free video tutorials and patterns available online to guide you, even if you’re a complete beginner.
- Upcycled and Personalized Planters: Give everyday items a second life as charming and distinctive plant pots. Decorate plain terracotta pots with geometric patterns, abstract designs, or a coat of vibrant color using acrylic paint. Transform mason jars, old tin cans (ensure they have drainage holes), or even vintage ceramic pots with a fresh coat of spray paint, elegant fabric decoupage, or natural rope wrapping for a truly personal and eco-friendly touch. These customized planters add character and warmth to your plant arrangements.
- Curated Low-Maintenance Plant Displays: If you’re new to plant care, start with hardy, forgiving options that thrive indoors with minimal attention. Pothos, snake plants (Sansevieria), ZZ plants, spider plants, and various succulents are excellent choices known for their resilience and air-purifying qualities. Create small groupings of these easy-care plants on shelves, windowsills, or side tables, or hang them in strategic spots to maximize their visual impact and health benefits. Research their specific light and watering needs to ensure their continued flourishing.
Beyond the undeniable aesthetic appeal, integrating indoor plants significantly contributes to a healthier living environment by improving air quality and fostering a sense of calm. For comprehensive plant care tips, species recommendations suited for various light conditions, and endless inspiration for displaying your green companions, explore Better Homes & Gardens’ extensive indoor plant guide. Discover your green thumb and bring nature home!
5. Illuminate Rooms with Custom DIY Lighting Fixtures
Lighting is much more than just a functional necessity; it’s a powerful and often underestimated tool for shaping the ambiance, mood, and character of your home. The right lighting can instantly transform a dull, uninviting room into a cozy haven, a vibrant social space, or a focused workspace. Fortunately, you don’t need to spend a fortune on designer fixtures to achieve this; you can craft unique, custom lighting solutions that not only brighten your space but also inject it with an abundance of personality, creativity, and warmth.
Brilliant DIY Lighting Ideas to Spark Your Inspiration:
- Personalized Custom Lampshades: Give an old, plain lampshade a complete and exciting makeover. Cover it with a vibrant patterned fabric that beautifully complements your decor, paint it a bold new color that makes a statement, or embellish it with elegant tassels, shimmering beads, or decorative trim for a sophisticated and custom touch. This is a quick, easy, and incredibly effective way to update an entire lamp and refresh a room’s aesthetic.
- Boho-Chic Basket Pendant Lights: Repurpose beautiful woven baskets (sourced from thrift stores, craft shops, or even antique markets) into stunning and unique pendant light fixtures. With a simple lamp cord kit (which typically includes a cord, socket, and plug, readily available at hardware stores), you can transform a basket into a textured, focal point that casts beautiful, intricate patterns of light across your room. Always prioritize electrical safety and ensure proper wiring; if in doubt, consult a professional electrician.
- Whimsical String Light Displays: String lights aren’t just for holidays or outdoor patios anymore! They can add a magical, inviting glow indoors year-round. Wrap warm white or colored string lights around a piece of reclaimed driftwood for a rustic, organic wall sconce. Drape them elegantly over an old wooden ladder or a simple headboard for a charming, whimsical display in a bedroom or living area. Alternatively, simply hang them across a wall or ceiling to create a soft, enchanting ambiance that feels both cozy and sophisticated.
- Geometric PVC Pipe Lamps: For a modern, industrial, and minimalist look, use readily available PVC pipes and connectors to build unique table lamps or wall sconces. Paint them in sleek metallic shades, matte black, or even bright primary colors for a contemporary edge. Pair these creations with vintage-style Edison bulbs to enhance the industrial aesthetic and cast a warm, inviting glow.
With these creative DIY lighting ideas, you have the power to profoundly enhance the warmth, charm, and functional illumination of any room in your home. Remember to always prioritize electrical safety in any lighting project; if you are unsure about wiring or electrical components, it is always best to consult a qualified professional. For more innovative lighting design tips, material recommendations, and inspiring concepts, visit Architectural Digest’s inspiring lighting guide.
6. Revamp Your Entryway with a Custom DIY Bench
Your entryway is much more than just a transitional space; it’s the very first impression guests have of your home, setting the immediate tone for what lies within. It’s also a high-traffic area that benefits immensely from smart organization, comfortable utility, and a welcoming aesthetic. A DIY entryway bench not only adds crucial functionality – providing a convenient spot to sit while putting on or taking off shoes, or a designated place to drop bags and mail – but also instantly creates a warm, inviting vibe that speaks volumes about your home’s style and hospitality.
Steps to Build Your Welcoming and Functional Bench:
- Select the Perfect Wood and Design: The choice of wood greatly influences the bench’s final look and feel. Opt for reclaimed wood, barn wood, or pallet wood for a charming, rustic, and character-filled aesthetic, celebrating natural imperfections. Alternatively, choose pre-cut boards of pine, oak, or even furniture-grade plywood for a sleeker, more contemporary, and easily paintable or stainable finish. Consider the overall design of your home (modern, farmhouse, traditional) when making your selection.
- Construct the Frame and Secure the Legs: Carefully measure and cut your chosen wood to the desired dimensions for the bench top and any necessary support structure. Assemble the frame using strong wood glue and sturdy screws for maximum durability and stability. For a modern, industrial, or mid-century look, securely attach stylish hairpin legs or sturdy metal legs. If you prefer a more traditional or classic style, craft wooden legs, build a solid base, or purchase pre-made wooden bench legs from a hardware store. Ensure all joints are tight and stable.
- Enhance Comfort, Style, and Functionality: Once the bench structure is complete, it’s time to add the personal and finishing touches. Top the bench with plush, custom-made cushions upholstered in a durable fabric for ultimate comfort and a pop of color. Alternatively, adorn it with cozy throws, decorative pillows, or sheepskin rugs to invite guests to sit and relax. You can also add a protective coat of paint or stain to the wood to seal it against wear and tear and perfectly match your entryway decor. Consider adding storage cubbies or shelves beneath the bench for shoes or baskets.
To maximize the utility and organizational power of your new entryway masterpiece, pair your bench with complementary organization solutions. Install wall-mounted hooks above it for coats, hats, and bags, or slide decorative storage baskets or bins underneath for shoe storage, scarves, gloves, or other essentials. This thoughtful integration ensures your entryway is not only aesthetically pleasing and inviting but also a highly practical and efficient command center for your comings and goings.
7. Transform Your Kitchen with Peel-and-Stick Backsplash Stickers
Dreaming of a kitchen refresh but hesitant about the significant cost, extensive labor, and disruptive inconvenience of a full renovation? You’ll be delighted to know that updating your kitchen doesn’t have to involve expensive contractors, messy demolition, or weeks of disruption. Peel-and-stick backsplash tiles offer an incredibly quick, remarkably affordable, and surprisingly impactful way to refresh your cooking space, giving it an instant facelift without the long-term commitment or permanence of traditional tiling. This DIY solution is perfect for renters and homeowners alike, offering style on a budget.
Quick and Easy Installation Tips for a Flawless Finish:
- Thoroughly Clean and Prepare the Surface: Just like with wallpaper, proper surface preparation is absolutely paramount for a smooth, bubble-free, and long-lasting application. Ensure the backsplash area is meticulously clean, dry, and smooth. Remove any grease, food splatters, dirt, or dust with a strong degreaser and allow the wall to dry completely. Any bumps or debris will show through the tiles, so a perfectly smooth and clean foundation is crucial for professional results.
- Precise Placement: Peel and Stick with Care: Start at one end of your desired backsplash area, typically a corner or near a cabinet. Carefully align each peel-and-stick tile or sheet, taking your time to ensure it’s perfectly straight and level before pressing it firmly onto the wall. Many modern peel-and-stick options are ingeniously designed to overlap slightly, which helps create a seamless, grout-like appearance that mimics traditional tiling. Use a credit card or a wallpaper smoother to press down firmly and remove air bubbles.
- Trim Edges for a Clean, Professional Finish: For areas around electrical outlets, corners, window frames, or the edges of your cabinets, use a sharp utility knife or box cutter to precisely trim the tiles to size. A straight edge, ruler, or T-square will be indispensable for achieving clean, precise lines, giving your DIY backsplash a polished and professional look that belies its easy installation.
Peel-and-stick backsplashes come in a dazzling array of styles, patterns, and textures, allowing for immense customization. From classic subway tiles and elegant marble patterns to modern geometric designs, rustic stone textures, or even realistic wood-grain looks, this versatility allows you to perfectly match your kitchen’s existing aesthetic or completely redefine its style with minimal effort and expense. For more inspiring kitchen design ideas, innovative solutions, and expert advice, explore Architectural Digest’s extensive kitchen design page.
Refresh Your Home and Your Spirit with New Year DIY Projects
The arrival of 2025 is more than just a calendar change; it’s a powerful invitation to embrace renewal, cultivate creativity, and proactively elevate your home environment. The collection of New Year DIY projects outlined above offers creative, impactful, and wonderfully budget-friendly ways to transform your living spaces without the stress, expense, or commitment of overspending. Whether you choose to infuse a room with vibrant indoor greenery, create a dramatic statement wall that instantly captures attention, or provide a much-needed aesthetic upgrade to your kitchen, each project is a unique opportunity to inject fresh energy, personal charm, and a sense of accomplishment into your surroundings.
Why wait to create the home you’ve always dreamed of, a space that truly reflects your personality and inspires joy? Empower yourself to start small with a quick weekend project, or bravely tackle a slightly larger transformation. The beauty of DIY lies in its accessibility, the immense satisfaction of bringing your vision to life with your own hands, and the lasting impact it has on your living environment. Investing your time and creativity into these home improvement endeavors will undoubtedly set a positive, productive, and inspired tone for a vibrant and fulfilling year ahead. Let your home be a canvas for your renewed spirit in 2025, a sanctuary crafted by you, for you!
Which of these inspiring New Year DIY projects will you be trying first? We’d love to hear about your plans, see your transformations, or learn any additional tips and tricks you have discovered in your own DIY journey. Share your creativity and experiences with our community in the comments section below!
Frequently Asked Questions About New Year DIY Projects
1. What are the absolute easiest New Year DIY projects for beginners?
For those just starting their DIY journey, we highly recommend beginning with projects that offer high visual impact with minimal skill requirements and tool investment. Excellent beginner-friendly options include adding peel-and-stick wallpaper to a single accent wall, giving a small piece of furniture a fresh coat of paint, or incorporating a variety of indoor plants into your decor. These projects deliver quick, satisfying results and help build confidence for future endeavors.
2. How can I ensure my DIY projects are as affordable as possible?
Making DIY projects budget-friendly is all about smart choices, resourcefulness, and creativity. Prioritize repurposing materials you already own, such as old crates, mason jars, or forgotten pieces of furniture. Actively shop at thrift stores, flea markets, online marketplaces, and salvage yards for unique items that can be upcycled. Furthermore, utilize leftover paint, fabric scraps, or craft supplies from previous projects. Opt for cost-effective materials like chalk paint (which often doesn’t require priming), and peel-and-stick wallpapers or tiles, which eliminate the need for expensive tools and professional installation fees.
3. Are most of these DIY projects suitable for renters who can’t make permanent changes?
Absolutely! Many of the projects highlighted in this guide are specifically chosen for their temporary and non-damaging nature, making them perfectly suitable for renters. Peel-and-stick wallpaper and backsplash tiles are designed for easy removal without harming walls or surfaces. DIY lighting fixtures can often be plug-and-play or easily uninstalled without leaving a trace. Furniture painting and decorative storage solutions are entirely reversible or portable, allowing you to personalize your living space without jeopardizing your security deposit. Always double-check product specifications for removability.
4. How long do these New Year DIY projects typically take to complete?
The duration of these projects varies significantly depending on their scope, your experience level, and the specific materials involved. Smaller projects, such as creating a macramé plant hanger, decorating personalized planters, or arranging indoor greenery, can often be completed in less than an hour or a single afternoon. Mid-range projects, like painting a piece of furniture (including drying times) or installing a peel-and-stick backsplash, might take a weekend. Larger endeavors, such as building an entryway bench, may span a couple of days but are still achievable within a short timeframe with good planning and focused effort.
5. Can children safely participate in these home improvement DIY projects?
Many of these projects offer wonderful opportunities for supervised children to get involved and express their creativity in a constructive way! Kids can assist with simpler tasks like lightly sanding furniture, painting decorative crates or planters, wrapping baskets with fabric, or helping arrange plants. Involving them not only makes the process more fun and memorable for the whole family but also helps foster a sense of accomplishment, teaches valuable hands-on skills, and encourages an appreciation for their home environment. Always ensure their safety by supervising them closely, providing age-appropriate tools, and keeping hazardous materials out of reach.