
Transform Your Garden: Easy & Fun National Garden Week Projects for Every Gardener
National Garden Week serves as a vibrant reminder to connect with nature, cultivate beauty, and invigorate your outdoor living areas. Whether you’re a budding enthusiast just starting your green journey or a seasoned horticulturist with years of experience, this special week, typically celebrated from April 7-13, offers the perfect opportunity to embark on enriching National Garden Week projects. These DIY endeavors are designed to be low-effort yet high-impact, bringing immense joy and a fresh perspective to your garden.
The beauty of these projects lies in their accessibility. You don’t need acres of land or a hefty budget; all that’s required is a genuine appreciation for plants and a spark of creativity. From transforming ordinary household items into charming garden decor to crafting welcoming havens for essential pollinators, these innovative ideas promise to revitalize your garden and help you make the most of this inspiring week. Get ready to explore a world where sustainability meets style, and every corner of your outdoor space can tell a unique story.
Embrace Nature: Simple & Rewarding National Garden Week Projects
Looking for imaginative ways to celebrate National Garden Week? These engaging and easy DIY projects are perfect for adding character to your landscape, supporting local wildlife, or cultivating your own fresh produce. Utilizing common materials and a touch of ingenuity, you can create functional and beautiful additions to your garden without breaking the bank. Prepare to roll up your sleeves and infuse new life into your garden, transforming it into a personalized sanctuary!
1. DIY Painted Rock Garden Markers 🎨
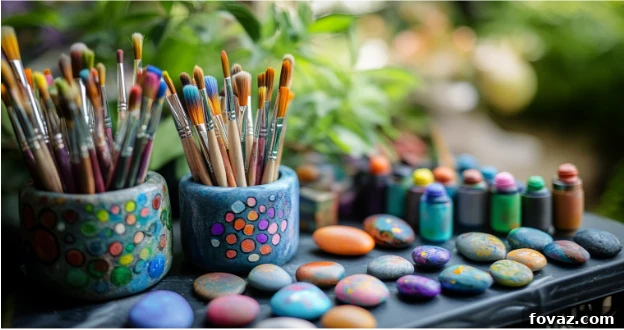
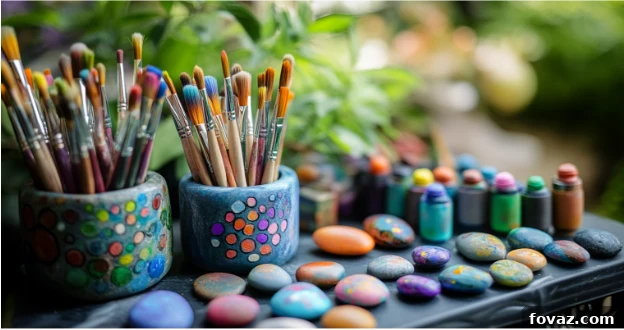
Keeping your garden organized and aesthetically pleasing has never been simpler with handmade painted rock markers. These charming markers help you identify different plants at a glance while adding a delightful decorative touch to your flowerbeds or vegetable patches. To begin, gather a collection of smooth, flat stones—river rocks work perfectly. You’ll also need acrylic paints in a variety of vibrant colors and a fine-tip brush for detailing. Start by cleaning your chosen stones thoroughly to ensure good paint adhesion. Once dry, let your imagination take hold! Paint the rocks with cheerful base colors, and after they’ve dried, carefully write the names of your plants or draw small illustrations like a carrot for your root vegetables or a sun for sun-loving flowers. To ensure these beautiful markers withstand the elements, apply several coats of a weather-resistant sealant once the paint is completely dry. These personalized and durable markers are not just practical; they also inject a unique charm and personality into any outdoor space, making your garden truly your own.
For more creative gardening inspiration and DIY ideas, explore resources like Better Homes & Gardens’ DIY gardening guide.
2. Upcycled Tin Can Planters 🥫
Before you toss those empty food cans into the recycling bin, consider their potential as charming and eco-friendly planters. Upcycling everyday items is a fantastic way to celebrate sustainability and add a rustic, whimsical touch to your garden decor. Start by thoroughly cleaning the cans and ensuring all sharp edges are smoothed down. Critically, poke several drainage holes in the bottom of each can using a hammer and nail or a drill bit – this is essential for plant health. Next, unleash your creativity! Customize your cans with a fresh coat of paint, wrap them with twine or jute for a natural look, or adorn them with decorative paper or fabric scraps. Once your designs are dry, fill the cans with a good quality potting mix and plant your favorite small herbs, vibrant annuals, or resilient succulents. These versatile planters can be arranged artfully on a sunny windowsill, hung individually or in clusters along a fence, or even displayed on a patio table, creating a unique vertical garden or an eclectic focal point. Upcycling is not only kind to the environment but also a wonderful way to garden on a budget, proving that beauty can indeed come from unexpected places.
Discover more innovative ways to repurpose household items for your garden and home at The Spruce.
3. Butterfly Puddler for Pollinators 🦋
Attracting graceful butterflies to your garden not only adds visual beauty but also supports vital pollination efforts. While butterflies are often drawn to nectar-rich flowers, they also require a reliable water source to absorb essential minerals. A simple butterfly puddler can provide just that! To create one, select a shallow dish – a terracotta saucer, an old pie plate, or a sturdy plastic lid works well. Fill the dish with sand, then arrange a few small, flat rocks or pebbles within the sand. The rocks will provide stable perching spots for the butterflies while they drink. Keep the sand consistently moist by adding a small amount of water daily; the aim is for damp sand, not a pool of standing water. Butterflies prefer to sip from damp sand rather than open water. Position your puddler in a sunny spot near groups of nectar-rich flowers, such as coneflowers, zinnias, or butterfly bush, to maximize its appeal. This thoughtful addition will turn your garden into an inviting oasis for these delicate and crucial pollinators, enhancing your garden’s biodiversity.
4. DIY Garden Stepping Stones 🏡
Garden pathways do more than just guide visitors; they protect your plants from foot traffic, define garden beds, and add significant character and charm to your outdoor space. Crafting your own stepping stones allows for unparalleled personalization. To create these unique pathways, you’ll need a quick-set concrete mix, molds (which can be as simple as old plastic containers, cake pans, or specialized stepping stone molds), and an assortment of decorative elements. Before the concrete begins to harden, embed colorful glass gems, smooth river stones, sea shells, mosaic tiles, or even leaves and handprints for a truly custom touch. You can also press large, interesting leaves into the wet concrete to leave an impression once removed. Once the concrete has fully cured and dried – typically after 24-48 hours, depending on the mix – carefully remove the stones from their molds. Arrange them along your desired pathway, spacing them appropriately for comfortable walking. These handcrafted stepping stones are not just practical; they are durable works of art that weave a narrative through your garden, inviting exploration and appreciation.
5. Mason Jar Solar Lanterns ✨
Infuse your garden with a magical, inviting glow using simple and energy-efficient DIY solar lanterns. These enchanting lights are perfect for creating a cozy ambiance for evening gatherings, intimate dinners al fresco, or quiet nights spent under the stars. The project couldn’t be easier: simply take clean, clear mason jars of any size and place solar-powered fairy lights inside them. The small solar panel attached to the string of lights should be positioned to receive direct sunlight during the day. As the sun sets, these clever lights automatically illuminate, casting a soft, warm glow that transforms your outdoor space. You can arrange them on patio tables, line pathways with them, hang them from tree branches using wire handles, or group them together for a more concentrated light source. Mason jar solar lanterns are an affordable, sustainable, and wonderfully atmospheric way to extend the enjoyment of your garden well into the evening hours, making every moment outdoors feel a little more special.
6. Build a Simple Raised Garden Bed 🌱
For many gardeners, especially those new to the hobby or with challenging soil conditions, a raised garden bed is a game-changer. This efficient gardening method simplifies cultivation, improves growing conditions, and makes gardening more accessible. To construct a basic raised bed, you’ll typically use wooden planks, such as cedar (known for its rot resistance) or untreated pine, to form a sturdy rectangular or square frame. Position your frame on a flat, level patch of soil, ensuring it receives ample sunlight. Once the frame is in place, fill it with a rich, nutrient-dense soil mix, often a blend of topsoil, compost, and other organic matter. Raised beds offer numerous advantages: they provide excellent drainage, help warm the soil faster in spring, reduce the prevalence of weeds by creating a defined growing space, and make tasks like planting, weeding, and harvesting far easier on your back. They are ideal for growing a wide variety of vegetables, herbs, and flowers, allowing you to tailor the soil composition to your plants’ specific needs and enjoy a more controlled and bountiful harvest.
7. Homemade Bird Feeder from Recycled Materials 🐦
Inviting local birds into your garden brings a lively symphony of chirps and songs, vibrant flashes of color, and natural pest control benefits. Crafting a DIY bird feeder from recycled materials is a wonderful way to support avian friends while embracing sustainability. The possibilities are vast: transform old plastic milk cartons or soda bottles by cutting openings and adding perches; repurpose pinecones by coating them in peanut butter and rolling them in birdseed; or even convert old teacups and saucers into charming feeders. Once you’ve assembled your chosen feeder, fill it with a high-quality birdseed mix appropriate for local species. Hang your finished feeder securely from a sturdy tree branch or a shepherd’s hook in a location where birds will feel safe from predators, yet still visible for your enjoyment. Regular cleaning of your feeder is important to prevent the spread of diseases among birds. A homemade bird feeder provides a consistent food source, encourages biodiversity, and adds an engaging, dynamic element to your outdoor space, fostering a deeper connection with nature.
8. Herb Drying Rack for Fresh Spices 🌿
Preserving the bounty of your herb garden ensures you can enjoy fresh flavors and aromatic scents year-round. Creating a simple herb drying rack is an effortless and effective way to store your homegrown rosemary, thyme, basil, oregano, and more. Begin by harvesting your herbs in the morning after the dew has dried, just before they flower, for the most potent flavor. Gently rinse them and pat them dry. Then, gather small bundles of 5-10 stems, depending on their thickness, and secure them tightly at the base with natural twine or rubber bands. It’s crucial not to make the bundles too large, as this can hinder air circulation and lead to mold. Find a dry, dark, and well-ventilated area in your home – a pantry, attic, or even a quiet corner of your kitchen (away from direct sunlight) works perfectly. Hang your bundles upside down from a clothesline, a drying rack, or even a coat hanger. The drying process can take anywhere from one to four weeks. Once the herbs are completely dry and brittle to the touch, strip the leaves from the stems and store them in airtight jars, away from light and heat. You’ll have a supply of your own fresh, flavorful herbs ready for cooking, brewing homemade teas, or even crafting potpourri.
9. DIY Vertical Garden with Pallets 🧱
For gardeners with limited space, a DIY vertical garden constructed from recycled wooden pallets offers an ingenious solution to maximize growing potential. This project is not only space-efficient but also adds a rustic, stylish element to walls, fences, or balconies. First, source a clean, untreated wooden pallet (look for “HT” stamped on it, indicating heat treatment rather than chemical treatment). Clean it thoroughly. Next, secure landscape fabric or heavy-duty weed barrier fabric to the inside of the pallet’s “pockets” to create planting containers. Use a staple gun to attach the fabric securely, ensuring it forms deep enough pockets for soil and roots. You may need to create a back panel for some sections if the pallet slats are too open. Once the pockets are formed, carefully fill them with a lightweight potting mix. This vertical structure is ideal for planting smaller herbs like mint, basil, and cilantro, vibrant annual flowers such as petunias or impatiens, and even strawberries, which thrive in vertical arrangements. Position your vertical garden in a spot that receives appropriate sunlight for your chosen plants and remember that vertical gardens often dry out faster, so regular watering is key. This eco-friendly project transforms a discarded item into a living wall of green, bringing lushness to even the smallest urban spaces.
10. Creating a Small Sensory Garden Section 🌸
Beyond visual appeal, a garden can be a rich tapestry of sensory experiences, offering a tranquil escape that engages all five senses. Creating a dedicated sensory garden section, no matter how small, is a deeply rewarding National Garden Week project. Plan your section with plants that stimulate touch, smell, sound, sight, and even taste. For touch, include plants with interesting textures like lamb’s ear (fuzzy), ornamental grasses (feathery), or spiky succulents. For scent, fragrant herbs such as lavender, rosemary, mint, and jasmine are perfect, along with highly perfumed flowers like roses or sweet peas. To introduce sound, choose plants that rustle in the breeze, like bamboo or tall grasses, and consider adding a small bird bath or wind chimes to attract natural melodies. Visually, incorporate a variety of colors, shapes, and heights with different flowering plants and foliage. Finally, for taste, edible herbs and small berry bushes or cherry tomatoes offer a delicious reward. Arrange these plants thoughtfully, creating accessible pathways and comfortable seating if space allows. A sensory garden provides a mindful retreat, encouraging relaxation, observation, and a deeper, more immersive connection with the natural world.
Essential Tips for a Thriving Garden
Beyond these exciting projects, remember the foundational elements of successful gardening. Ensure your plants receive adequate sunlight—most require at least six hours daily. Good soil is paramount; enrich it regularly with compost and organic matter. Proper watering is critical; check soil moisture before watering and aim for deep, infrequent watering rather than shallow, frequent sprinkles. Finally, adopt natural pest management techniques to protect your plants and the beneficial insects in your garden.
Celebrate with Fun National Garden Week Projects 🌻
Gardening is so much more than just planting seeds; it’s an empowering blend of creative expression, a source of calming relaxation, and a meaningful way to enhance and enjoy your outdoor spaces. These National Garden Week projects are not only simple to undertake but also incredibly rewarding, designed to be accessible and enjoyable for all skill levels. From crafting delightful decorative markers that personalize your garden to creating vital habitats that attract and sustain pollinators, or illuminating your evenings with charming solar lanterns, each small effort contributes to a significant impact. Take this opportunity to immerse yourself in the beauty of flora, cultivate new skills, and connect with the natural world around you. Enjoy every moment of making your garden a more vibrant, inviting, and sustainable place!
Now, it’s your turn! What garden DIYs do you love, or which of these projects are you excited to try? Drop a comment below and share your National Garden Week projects and ideas! 🌿👇
FAQs About National Garden Week Projects 🌿
- What is National Garden Week and why is it celebrated?
National Garden Week, typically observed from April 7–13, is an annual celebration designed to encourage gardening, promote environmental sustainability, and inspire outdoor creativity. It highlights the numerous benefits of gardening for individuals, communities, and the planet. - What are the easiest garden projects for beginners during National Garden Week?
For those just starting out, painting rock markers for plant identification, upcycling tin cans into charming planters, and creating simple butterfly puddlers are all excellent, beginner-friendly activities that require minimal tools and experience. - Can any of these projects be adapted for indoor gardening?
Absolutely! Tin can planters are perfect for growing small herbs or succulents indoors on a windowsill. Herb drying racks can be set up in any well-ventilated indoor space, and mason jar solar lanterns make delightful indoor decorative lights, provided they receive sunlight to charge. - How can I effectively attract more pollinators like butterflies and bees to my garden?
To attract more pollinators, focus on planting a diverse range of native flowers that bloom throughout the seasons, avoid using chemical pesticides, and create a butterfly puddler or a bee-friendly habitat with accessible water sources and nesting spots. - Are these National Garden Week projects generally budget-friendly?
Yes, a significant advantage of these projects is their cost-effectiveness. Many of the ideas emphasize the use of recycled or repurposed materials, making them both economical and highly sustainable. - What’s the best method to waterproof my painted rock garden markers for durability?
To protect your painted rock markers from harsh weather conditions like sun exposure and rain, apply several coats of a clear, outdoor-grade sealant or varnish once the paint has thoroughly dried. - Which types of wood are recommended for building a durable raised garden bed?
For long-lasting and safe raised garden beds, cedar is highly recommended due to its natural resistance to rot and insects. Untreated pine is another good, budget-friendly option, as it avoids harmful chemicals. - Do mason jar lanterns require specific types of lights, or can any small lights be used?
For the best results and energy efficiency, solar-powered fairy lights or small, battery-operated LED garden lights are ideal for mason jar lanterns, as they are designed for outdoor use and provide a soft, ambient glow. - What is the most effective way to dry homegrown herbs to preserve their flavor and potency?
The most effective way to dry herbs is by hanging them in small bundles upside down in a dry, dark, and well-ventilated area, away from direct sunlight. This slow drying process helps retain their essential oils, flavor, and color. - How quickly can I expect butterflies to start visiting a newly created butterfly puddler?
The time it takes for butterflies to visit a puddler can vary depending on local butterfly populations, weather conditions, and proximity to blooming nectar plants. Placing it near existing butterfly-attracting flowers will significantly improve your chances of attracting them sooner.