
Have you ever dreamed of giving your home a fresh new look without the hefty price tag of buying all-new pieces? Imagine transforming that tired, old furniture into something that truly reflects your style and breathes new life into your living space. This isn’t just a dream; it’s an achievable reality, and one of the most satisfying ways to do it is through the magic of painting. Specifically, we’re talking about chalk paint – a revolutionary medium that makes furniture makeovers incredibly accessible and rewarding. Get ready to embark on an exciting DIY journey as we guide you through an awesome chalk paint furniture tutorial, revealing how you can easily achieve professional-looking results right at home.
Chalk Paint Furniture Makeover: Your Ultimate DIY Guide
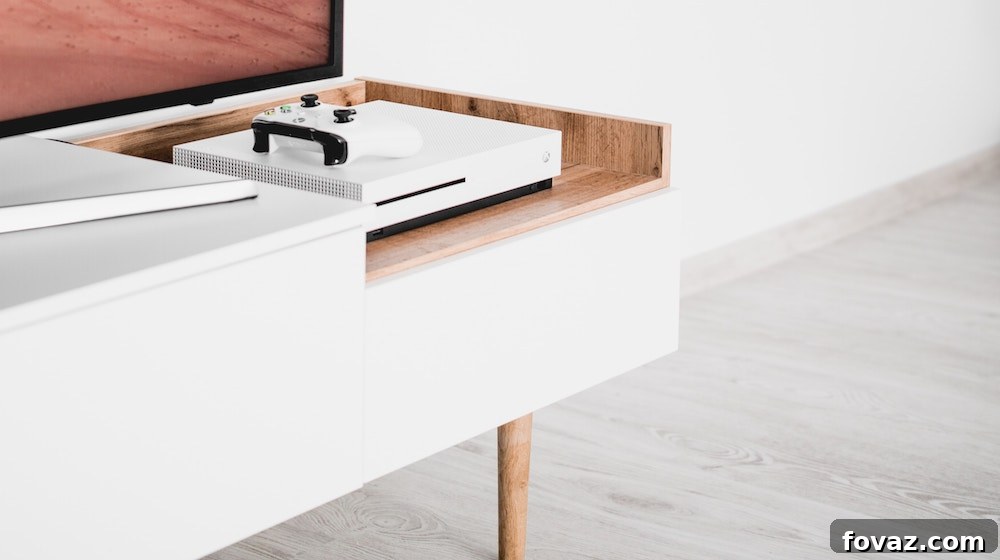
Chalk paint has become a game-changer for DIY enthusiasts and interior design lovers alike. Its unique properties often eliminate the need for laborious sanding and priming, making it an ideal choice for transforming a wide array of furniture pieces. For this comprehensive guide, we’ll illustrate the process by detailing the transformation of a common household item – a multi-functional TV stand, complete with shelves and drawers. This project will serve as a perfect example, equipping you with valuable tips and techniques applicable to any furniture piece, especially those with intricate parts like drawers and shelves.
While many excellent chalk paint brands are available today, we highly recommend using Annie Sloan Chalk Paint. Known as the original and a pioneer in the chalk paint world, Annie Sloan products are celebrated for their rich pigments, incredible adhesion, and beautiful matte finish, making them a top choice for countless DIY projects. Their accompanying soft wax is also essential for a durable, professional finish. Let’s dive into the world of creative furniture transformation and begin your chalk paint journey!
Why Choose Chalk Paint for Your Furniture Makeover?
Before we jump into the steps, let’s explore why chalk paint stands out as the go-to option for furniture transformations:
- Minimal Preparation: One of the biggest advantages of chalk paint is its ability to adhere to almost any surface – wood, laminate, metal, even fabric – with little to no sanding or priming required. This dramatically cuts down on preparation time, allowing you to get straight to the fun part: painting!
- Versatile Finishes: Whether you desire a smooth, modern matte finish, a rustic farmhouse look, or a charming vintage distressed aesthetic, chalk paint can achieve it all. Its thick consistency makes it easy to distress, while layering different colors can create incredible depth.
- Quick Drying Time: Chalk paint typically dries very quickly, often within 20-30 minutes, which means you can apply multiple coats and complete your project in a shorter timeframe.
- Eco-Friendly Options: Many chalk paint brands, including Annie Sloan, offer low-VOC (Volatile Organic Compound) formulas, making them a more environmentally friendly choice for your home.
- Easy to Use: Its forgiving nature makes it perfect for beginners. Mistakes can often be easily corrected, and its matte finish hides imperfections beautifully.
Planning Your Chalk Paint Furniture Project
A successful furniture makeover starts with thoughtful planning. Consider these points before you even open a can of paint:
- Choosing the Right Piece: While chalk paint works on almost anything, solid wood furniture often yields the most satisfying results, especially if you plan to distress it. Inspect your chosen piece for structural integrity.
- Color Palette and Vision: Browse online inspiration, home decor magazines, or Pinterest to envision the final look. Will your piece be a bold statement or a subtle accent? Consider how the chosen color will complement your existing room decor. Annie Sloan offers a stunning palette, from vibrant hues to timeless neutrals.
- Desired Finish: Do you want a smooth, contemporary finish, or a rustic, distressed look? Your painting and sanding techniques will vary depending on your desired outcome.
- Workspace: Ensure you have a well-ventilated area, preferably outdoors or in a garage, to work on your project. Prepare your workspace with drop cloths to protect floors and surrounding items.
Essential Supplies for Your Chalk Paint Furniture Makeover
Gathering all your supplies before you begin will ensure a smooth and enjoyable process. Here’s what you’ll need:
- Annie Sloan Chalk Paint: Choose your desired color(s). A little goes a long way, but it’s always better to have slightly more than you think you’ll need.
- Annie Sloan Soft Wax (Clear and/or Dark): Essential for sealing and protecting your painted surface, providing durability and enhancing the color. Dark wax can be used to create an aged, antique effect.
- High-Quality Paintbrushes: Invest in good brushes specifically designed for chalk paint or natural bristles. Annie Sloan offers excellent chalk paint and wax brushes that hold a lot of paint and apply it smoothly. A smaller brush might be useful for intricate details.
- Furniture Cleaner (TSP Substitute or Mild Degreaser): To thoroughly remove dirt, grease, and grime that could prevent paint adhesion.
- Soft, Lint-Free Cloths: Several cloths will be needed for cleaning, wiping off excess wax, and buffing.
- Sandpaper (Fine to Medium Grit): Primarily used for evening out built-up paint or creating a distressed look. Grits like 120-220 are typically sufficient.
- Screwdriver: To remove hardware.
- Drop Cloths or Old Sheets: To protect your workspace.
- Painter’s Tape (Optional): For masking off areas you don’t want to paint, although chalk paint’s versatility often makes this unnecessary.
- New Hardware (Optional): To truly refresh the look, consider replacing old knobs or pulls.
Step-by-Step Chalk Paint Furniture Makeover Tutorial
1. Prepare Your Furniture: Remove Hardware and Clean Your Workspace
Begin by carefully unscrewing and removing all knobs, pulls, and any other hardware from your furniture piece. Store these small parts in a labeled bag or container to avoid losing them. Next, gently pull out all drawers and remove any shelves. Treating these components separately will ensure a more thorough and even paint application. Lay down drop cloths to protect your flooring and create a clean, organized workspace. Good ventilation is also crucial, especially when cleaning and painting.
2. Thoroughly Clean the Furniture Surfaces
This step, though often tempting to skip, is paramount for ensuring proper paint adhesion and a long-lasting finish. Use a reliable furniture cleaner, such as a TSP substitute or a mild degreaser, to meticulously clean all surfaces you intend to paint. This will remove years of accumulated dirt, grease, grime, and any existing polish or wax that could compromise the paint’s bond. Apply the cleaner with a soft cloth, following the product instructions, and make sure to wipe down every nook and cranny. Rinse thoroughly with clean water and allow the furniture to dry completely before moving on.
3. The Art of Painting with Chalk Paint: Apply Your First Coat
Before you begin, stir your Annie Sloan Chalk Paint thoroughly to ensure the pigments are well-mixed. Dip your paintbrush into the paint, ensuring it’s loaded but not dripping excessively. We recommend starting your painting process on the underside or legs of the furniture, or less visible areas. This allows you to get a feel for the paint and your brushstrokes. For a smooth finish, apply the paint with long, even strokes. If you prefer a more textured or rustic look, shorter, cross-hatch strokes can be effective.
Once you’ve tackled the initial less visible areas, move to the main body of the furniture. If your piece has fixed shelves, paint these as well. For areas that will be hidden by drawers, it’s often optional to paint them; focus your efforts on the visible exterior parts for efficiency. Allow the first coat to dry completely, which usually takes about 20-30 minutes. The paint will appear streaky or transparent in some areas after the first coat – this is normal and will be addressed with subsequent coats.
4. Paint the Drawers and Other Components
With the main furniture body drying, turn your attention to the drawers and any removable shelves. Paint the exterior surfaces of the drawers first, ensuring even coverage. Whether you paint the interior of the drawers is entirely up to you and your desired aesthetic; it’s not always necessary, especially if you’re aiming to save paint. Apply the paint carefully, making sure to cover all visible edges. Allow these components to dry fully before handling them extensively.
5. Apply a Second Coat and Sand for Desired Effects
Once your first coat is dry, assess the coverage. If the original furniture color is still showing through too much, or if you’re working with a lighter chalk paint color, a second coat (or even a third) will likely be needed to achieve full opacity and depth of color. Apply subsequent coats in the same manner as the first, allowing ample drying time between each. Once all coats are dry, this is where you can truly customize the finish:
- For a Smooth Finish: If there are any areas with built-up paint or slight unevenness, use a fine-grit sandpaper (e.g., 220-grit) to gently smooth them out. Wipe away all dust with a clean, soft cloth.
- For a Distressed, Vintage Look: If you desire a charming, aged appearance, use sandpaper (a medium grit like 120-150 works well) to lightly sand along edges, raised details, and areas where natural wear would occur. This technique allows glimpses of the original finish or previous paint layers to show through, creating character. Experiment with the amount of pressure to achieve your preferred level of distressing. Again, meticulously wipe away all sanding dust.
6. Allow for Complete Drying Time
Before proceeding to the waxing stage, it is crucial to allow all paint coats to dry thoroughly. While chalk paint dries to the touch quickly, giving it a few hours, or even overnight, ensures that it has properly cured enough to accept the wax without smudging or peeling. Environmental factors like humidity and temperature can affect drying times, so always err on the side of caution.
7. Seal and Protect Your Masterpiece with Soft Wax
Sealing your chalk-painted furniture with soft wax is an indispensable step. The wax not only protects your beautiful paint job from stains, spills, fingerprints, and general wear but also deepens and enriches the paint’s color, giving it a velvety, durable finish. Using an Annie Sloan Wax Brush or a soft, lint-free cloth, apply a thin, even layer of the clear soft wax to the painted surface. Work in small sections, rubbing the wax into the paint. The key is to apply thin coats; too much wax can be difficult to buff and may leave a sticky residue.
After applying the wax to a section, immediately wipe off any excess with a clean, soft cloth, gently buffing the surface as you go. This buffing action will bring out a subtle sheen and ensure an even protective layer. You may consider applying a second thin coat of wax for high-traffic areas or for added durability. If you wish to achieve an aged look, you can apply dark wax after the clear wax, focusing on crevices and edges, then wiping back the excess until you achieve your desired antique effect.
The wax will feel dry to the touch within a day, but it will continue to harden and “cure” over the next 30 days. During this curing period, be mindful of how you treat your newly finished furniture. Avoid placing very heavy items on top, or exposing it to excessive moisture or heat. Treat it gently to ensure the wax fully hardens and provides maximum protection.
8. Reassemble and Add Finishing Touches
Once the wax has had sufficient time to dry, carefully reattach all the hardware you removed earlier. This is also the perfect opportunity to upgrade the look of your piece even further by installing new knobs or pulls that complement your furniture’s new style and your home’s decor. Replace the drawers and shelves, taking care not to scratch the freshly painted surfaces. Step back and admire your handiwork!
Beyond the Basics: Creative Enhancements for Your Chalk Paint Project
The beauty of chalk paint lies in its versatility. Once you master the basic techniques, consider these creative enhancements to truly personalize your furniture:
- Stenciling: Add intricate patterns or motifs using stencils and a contrasting chalk paint color or metallic paint.
- Two-Tone Finishes: Paint different sections of your furniture in complementary colors for a dynamic look.
- Color Washes: Dilute chalk paint with water to create a translucent wash, allowing the wood grain to subtly show through.
- Distressing with Wax: Use dark wax more liberally in certain areas to emphasize depth and create a heavily aged patina.
- Glazing: Apply a decorative glaze over your chalk paint for a subtle shift in color or an antiqued effect.
Maintaining Your Chalk Painted Furniture
With proper care, your chalk-painted and waxed furniture will look beautiful for years to come:
- Cleaning: For daily dusting, a soft, dry cloth is sufficient. For spills or light cleaning, use a damp cloth with plain water. Avoid harsh chemical cleaners, as they can strip the wax.
- Protection: Use coasters under drinks and placemats under hot items to protect the waxed surface from moisture rings and heat damage.
- Re-waxing: Depending on wear and tear, you might need to re-wax high-traffic areas every few years to maintain protection and sheen.
To provide an even clearer visual guide, here is the full video tutorial for the chalk paint furniture makeover, courtesy of the talented Allison Anderson:
Congratulations! You now have something truly unique and “new” without having to spend a fortune on store-bought items. A beautifully revitalized piece of furniture, crafted with your own hands, is infinitely more rewarding than buying an entirely new one. Make sure to choose the colors and finishes that best resonate with your personal style and the overall aesthetics of your home. Your chalk paint furniture makeover will not only complement your interior design but also stand as a testament to your creativity and resourcefulness.
Ready for more inspiring projects? Click here for more DIY painting projects and clever tricks to transform your beautiful home!
You Might Also Like These DIY Home Transformation Ideas…
How to Paint Wood Furniture | DIY Home Projects
Dry Brush Furniture Painting With Style! | Home Furniture Ideas
Painted Concrete Floors | How To Paint Concrete Floors
20 Awesome Chalk Paint Furniture Ideas to Inspire Your Next Project
Featured Image from Allison Anderson