
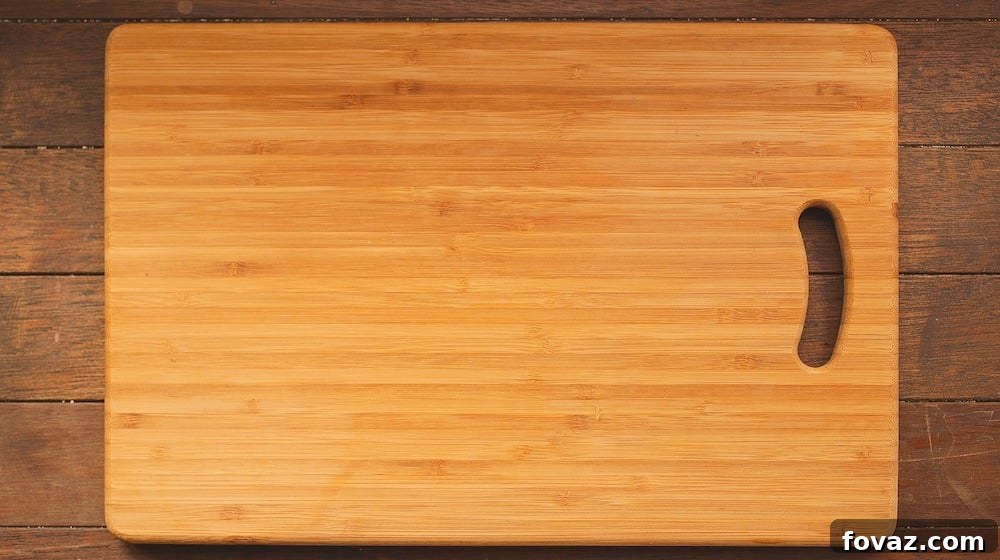
Transform your kitchen with a timeless piece that combines both functionality and rustic elegance: a DIY butcher block cutting board. Far more than just a surface for chopping, a well-crafted butcher block can become a central culinary tool and a beautiful accent that elevates your kitchen’s aesthetic. Forget the limitations of mass-produced boards; this project empowers you to create a bespoke masterpiece tailored to your exact needs and style preferences. Imagine the satisfaction of preparing meals on a board you built with your own hands, knowing it’s designed to last for generations.
This engaging woodworking project is an ideal way to spend a productive weekend. Whether you’re an experienced woodworker or new to DIY, crafting your own butcher block cutting board is incredibly rewarding. It makes a thoughtful and personal gift for the avid home chef in your life, or a fantastic addition to your own kitchen. Beyond its utility, it’s a tangible representation of your craftsmanship, a sturdy piece ready to handle daily culinary demands with grace and durability. Let’s embark on this journey to create a kitchen essential that is as robust as it is beautiful.
Tutorial: Crafting Your Own Butcher Block Cutting Board
The Allure of Crafting Your Own Butcher Block
There’s an undeniable charm and significant advantage to building your own kitchen essentials. When you undertake a project like a butcher block cutting board, you ensure not just its utility but also its enduring quality and perfect fit for your space. Mass-produced items often compromise on materials or construction, leading to pieces that might not withstand the test of time or rigorous daily use. By taking the DIY route, you gain complete control over every aspect of its creation, from the initial wood selection to the final finish.
- **Unmatched Durability and Customization:** Building your own butcher block allows you to dictate its dimensions, wood type, and construction method, ensuring it meets your specific requirements for size, thickness, and longevity. You’re not limited by standard retail offerings; if you need an extra-large board for baking or a compact one for a small kitchen, you can make it happen.
- **Superior Material Selection:** One of the most critical aspects of a food-contact surface is the material. Crafting your own board means you can hand-pick the wood, ensuring it’s free from harmful chemicals often used in treated lumber. Opt for hardwoods known for their density, closed grain, and food-safe properties, which contribute to a hygienic and long-lasting cutting surface.
- **Personal Touch and Satisfaction:** There’s immense satisfaction in using a kitchen tool you’ve brought to life. From smoothing the rough lumber to applying the final food-safe finish, each step imbues the board with a part of your effort and personality. It transforms from a mere utilitarian object into a cherished item with a story.
Choosing Your Wood: The Foundation of a Great Board
The type of wood you select is paramount for a butcher block cutting board, impacting its durability, hygiene, and aesthetic appeal. The best woods for cutting boards are hardwoods, known for their density and ability to withstand repeated knife use without dulling blades excessively or harboring bacteria. Look for woods with a tight grain, as this prevents moisture and food particles from penetrating deeply, making cleaning easier and enhancing longevity. Always choose kiln-dried, untreated lumber to ensure it’s safe for food contact.
- Maple (Hard Maple): Often considered the gold standard for cutting boards due to its excellent density, fine grain, and neutral color. It’s incredibly durable, resistant to scratches, and doesn’t impart any flavor to food.
- Cherry: Offers a beautiful reddish-brown hue that deepens with age. It’s slightly softer than maple but still very durable and knife-friendly, with a lovely tight grain.
- Walnut: A popular choice for its rich, dark color and attractive grain patterns. Walnut is a bit softer than maple, which is gentle on knives, but still sufficiently hard for a cutting board. Its natural oils also offer some resistance to bacteria.
- Oak (Red or White): While sturdy, oak has a more open grain structure, which can make it slightly more challenging to keep perfectly clean compared to maple or cherry. If using oak, ensure a very smooth finish and diligent maintenance.
- Ash: Similar in hardness to maple with a good grain pattern, ash can also be an excellent choice, offering a lighter color palette.
Avoid softwoods like pine or fir, as they are too easily scored by knives, creating grooves where bacteria can flourish. Also, steer clear of exotic woods unless you can verify their food safety and ensure they don’t contain natural toxins or irritants. Ultimately, selecting high-quality, food-safe hardwood is the first and most crucial step in crafting a butcher block that will serve you well for years.
Essential Tools for Your DIY Journey
Having the right tools is crucial for any woodworking project, and a butcher block cutting board is no exception. Each tool plays a specific role in ensuring precision, safety, and a professional finish. Here’s a list of what you’ll need:
- Table Saw, Miter Saw, or Jack Clamps (or other woodworking clamps): A multitude of clamps are vital for applying even, consistent pressure across the entire surface of your board during the glue-up process, ensuring strong, gap-free joints.
- Wood Glue: Specifically, a waterproof or water-resistant wood glue (like Titebond III) is recommended for cutting boards, as they will be exposed to moisture. This creates a bond stronger than the wood itself.
- Ryobi Orbital Sander (or any random orbital sander): An orbital sander is indispensable for achieving a super smooth finish. It efficiently removes saw marks, glue residue, and progressively refines the surface for a professional look and feel.
- Mineral Oil Foodsafe Finish: A food-grade mineral oil is the most common and safest finish for cutting boards. It penetrates the wood, conditioning it, preventing drying and cracking, and creating a protective, water-resistant barrier without becoming rancid.
- Thickness Planer (optional but highly recommended): A planer dramatically speeds up the flattening process after glue-up, creating perfectly parallel and smooth surfaces. If you don’t have one, extensive sanding will be required to achieve similar flatness.
Step-by-Step Guide: Crafting Your Butcher Block Cutting Board
1. Prepare and Measure Your Lumber
Begin by selecting your chosen hardwood. For this project, consistency is key, so aim for boards that are as straight and flat as possible. Use your table saw or miter saw to mill your raw lumber. First, square one edge of each board, ensuring it is perfectly straight. Then, using that squared edge as a reference, rip each board to a consistent width. This initial step sets the foundation for a flawless glue-up, as uniform strips are essential for a smooth final surface. Measure and cut all boards to your desired length for the cutting board.
2. Create Uniform Wood Strips
Once your initial boards are dimensioned, it’s time to cut them into strips. The thickness of these strips will determine the thickness of your finished cutting board if you are making an end-grain board, or the width of the strips in an edge-grain board. Using a table saw, carefully rip each board into multiple uniform strips. For example, if you aim for a board that’s 1.5 inches thick, cut your strips to be 1.5 inches wide. Consistency in strip width is absolutely critical for a seamless glue-up and a flat final product. A total of five strips per board is a good starting point, but this can vary based on your desired board dimensions.
3. Plan Your Pattern and Assemble
With all your strips cut, arrange them in the pattern you desire for your cutting board. This is where you get to be creative! You can alternate wood types for a striped effect, or simply arrange strips of the same wood to create a cohesive look. Lay them out on a flat surface and ensure they fit together snugly without gaps. This “dry fit” step is crucial for visualizing the final product and confirming that all strips are of uniform dimensions. Take your time to organize the strips in a visually appealing sequence before moving on to gluing.
4. Laminate with Wood Glue
Now, it’s time to bring your cutting board together. Apply a generous, even layer of waterproof wood glue to one side of each strip (or both sides if you prefer, ensuring full coverage). Work quickly but carefully, as wood glue has an open time before it starts to set. Rotate the strips into position, ensuring their ends and edges are aligned. Once all strips are in place, apply strong, even pressure using your jack clamps or other woodworking clamps. Ensure the clamps are tightened sufficiently to squeeze out excess glue, but not so tight as to deform the wood. Check for squareness and flatness as you tighten. Allow the glue to dry thoroughly for at least an hour, or ideally, several hours, following the manufacturer’s recommendations.
5. Plane and Sand for Smoothness
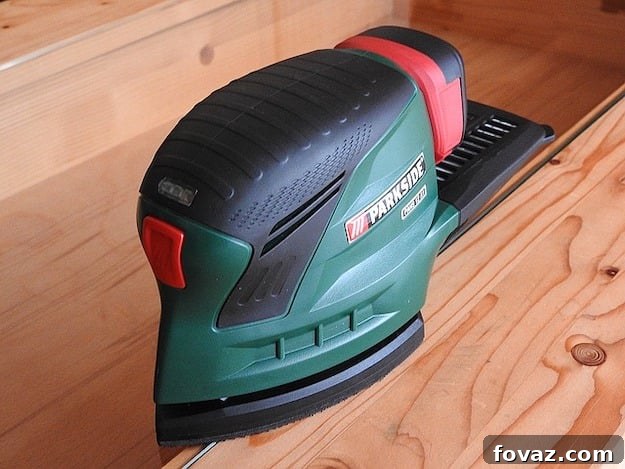
After the glue has fully cured, your board will likely have some irregularities from the glue-up. This is where a thickness planer becomes invaluable. Run the cutting board through the planer multiple times, taking off small amounts of material with each pass, until both faces are perfectly flat and parallel, and the glue lines are invisible. If you don’t have a planer, you can achieve flatness with extensive sanding using a belt sander or even a hand plane, followed by an orbital sander. Next, use a miter or table saw to trim the two ends of the board, squaring them up and bringing your cutting board to its final dimensions. Finally, use an orbital sander to progressively sand all surfaces of the cutting board, starting with a coarse grit (e.g., 80 or 100) and moving through finer grits (120, 180, 220, and even 320) until the surface is incredibly smooth to the touch.
Tip! The thickness planer is optional but highly recommended for achieving professional results quickly. If you don’t have one, you can still achieve a flat surface by meticulously sanding with a coarser grit and then progressing to finer grits, or by using a router sled setup for flattening.
6. Apply Food-Safe Finish
Once your board is sanded to perfection, it’s time for the crucial finishing step. Apply a generous amount of food-safe mineral oil to all surfaces of the cutting board. Mineral oil deeply penetrates the wood, conditioning it, preventing it from drying out, cracking, and becoming brittle. It also creates a protective barrier against moisture. Liberally apply the oil, letting it soak in for at least 30 minutes, or even several hours. Wipe off any excess with a clean, lint-free cloth. Repeat this process multiple times, especially on the first application, until the wood no longer readily absorbs the oil. The more oil the wood absorbs, the better protected it will be.
7. Add Rubber Pads (Optional)
To enhance stability and prevent your cutting board from sliding around on the counter during use, consider adding small rubber feet or pads to the bottom. These can be attached with small stainless steel screws. Not only do they provide grip, but they also elevate the board slightly, allowing air circulation underneath and further protecting your countertops. And voilà! You’ve just completed a beautiful, durable, and fully personalized butcher block cutting board that will be a joy to use for years to come.
Beyond the Board: Your DIY Journey Continues
Completing your first butcher block cutting board is more than just finishing a project; it’s an accomplishment that hones your woodworking skills and boosts your confidence for future endeavors. The precision required for glue-ups, the patience for sanding, and the satisfaction of a perfect finish are all transferable skills that will serve you well in countless other DIY projects. Your handcrafted cutting board is a testament to your ability to create something beautiful and functional with your own hands, providing lasting value and a unique touch to your home. It’s an investment in your kitchen, and in your creative journey.
Discover More DIY Inspiration!
Pretty interesting, huh? Watch the full video tutorial here from DIY Pete:
There’s no way you wouldn’t like this project. Have your own now! Click here for more DIY inspiration.