
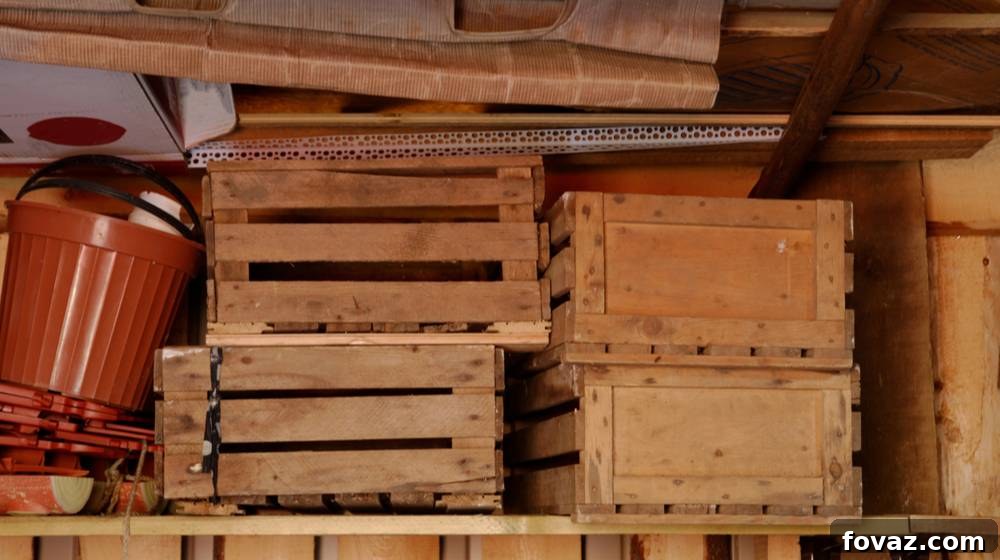
Are you tired of tripping over shoes, hunting for misplaced toys, or struggling with overflowing closets? A truly organized home often feels like an unattainable dream. However, with the right tools and a touch of DIY magic, you can transform chaotic areas into serene, functional spaces. Introducing the game-changer for any busy household: **rolling storage crates**. These versatile, mobile storage solutions offer an unparalleled blend of convenience, style, and practicality, making home organization not just achievable, but enjoyable. Forget the stress of constant tidying; with these functional and fashionable tools, keeping your home neat and tidy becomes an effortless task.
Whether you’re battling mountains of children’s toys, an ever-growing collection of books, or simply need a smart way to store seasonal clothing, rolling storage crates provide the flexibility and accessibility you need. Their mobility allows you to easily reconfigure spaces, access items tucked away, or even move your entire organization system for cleaning. Best of all, they’re incredibly simple and affordable to create yourself, allowing you to customize them to perfectly match your home decor and specific storage needs.
RELATED: Closet Organizer Ideas | Chic Ideas In Organizing Bedroom Closets, Clothing, and Accessories
How To Make Rolling Storage Crates: Your Comprehensive DIY Guide
Embark on a rewarding DIY journey to create your own bespoke rolling storage crates. This detailed guide breaks down the process into four straightforward steps, ensuring even beginner crafters can achieve professional-looking results. Let’s gather our materials and turn those cluttered corners into organized masterpieces!
What You’ll Need for Your DIY Rolling Storage Crates:
Before diving into the creative process, it’s essential to gather all your materials. Opting for quality supplies will ensure the longevity and durability of your finished storage crates. Consider the aesthetic you want to achieve when selecting your wooden crates and paint, as these will be the most prominent visual elements.
- Wooden crate: Choose sturdy crates that are free from splinters or major defects. Standard sizes work well, but you can also find larger or smaller ones to suit specific needs.
- 4 pcs. of 2-inch caster wheels: Select wheels that can support the weight of your crate plus its contents. Swivel casters offer maximum maneuverability, making your crates easy to move in any direction.
- 16 pcs. of small wood screws and screwdriver: Ensure your screws are suitable for wood and won’t be too long, potentially poking through the crate’s interior. A power drill with a screwdriver bit can make this step much quicker.
- Paint and paintbrush: Pick a paint color that complements your existing home decor. Consider durable, low-VOC (volatile organic compound) options for a safer finish.
- Sandpaper: Various grits will be useful – a coarser grit (e.g., 80-100) for initial smoothing and a finer grit (e.g., 150-220) for a silky-smooth finish.
- Piece of cloth or old newspapers: Essential for protecting your work surface from paint spills and for wiping away sanding dust.
- Optional: Wood primer, wood filler, clear sealant/topcoat, safety glasses, dust mask.
Step 1: Prepare and Mix Your Paint or Stain
The first step in customizing your rolling storage crates is to prepare your chosen finish. The aesthetic possibilities are endless, ranging from vibrant splashes of color to rustic wood stains that highlight the natural grain. The color and finish you choose will significantly impact the overall look of your finished product, so take some time to consider your existing decor and personal style.
If you’re using acrylic paint, you might want to mix it to achieve a custom hue. For a more professional, long-lasting finish, especially if your crates will be subject to heavy use or moisture, consider professional wood washes and wood stains. These penetrate the wood, offering deeper color and enhanced protection. Alternatively, if you’re on a budget or prefer a more translucent effect, you can create your own wash by diluting acrylic paint with water. Experiment with different ratios on a scrap piece of wood to find your perfect shade. Remember to stir your paint or stain thoroughly before use to ensure an even consistency and color application.
For optimal adherence and a flawless finish, especially if you’re painting lighter colors over darker wood, consider applying a wood primer first. This will help seal the wood and prevent the original wood color from showing through, resulting in a richer, more uniform final coat.
Step 2: Sand Your Wooden Crate for a Smooth Finish
With your paint or stain ready, it’s time to prepare the wooden crate itself. This crucial step ensures a smooth, even surface for painting and significantly enhances the durability and aesthetic appeal of your finished product. Skipping this step can lead to a rough, uneven finish that is prone to chipping or flaking.
Start by using a medium-grit sandpaper (around 100-150 grit) to smooth out any rough edges, splinters, and uneven surfaces on the crate. Pay close attention to corners and areas that might have sharp pieces. Sand with the grain of the wood for the best results. Once the crate feels generally smooth, switch to a finer-grit sandpaper (180-220 grit) to achieve a silky-smooth finish. This fine sanding will create the ideal surface for paint adhesion.
After thorough sanding, it’s vital to remove all dust and debris. Use a clean, dry cloth, a brush, or even a vacuum cleaner to sweep away any tiny particles that may have settled in the creases or on the surface of the crate. Ensure the crate is completely dust-free before moving on to painting, as residual dust can cause a gritty texture in your finished paint job. Repeat the sanding and cleaning process until your crate is smooth, clean, and perfectly prepped for painting.
RELATED: 25 Toy Storage Solutions For A Well-Organized House
Step 3: Paint Your Rolling Storage Crates with Precision
Now for the exciting part – bringing your rolling storage crates to life with color! Before you begin, set up your workspace by laying down a piece of cloth or old newspapers to protect your floor or table from paint splashes. Ensure you’re in a well-ventilated area.
Apply your first layer of paint or stain evenly across all surfaces of the wooden crate. Work in thin, consistent coats to avoid drips and ensure better adhesion. Don’t overload your paintbrush; instead, apply several thin coats rather than one thick one. Pay attention to the interior and exterior surfaces, as well as the edges and corners, to ensure full coverage.
Once the first layer is applied, allow it to dry completely. Drying times can vary significantly based on the type of paint, humidity, and temperature. Generally, a few hours should suffice, but if necessary, leave it overnight to ensure it’s thoroughly dry before applying another coat. Applying subsequent coats too soon can lead to tackiness, uneven drying, and an inferior finish.
After the first coat is dry, lightly sand the surface with a very fine-grit sandpaper (e.g., 220 grit or higher). This ‘scuff sanding’ creates a microscopically rough surface that helps the next coat adhere better, resulting in a smoother, more durable finish. Wipe away any dust before applying your second coat. Repeat this process for two to three coats, or until you achieve the desired depth of color and opacity. For added protection and durability, especially for items that will see a lot of use, consider finishing with a clear sealant or a protective topcoat once all paint layers are fully dry.
Pro tip: For an ultra-smooth finish and to avoid unsightly brushstrokes that might be visible on your rolling storage crates, consider using a high-density foam roller or a sponge brush instead of a traditional bristled brush for this DIY project. These tools help apply paint more evenly and minimize texture, giving your crates a more professional and sleek appearance.
Step 4: Install the Caster Wheels and Get Ready to Roll
With your rolling storage crates beautifully painted and thoroughly dried, you’re literally just steps away from bringing them to life! This final stage involves installing the caster wheels, which will give your crates their signature mobility. Careful installation ensures stability and smooth movement.
Grab your caster wheels and the small wood screws. Position one wheel on each corner of the bottom of your crate. It’s crucial to ensure that the wheels are placed consistently at the very edge of the base, yet with enough wood to secure them firmly without splitting. This even placement will distribute weight properly and prevent wobbling.
Before drilling, it’s highly recommended to pre-drill pilot holes for your screws. Use a drill bit that is slightly smaller in diameter than your screws. This prevents the wood from splitting, especially given the crate’s relatively thin boards, and makes driving the screws much easier. Carefully align the holes on the wheel mount with your pre-drilled holes.
When selecting screws, remember that the crate’s wood boards are not typically thick. Choose screws that are long enough to provide a secure hold but short enough that they won’t end up coming out of the base’s other side, which could damage items stored inside or scratch surfaces. Secure each wheel with all four screws provided for its mount, tightening them firmly but without over-tightening, which can strip the wood.
Once all four wheels are securely attached, gently roll the crate around on a flat surface. Test its stability and maneuverability. Make sure the wheels don’t wobble, come off, or shake excessively when moved. If you notice any instability, double-check the tightness of the screws and the evenness of the wheel placement. Your final project should look like a professional, custom-built piece:
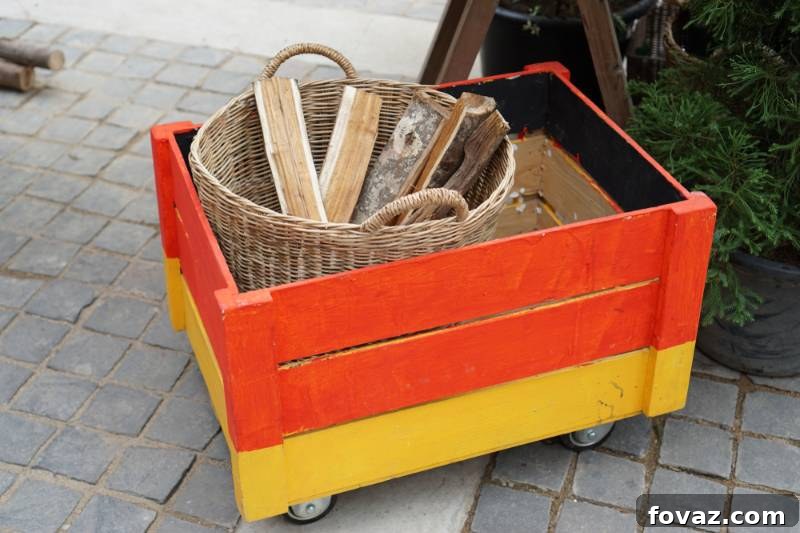
There you have it! Your DIY rolling storage crates are finished and ready for action. In just four easy steps, you’ve created a practical, stylish, and completely customizable solution for your home organization needs. All that’s left to do now is to gather those toys the kids left lying around, sort out those extra blankets, or finally organize your craft supplies, and then organize them in your brand-new, mobile containers. Enjoy the satisfaction of a clutter-free and beautifully organized space!
Done making those rolling storage crates? Here are some other genius wooden storage crates ideas by Jansen’s DIY:
Maintaining a clean, organized, and aesthetically pleasing house doesn’t always have to come with a heavy price tag or require extensive renovation. The DIY rolling storage crates tutorial above elegantly demonstrates that even from the simplest, most accessible materials, you can craft incredibly useful and visually appealing items for your home. This project is not just about creating storage; it’s about embracing the satisfaction of building something with your own hands, saving money, and customizing solutions to perfectly fit your unique lifestyle and decor. These crates are fantastic for adding storage under beds, in playrooms, craft rooms, or even as stylish laundry hampers. The possibilities are truly endless when you tap into your inner DIYer!
Other than these rolling storage crates, are there other innovative or effective organization crafts that you know about or have tried? We’d love to hear your brilliant ideas and tips! Share them with us and our community in the comments section below!
Up Next:
- Space-Saving Kitchen Organization Ideas For The Tidy Chef
- 25 Tricks To Make Your Bedroom Look Bigger | DIY Home Decor Hacks
- DIY Folding Workbench Project For Your Garage To Save Space
Calling all crafting DIYhards, DIY Projects needs YOU! Click here if you want to write for us.
Don’t forget to stay connected with us for more inspiring DIY projects, home organization tips, and creative ideas! Find us on Facebook, Twitter, and Instagram!